How to Backup C Drive in Windows 7?
Every Windows user knows the importance of C Drive. By default, the drive is created by the operating system to store its drivers, system files, and other important content. While taking a backup of any other drive is pretty easy, users often find it tough to backup C drive in Windows. If you are also facing the same problem, then you have come to the right place. In this stepwise tutorial, we will teach you how to backup C drive in Windows 7 and restore it afterward. Even though we have taken an example of Windows 7, it would work in the same way for other Windows operating systems as well.
You might already know why C drive is so important in Windows. Since the computer allocates A and B drive to floppy and external hardware, C drive is allocated for Windows to install the system files. Besides that, it can also have your downloaded content and other significant files. Therefore, it is of utmost importance to take a timely backup of the C drive.
How To Backup C Drive in Windows 7?
We can simply copy and paste the content of our choice when it comes to any other drive. Though, the technique can't be applied to C drive. Learn how to backup C drive in Windows by following these easy steps.
Step 1 To start with, connect an external hard disk or USB drive with enough storage on it to your system.
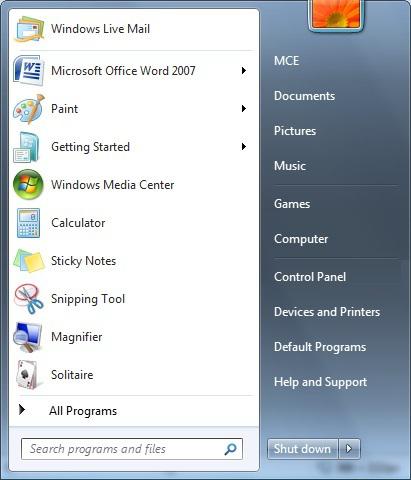
Step 2 Once your external data source is detected, go to the Control Panel on your system. You can visit it from the Start menu.
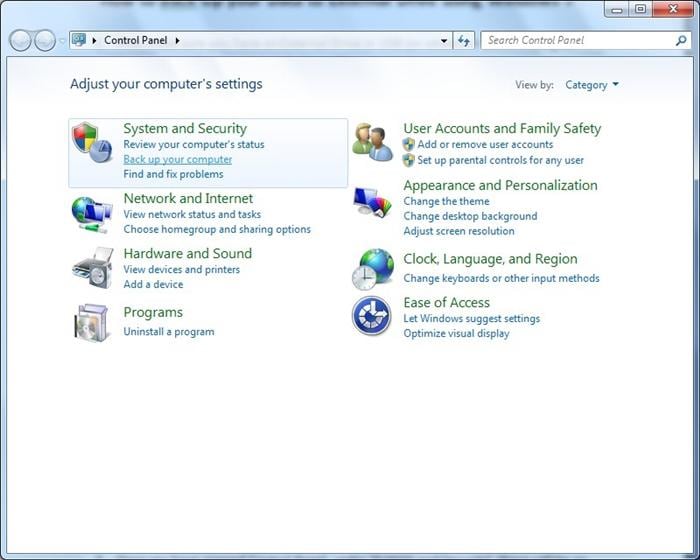
Step 3 Under the "System and Security" section, you will find an option of "Back up your computer". If you don't find it, you can also look for it in the search bar. Just click on it to continue.
Step 4 Now, choose the "Set up backup" option from the next window. This will initiate the process and your system will start preparing Windows backup. You will get a screen similar to this.
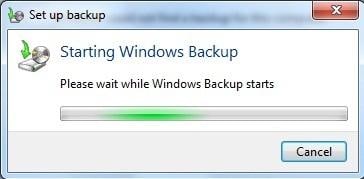
Step 5 Wait for a while as Windows will prepare your system for the backup process. Don't close the dialog box as it might take a while to process.
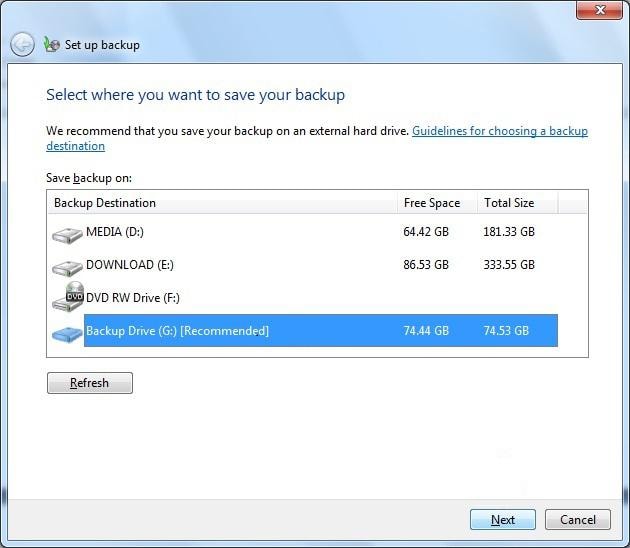
Step 6 After completing the process, it will let you choose the destination for your backup. From the following window, you can provide where you want the backup to save. Ideally, you should select the external device you have recently attached. Click on the "Next" button to proceed.
Step 7 Now, you can select the way you wish to backup files. To let Windows choose the files backup C drive, you can select the "Let Windows choose" option. It is the recommended option and will back up all the essential files of C drive. If you want to customize it, then you can click on the "Let me choose" option as well.
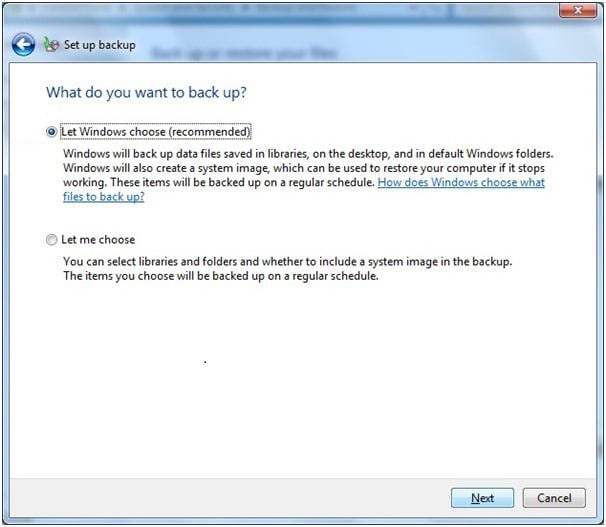
Step 8 After making your selection, click on the "Next" button. The system will ask you to review your backup settings.
Step 9 Click on the "Save settings and run backup" option to initiate the backup process.
Step 10 Sit back and relax as Windows will start taking a backup of your C drive with all the essential data. Make sure that the external drive stays connected until the process is completed. You can get to know about the progress from an on-screen indicator.
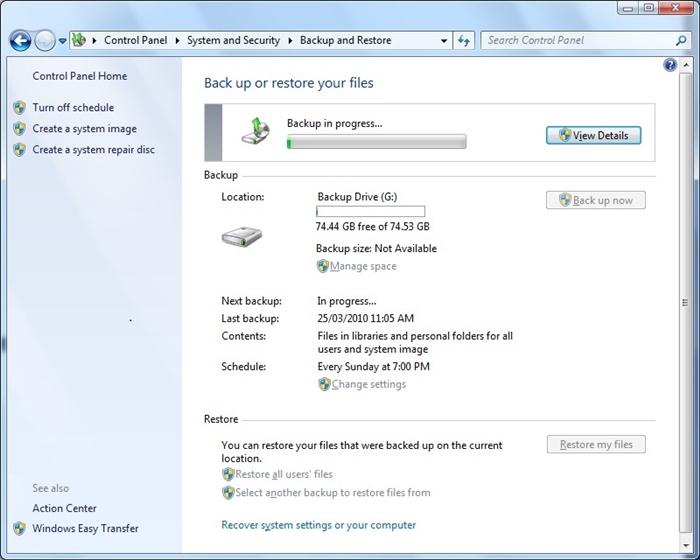
Ideally, it is recommended not to open any other window or program while the backup operation is taking place. After Windows will complete the process, you can visit your external drive and view your backup. Most probably, a new folder "Backup of C" would be created on the storage. This will let you backup C drive without much trouble.
How To Restore Your C Drive Files From the Backup?
Now when you know how to backup C drive, you can take a step up and learn to restore the backup as well. If you have already taken a backup of your drive, then you can overcome an unforeseen situation and restore your content. You can restore the backup of C drive while following these simple instructions.
Step 1 Connect the external storage device to the system that has the backup of your drive.
Step 2 Follow the same initial drill and visit the "Backup and Restore" section in Control Panel > System and Security.
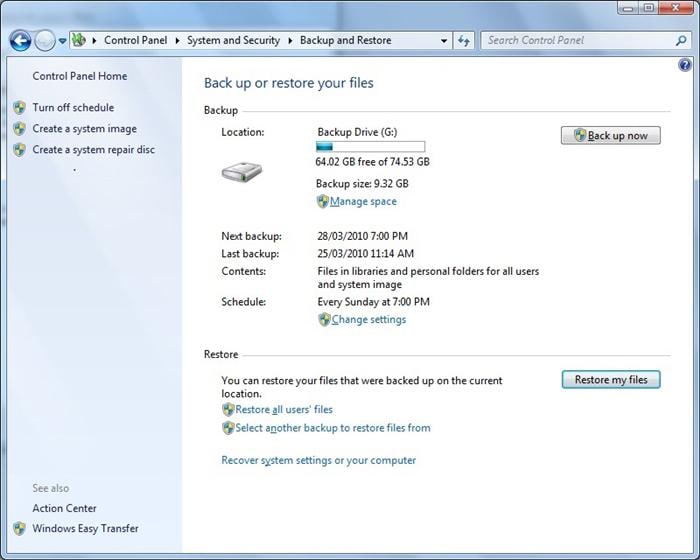
Step 3 You will get a screen similar to this. From here, you can view the connected storage device that has the backup of your drive. To initiate the process, click on the "Restore my files" button.
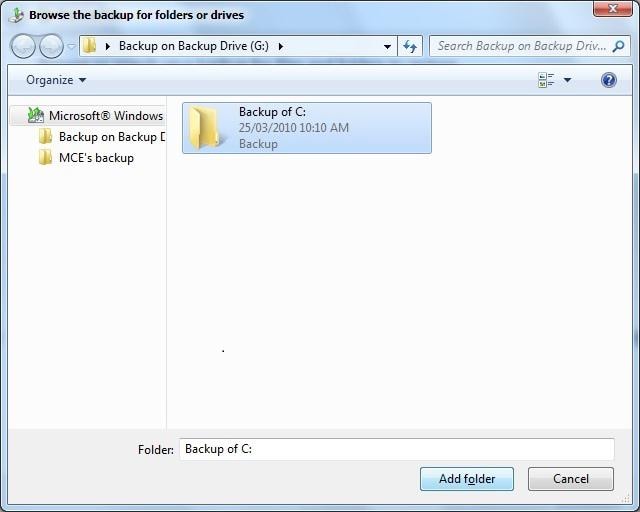
Step 4 As you would click on the button, a pop-up window will appear. From here, you can browse the location where your backup is saved (on the external storage device). After selecting it, click on the "Add folder" button.
Step 5 The subsequent window will ask you the location to store your files. You can select the "In the original location" if you have recently reinstalled Window. Else, you can select the "In the following location" and manually provide the location where you want to restore files from the backup.
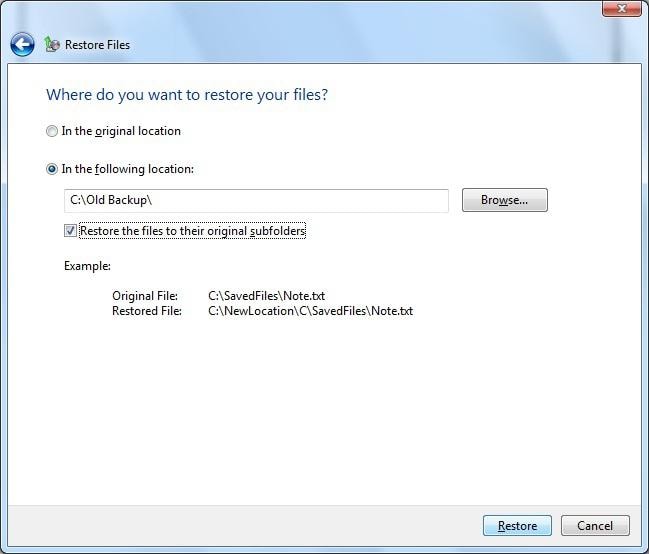
Step 6 After making your selection, click on the "Restore" button to start the process.
Step 7 Wait for a while as Windows will restore your content to the provided location.
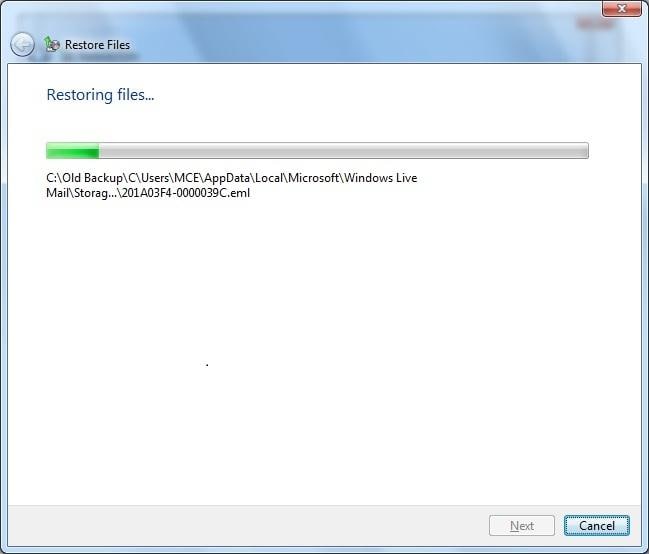
This might take a while, depending on the size of the backup. Ideally, you should not interrupt the process in between and make sure that the external drive stays connected to the system. Once the process is completed successfully, you can visit the location to view your content.
After following this stepwise tutorial, you would be able to learn how to backup C drive to any other external storage device without much trouble. Additionally, we have also provided an easy way to restore the backup as well. Even though this tutorial is focused on Windows 7, it can also be used to implement the same in other Windows versions as well. Go ahead and backup C drive in Windows right away and never lose your important data again.
If you accidentally delete or lose files from your C drive, don't panic. There are multiple ways to recover data from the C drive.
- Allows you to take automatic, full, incremental, and differential backups of system, disk, partition, and files.
- Supports system restore, disk restore, dissimilar hardware restore, partition restore, and selective file restore.
- Supports disk clone, partition/volume clone, and flexible clone.
- Supports Windows 11, Windows 10, Windows 8.1/8, Windows 7, Vista, and XP (all editions, 32/64-bit)
Data Backup Services
- Computer Backup
- Hard Drive Backup
- Mac Backup
- Cloud Backup




Amy Dennis
staff Editor