
Twitch is the most popular live streaming service used worldwide. But despite its popularity, people end up with a stream that keeps buffering or sometimes even worse. The twitch lagging or twitch keeps buffering problems greatly hinder the user experience. Twitch buffering problems can be very annoying and can affect its ease of use. Some similar problems reported by users are:
-
Twitch VOD, Clip buffering
-
Twitch keeps buffering on Chrome, Firefox, and every few seconds, lag
-
Twitch Playback Buffer
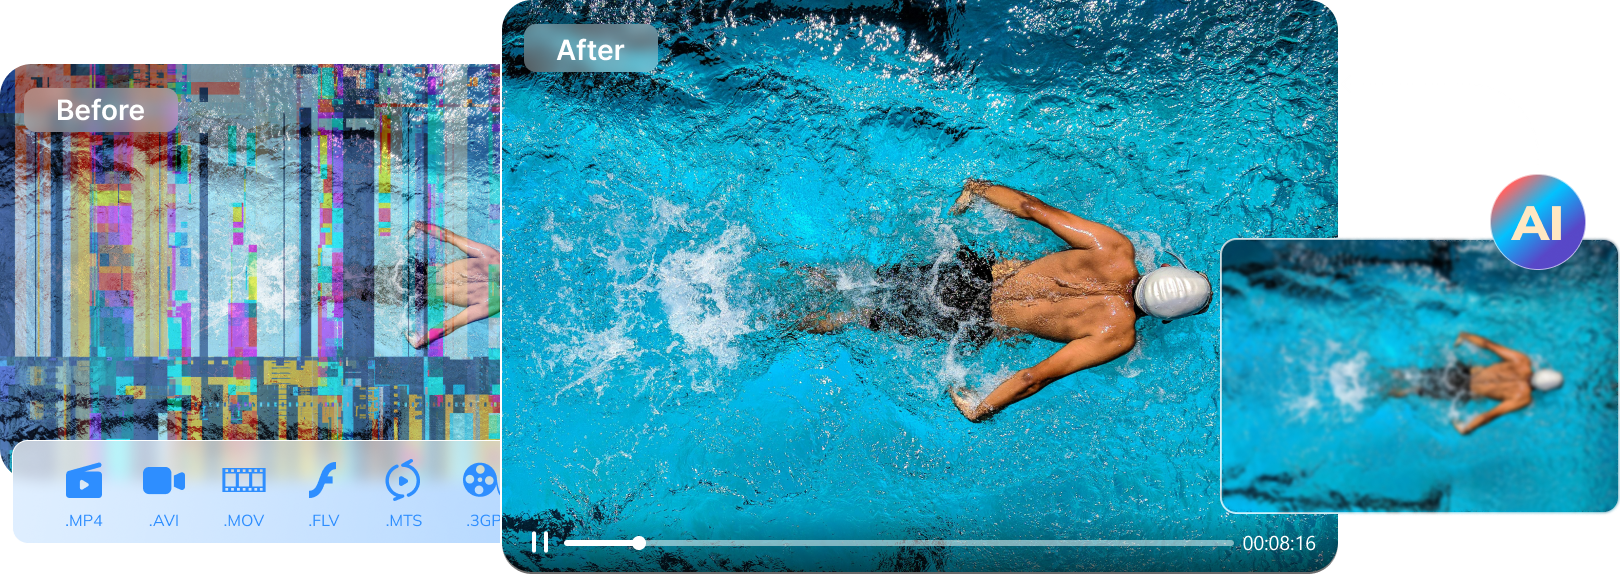
However, some solutions that come in handy to fix Twitch lagging or buffering are PC with better specifications, checking firewall settings, making sure that the internet connection is good and speedy, using VPN and the easiest solution is to change the browser. Also, lagging videos can be repaired with a powerful video recovery software i.e. Wondershare Repairit Video Repair. It recovers the video in three simple steps i.e. add the corrupted video, repair video, and save the video.
Part 1: 7 Best Solutions to Fix Twitch Lagging or Buffering Issue
Twitch is a go-to-platform for gamers. But Twitch stream lagging or buffering problems greatly hinders the user experience. So, we are taking a deep look over Twitch lagging and its related issues as well as different ways to solve it.
1. Computer with Better Specifications
Among the many other reasons, computer specification is one of the reasons why you might be facing Twitch lag. And it is going to be a concern if you are a streamer. Viewers won't have much of a problem since watching Twitch is just like watching a video on YouTube. However, for streamers, it's a bit different. Apart from the intense bandwidth that is required to stream, it takes a lot from your computer to do it smoothly.
This is why having a good computer with better-than-average specifications is the least that you should have. We have compiled a list of things that you should keep in mind. Consider it as a benchmark and if you are facing troubles like lag while Twitch streaming, then upgrading your PC is the first thing that you should do.
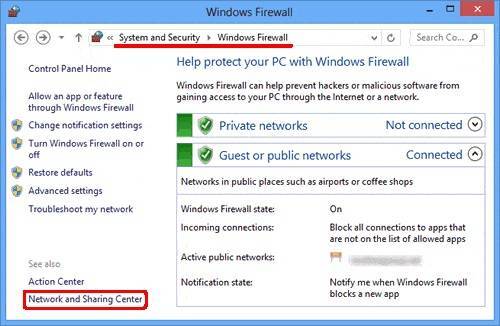
2. Check Firewall Settings
Specific firewalls trouble Twitch streamers and viewers alike. Different firewall settings might be preventing running Twitch smoothly. In this instance, disable the firewall and see if anything changes with Twitch.
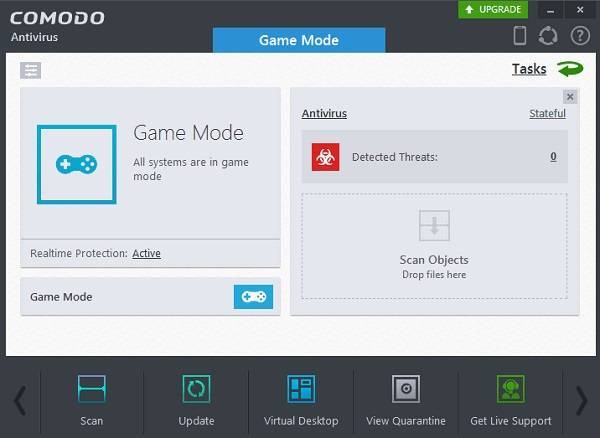
Additionally, Antivirus running in the background might also be the culprit in this case. Antiviruses are programmed to stop any software that is leeching your bandwidth in the background. As a streamer, upload and download is constantly in progress and thus falls on the list of things that are stopped by the antivirus software. There are two workarounds for this. Either you can switch it to gaming mode while streaming Twitch or you can deactivate it. The latter is an option for all antiviruses while the former is only applicable in new and updated antivirus software.
3. Good Internet Connection
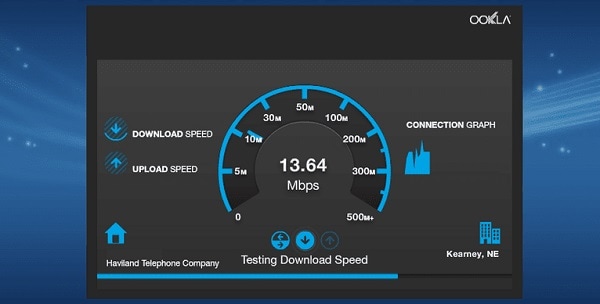
Internet connection is a bigger problem and is comparatively difficult to know and solve. 75% of the time, an Internet connection is a contributing factor to Twitch videos not loading properly. As a streamer, you have to be very careful about it. Having a good internet connection is a must and also to make sure that you are getting a consistent bandwidth throughout the day.
The best way to check your internet speed is by running a quick and simple speed test. Just check your internet through a speed test whenever you are going over to Twitch. This speed test will give a good idea of how the internet is performing. If the internet connection is slower than expected then doing a few tweaks would greatly help.
-
Using a wired connection
-
Changing Wi-Fi password
-
Removing existing users except for your computer
4. Use VPN
The reason Twitch won't load for you might also be related to issues in a specific country or territory. There's a quick fix for that—simply use a VPN. You can choose to install a VPN browser extension or head directly to a VPN site.
Alternatively, if you already use a VPN, this might be the issue behind Twitch streams not loading. In such a case, you might disable your current VPN and see if anything changes for you.
5. Change Your Browser
Probably the easiest step to take in finding a solution for Twitch constantly buffering with good internet is to try using a different browser. If your Twitch stops running for unknown reasons or doesn't even start then it's probably due to your browser. Updating it is also a solution to the problem but if you are too lazy to do that then probably switching over to a different browser e.g. Firefox, Opera is the best thing for you.
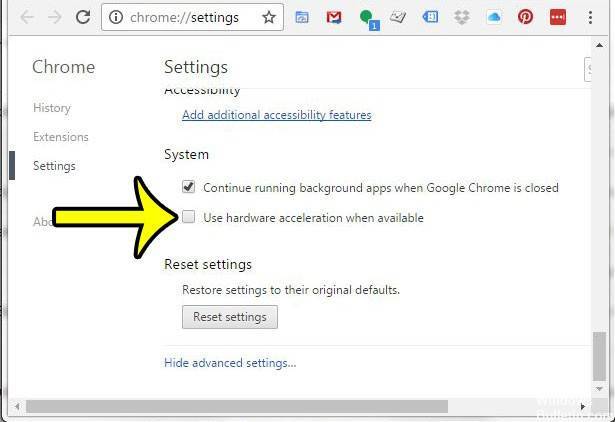
6. Disable Hardware Acceleration
The "Twitch keeps buffering on Chrome" often happens if you are using Chrome as your sole browser. Chrome is notorious for taking up a lot of memory and thus leaving little to nothing for your stream. You can simply solve this by going to your Chrome settings and turning off "hardware acceleration."
Twitch keeps lagging mostly happens if you are using Chrome as your sole browser. Chrome is notorious for taking up a lot of memory and thus leaving little to nothing for your stream. You can simply solve this by going to your Chrome settings and turning off "hardware acceleration."
-
Open the Google Chrome browser on your computer by double-clicking its desktop shortcut or by searching for it in the Start menu.
-
Click on the three horizontal points at the top right of the browser window. It should read: Customize and control Google Chrome when you float above them. This opens a drop-down menu.
-
Click on the Settings option at the bottom of the drop-down menu and scroll down this page to the "Advanced" button. Make sure you click on it.
-
Scroll down the new page again until you reach the System area. To disable hardware acceleration in Google Chrome, clear the Use hardware acceleration checkbox next to the input.
-
Make sure to restart your browser by closing and reopening Google Chrome.
7. Check and change your DNS
When ISPs provide slower DNS servers or don't configure caching properly, it can effectively slow down your connection, slow the speed of discovering the IP address quickly, and affect the browsing experience. This is especially true when you load pages that fetch content. Fortunately though, the public DNS providers on the market such as Google DNS, Cloudflare DNS or OPEN DNS are faster and more secure than most ISPs.
Here's how to set up a third-party DNS service on your computer:
Step 1: Choose "Network and Internet" from the "Control Panel" search bar, then click "View network status and tasks" under the Network and "Sharing Cenetr".

Step 2: Click on the "Change Adapter Settings" option from the left pane, which will pop up a new window, then right-click to choose the "Properties" option.

Step 3: Look for and click the "Internet Protocol Version 4" option in "Properties", then click "Properties" under the options.

Step 4: Click "Use the following DNS server address" on the new pop-up window, then enter the following DNS server addresses:
DNS Server Preferred - 8.8.8.8
DNS Server Substitute - 8.8.4.4

After that, click "OK" to check if the Twitch lagging or buffering is solved.
Part 2: Fix Lagging Video with Wondershare Repairit Video Repair
Sometimes videos don't play smoothly because of improper conversion, video file corruption, improper download, and downloading from unverified sources. These deep-rooted technical problems require video repair tools to correct video playback. There are lots of tools out there that can help you to repair your corrupt videos. Wondershare Repairit - Video repair is one such tool.
It is powerful video repair software for repairing corrupt, broken, or damaged videos in various formats. It supports two repair modes. Quick repair is to repair various video errors. The advanced repair can repair your corrupt videos by analyzing the data and technology of the sample video shot by the same device. Below are some key features of Wondershare Repairit:

-
Repair damaged videos with all levels of corruption, such as video not playing, video no sound, out-of-sync video or audio, playback errors, header corruption, flickering video, missing video codec, etc.
-
Repair videos of diverse formats, including MOV, MP4, M2TS, MKV, MTS, 3GP, AVI, FLV, MXF, KLV, INSV, M4V, WMV, MPEG, ASF, etc.
-
Repair damaged or corrupted videos caused by video compression, system crash, video format change, etc.
-
Repair critically damaged or corrupted videos available on SD cards, mobile phones, cameras, USB flash drives, etc.
-
Repairit has a quick and advanced scanning mode. You can use either depending upon the level of corruption the video file has undergone.
-
No limitations on the number and size of Video files for repair
-
Compatible with Windows PC, Mac OS, and supports PC to mobile transferring/sharing.
See how to repair your corrupted videos on a computer or Macbook:
Step 1: Add Corrupt Video
First of all, please download and launch Repairit on your computer or mac. Then add the video you want to repair on the software's interface.

Step 2: Start the Repair Process
This step applies to videos you want to repair using one of the tools repair modes: Quick Repair. This will simply remove the errors in your corrupted videos once you click "Repair"

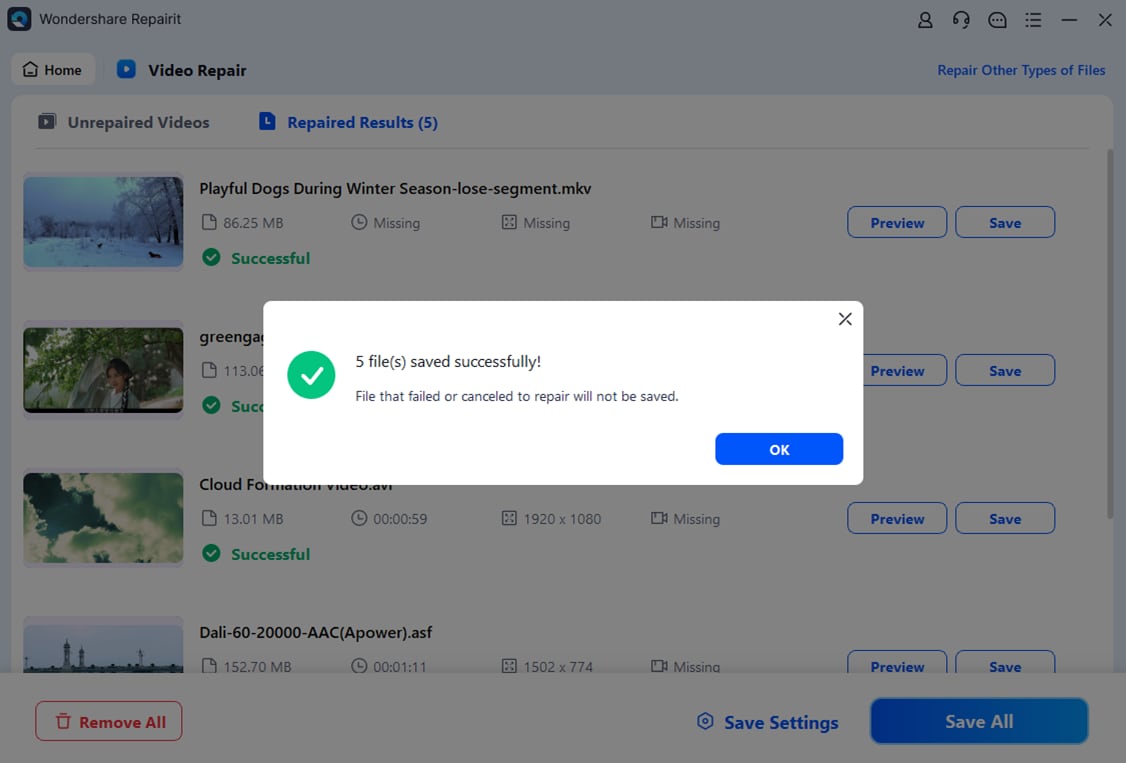
Step 3: Preview and Save Video
Recoverit Video Repair lets you preview the files from which errors have been scanned and removed. Next, you can save the files when you click "Save"

Step 4: Advance Repair for Severely Damaged Video (Optional)
This step is only for the second repair mode: Advance Repair. This mode works for badly damaged videos. Just click the Advanced Repair button. Then add a sample video and repair it now.

Step 5: Save Repaired Video
This is the final step where the advanced repair will perform the repairing process. You get to save all the repaired video files. Just click the "Save" or "Save All" button to save the repaired video.
Attention:
Wondershare Repairit is a desktop software, so you need to repair the files on your Windows PC or MacBook. If you just want to repair videos on your phone and the damaged video is no more than 3GB, please try the online version of Wondershare Repairit - Online Video Repair. The online version of Repairit supports repairing your corrupted videos freely within seconds and also provides a nice video repair experience for you.
Note: It's also necessary to learn about the tricks to fix the Snapchat video freezing problem and TikTok video issues.
Closing Words
Sometimes Twitch keeps lagging or buffering for different reasons. Don't worry, the above tips may help you to deal with these situations. Always have Wondershare Repairit Video Repair at hand to help repair lagging or buffering videos.
People Also Ask
-
Why does my Twitch stream keep buffering?
Buffering can be caused by slow internet, poor computer specs, or browser issues. Try improving your internet speed, upgrading your PC, or switching browsers. -
How can I fix a Twitch video that is lagging or not loading properly?
Check your internet speed, use a VPN, change your browser, or disable firewalls/antivirus programs. A wired connection may also help. -
How can I repair a corrupted Twitch video file?
Use Wondershare Repairit to fix corrupted Twitch videos. Just upload the damaged file, choose a repair mode, and restore your video.
