How to Use the Windows 10 Automatic File Backup Software and Its Best Alternative
If you are a Windows 10 user, then you might be familiar with its native automatic backup software, which is known as File History. Using it, you can configure a file backup solution and maintain an automatic second copy of your data. Since using File History to take automatic backup in Windows 10 can be tough, many find it hard to implement. Don’t worry – in this post, I will let you know about the native Windows automatic file backup tool and its best alternative.

Image Name: automatic-file-backup-software-windows-1 Image Alt: Automatic Backup Software Banner
The Inbuilt File Auto-Backup Utility on Windows 10: File History
Before the release of Windows 10, Microsoft came up with inbuilt automatic backup software, which is known as File History. Using it, you can take an automatic backup on Windows 10 at a preferred location.
- With the File History option, users automatically copy files to an external hard drive, internal partitions, or a network.
- If you want, you can also integrate it with your OneDrive account to take your backup on the cloud.
- Once you configure a file backup solution, you can save your photos, documents, videos, music, folders, and other data types.
- This periodic backup software will take an incremental backup of your data and would let you browse it before restoring.
- Since this automatic backup Windows 10 option is an inbuilt feature, you don’t need to install any third-party tool.
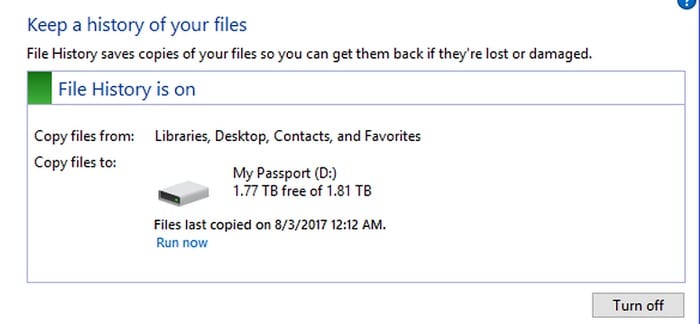
Image Name: automatic-file-backup-software-windows-2 Image Alt: Windows File History
Cons
- Limited backup options
- No inbuilt filters
- A bit complicated to implement
- Difficult to maintain different version history
Periodic And Automatic File Backup Software for Windows 10: Wondershare UBackit
Since the Windows automatic File Backup (File History) tool can be a bit complicated, you can consider using Wondershare UBackit. One of the best automatic backup software, it will let you back up the files of your choice at any preferred location.
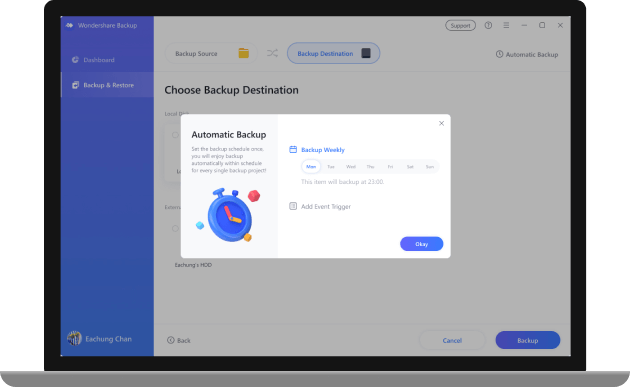
UBackit supports an inbuilt automatic backup option, letting us select a preferred frequency (like daily, weekly, monthly, or ongoing).
Instead of making a new copy of the backup, UBackit will take an incremental backup by maintaining different versions of your files. This would save your storage by around 80 percent.
Users can simply select the partitions, folders, or files they wish to back up. They can also filter results based on the file type or by entering keywords on the search bar.
UBackit fully supports all the major data types and file formats for photos, music, videos, documents, compressed files, emails, and more.
UBackit has an inbuilt virus detection feature to keep your files safe. It also offers a preview of our data and has an advanced storage management feature.
How to Configure an Automatic File Backup Solution on Windows 10?
Now when you are familiar with these solutions to auto backup files, let’s consider how to use them one step at a time.
Method 1: How to Use Wondershare UBackit (the Best Automatic Backup Software)
Wondershare UBackit is extremely easy to use and will let you automatically copy files to an external hard drive as per your requirements. To take the auto backup of files from your Windows 10 to any other storage via UBackit, you can follow these steps:
Step 1: Launch UBackit and select the Backup tool
At first, you can install Wondershare UBackit on your computer and launch it to take an automatic backup on Windows 10. Simply go to the “Backup & Restore” option from the sidebar and choose to create a new backup.

Step 2: Select the files/folders to back up
Once you choose to create a new backup, the application will ask you to pick a source. Here, you can browse the storage of your computer to select any partition, folders, or files to back up.
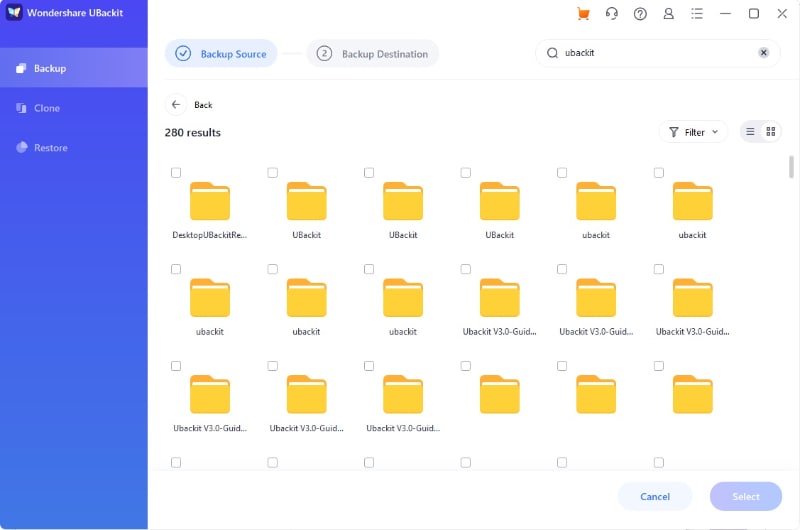
If you are looking for specific things to back up, then just enter keywords on the search bar to automatically get the relevant results.
Besides that, you can also find the available filters on UBackit to pick the type of data that you wish to include in the backup.

Step 3: Pick a destination to store the backup
To further proceed, you can select a location where the Windows backup would be stored. Here, you can select any other partition or even an external source (like an SD card or an external hard drive connected to the system).

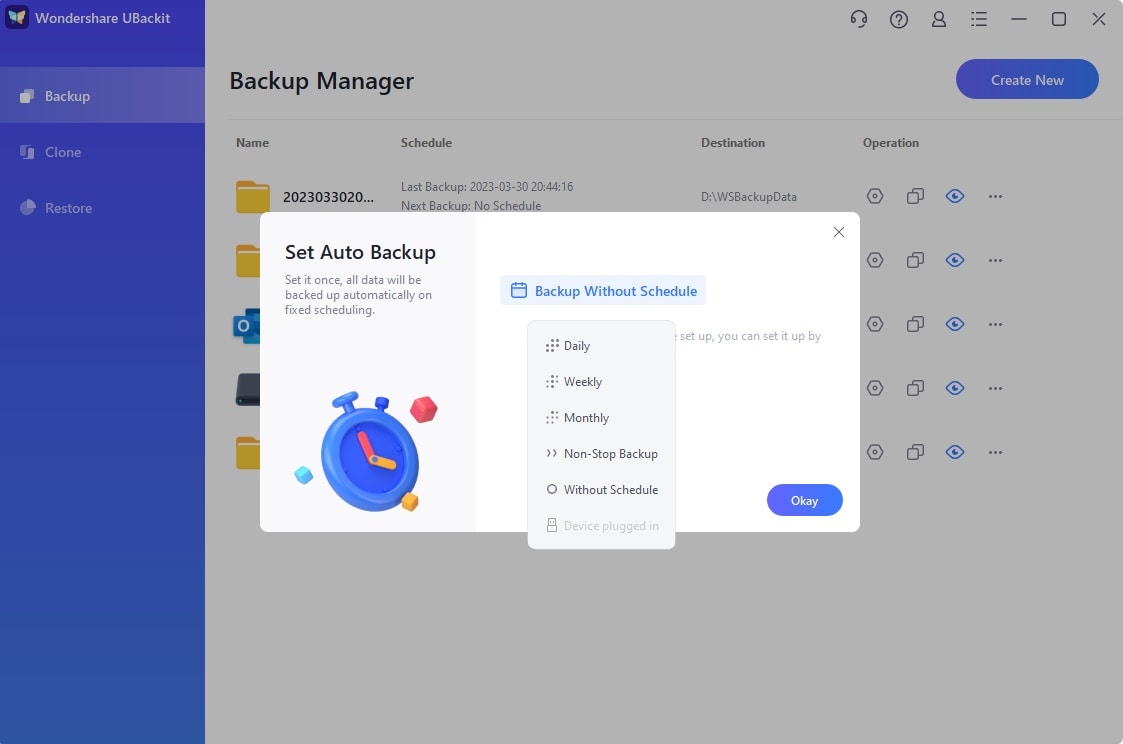
Step 4: Enable the Automatic Backup schedule
To configure a file backup solution automatically, you can click on the “Set Auto Backup” option from the top. This will let you select a schedule (like daily, weekly, or monthly) to take Windows automatic file backup. If you want, you can manually take the backup or set it as ongoing as well.
Step 5: Wait for the backup process to be over
That’s it! You can now click on the “Start Backup” button and wait as UBackit would automatically backup Windows 10 data.
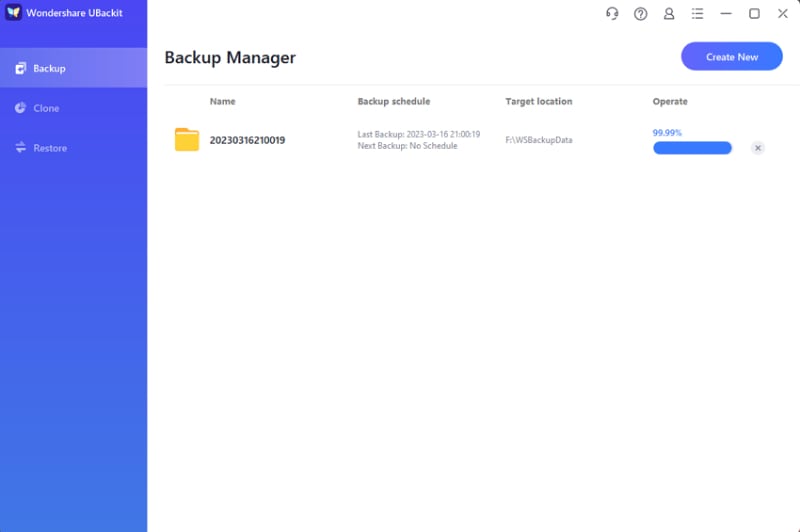
The periodic backup software would let you know the progress of the process so that you won’t halt it in between. Once the auto backup of files is maintained, you will be notified, letting you manage your data easily.
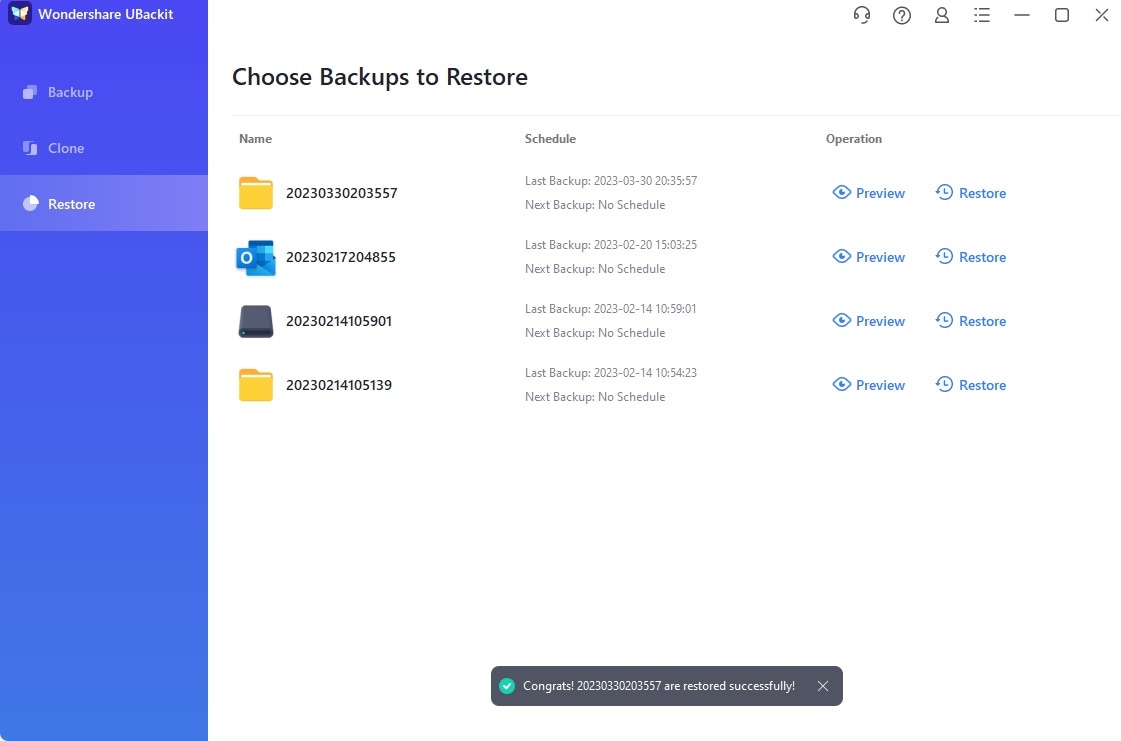
You can later check the available backups (their version history) and even preview your files to restore them to the selected location.
Method 2: Use File History: Windows Automatic File Backup Tool
As listed above, you can also use the automatic backup module on Windows 10, which is known as File History. If you find the Windows automatic file backup option a bit complicated to use, then follow these instructions.
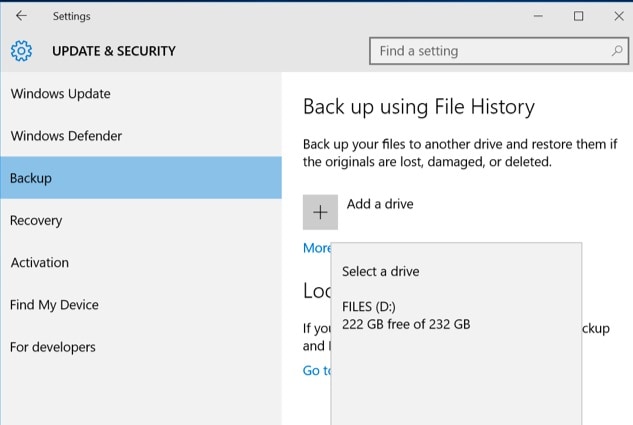
Step 1: Add a Backup Drive
To begin with, you first need to select a drive where the backup would be stored. Once the external hard drive is connected, you can go to your system’s Settings > Update & Security > Backup and click on the “+” button to add a drive.
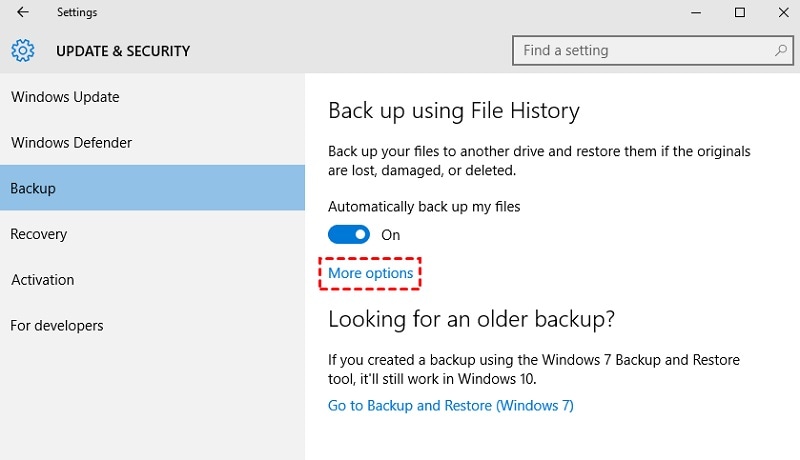
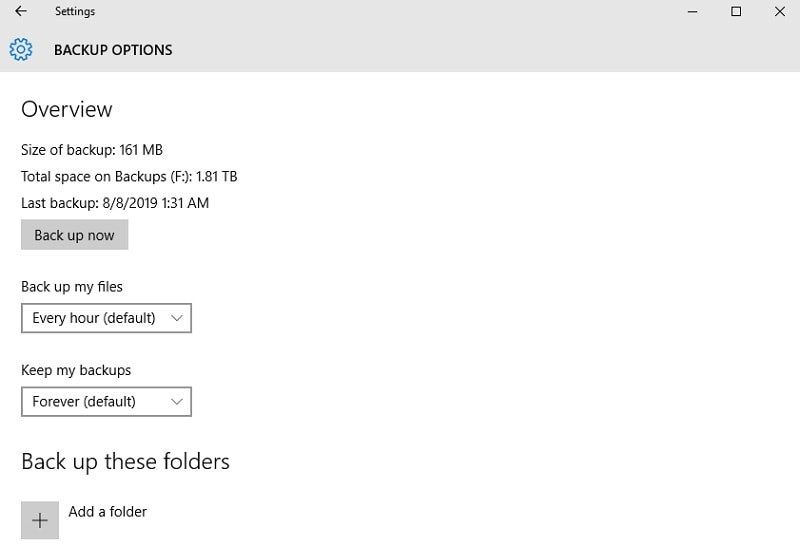
Step 2: Set up the automatic backup schedule
After selecting the backup drive, you can enable the feature to automatically back up your data. To configure a file backup solution, you can click on the “More Options” button here.
From the provided options here, go to the “Back up my files” dropdown menu and select an appropriate schedule to maintain the Windows automatic file backup. You can also manually take the backup by clicking on the “Back up Now” button.
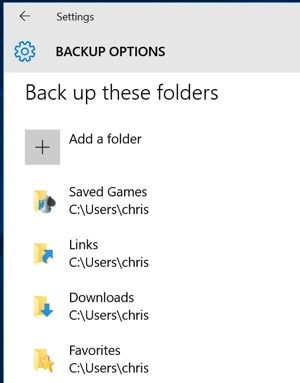
Step 3: Select what you want to back up
Lastly, you can scroll down to find the “Back up these folders” section. Here, you can click on the “+” icon to navigate and manually include the folders that you wish to include in the backup.
After the File History backup is stored, you can go to the same feature to preview your data and restore it to your computer.
As you can see, it is pretty easy to automatically copy files to an external hard drive with the help of two popular methods. If you can’t seem to configure a file backup solution of Windows 10 via File History, then simply give Wondershare UBackit a try. A user-friendly and professional periodic backup software, it provides automatic and incremental backup solutions that would keep your files safe at any location of your choice.


Amy Dennis
staff Editor