
 TL;DR:
The eDiscovery PST Export Tool enables Office 365 E3 and E5 enterprise users to locate and export mailbox data to local storage as PST files, though it requires configuring specific administrator permissions to function.
● Assigning eDiscovery Manager or Administrator roles via the Office 365 Security & Compliance Center is a mandatory prerequisite before users can initiate content searches or export data.
● Google Chrome and Mozilla Firefox require a ClickOnce extension; without it, the export button will be missing from the results page.
● Enabling the native deduplication feature risks marking unique items as duplicates and excluding them, potentially leaving users with partial data or corrupt PST files.
Ask AI for a summary
 ChatGPT
 Perplexity
 Gemini
 Claude
 Grok
Grok
Microsoft Office 365 is one of the most popular utility tools people worldwide widely use. Even though it is a verified solution that offers reliable security features, there’s still a chance you could lose your sensitive data.
Many people use Office 365 for essential tasks, and keeping all the data and conversations private is imperative. Sadly, this solution doesn’t back up any data automatically, so you will have to do it manually. One of the best ways to do it is to use the eDiscovery PST Export Tool. Here’s everything you need to know.
In this article
Part 1. What Is the eDiscovery Export Tool?
eDiscovery is an essential feature that comes with Microsoft Office 365. eDiscovery is a feature for finding and delivering content results from Office 365 Groups, Exchange Online mailboxes, and other services for business conversations.
It’s short for electronic discovery, and this process delivers information to all parties involved in legal cases, including records and evidence. The best way to handle eDiscovery is to manage documents and information proactively while completely controlling eDiscovery requests.
The data comes in digital forms like emails or documents, making searching for and indexing all important data easier. Only users who subscribe to the Enterprise Office 365 E5 and E3 plan can access eDiscovery tools.
Part 2. How eDiscovery Export Tool Works
Most users with the enterprise versions of O365 use eDiscovery procedures as an option for backing up all mailbox data in local storage. The best tool for doing that is the eDiscovery Export Tool. It’s a simple but effective solution that locates searched content and exports it to a desired location on your local system in PST file format.
Now that we’ve discussed the Office 365 eDiscovery process and why you can use it, let’s get to the part about using this function in your mailbox. Before using eDiscovery, you must go through many steps, and all of them are crucial, so don’t skip any.
Part 3. Additional Information You Need Before Using eDiscovery
The first thing you need to do before using the eDiscovery PST Export Tool is set permissions for all your team members so you can add them as case members. However, becoming a role group member is crucial before assigning case members. Here are eDiscovery role groups you can use.
eDiscovery Manager Role
This role of group members is the primary one, enabling the members to manage and create cases. These members can edit and create content searches, change content locations, and add or remove members.
Reviewer Role
The least authoritative role group in eDiscovery can give access to other members to view case data.
Global Administrator Role
This role is the most authoritative and lets you perform all actions without asking permission from anyone else.
Assigning Privileges in Office 365 Security & Compliance Center
- Step 1: Start your web browser and log into your Office 365 account.
- Step 2: Find the Apps menu and click the Admin icon.

- Step 3: Once you’ve entered the Admin Center, click Security to access the Office 365 Security & Compliance center.

- Step 4: Click the Permissions button in the left corner.

- Step 5: Select the eDiscovery Manager role so you can edit roles and add permissions.

- Step 6: Find the eDiscovery Administrator role in the next window and click Edit.

- Step 7: Go to Choose eDiscovery Administrator.

- Step 8: Click the Add button to find the user you want to assign a new role.

- Step 9: Once you’ve chosen all the members, click Add in the bottom left corner.

- Step 10: Press Done in the bottom left corner to complete the process, then click Save.

Part 4. How To Use the eDiscovery Export Tool to Export PST Files
Once you’ve successfully added permissions, you can use the eDiscovery Export Tool.
- Step 1: Open the Security and Compliance menu and click More Resources. Once you reach the Microsoft Purview Compliance Portal, click Content Search, select Search on the right window, and click New search below.

- Step 2: Set up the content search settings in the New Search Choose the location of the mailbox and the Name & description.

- Step 3: Once you’ve set up the location, go to the Conditions section and adjust conditions, keywords, region, language, and other filters for the search. Then, click Submit & Done.

- Step 4: Wait until the search completes and go to the Search tab, click Actions, and then Export Results to see if the process is complete.

- Step 5: The Export results window will display different export options. Mark the desired option and click Export.

- Step 6: Once the process finishes, click Download Results once the option appears and hit Copy to the clipboard at the bottom.

- Step 7: Provide the Export key in the next window and click Browse to set the destination path for your exported files. Click Start and wait for the export to finish.

Part 5. eDiscovery Has Limitations
Even though eDiscovery is an excellent option for exporting data from your mailbox, you should be aware of some potential problems.
eDiscovery Duplicates Items
eDiscovery usually locates multiple instances of the same messages and treats them separately. That’s why it exports duplicates, and you can deal with that by enabling the deduplication option when choosing output options. However, it isn’t always a 100% successful option, as this feature can mark unique items as duplicates and exclude them from the PST export, leaving you with partial data.
Export Button Missing
Some users don’t get the export button. That happens because of two reasons:
- The account doesn’t have the import/export role, or the changes haven’t been communicated to eDiscovery.
- The browser version you’re using doesn’t support exporting. Google Chrome and Mozilla Firefox require ClickOnce extensions before they can work.
Other Potential Problems
Even though you can fix the problems above, there are issues you can’t overcome. They include complex searches and the inability to locate required data. Exports can take too long, and you can get corrupt PST files. Some users also experience missing items or partial data.
Part 6. A Simpler Alternative to eDiscovery: Wondershare UBackit
If you’re having issues with eDiscovery or want a more straightforward solution to help you export and backup Outlook PST files, you can choose a third-party tool. One of the most popular options is Wondershare UBackit because it has exceptionally high success rates when exporting and backup to PST and because the process is quick and easy.
You can set up Wondershare UBackit to back up Outlook emails or other data on a desired schedule, so you don’t have to manually go through the same process whenever you need to back up PST files.

Wondershare UBackit - Your Reliable Email Backup Tool
Export and back up emails to local hard drives or external storage devices effectively, safely, and completely.
Provide automatic backup to back up your email files daily, weekly, monthly, or non-stop.
Set a password to protect your backups, keeping your data confidential should it be stolen, lost, or compromised.
Support incremental backup, which saves only the changes made to your files since the last backup, reducing backup time and saving storage space.
Here are simple steps for exporting and backing up PST files using Wondershare UBackit:
- Step 1: Open Outlook and add your Office 365 account in your Outlook.
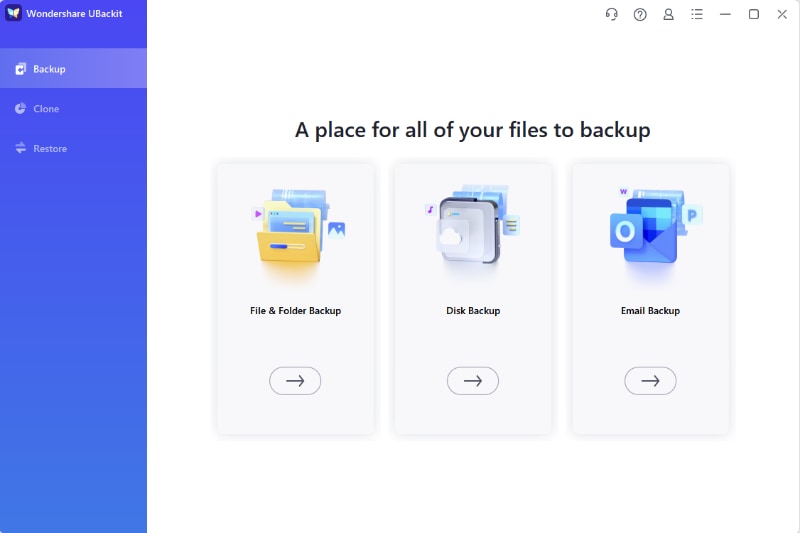
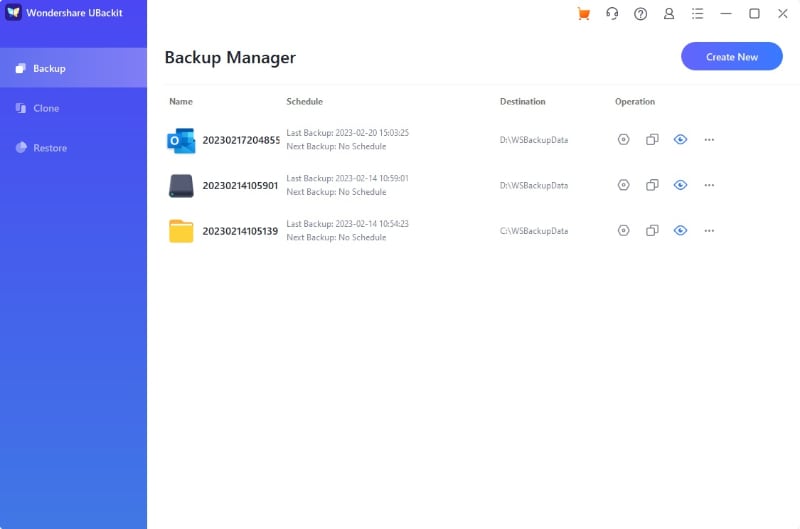
- Step 2: Launch Wondershare Ubackit after downloading and installing it on your computer. Then, choose the Email Backup in the Backup section.
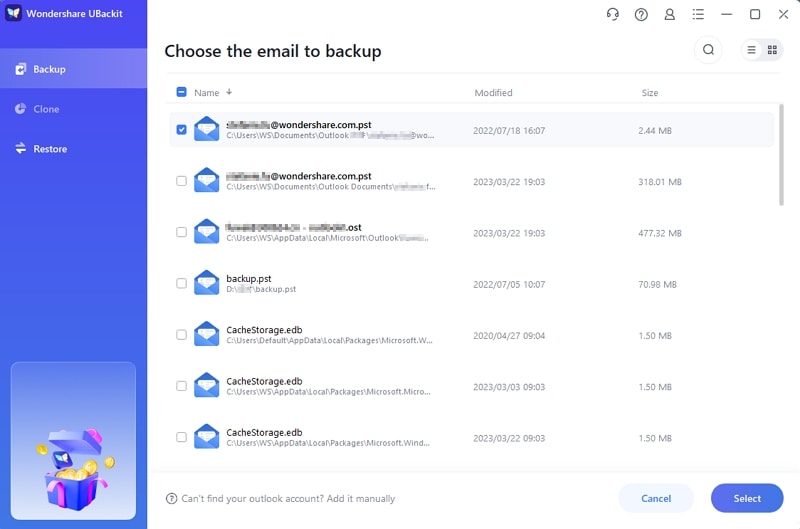
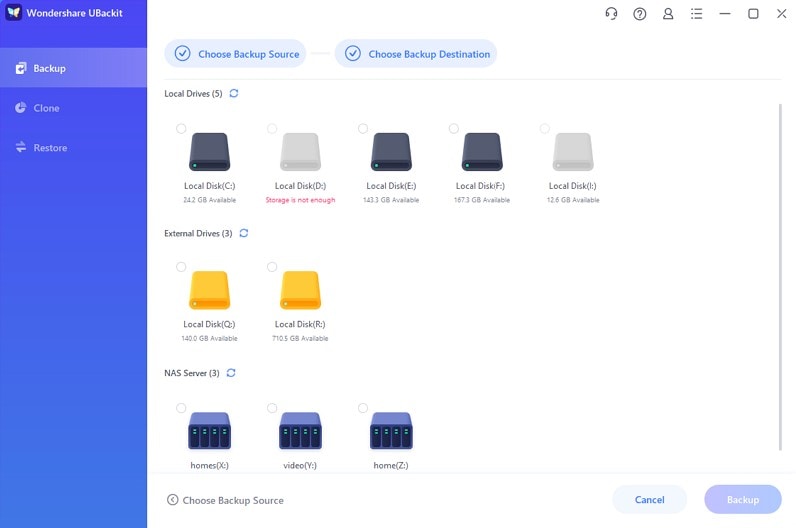
- Step 3: Choose the PST file source (your email account) that you want to export or backup and click Select.
- Step 4: Choose the backup location for your PST files and press Backup at the bottom left corner to start the process.
- Step 5: Wait until the backup has been completed. Now, you can find your Office 365 PST file in the destination location.
Conclusion
We hope this post has helped you learn more about eDiscover PST Export Tool and how to use it correctly. Make sure to follow all the steps, and if you encounter problems with this method, consider trying an alternative solution that can help you deal with these manual tasks more effectively.


