How to Repair Damaged Video Files on Windows
Just like any other kind of data, video files also undergo some kind of corruption sometimes. While it seems to be totally out of the blue, there might be a few explanations to it. You might have fallen a victim to one of the notorious computer viruses or there might be something wrong with your hard drive. If you are using an optical storage media, there might be something wrong with the CD or DVD.

The whole thing may turn out to be a very unwanted and wearing experience but luckily there is something you could do about it. Different video repair tools are available in the market. They may be used to repair damaged videos by following just a few simple and easy steps. So if you are looking to repair videos on Windows, the best possible course of action is to make use of a video repair tool to do that. A few details that you might find very handy while dealing with corrupted videos are discussed below for your ease and convenience.
Part 1: The Best Video Repair Tool for Windows
Recoverit Video Repair is a simple yet highly effective software application that allows you to repair damaged videos by following just a few simple steps. Regardless of the reason behind the corruption of all your files, this software can fix all your damaged/broken videos make as good as new. Recoverit Video Repair makes all the changes required to make the file free of corruption including rebuilding and renovating the header, duration, frame, movement, and sound of your video files. You can easily get access to this software if you are a MAC or a Windows user.
Part 2: How to repair damaged videos on windows
Recoverit Video Repair is a very simple and user-friendly video repair tool that allows you to repair damaged videos by following a series of some very simple steps. A tutorial explaining how you may use this software to bring your broken video files back to life is given below for your convenience.
Step 1 Launch Recoverit Video Repair Tool. Click the "Add" button or "Add video and start repairing" area to add damaged video files

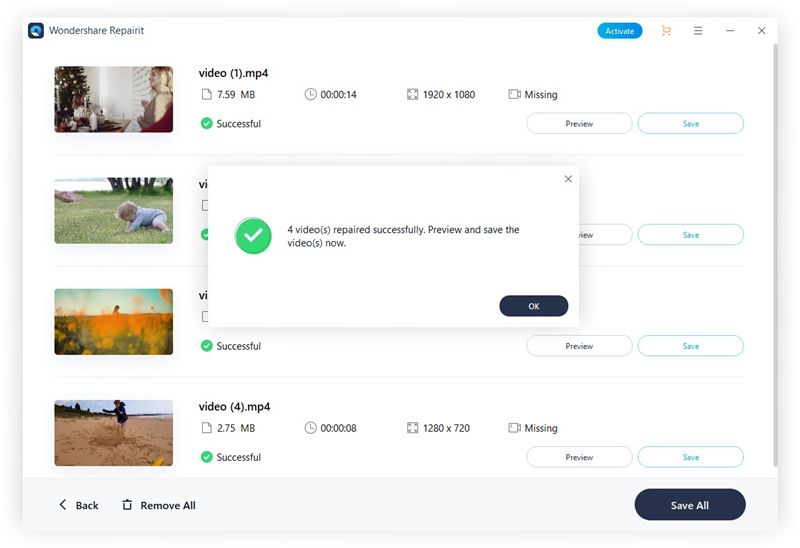
Step 2 Click the "Repair" button to start and wait for the process completed.

Step 3 Click the black right triangle icon to check the contents of the repaired video file before saving the files on your hard drive.

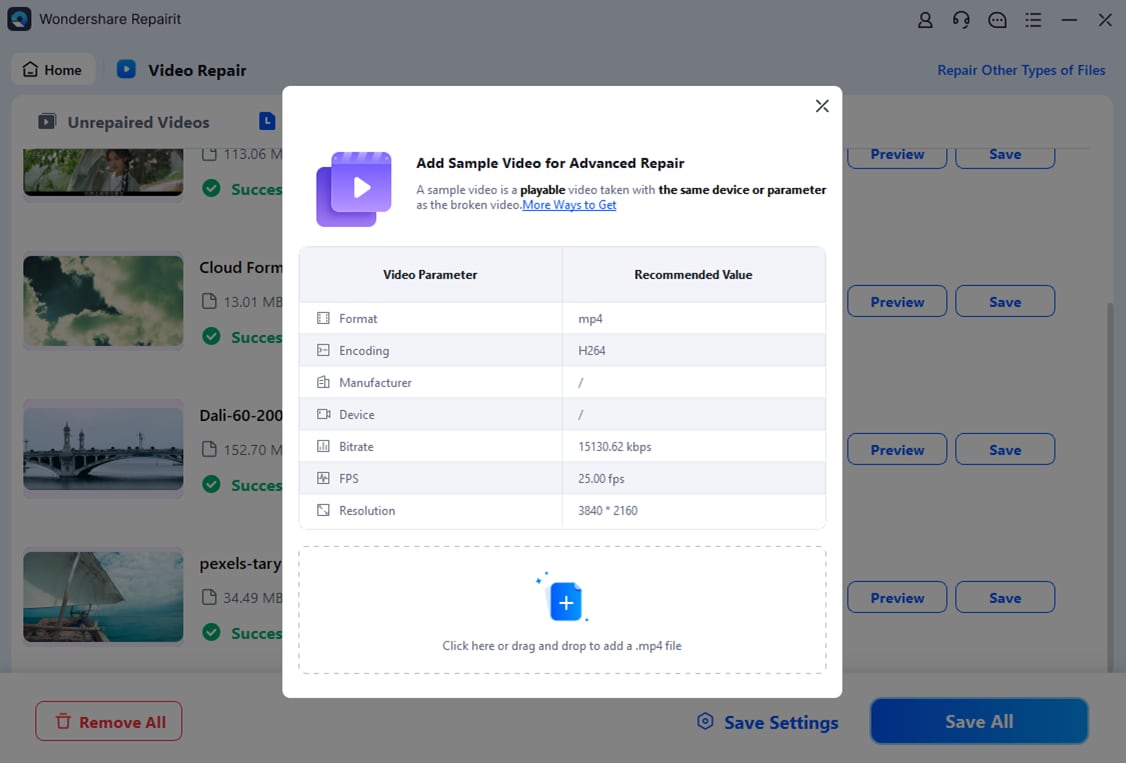
Step 4 Add a simple file to repair severely corrupted video in Advanced Repair mode. Just click the Advanced Repair button to enter this mode. Then click the folder button to browse and choose a sample file. Finally, just click the Repair button to start repairing.

Step 5 with this process done, you can preview and save the repaired video like the operations in Quick mode.

With everything getting electronic, the risk of losing data to different vulnerabilities is a hot topic under discussion. Several reasons might cause your video files to get corrupted in some way. so the best course of action is to take the right preventive measures before there arises the need of doing something to make it right. A few tips that might prove to be helpful in this regard are listed below:
- Keep a check on the health of your hard drive to be aware of any bad sectors or other damages
- Install an antivirus to keep your computer free of any infestations
- If you are using optical media, keep it in a safe case to protect it from damages
- Upgrading your computer’s hardware might help you run videos in a better way
- Always keep a backup of important files that you can not risk losing
- Never use low-end media players as they might be able to damage the video files while encoding and decoding
Solve Media File Problems
- Recover & Repair Photos
- Recover & Repair Videos
- Recover & Repair Audio
- Recover & Repair Cameras


Eleanor Reed
staff Editor