 TL;DR:
Fix an unplayable recovered video by testing a duplicate file in VLC media player to rule out missing codecs, rescanning the original storage if data is missing, or applying a dedicated repair tool to fix broken file structures.
● Rescan the original storage drive using Wondershare Recoverit if the recovered video shows 0 bytes or is visibly truncated, provided the source hardware is physically stable and no new data has overwritten the original sectors.
● Process a duplicate file through Wondershare Repairit only when the recovered MP4, MOV, or AVI retains substantial data payload but suffers from structural damage, because software cannot recreate permanently deleted or zero-filled video frames.
● Avoid changing an MP4 file extension to AVI in an attempt to trigger the VLC AVI index repair tool, as renaming does not alter the actual video container or resolve format compatibility issues like Windows error 0xc00d36c4.
Ask AI for a summary
 ChatGPT
 Perplexity
 Gemini
 Claude
 Grok
Recovered video files not playing? Do not overwrite the original card, drive, or phone storage. First check whether the recovered file is complete and whether your player supports its codec. If recovery missed video data, scan the original storage again and save the results elsewhere. If the file contains substantial video data but has damaged container information, test a video repair tool on a copy. Changing an MP4 filename to AVI does not repair an MP4.
In This Article
Part 1. Why Recovered Video Files Will Not Play
A recovered file can be unplayable because the source data was only partly reconstructed, its video container is damaged, the codec is unsupported, or the player itself is malfunctioning. These causes require different fixes. Check the original storage and a working copy before you try repairs.
Check the Symptoms Before Choosing a Fix
Start by checking the recovered file size, file origin, and playback behavior. File size is only a clue: a large file can still contain wrong or overwritten bytes, while a small clip may naturally be small. Preserve the original recovered file and diagnose a separate copy.
| What you see | What it may mean | Safest next step |
| 0 bytes or obviously truncated file | Missing source data or an interrupted recovery/export | Preserve source storage; try a new scan of the original media |
| Only one player fails; other files play normally | Codec, player configuration, or local software issue | Open a copy with an updated alternative player |
| Same video fails in multiple players; file has plausible size | Incomplete data, damaged video container, or unsupported codec | Check codecs, then test repair on a copy |
| Audio plays but picture is black | Decoder, codec, damaged video stream, or rendering issue | Test another player and known-good video from the same camera |
| Playback freezes at the same timestamp | Missing, corrupted, or improperly ordered media data | Compare a second recovery; repair may not restore missing frames |
| Windows error 0xc00d36c4 | File type/codec or media structure not supported or not readable | Check file type and codec; do not assume a missing MP4 moov atom |
If the drive intermittently disconnects, reports hardware errors, makes unusual noises, or has suffered liquid or physical damage, stop DIY scanning and ask a professional data recovery service. Do not format, initialize, run repair utilities, or perform a factory reset before preserving the data.
Part 2. Fix Recovered Videos That Will Not Play
Follow the least-destructive method that matches your symptom. Only use Recoverit when the source video may still be recoverable from a readable original storage device; use repair software when the video file itself has already been recovered but is structurally damaged.
Method 1. Re-run Video Recovery From the Original Device
Recovered MP4 or MOV won't play? Your first scan may have missed important video data. Try Recoverit's Enhanced Video Recovery to rescan supported drives and SD cards, preview found clips, and save recoverable videos safely.

Best for: Zero-byte videos, incomplete exports, missing footage, or files whose first recovery attempt collected incorrect fragments. This approach requires access to the original storage device. A second recovery may fail when the underlying data is overwritten, trimmed, or unavailable.
Step 1. Stop recording or writing to the original camera card, USB drive, or disk. Connect the source to a stable Windows or Mac computer and choose a different healthy destination for recovered files.
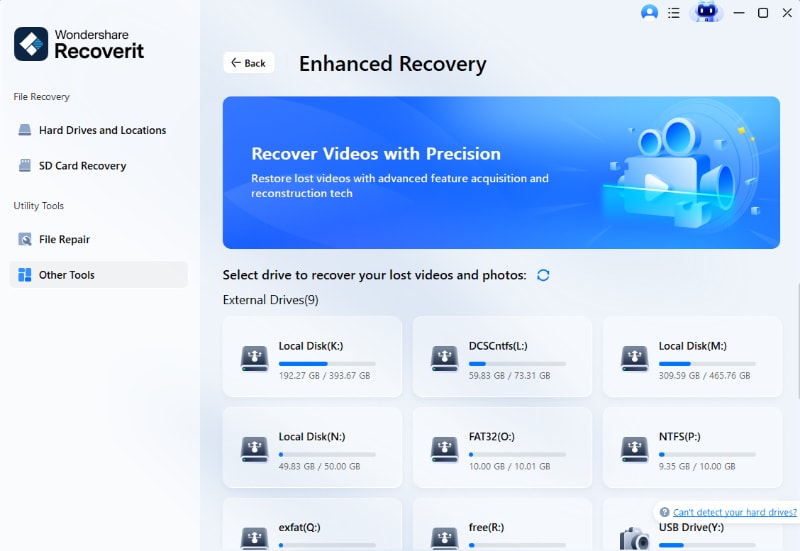
Step 2. Open Recoverit Video Recovery. Select the original device or location; where available, choose Enhanced Recovery for eligible video sources. Identify the source volume carefully before starting a scan.
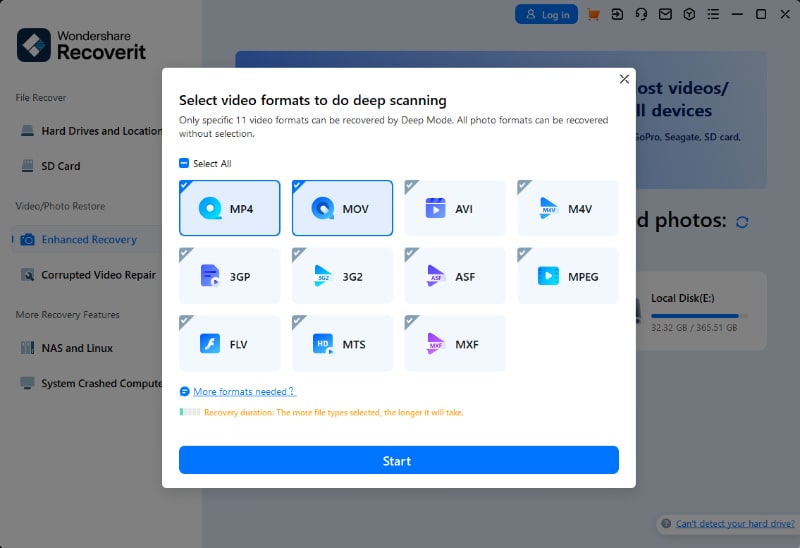
Step 3. If Enhanced Recovery asks for video formats, choose the relevant file types. Start scanning and allow the scan to finish; do not disconnect the source mid-scan.
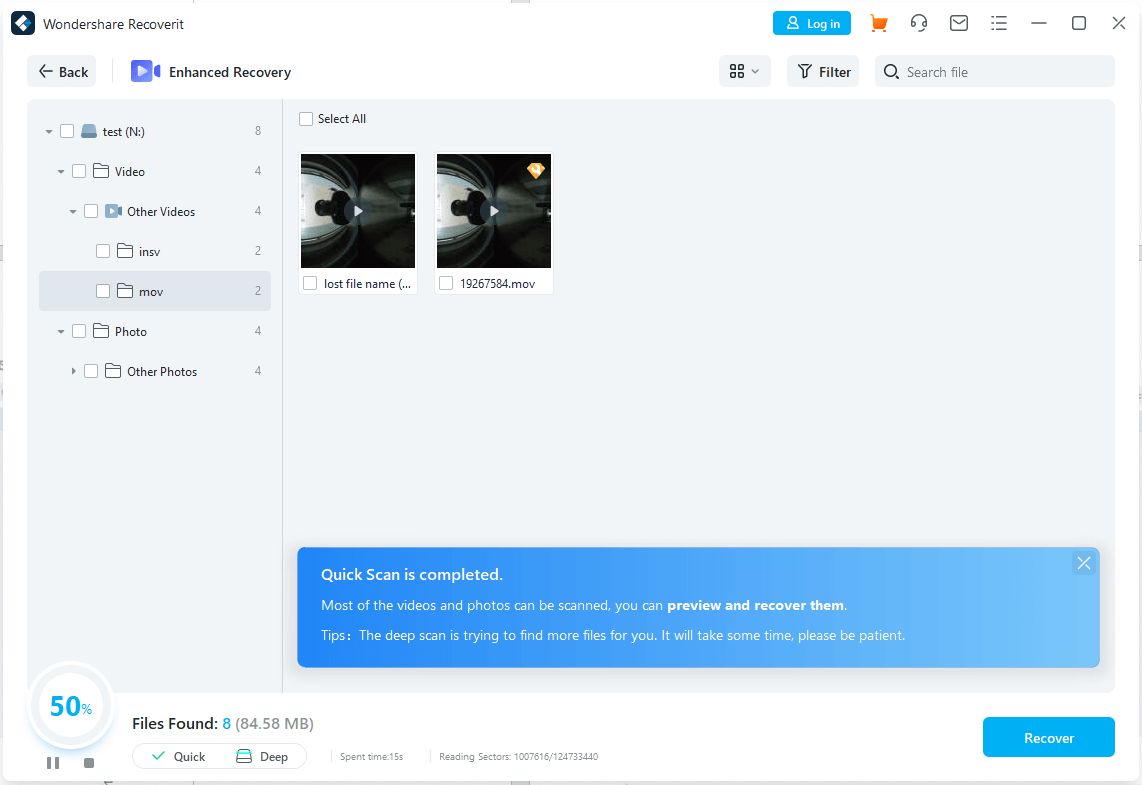
Step 4. Preview detected videos where the preview is available, select the correct files, and click Recover. Save the results on another healthy drive or folder, never the original loss location.
Success check: Open the restored file, inspect picture and sound, and scrub to the end. Compare multiple recovered versions if available. A scan finding a file name or thumbnail is not proof that its full video stream is intact.
If it fails: Do not repeatedly write to the source. If another scan recovers the same broken data, try a copy with a repair tool only if the video has recoverable payload; otherwise the missing media cannot be created by software.
Method 2. Repair a Recovered Video That Has Real Data
Best for: A recovered MP4, MOV, AVI, or another supported video with substantial remaining data that no compatible player can open, or that stalls due to damaged file structure. File repair is different from locating deleted video fragments.
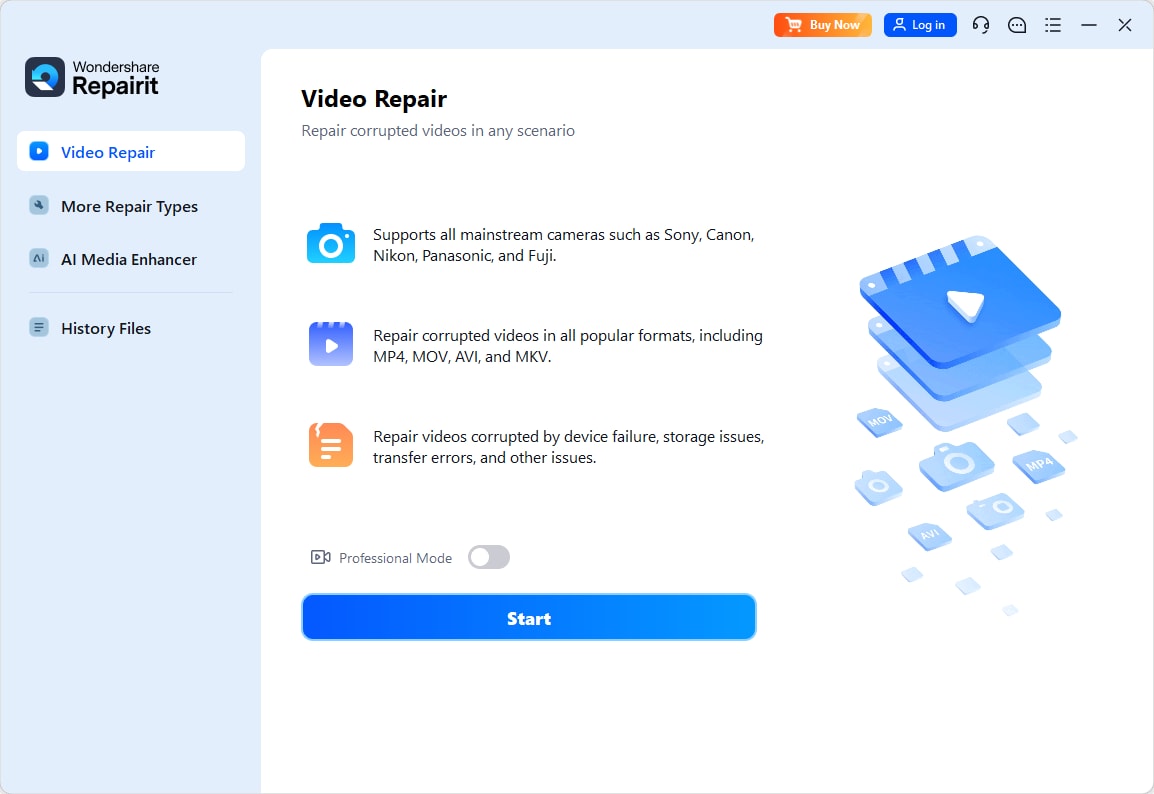
Step 1. Make a duplicate of the broken recovered video. In Wondershare Repairit Video Repair, open Video Repair and add the copied corrupted file.
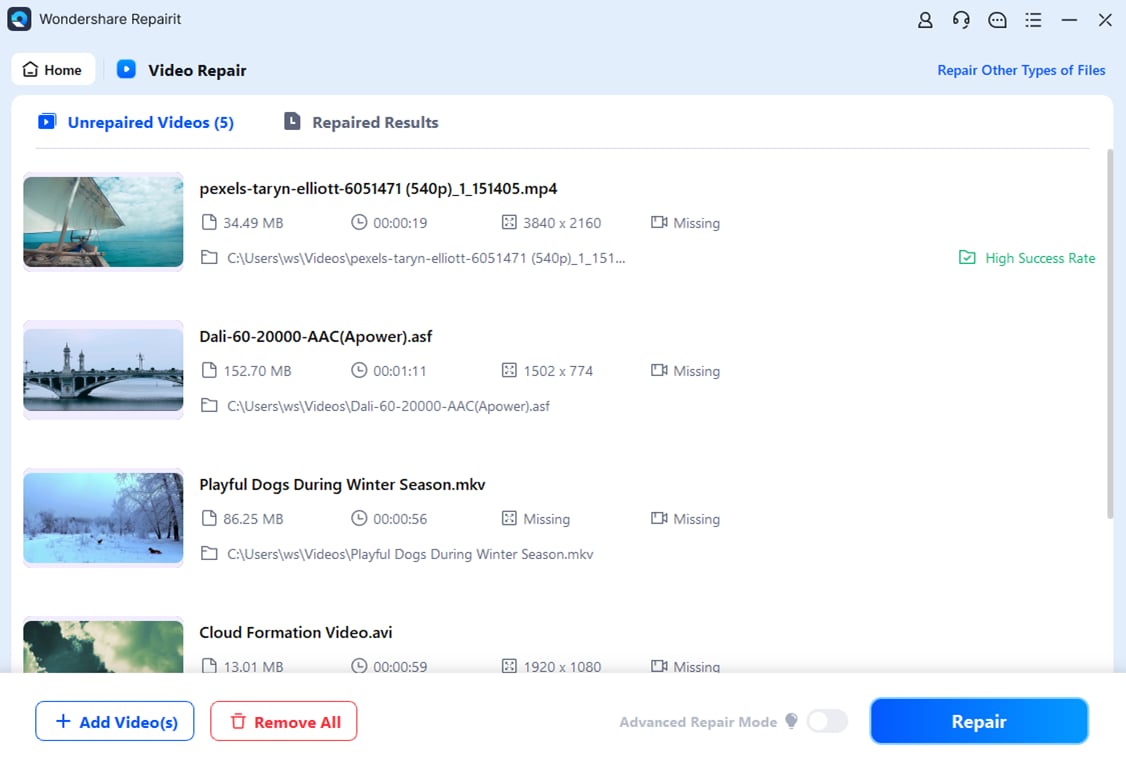
Step 2. Select the video and start the standard Repair operation. Wait for its result and do not change the preserved original recovered file.
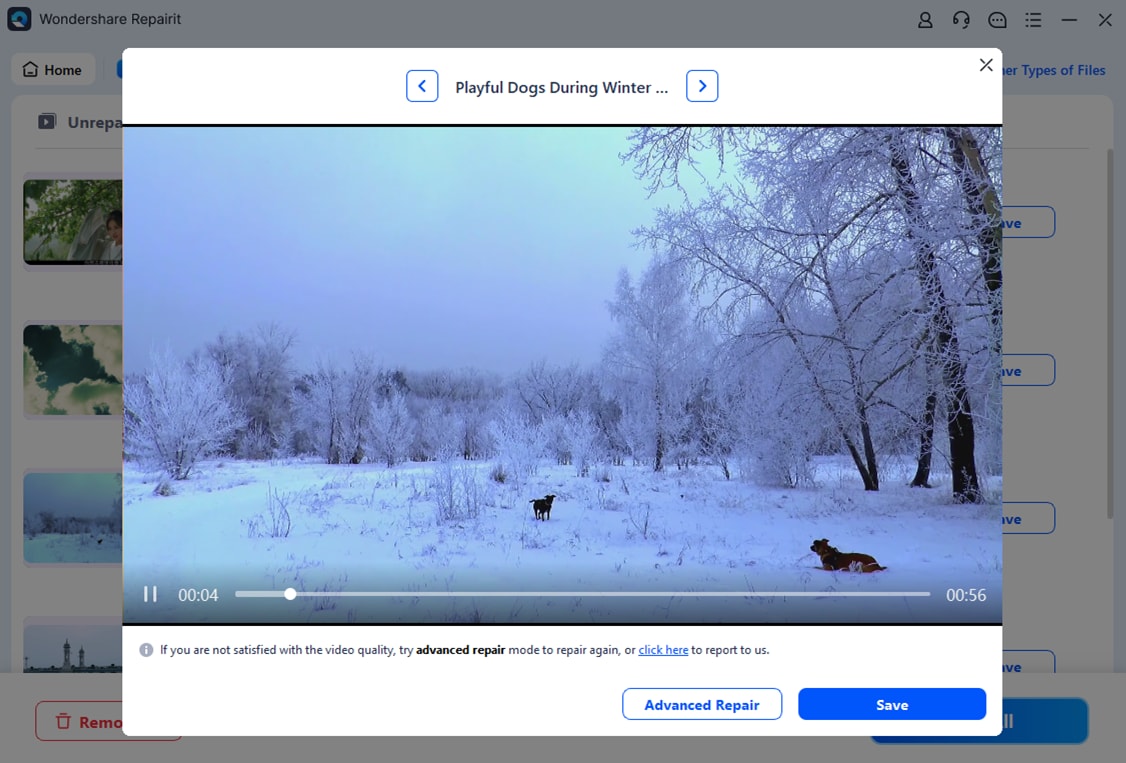
Step 3. Preview the repaired result; if playback looks correct, save it to a separate location. Where the software offers an advanced workflow, follow its actual on-screen eligibility guidance for a suitable healthy reference video.
Success check: Play the full output from beginning to end and check audio synchronization and frames. A repair can improve certain container or media-structure problems, but it cannot reliably recreate deleted or overwritten source footage. For smaller uploads, Repairit Online Video Repair offers a browser-based alternative; review file sensitivity, upload limits, and current availability before using cloud repair.
Method 3. Try Another Player and Check Codec Support
Best for: A file that may be intact but uses a codec not supported by the default player. Testing playback is reversible and should come before re-encoding or system changes.
Step 1. Make a copy of the video and open it in VLC media player from the official website. Use Media > Open File, select the recovered video, and try playback.

Step 2. If VLC plays the file but the default player does not, check the original file codec or player support before modifying the video. If VLC also fails, test a second known-good video from the same device to rule out a system-wide playback issue.
Success check: The video plays with picture and sound in a compatible player. A successful VLC playback test does not mean the original file needed repair; the issue may only have been player compatibility.
Method 4. Use VLC AVI Index Repair Only for Genuine AVI Files
Best for: An actual AVI file with an incomplete or damaged AVI index. This is an AVI-specific VLC feature, not an MP4/MOV repair method. Do not rename an MP4 to .avi to attempt this fix.
Step 1. Open VLC. On supported desktop builds, choose Tools > Preferences > Input / Codecs.

Step 2. Find the Damaged or incomplete AVI file control, select Always fix if that option is available, and save the preference. Now open a copy of the genuine AVI file.

Success check: Playback improves for the AVI copy. VLC builds differ, so this setting may be absent or look different. If the file is MP4 or MOV, use the other diagnostic paths instead.
Method 5. Convert a Playable Recovered Video With VLC
Best for: A recovered video that already plays in VLC but is incompatible with another player. Conversion requires successful decoding; it will not reconstruct missing recording data.
Step 1. Open VLC and select Media > Convert / Save. Add the playable copy of your recovered video.

Step 2. Select Convert / Save, choose a compatible output profile such as MP4 with H.264 where offered, set a destination that differs from the source, and start conversion.
Success check: Play the converted output in the intended app and compare duration, audio, and image quality. If conversion stops at the same damaged segment, try another recovery from the original storage or a file-repair workflow. Transcoding normally changes encoded media and can reduce quality.
Part 3. What to Do When Repair Still Fails
If recovery and repair both fail, the next step depends on whether the file has retrievable media data. Do not pay for an export merely because a thumbnail appears or a scan lists a familiar filename.
Verify Results and Understand Recovery Limits
- Verify the full clip: Confirm duration, first and final seconds, audio, and several playback points.
- Compare copies: Look for an intact camera original, another SD card copy, cloud sync, editing export, or earlier backup.
- Check file identity: A misleading extension does not convert the actual video container; use software that reports container and codec information.
- Do not overwrite: Keep recovered and repaired files on a separate drive and stop when source hardware is unstable.
- Recognize limits: Overwritten frames, zero-filled data, and physically inaccessible storage cannot be restored by renaming or changing player settings.
If you have valuable irreplaceable footage and the source drive is failing, consider a professional recovery lab rather than performing repeated scans. If the original bytes are no longer present, neither recovery nor file repair can promise a playable video.
Part 4. Prevent Broken Videos During Future Recoveries
Prevention matters because a recovered filename is not enough to ensure complete video data. Record to healthy media, stop using storage as soon as a loss is noticed, and keep more than one verified copy of important footage.
- Back up camera and phone footage to two independent locations before deleting or formatting a card.
- Use a reliable reader and power source during file transfers; safely eject removable media.
- Spot-check video duration and playback after every major offload instead of assuming thumbnails are sufficient.
- Avoid editing, cleaning, reformatting, or repeatedly recording to a storage device after footage disappears.
Conclusion
To fix recovered video files that will not play, determine whether the recovery is incomplete, the file structure is damaged, or only the player lacks codec support. Start with safe playback checks; re-run Recoverit on an untouched readable source when footage may still be missing. Use Repairit on a copy when the recovered file contains video data but needs structural repair. Neither method can guarantee restoration of overwritten bytes.
FAQ
-
Why are my recovered MP4 files not playing?
The recovery may have collected incomplete MP4 data, damaged container information, or a video encoded with a codec that your player cannot decode. Test a copy in a compatible player, then choose re-recovery or repair based on the symptoms. -
Can a video be repaired after data recovery?
Sometimes. A file with valid video data and damaged structural metadata may be repairable; a file with overwritten or missing video frames may not be. Preserve the original and evaluate the full output. -
Does changing MP4 to AVI fix recovered videos?
No. Renaming an extension does not convert an MP4 container into AVI. The VLC incomplete AVI repair setting is intended for actual AVI files. -
Can Recoverit recover a video that shows 0 bytes?
A zero-byte recovered file contains no video payload, but the original device may still hold some data. If the source is detectable and has not been overwritten, try a separate scan and save any recovered results elsewhere. -
What does error 0xc00d36c4 mean for a recovered video?
It is a playback or media-format error, not a conclusive diagnosis of one missing MP4 index. Verify codec support, file identity and integrity before choosing a repair method. -
Should I repair the video or run recovery again?
Try recovery again if source footage appears incomplete or the recovered file is empty. Test video repair if you already have a file containing substantial data that refuses to play. Neither solution guarantees success.


