
 TL;DR:
Deleted 4K or 8K videos can often be recovered if the underlying data has not been overwritten, providing you immediately stop using the original storage device and scan it to extract the files onto a completely different drive.
● Since high-bitrate 4K and 8K recordings are frequently stored in noncontiguous fragments, utilize an Enhanced Recovery scan designed to match separated video blocks rather than relying on a standard file search.
● A generated thumbnail or expected file size does not guarantee successful retrieval; actively verify the extracted MP4 or MOV by seeking through its entire timeline in a compatible player to check for sudden freezes or missing frames.
● Never attempt to run file-system repairs like CHKDSK or authorize format prompts prior to data extraction, and abandon software recovery entirely in favor of professional services if the card is physically damaged or repeatedly disconnects.
Ask AI for a summary
 ChatGPT
 Perplexity
 Gemini
 Claude
 Grok
That missing camera clip may be the only copy of a shoot, a client handoff, or footage you have already started editing. You may be able to recover deleted 4K or 8K videos if their data still exists on the original storage device. First stop recording or copying new files to that card or drive. Check for an intact copy in your editing folders, Recycle Bin, Trash, or backups. If none exists, scan the original readable storage and save any recovered video to a different drive.
The best next step depends on where the footage was lost, not simply whether it was recorded in HD, UHD, 4K, or 8K. A video that is still present but will not play needs different treatment from one that has been deleted. The guide below helps you tell those situations apart, recover footage when appropriate, and check that a recovered clip is actually complete.
In This Article
Part 1. Identify the Loss and Protect Your 4K or 8K Footage
Before starting a recovery scan, establish what happened to the original file. This prevents you from spending time rebuilding footage that is still available in another location, or from modifying a card that contains the only remaining data.
Is the Video Missing, Unreadable, or Only Offline in Your Editor?
| What you see | What to check first | Next safe action |
| The clip was deleted from a computer folder | Recycle Bin, Trash, File History, Time Machine, or backup drive | Restore an existing copy; scan the original computer drive if necessary |
| The camera SD card was erased or quick-formatted | Whether the card is still detectable and has been reused | Stop recording; scan the original card without formatting it again |
| The video is missing after import or a transfer | Original camera card, destination folders, editor media folders, and backup copies | Copy an intact source file; do not assume an offline timeline means deletion |
| The MP4 or MOV exists but will not play | File size, compatible playback app, and a known-good clip from the same camera | Preserve a copy and investigate file integrity or compatibility; do not treat this as deletion |
| The card is physically damaged or repeatedly disappears | Visible damage and whether it is stable across a safe reader/connection check | Stop repeated scans and consult a qualified recovery specialist |
Before proceeding: If footage disappeared from a camera card or editing drive, avoid new recordings, exports, renders, cache builds, formatting, or file-system repair on that source. Connect a stable, detectable card to a computer with a suitable reader. If prompted to format or initialize it, cancel. Save recovered files only to another healthy drive with enough free space.
Why Large High-Resolution Clips Need Extra Checks
HD commonly refers to 1280 x 720, Full HD to 1920 x 1080, 4K UHD to 3840 x 2160, and 8K UHD to 7680 x 4320 pixels. The last two describe resolution, not a guaranteed file size or codec. A 4K clip can be an MP4, MOV, MXF, or another supported recording format; bitrate, recording duration, codec, and camera settings determine how much storage it consumes.
Long, high-bitrate recordings can occupy many storage blocks. Some camera videos are fragmented across a card, while others include separate metadata or sidecar files needed by an editing workflow. Recovering one large file or its thumbnail does not establish that every frame survived. The real success test is the recovered recording's duration, image, audio, and ability to seek across the timeline. For a general comparison of resolutions rather than data loss, see 4K vs. 8K video.
Part 2. Check Existing Copies Before Scanning a Drive
Restoring a file that already exists is usually simpler than searching a card or disk for deleted blocks. Start with copies you can confirm without writing new data to the affected storage.
Restore a Computer-Deleted Video from Recycle Bin or Trash
Use this when: You deleted a video from a local Windows or Mac folder and have not emptied the relevant bin. Deletions made inside a camera or on certain removable media may bypass the computer's bin entirely.
Step 1. On Windows, open Recycle Bin; on Mac, open Trash. Search for the video by name, approximate deletion date, or an extension such as MP4 or MOV. If the name has changed, also inspect folders around the time the footage was imported.

Step 2. If you locate the correct file, choose Restore on Windows or Put Back on Mac. Open it, compare its duration with the expected recording, and check that it reaches the end without freezing.
If it is not there: Check backups next. An emptied bin or camera-side deletion requires a different recovery route; do not repeatedly save test files to the original drive.
Find a Previously Backed-Up Version
Use this when: Your missing original was on a computer and you had a backup system running before the loss. Backups cannot restore an older version that was never captured.
Step 1. On Windows, open File Explorer, right-click the folder that originally held the recording, and choose Restore previous versions. The list depends on available backups, including File History. If a version predates the deletion, inspect it before restoring. Microsoft's File History instructions explain the available controls.

Step 2. Restore the selected recording to a different location when that choice is offered, so the restored copy does not replace newer project files. On Mac, open the original folder and browse any existing Time Machine backups, then restore the clip using Apple's Time Machine procedure.
Success check: The restored video exists in your chosen destination and opens from beginning to end. If not: Try another dated backup or return to the card or drive that originally contained the recording.
Check an Uploaded or Synced Copy
Use this when: You previously uploaded camera originals, exports, or project media to a service such as OneDrive or another cloud backup. Synchronization by itself is not proof that a deleted file is retained.
Step 1. Sign in to the account that held the video and search for the original filename, capture date, and recording folder. Look in the provider's recycle bin and available file versions; for OneDrive, use Microsoft's deleted-file restoration guide.

Step 2. Download a candidate to a healthy destination. Compare the filename, actual resolution, duration, and frame content. A small preview, streaming copy, or compressed proxy may not replace the camera original.
If it fails: The account may not have retained the file or its original quality. Return to the source card or drive instead of assuming that a deleted cloud item can be recreated by desktop scanning.
Part 3. Recover Deleted 4K or 8K Videos from Readable Storage
If there is no usable copy and the original SD card, camera card, external SSD, or computer drive remains stably readable, Recoverit Video Recovery can scan for recoverable videos. It supports desktop recovery from readable storage, not the recovery of footage that a cloud service no longer holds or data that has been overwritten.
For camera media, the current Recoverit Guide documents the SD Card Recovery workflow. Large or fragmented camera footage may also warrant Recoverit Enhanced Recovery. Use the options actually shown in your installed interface; menu labels can differ between platforms and product updates.
Choose the Original SD Card, Camera Storage, or Drive
Use this when: A video was deleted from a memory card, formatted camera storage, or a drive that a computer can still detect. Install and run your recovery program from another drive where practical, not from the source you are trying to preserve.
Step 1. Safely remove the memory card from the camera after stopping recording. Connect it with a suitable reader, then open Recoverit and choose the card under SD Card Recovery. For clips deleted from a computer or external editing drive, choose the original detected drive instead of the camera-card workflow. Check the capacity and device name so you do not scan the wrong volume.
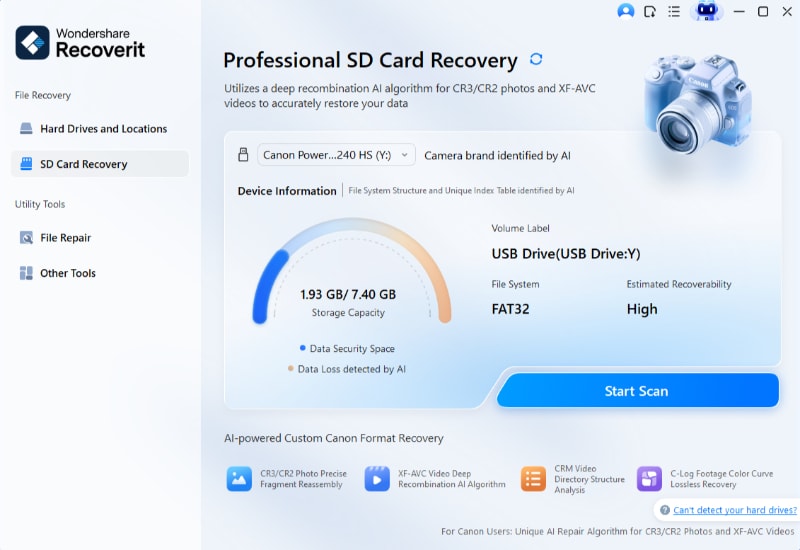
Success check: The card or drive appears as the expected source and remains connected. If it does not: Try one known-good reader or port without formatting, initializing, or changing partitions. Stop if the device disconnects repeatedly, reports no media, or has physical damage.
Scan and Inspect Recoverable Videos
Once you have selected the right source, scan it without saving anything to it. A new recording or recovery output could overwrite the footage you are trying to find.
Step 2. Start the scan and allow it to inspect the selected storage. Look for relevant camera formats such as MP4, MOV, or MXF, as well as the actual original folder or capture time when those details are available. If the file is unusually large, wait for the full scan rather than judging the result from the first thumbnail.
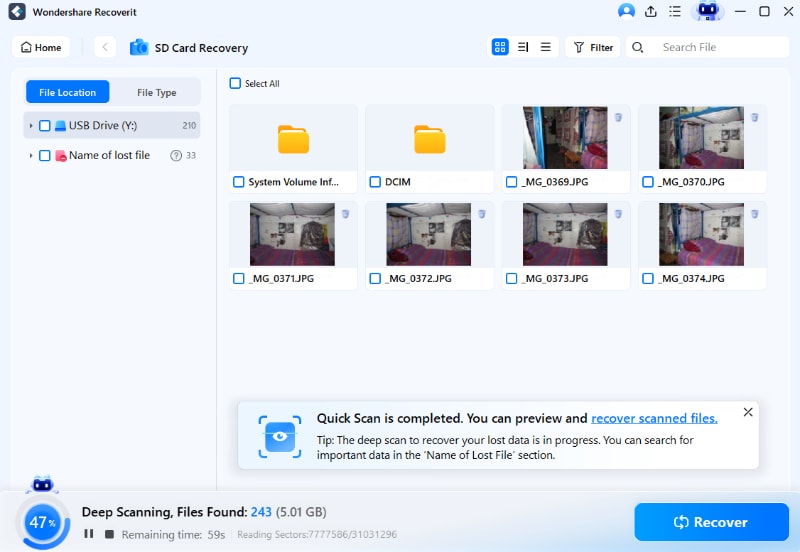
Success check: You find candidate clips with plausible duration, file type, and recording context. If not: Confirm that the original source was selected, inspect additional scan results, and use the high-resolution workflow below when the file is large or fragmented.
Use Enhanced Recovery for Large or Fragmented Footage
A single 4K or 8K recording can be stored in noncontiguous fragments. If a normal scan returns only short segments or fails to identify a large camera recording, Recoverit Enhanced Recovery offers additional video-focused scanning and fragment matching. This is useful to try, but it cannot reconstruct data that is no longer present.
Step 3. In Recoverit, locate Enhanced Recovery under the available tools, select the original readable source, and choose the relevant video format when prompted. The official Guide shows format-selection and enhanced scanning screens; scan the same preserved source without saving output to it.
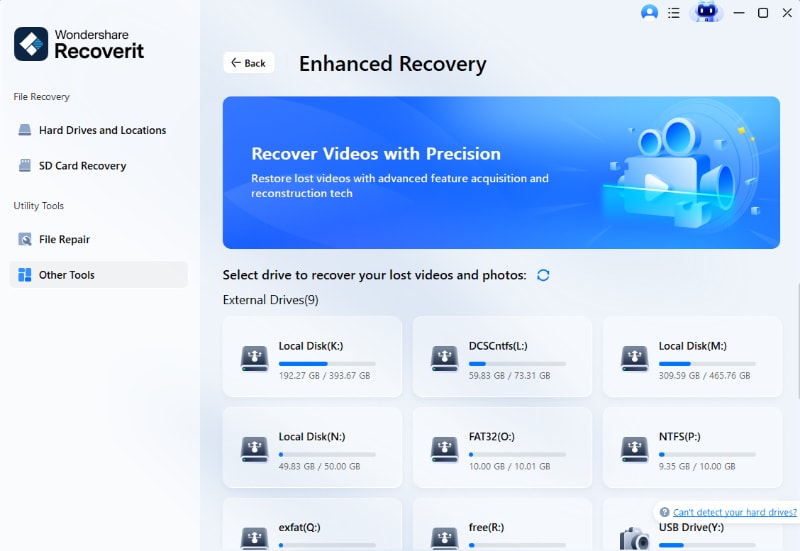
Success check: The scan identifies fuller or more relevant video candidates. If not: Do not keep rewriting the card or repeatedly attempt file-system repairs. Consider whether the recording was overwritten, interrupted before completion, or stored on failing hardware.
Recover to Another Drive and Check the Full Clip
Finding the right filename is only part of the job. Long-form high-resolution footage is useful only if the content survived the recovery.
Step 4. Preview supported results to identify the correct scene. Select the files you need and choose Recover. Save them to a different healthy physical drive with enough free space for the complete video; do not save to the card or volume being scanned.
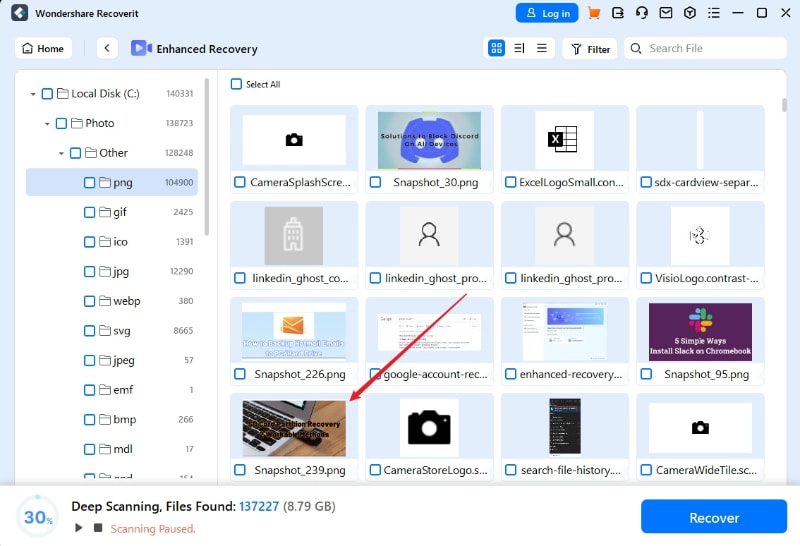
Step 5. Open each saved video in a player that supports its codec. Check the full duration, seek near the middle and the end, listen to the audio track, and test import in the editing app if that is your intended use. Compare the video with camera records or known-good footage where possible. A thumbnail or file size alone does not show that every fragment is complete.
Success check: The recovered recording contains the expected scenes and plays through the requested timeline. If not: Keep the recovered file and the source unchanged, then follow the incomplete-video branch below.
Part 4. What to Do When the Scan or Recovered Video Fails
A scan can end without a usable video for several different reasons. Choose the next action from the observed failure rather than starting over with destructive repairs.
The Card Is Unreadable or Keeps Disconnecting
If the storage disappears during scanning, is physically cracked, repeatedly disconnects, or reports no media, continuing to power-cycle or rescan it may make matters worse. Stop attempting software recovery and consult a professional service that handles the specific card or drive. If a stable card merely asks to be formatted, cancel the prompt and recover the needed footage before changing its file system.
For the narrower camera-card decision path, see the SD card video recovery guide. The SD Association's formatter FAQ also distinguishes Quick Format from Overwrite Format. A quick format may leave some file data intact, while an overwrite format is designed to erase it; neither guarantees successful recovery.
The Video Is Found but Freezes, Cuts Off, or Will Not Open
First distinguish compatibility from damage. Test a copy in a player that supports the camera's codec and compare it with a known-good recording from the same device. If other clips with the same codec play normally but this recovered file freezes, contains black sections, or ends early, it may have missing frames, fragments, or metadata.
Preserve the recovered output and the original source. A Recoverit File Repair workflow may help a structurally damaged video copy in supported situations, but it does not substitute for recovering absent or overwritten video data. If the original recording was interrupted before the file was finalized, a repaired copy still may not contain material that was never written.
Part 5. Keep the Next 4K or 8K Recording Safe
High-resolution video workflows often involve a camera card, an ingest drive, a working SSD, project caches, and exports. Treat each as a different copy, not as a backup simply because the same clip name appears in several places.
- Verify before erasing media: After an import, check representative camera originals at their full resolution and duration before reformatting a card.
- Keep independent copies: Maintain at least two working copies on separate storage and another backup where practical. Make sure your backup actually includes the camera originals, not only proxies or exports.
- Label the source: Record the shoot date, card identifier, camera model, and original file structure so a missing clip can be traced to its first location.
- Use safe removal: Finish recordings and file transfers before removing camera cards, readers, or editing drives.
- Check restoration occasionally: A backup is useful only if files can be located and opened when needed.
Conclusion
Deleted 4K, 8K, HD, and UHD videos can sometimes be recovered, but their resolution does not determine whether the original data survives. First preserve the card or drive and look for an intact copy. If the files are genuinely missing and the storage remains readable, scan that original source, save the result to another device, and check the entire recording. For incomplete files, investigate repair only after preserving recovered copies. Where footage has been overwritten or the hardware is failing, recovery software may not be the right next step.
FAQ
-
Can I recover a deleted 8K video after formatting an SD card?
Sometimes. Recovery depends on the type of format, whether new recordings reused the space, and the condition of the card. Stop using the card, avoid formatting it again, and scan stable, readable storage before making further changes. -
Is restoring a 4K or 8K file different from restoring a 1080p file?
The basic safety steps are the same: preserve the source, check backups, and recover to another drive. Large, long, or fragmented high-resolution footage can need additional scanning and more thorough playback checks. -
Why does my recovered MP4 show a thumbnail but stop halfway through?
The preview may be available even if some media data, indexes, or video fragments are missing. Test a saved copy in a compatible player, check the full duration, and consider file repair only for a damaged copy after recovery. -
Should I run CHKDSK or format a card before recovering my video?
No. If footage is still needed, first preserve the original storage and recover or copy data to another device. Repair and formatting operations can modify source data and make recovery more difficult. -
Can Recoverit restore overwritten 4K or 8K footage?
No recovery software can recreate video data that has been overwritten or never recorded. Recoverit can scan supported, readable storage for files and fragments that remain recoverable.


