

 TL;DR:
You can recover permanently deleted photos by immediately restoring them from cloud trash folders and local backups, or by scanning the original hard drive, SD card, or USB drive with recovery software before new data overwrites the remaining file blocks.
● Google Photos retains backed-up items in Trash for 60 days and unsynced files for 30 days, while Apple iCloud keeps recently deleted photos for 30 days, though recovery is impossible if these folders are manually emptied or expire.
● Stop using the affected storage immediately and save all restored files to a separate drive, because software like Wondershare Recoverit or Windows File Recovery cannot rebuild photos if the original data is overwritten or if an internal SSD has executed a TRIM command.
● Large image formats like RAW (CR2, NEF, ARW) and HEIC are highly susceptible to fragmentation during recovery, requiring you to open the recovered files at full size instead of relying on clean thumbnails to verify the actual data is intact.
Ask AI for a summary
 ChatGPT
 Perplexity
 Gemini
 Claude
 Grok
Grok
Permanently deleted photos are not always gone. Deletion usually removes the file entry first. The image data can stay on a hard drive, SD card, USB drive, or camera card until new files overwrite that space. That is why how to recover permanently deleted photos depends less on the word "permanent" and more on where the pictures lived and what happened after they disappeared.
Start with backups, Recycle Bin or Trash leftovers, and cloud trash folders. If no copy remains, scan the original storage as soon as possible. Recoverit Photo Recovery can help recover remaining local photo files from readable computers, memory cards, and external drives. It cannot restore overwritten data, TRIM-cleared SSD blocks, securely erased storage, or photos that exist only in a purged cloud library.
Try Recoverit to Recover Permanently Deleted Photos
 Security Verified. Over 7,302,189 people have downloaded it.
In this article
-
- Method 1. Recover Permanently Deleted Photos With Wondershare Recoverit
- Method 2. Restore Photos From Windows File History
- Method 3. Recover Photos With Windows File Recovery
- Method 4. Restore Photos From a Time Machine Backup
- Method 5. Check Google Photos, iCloud Photos, and Other Cloud Copies
- Method 6. Recover Photos From an SD Card, Camera, USB Drive, or External Drive
- Method 7. Restore Photos From Another Backup or Existing Copy
Part 1. Can Permanently Deleted Photos Be Recovered?
Sometimes. A photo is recoverable when another copy still exists, or when the original image data is still sitting on readable storage. If the only copy was overwritten, securely erased, physically unreadable, or purged from a cloud trash folder, no software can rebuild it from that location.
Permanently Deleted vs Recently Deleted Photos
A picture in the Recycle Bin, Mac Trash, Google Photos Trash, or iCloud Recently Deleted has only been moved. Restore it from there first. Permanent deletion means the file is no longer listed in that holding area. On a computer or memory card, the photo data may still remain until something else uses the same space.
What Decides Whether Deleted Photos Come Back
Recovery is a storage problem, not a guessing game. These factors decide whether there is anything left to find:
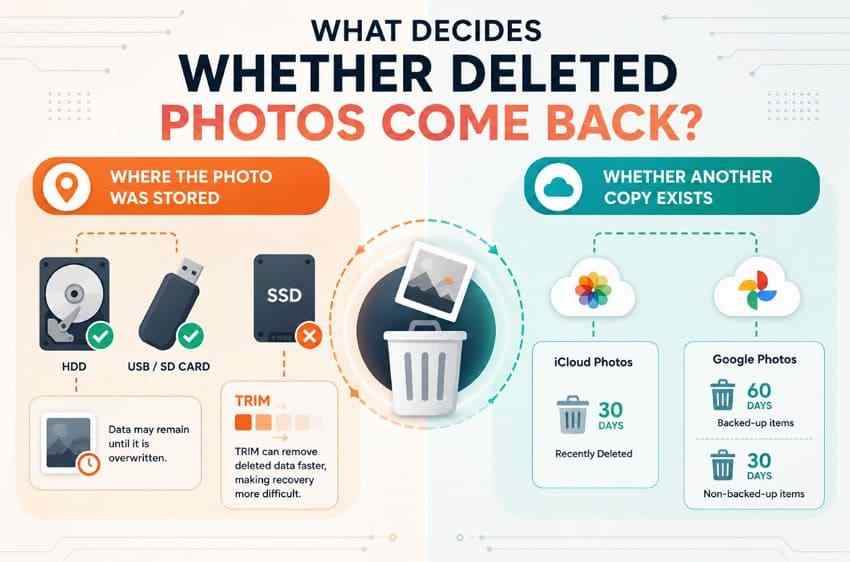
- Where the photo was stored: Deleted files on HDDs, SD cards, USB drives, and many external disks can remain until overwritten. SSD recovery is harder because Windows can send TRIM hints that tell a supported SSD the deleted blocks are no longer needed.
- Whether another copy exists: File History, Time Machine, camera cards, old laptops, messaging apps, and cloud libraries can hold an independent copy.
- How long the cloud service keeps deleted items: Apple keeps deleted iCloud Photos in Recently Deleted for 30 days. Google Photos keeps backed-up items in Trash for 60 days and items that were not backed up for 30 days.
When Permanently Deleted Photos Are Still Recoverable
Permanently deleted photos recovery is more likely when:
- The photos were stored on an SD card, USB drive, external drive, or a lightly used HDD.
- The device has barely been used since the deletion.
- A backup, exported folder, or synced library still contains the pictures.
- The photos are still inside the cloud service's trash or Recently Deleted period.
Microsoft also recommends minimizing or avoiding computer use after deletion because new data can overwrite deleted files.
When Photo Recovery Is No Longer Possible
Do not keep scanning the same drive after these limits are reached:
- New files have overwritten the original photo blocks.
- SSD TRIM has already cleared the deleted data.
- A secure erase or full overwrite replaced the original image data.
- The cloud trash or Recently Deleted period expired, or someone emptied that folder.
- The drive, SSD, or memory card is physically damaged and no longer detected.
Part 2. What to Do Before Recovering Permanently Deleted Photos
The first minutes matter more than the recovery tool. Protect the original storage before you install software, restore a backup, or format anything.
- Stop using the affected device: Switch off the camera or phone, or stop writing to the computer drive that held the photos.
- Do not save new files to the same drive: Downloads, screenshots, and recovery-tool installers can overwrite remaining photo data.
- Check existing backups and synced copies first: Look at File History, Time Machine, Google Photos Trash, iCloud Recently Deleted, OneDrive, Dropbox, and old exported folders.
- Avoid formatting or disk repair first: Do not format the card or run CHKDSK or Disk Utility First Aid until you have copied or recovered what you can.
- Keep unsynced devices offline: An old phone, tablet, or laptop may still hold a local copy until it reconnects and syncs the deletion.
- Prepare another drive for recovered photos: Save restored files somewhere other than the storage you are scanning.
Part 3. Choose the Right Photo Recovery Method
Use the scenario that matches what you actually did. The same photo-loss story can need a backup restore, a cloud trash check, or a local scan.
| Deletion Scenario | Storage Location | Recovery Possibility | Best First Option |
| Shift + Delete | Windows HDD or external disk | Good if the drive has stayed idle | File History, then a Recoverit scan |
| Emptied Recycle Bin or Mac Trash | Windows or Mac drive | Better on HDD than on SSD | Backup restore, then Recoverit |
| Formatted SD card or external drive | SD card, USB, camera card, external disk | Often possible if the card was not reused | Recoverit deep scan of the original media |
| Deleted from an SSD | Internal system drive | Low after TRIM has run | Backups and cloud copies first |
| Cleared cloud album | Google Photos or iCloud Photos | Possible only while Trash or Recently Deleted still holds the item | Restore from the cloud trash folder |
| Failing drive or unreadable card | Any local storage | Uncertain and falling | Stop using it and consider a recovery lab |
Part 4. How to Recover Permanently Deleted Photos
If the photos are gone from Recycle Bin, Trash, or a Recently Deleted album, work through the methods below. Start with the least risky copy you already have.
Method 1. Recover Permanently Deleted Photos With Wondershare Recoverit
Use Recoverit when the pictures existed as local files on a computer, SD card, USB drive, camera card, or external disk, and no backup copy is available. The software scans the selected storage for remaining photo data that File Explorer or Finder no longer lists. It supports common image formats such as JPEG, PNG, HEIC, and camera RAW files. Recovery still depends on whether the original data is readable and has not been overwritten.
- Fragmented photo recovery: Large images can be stored in more than one place. A scan that only copies the first piece can produce a photo that starts normally and then breaks.
- RAW photo support: Camera originals such as CR2, NEF, ARW, DNG, and ORF can be recovered when the card or drive still holds that data.
- Formatted storage recovery: A quick format does not always wipe every photo immediately. Scan the original card or drive before writing anything new to it.
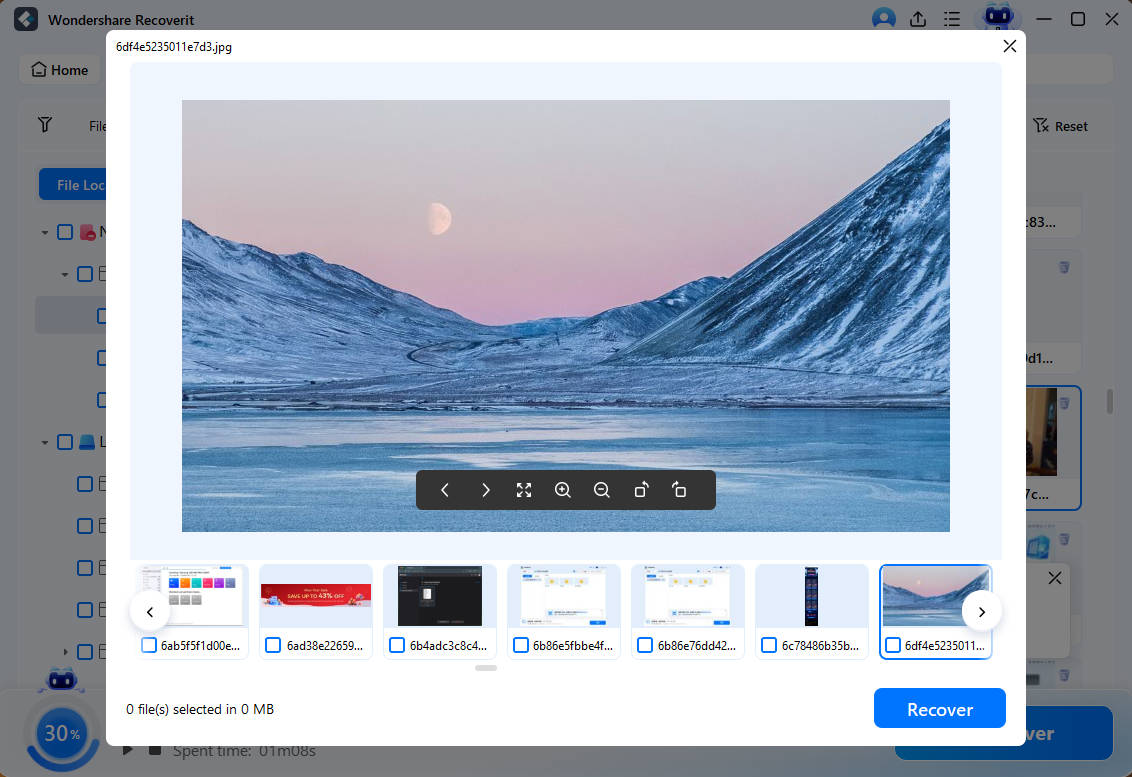
- Preview before saving: Open recovered photos at full size. A clean thumbnail can hide a damaged file.
- Deep file scanning: Search the original device for deleted photos that no longer appear in normal folders.
Step 1. Select the storage location.
Install Recoverit on a different drive if possible. Open the program, choose Hard Drives and Locations, and select the computer disk, SD card, USB drive, or external drive that held the deleted photos.

Step 2. Scan and locate the deleted photos.
Start the scan, then filter results by image types such as JPG, PNG, HEIC, or RAW. Sort by date or folder path when those details are still available.

Step 3. Preview and recover the photos.
Preview each important photo, recover the files you need, and save them to another drive. Do not write recovered pictures back to the source card or disk.
Try Recoverit to Recover Permanently Deleted Photos
Security Verified. Over 7,302,189 people have downloaded it.
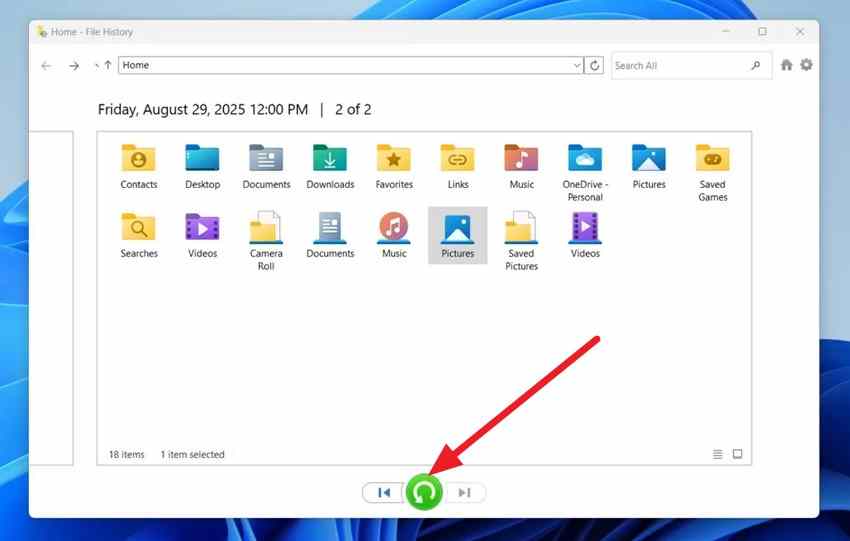
Method 2. Restore Photos From Windows File History
Windows File History can restore earlier copies of photo folders if it was already enabled before the deletion. Microsoft's current restore path also includes File Explorer's previous versions. Use this method when the original folder was protected, not when you need to reconstruct overwritten disk blocks.
Step 1. Open Control Panel > File History, or open File Explorer and go to the folder that used to contain the photos.
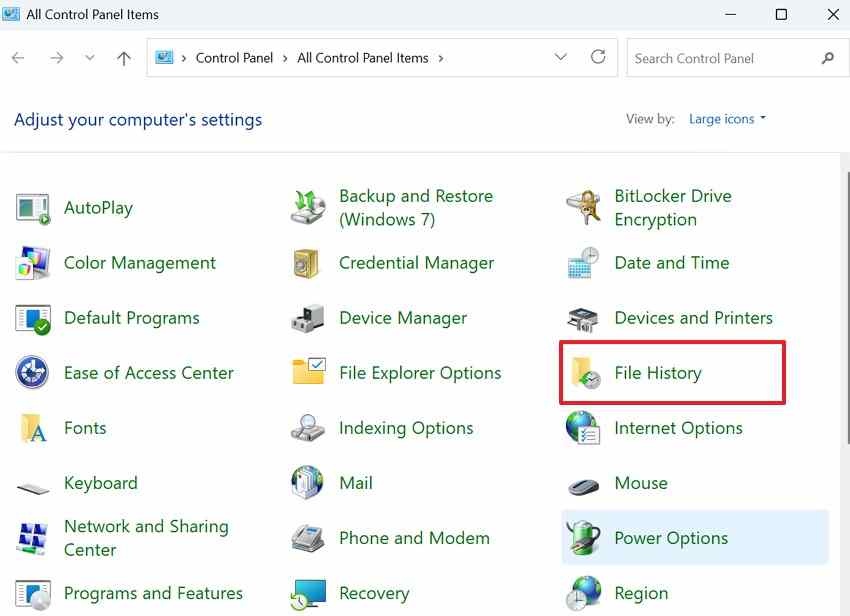
Step 2. Select Restore personal files, or right-click the folder and choose Restore previous versions. Browse the available backup dates.
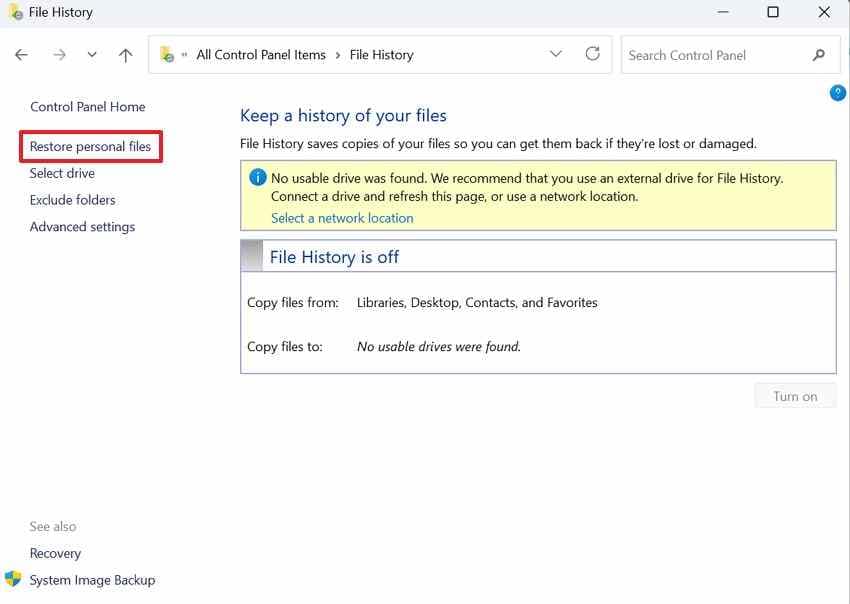
Step 3. Select the deleted photos or their original folder, then restore them. If you want to keep the current folder unchanged, restore to a different location.
Method 3. Recover Photos With Windows File Recovery
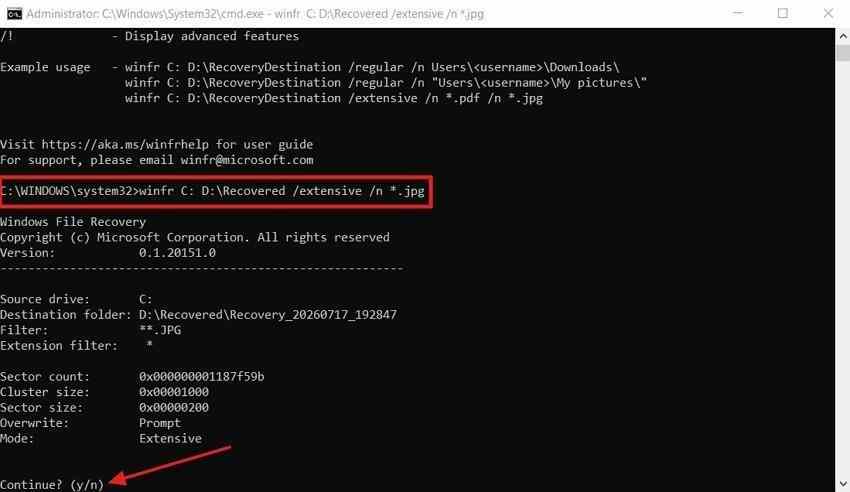
Microsoft's Windows File Recovery is a command-line tool for local NTFS, FAT, and exFAT storage. It can help recover recently deleted or formatted photo files, but Microsoft says recovery is less likely once an SSD's free space has been reused. Install it from the Microsoft Store, run it as administrator, and save recovered files to a different drive. It does not recover files from cloud storage or network shares.
Instructions: Open Windows File Recovery and run a command such as winfr E: D: /extensive /n *.jpg /n *.jpeg /n *.png. Replace E: with the source drive and D: with another drive. Use /extensive for FAT, exFAT, formatted storage, or older deletions. Press Y to confirm, then open the Recovery_<date and time> folder created on the destination drive.
Method 4. Restore Photos From a Time Machine Backup
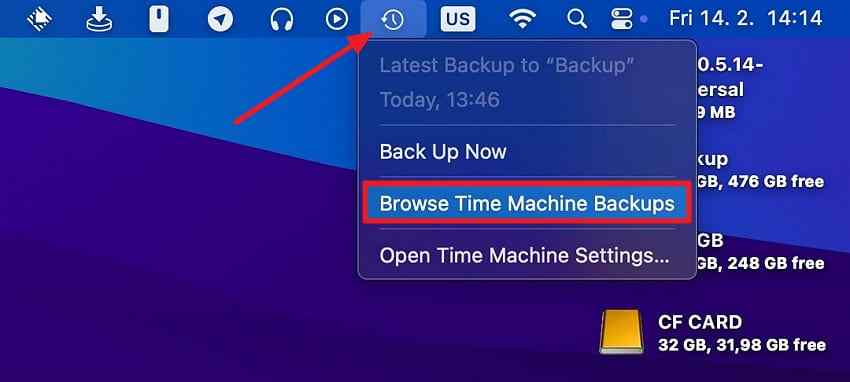
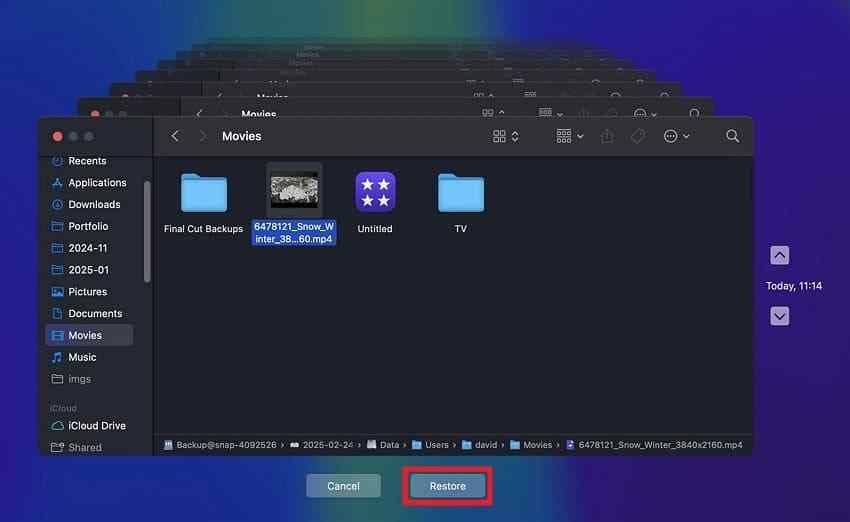
Mac users who already had Time Machine enabled can restore photos from an earlier backup. Apple's Time Machine guide is the official restore path for files that were backed up before they disappeared.
Step 1. Open Time Machine from the menu bar and choose Browse Time Machine Backups.
Step 2. Go to the folder that held the photos, move back to a date when they still existed, select the pictures, and click Restore.
Method 5. Check Google Photos, iCloud Photos, and Other Cloud Copies
Cloud copies are often the fastest answer. Check Trash or Recently Deleted before scanning a drive. A photo that was emptied from those folders is usually gone from that cloud library.
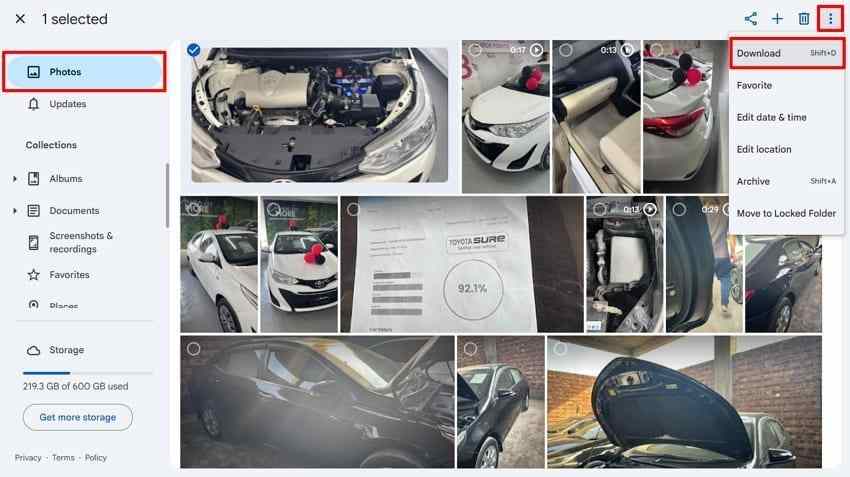
For Google Photos: On a computer, open Google Photos and click Trash in the left sidebar. On the Android app, open Google Photos, tap Collections, then open Trash. Select the photos and choose Restore. Backed-up items stay in Trash for 60 days. Items that were not backed up stay for 30 days. After that, or after you empty Trash, Google says they cannot be restored from Photos. If a photo is missing but not in Trash, check Archive before assuming it was deleted.
After the photos are back in your library, download any copies you still need so you have a local file again.
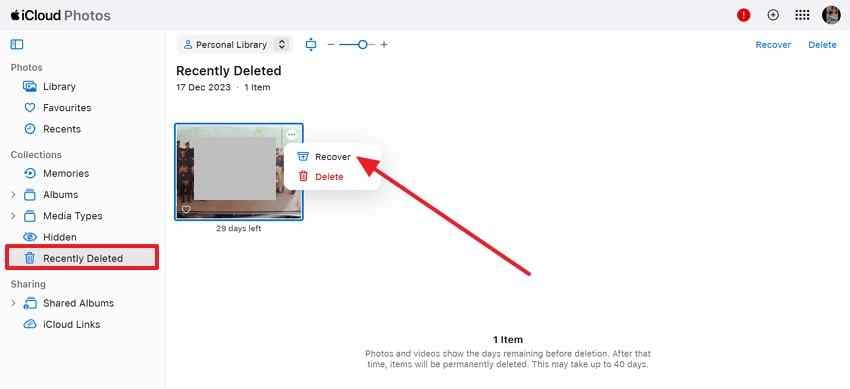
For iCloud Photos: On iPhone or iPad, open Photos, tap Collections, swipe up, and open Recently Deleted under Utilities. On a Mac, open Photos and select Recently Deleted in the sidebar. On a computer browser, sign in to iCloud.com, open Photos, and select Recently Deleted in the sidebar. Select the photos and choose Recover. You may need Face ID or Touch ID to unlock Recently Deleted. Apple keeps those items for 30 days. In an iCloud Shared Photo Library, only the person who added the item can recover it. If iCloud storage is already over the limit, Apple says deleted photos and videos may be removed immediately and may not stay in Recently Deleted.
Method 6. Recover Photos From an SD Card, Camera, USB Drive, or External Drive
Camera cards and removable drives are often the best local recovery cases because they are not usually trimmed like an internal SSD. Stop using the device, take the card out of the camera, and connect it through a card reader instead of copying new pictures onto it.
Instructions: Stop recording or transferring files. Remove the SD card or USB drive. Connect it to a computer. Scan that original device with Recoverit from Method 1. Save recovered photos to a different drive, not back to the card.
Method 7. Restore Photos From Another Backup or Existing Copy
If the original storage has been reused, the last chance is often another copy: an old laptop, an exported holiday folder, a messaging chat, an email attachment, or a second cloud drive.
For a local or external backup:
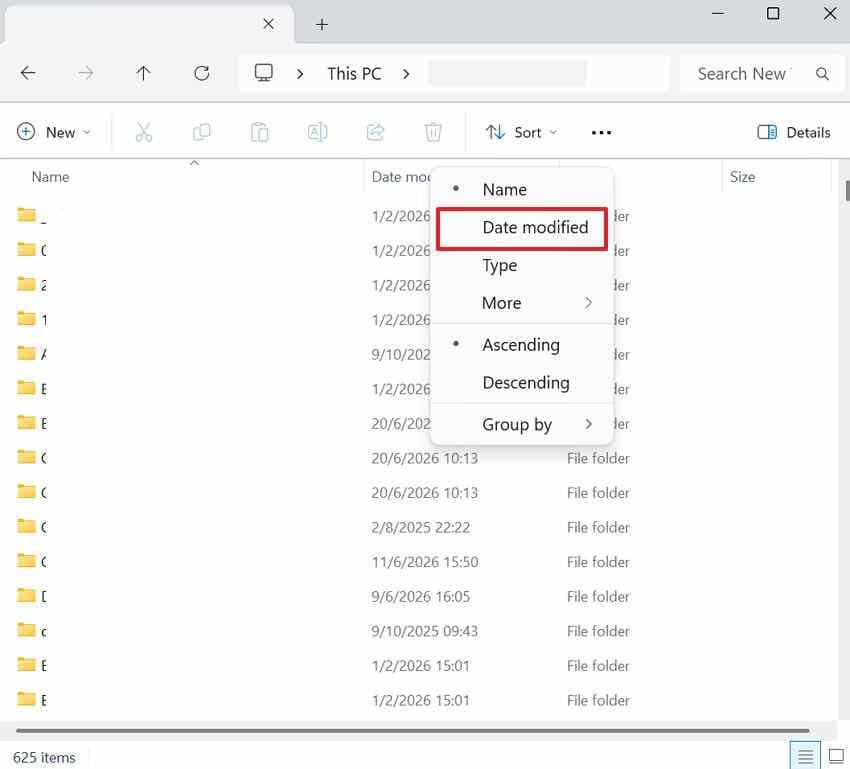
Step 1. Connect the backup drive or computer, open the photo folder, and sort by Date Modified.
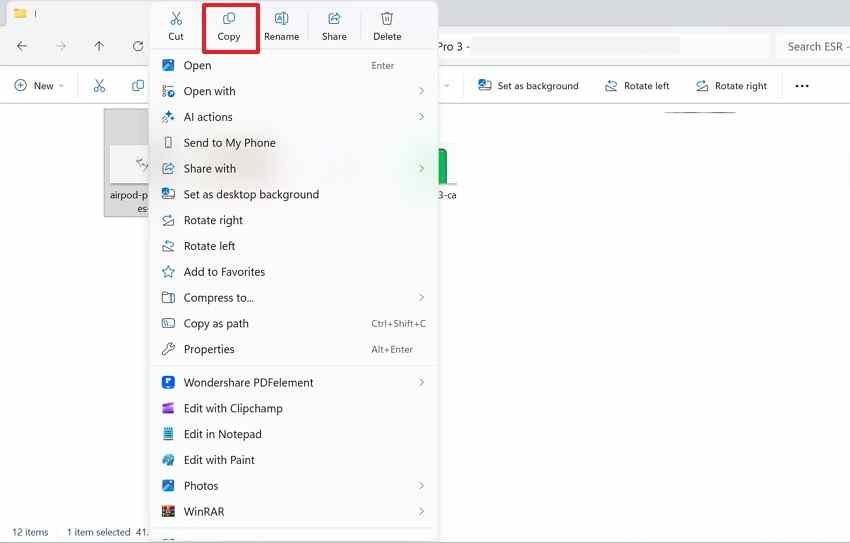
Step 2. Find a copy from before the deletion, copy it, and save it somewhere safe.
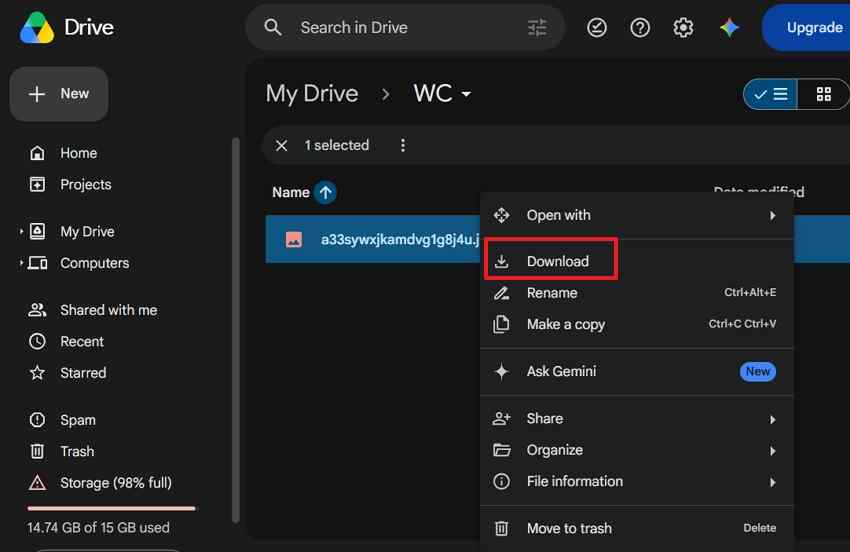
For a cloud backup service: Sign in to Dropbox, OneDrive, Google Drive, or another backup account. Check both the photo folder and that service's trash or recycle bin. Download the pictures you still need.
Part 5. Why Permanently Deleted Photo Recovery Can Fail
A scan can list a photo and still fail to restore a usable image. These are the usual reasons:
- The data has been overwritten: New files now occupy the same blocks. A partial overwrite is the confusing case: the scan finds enough of the image to list it, but the rest is gone.
- SSD TRIM has cleared the blocks: TRIM tells a supported internal SSD that deleted blocks can be discarded. No ordinary recovery tool can undo that controller-level cleanup.
- The photo was fragmented: A large image split across separate areas cannot be rebuilt by reading only the header. Simpler tools return the first fragment, so the picture starts correctly and then turns into gray or broken blocks.
- The cloud copy expired: Google Photos and iCloud Photos only keep deleted items for a limited time. Emptying Trash or Recently Deleted ends that window early.
- Secure erase was used: Overwrite, secure-erase, and some "wipe free space" tools replace the original photo data on purpose.
- The storage has failed: A clicking hard drive, a card that is no longer detected, or a physically damaged camera module needs hardware recovery, not another software scan.
Part 6. How to Improve Photo Recovery Chances
These habits protect whatever photo data is still left:
- Start recovery as soon as possible: Every new photo, download, or Windows update can overwrite deleted image data.
- Scan the original storage device: Copying the visible folder first only copies what the file system still shows.
- Install software on a different drive: Putting a recovery program on the affected disk can overwrite the photos you want back.
- Save recovered photos to another drive: Writing results back to the source can destroy other recoverable images.
- Check recovered photos at full size: Open JPEG, HEIC, and RAW files completely before you reuse or format the original storage.
- Use a recovery lab for physical damage: If the computer cannot detect the drive or card, stop using it. Clean-room work is for hardware that has to be opened.
Part 7. How to Prevent Permanent Photo Loss
The cheapest recovery method is a second copy that already exists.
- Enable automatic photo backups: iCloud Photos, Google Photos, or OneDrive can upload new pictures as you take them.
- Keep a separate local backup: A syncing library is not a complete backup, because a deletion can follow the photo to every connected device.
- Use File History or Time Machine: Dated folder versions turn many deletions into a restore instead of a scan.
- Back up camera and SD card photos before formatting: Copy the card to a computer before the camera asks to format it again.
- Check Recently Deleted before emptying it: Manually clearing Trash or Recently Deleted removes the easiest official recovery path.
- Keep more than one copy of irreplaceable photos: Family photos should not live only in two folders on the same disk.
Conclusion
How to recover permanently deleted photos comes down to location and timing. Stop using the original storage, check Recycle Bin, Trash, File History, Time Machine, Google Photos Trash, and iCloud Recently Deleted first, then scan the original disk or memory card if no copy remains. Save anything you recover to a different drive.
Recoverit is useful when the photos still exist as recoverable local files on a computer, SD card, USB drive, or external disk. It cannot bring back overwritten data, TRIM-cleared SSD blocks, securely erased storage, or cloud photos that have already been purged. For important pictures, keep at least one independent backup before the next deletion happens.
FAQ
-
Can permanently deleted RAW photos be recovered?
Yes, if the RAW file data is still on the card or drive. CR2, NEF, ARW, DNG, and ORF files follow the same overwrite rules as JPEG files. Their larger size makes fragmentation more likely, so preview the recovered RAW file itself rather than only the embedded preview. -
Why do some recovered photos appear corrupted?
The usual cause is a partial overwrite or a fragmented file. A tool that copies only the first piece can produce an image that looks fine at the top and then breaks. An embedded JPEG preview can also look complete while the main RAW or HEIC data is incomplete. -
Can deleted photos be recovered with their original file names?
Sometimes. If file-system records remain, recovery software may keep the original name, date, and folder path. A deep signature scan often recovers the image data under a generic name. Capture dates from EXIF data can still help you sort the photos after recovery. -
Should you stop using an SSD immediately after photo deletion?
Yes. Stop writing to the SSD and check backups or cloud copies first. TRIM can make deleted SSD data difficult or impossible to recover, so extra use after deletion usually makes a local scan less useful.


