Feb 05, 2026 • Filed to: Photo/Video/Audio Solutions • Proven solutions
Problems playing audio in a video are common and in most cases, it is due to compatibility errors with the Audio Codecs. There are several ways to solve these problems quickly and easily, here I will show you some methods to solve the audio problems in your videos through simple solutions and how to solve the audio problems by conversion with programs like VLC and UniConverter. In case the source of the problem is that your file has been corrupted, I will also show you how to repair a corrupted video file.
| Solution | Key Advantages | Recommended Use Case |
| 1. Update Your Audio Drivers | Fixes system-wide audio issues | When you experience no sound across multiple applications or videos, not just a single file. This is a crucial step after an operating system update or if you suspect a system-level conflict. |
| 2. Use VLC Media Player | Free and open-source | When you suspect the issue is a missing or unsupported audio codec for a specific file. It's an excellent, safe way to test if the problem is with your default player rather than the file itself. |
| 3. Download the Appropriate Video Codecs | Directly solves missing codec errors | When your media player gives a specific error message about a "missing codec" (e.g., AC3, DTS).(Note: Only download codec packs from reputable sources to avoid malware.) |
| 4. Use Online Repair Tools | Convenient, no software installation required | Best for small, non-sensitive video files where convenience is the top priority and the corruption is minor. |
| 5. Use a Specialized Tool-Recoverit Video Repair | Highest success rate for severe issues | When the video file itself is damaged or corrupted. This is the most powerful option if other methods fail, or if the video shows signs of corruption (glitches, freezing, won't open). |
Causes for Video with No Sound
The issue of video file playing without sound is a common type of issue associated when playing converted or transferred video files. This error causes the videos to play without any sound being produced. The videos play smoothly but you can't hear what is being said. This can be quite annoying as it makes it impossible to view the video file properly. The main reason for the occurrence of the issue of video file playing without sound is a corrupted video file. Here are some of the actions that can cause the video files to corrupt and thus end up causing bad frames in them.
- Saving the video files on a local hard drive that has bad sectors present on it.
- Using unreliable converters for converting video files into other multimedia formats.
- The unexpected loss of power during the copying of the video files from one storage media to another.
- Malware or bugs that are infecting the video files and are damaging them beyond repair.
Method 1. Repair The Video With Wondershare Recoverit Video Repair
If you are facing the issue of video file playing without sound then you will have to look to repair corrupt video files. It is the most efficient way to get the video files playing properly again. Making use of a video repair tool can be of great assistance to you in this regard. Wondershare Recoverit is the premier tool for video file repair that can help you to repair video files with no sound as well.
- Fixes video corruption issues by rebuilding header, frame, movement, duration, and sound damages.
- Repairs video files formats like MOV, MP4, M2TS, MKV, MTS, 3GP, AVI, FLV, etc.
- Repairs videos stored on hard drives, memory cards, and other storage media.
- Provides a preview of the repaired video files of supported file formats.
- Fixes various corruptions of the file on Windows and Mac computers.
Video Tutorial on How to Repair Corrupted MP4 File
This instruction set has been organized to give you the chance to see how the Recoverit Video Repair can be used to repair corrupt video files.
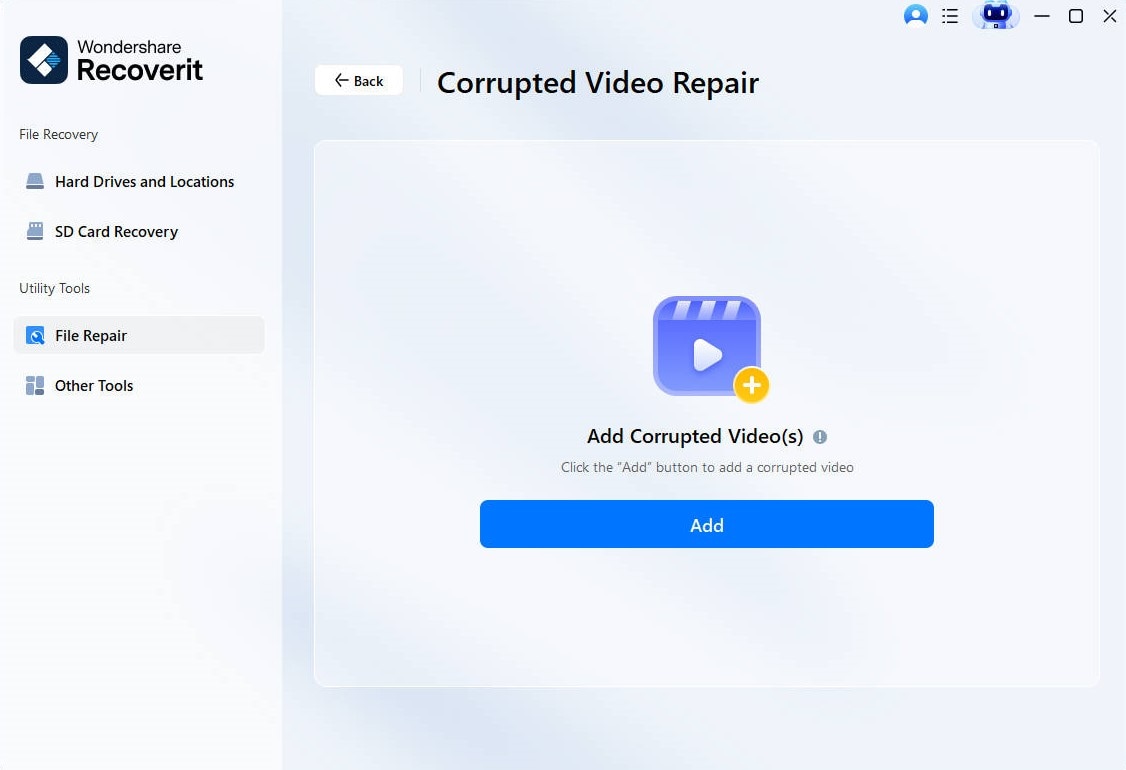
Step 1 Add Corrupt Video Files
Launch the Video Repair tool on your computer, locate the File Repair section and click "Corrupted Video Repair". Click the "Add" button to add corrupt video files from the local drive.
Step 2 Repair Corrupt Video Files
Select multiple video files for repairing, click the "Repair" button to start the repairing process.

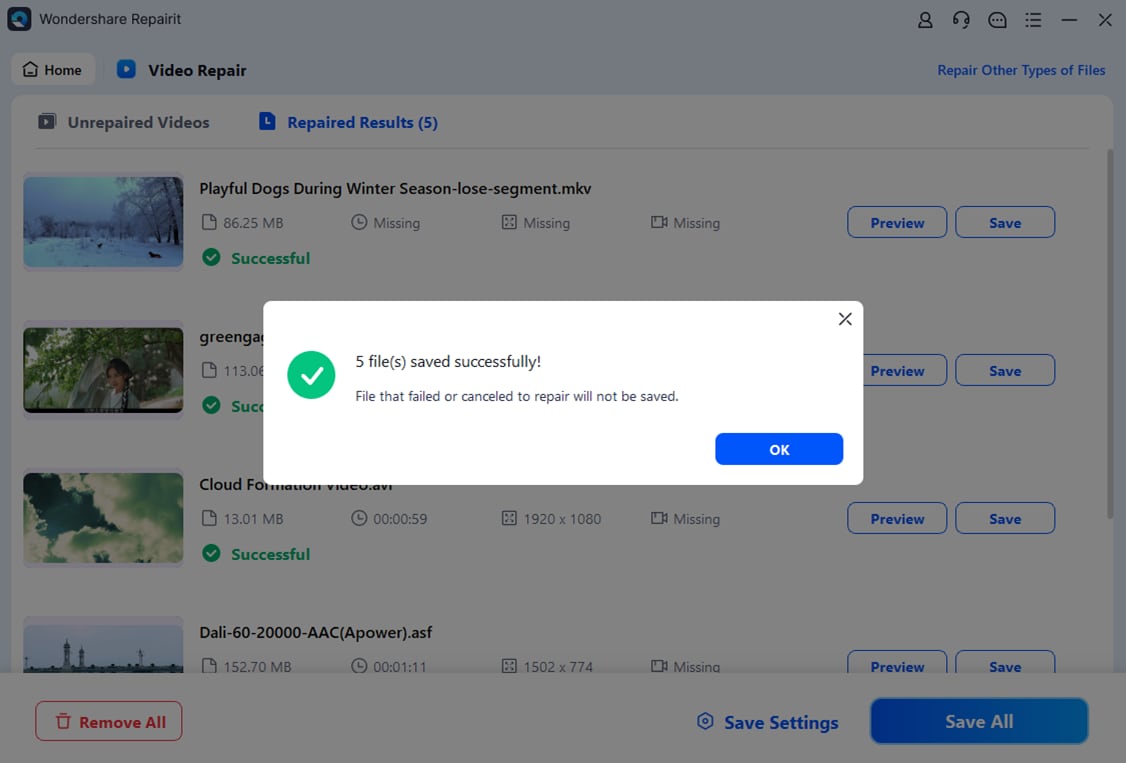
Step 3 Preview Repaired Video Files
Selected video files repaired successfully, you can preview the repaired video with sound.

Step 4 Add A Sample Video File
In case you are not able to repair the videos, try "advanced repair". Click the folder icon, add a sample video to repair. A sample file is a valid file created with the same device and the same format as the corrupted video. Advanced Repair uses the information from the sample file and repairs the corrupt video.

Step 5 Save Repaired Video
Click the "Repair" button, here are some tips in the interface. The repaired videos will not be saved if you start Advanced Repair. Do you want to save the repaired video before Advanced Repair? Choose No or Yes as you need. Then, click the "Save" button, you will see the prompt in the interface. "Select a path to save the recovered files. Please do not save files to the path where you lost them. After that, you can repair and save corrupted videos.
Precautions:
The following are some precautions that you will have to keep in mind if you want to ensure that your video files remain safe from errors like the video files with no sound.
- Getting a good antivirus suite should be your priority number one. It is going to make sure that your system remains protected at all times from the threat of malware and viruses that are out to infect your video files.
- Secondly, you must see to it that conversion of the video files to other formats is done using a reliable converter which has been known to convert video files from one format to other formats without any issues.
- Always ensure that the system does not shut down unexpectedly when the video files are being copied from your local hard disk to an external storage device.
- Keep backup copies of your video files stored on the cloud. This would ensure that even if the video files on your local or external hard drives get corrupted, you will always have the cloud to get back your video files.
Other Free Methods to Repair The Video without Sound
There are several options to solve an audio problem in a video. Here you will learn how to do it.
Method 2: Convert the video format
If the audio codec is not supported by your video player, you can convert using tools such as VLC or Uniconverter. Here I will explain how to perform this process with both tools step by step.
1 Convert a video using VLC Media Player
Step 1 Open VLC and click on Media
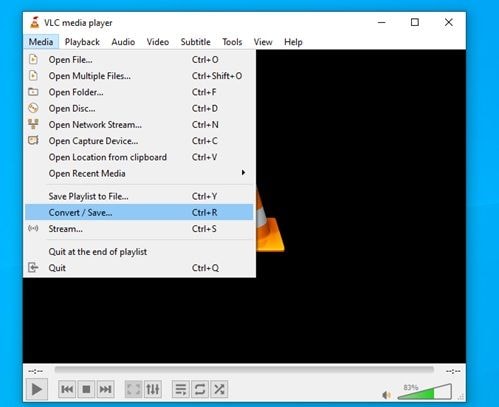
This will open the format conversion tool.
Step 2 Add a corrupted video
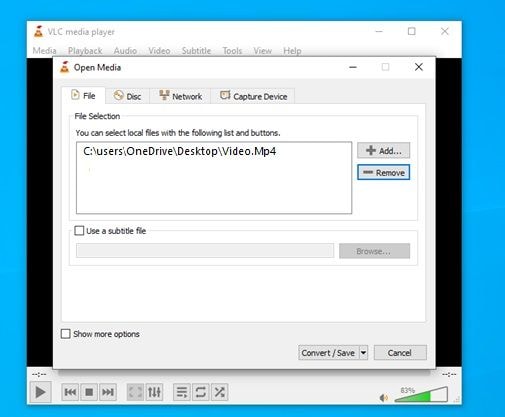
Here you will have the option to add the file that you will convert, once added file click on Convert / Save
Step 3 Set the conversion features
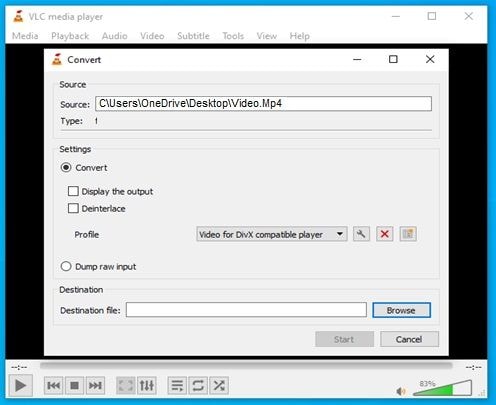
Choose a Codec and set a location for your video and click on "Start"
2 Convert a video using Uniconverter
Step 1 Download & Install Uniconverter
![]()
You can download the UniConverter tool in the link that is written above. After opening the installer, a box will appear where you can customize the language preferences, once everything is in order, you will have to click on "Install" to continue.
Step 2 Drag & drop the file you'll convert
![]()
When you start the program you can notice there's a displayed tool to attach files to convert, you can drag and drop them into the picture of the folder or you can just click on "+".
Step 3 Set the conversion features
![]()
In the "Target" section, click on the dropdown options button. Here you'll be able to choose the audio and video codecs, format, and quality.
Step 4 Locate the converted file
![]()
Once you have done all the previous steps, the file should be ready, you can find it in the "Converted" section that it's located next to the converting section, then just click on the "folder" icon, this will open the location of the file.
Method 3: Repair using Repairit online video repair
Follow these steps to repair your corrupted video with no sound online:
- Go to the Wondershare Repairit Online website and upload your silent video file.
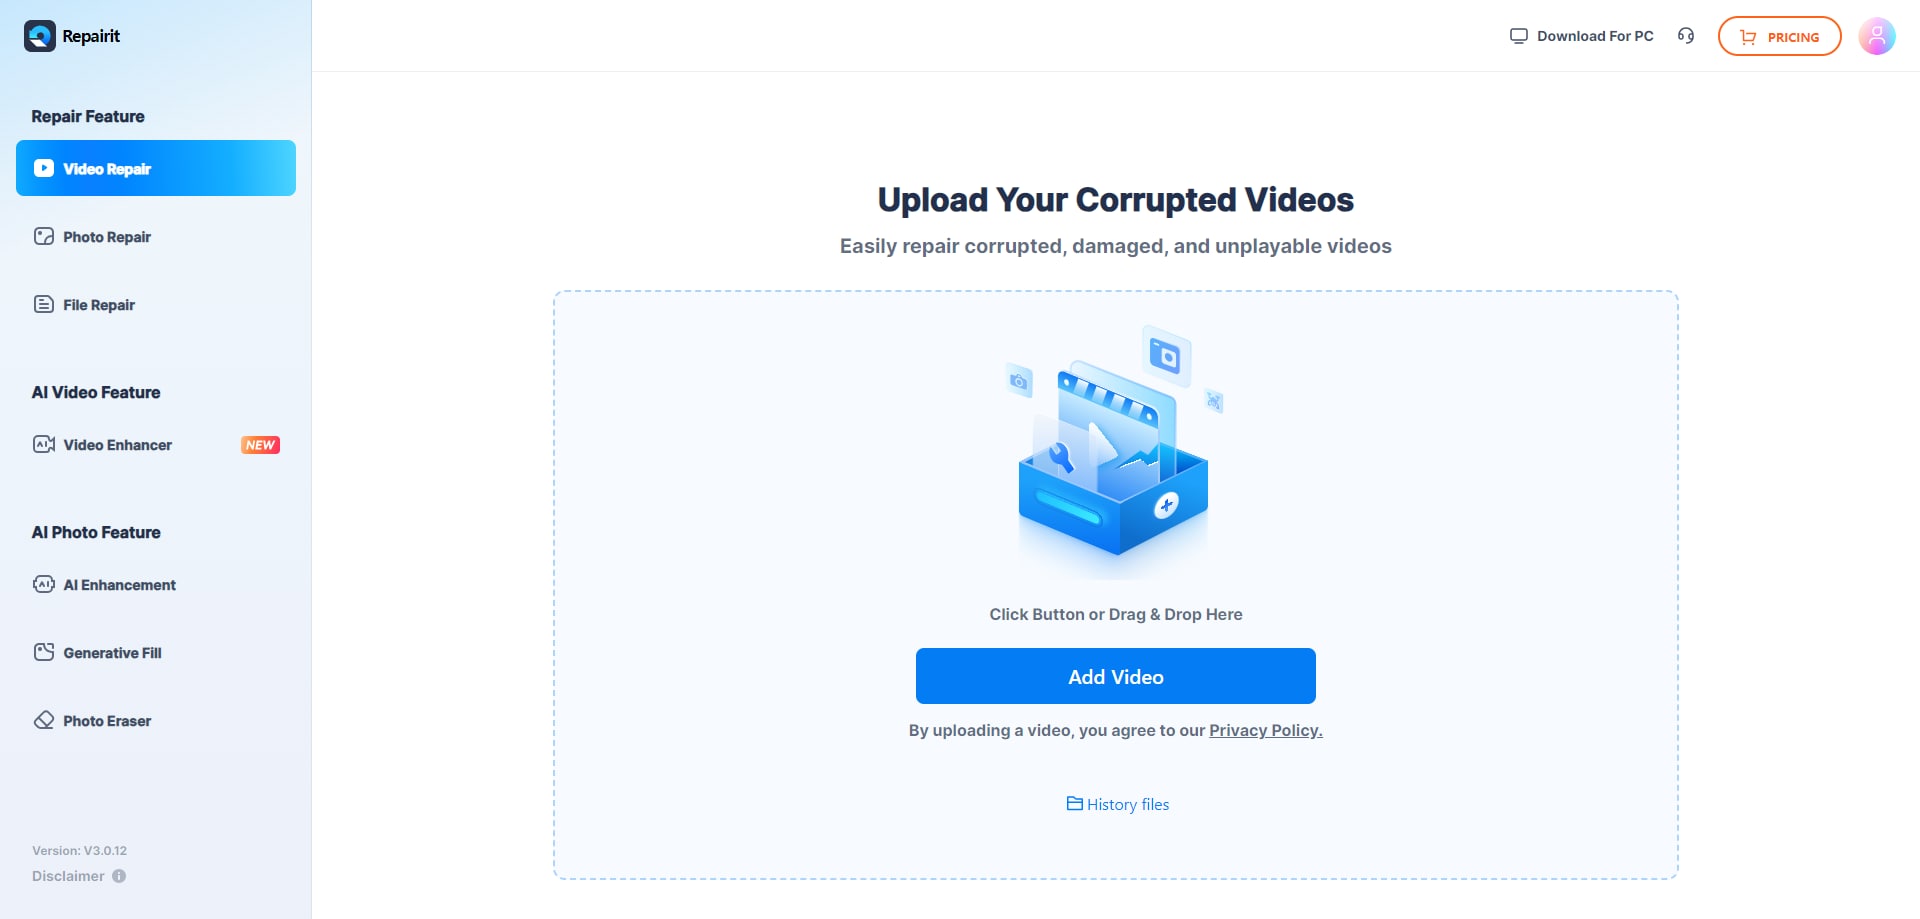
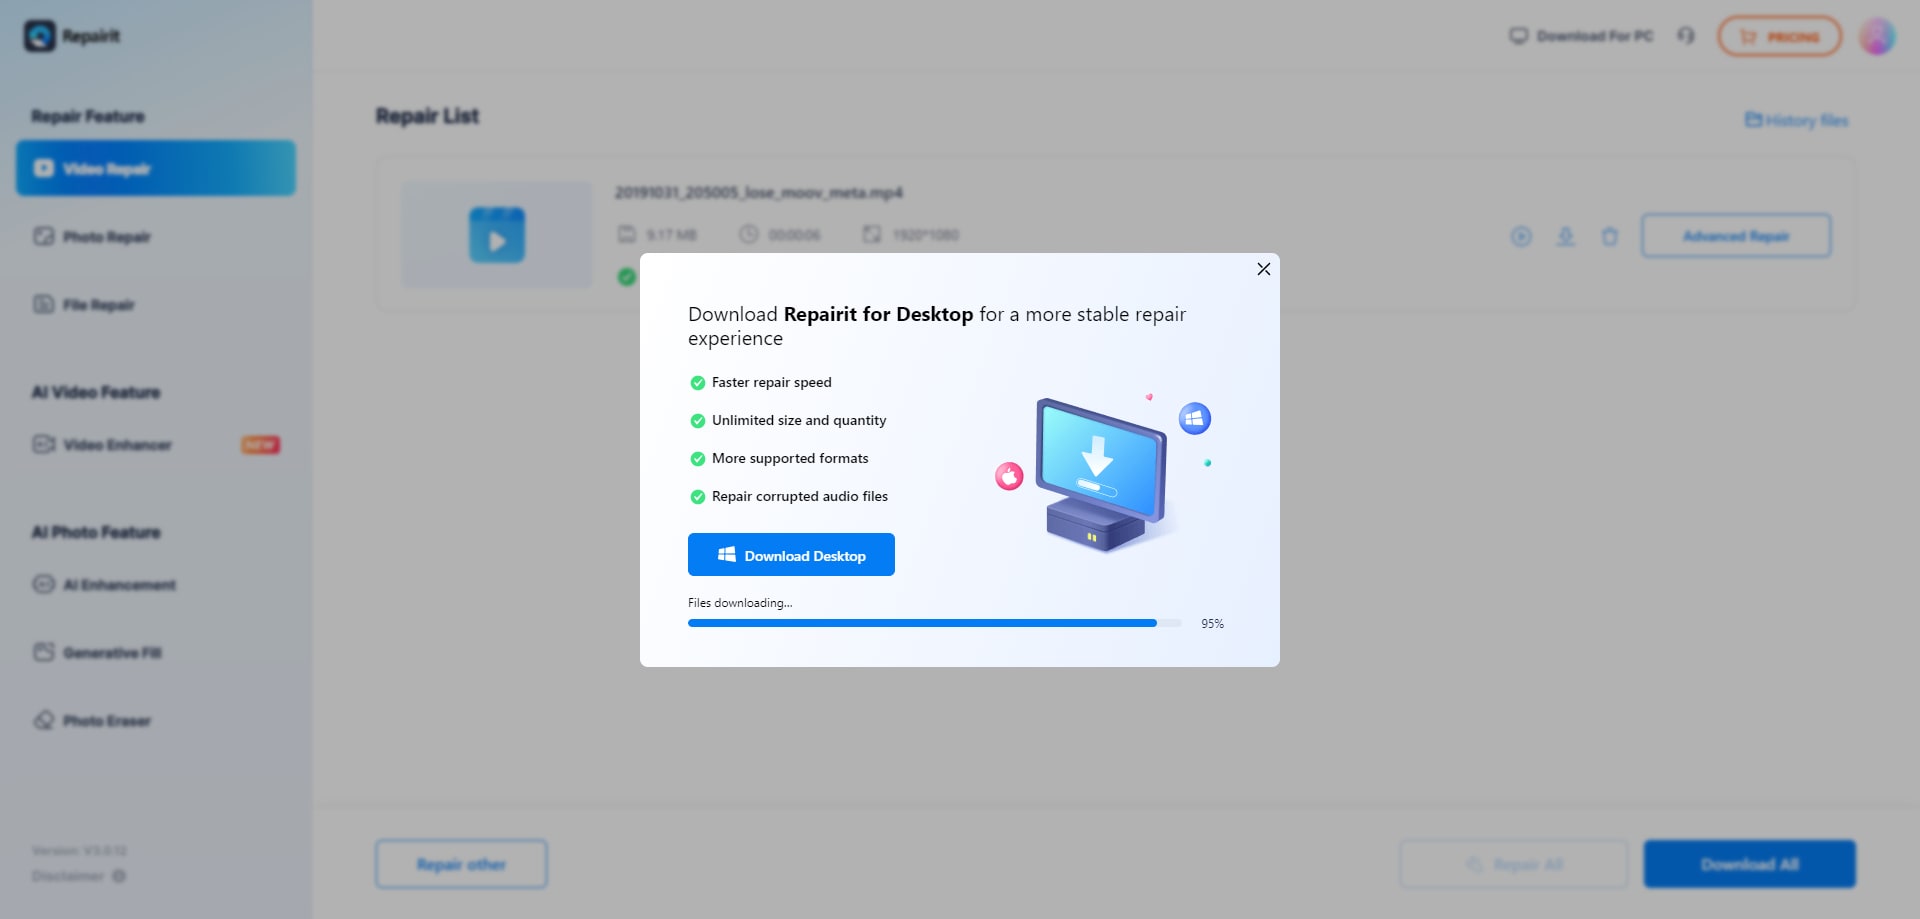
- Click Repair and let it process the repairing task. After that, use the preview player to check if the sound is fixed. If it is, proceed.

- Click download to save the repaired video with restored audio to your computer.
Method 4: Download the appropriate video codecs
Depending on the player you use, you will need to keep your codec library updated. Most video players have an option to check for updates automatically, you will need to access this option and verify that it is activated and if your player does not have an automatic update option, you can search the internet for codecs.
Method 5: Update your audio drivers
Follow these steps to update your drivers in Windows 11/10
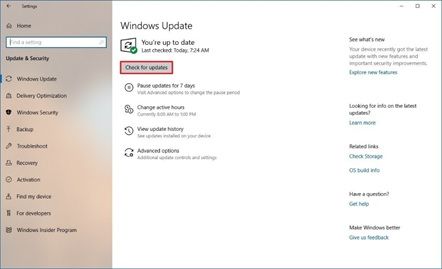
- Go to Settings.
- Click on "Update & Security".
- Click on "Windows Update".
- Click the "Check for updates" button.
Conclusion
As you may have noticed, audio playback problems in videos are fairly easy to solve in most cases. It is advisable to keep the drivers of your computer updated, as well as the codecs of your video player to avoid this type of problem. It is also very useful to have some conversion tool installed on your computer to solve these types of problems and if the problem is because your file has been corrupted, you can easily solve it using a specialized tool for repairing corrupted videos such as Wondershare Video Repair.
People Also Ask
-
Why is there no sound in my video file?
A video with no sound typically has a corrupted or missing audio track. This can be caused by a faulty recording, an incomplete file transfer, a codec mismatch, or the audio track being accidentally stripped during editing or export. -
What is the easiest way to fix a video with no sound?
The easiest fix is to use VLC Media Player to convert the file. Go to Media > Convert/Save, add your video, select a profile like "Video - H.264 + MP3 (MP4)," and convert. This often rebuilds the audio track.Can video repair software restore the audio?
Yes. Specialized video repair software like Wondershare Recoverit video repair can analyze the file and reconstruct the corrupted audio data, syncing it back with the video.How can I fix the audio for free?
For a free fix, try:
1. Re-encode with VLC (as above).
2. Use a free online video repair tool.
3. Extract the video and (if available) audio tracks separately using a tool like FFmpeg, then remux them.The audio works in one player but not another. Why?
This is a classic codec issue. The first player has the correct audio codec, while the second does not. Converting the video to a universal format like MP4 with AAC audio will ensure compatibility across all players and devices.
Solve Media File Problems
- Recover & Repair Photos
- What's picture recovery?
- SD card pictures are lost?
- Top 5 free photo recovery software.
- Restore photos from recycle bin.
- Recover & Repair Videos
- Recover SD card videos.
- Repair MOV/M4V/MP4 videos.
- Repair MKV videos.
- Solve video black screen.
- Repair restored videos.
- Recover & Repair Audio
- Repair video without sound.
- Fix audio sync problems.
- MP4 No Sound?
- Repair corrupt WAV files.
- Corrupted video repair guide.
- Recover & Repair Cameras

 ChatGPT
 Perplexity
 Google AI Mode
 Grok
Grok


Eleanor Reed
staff Editor