
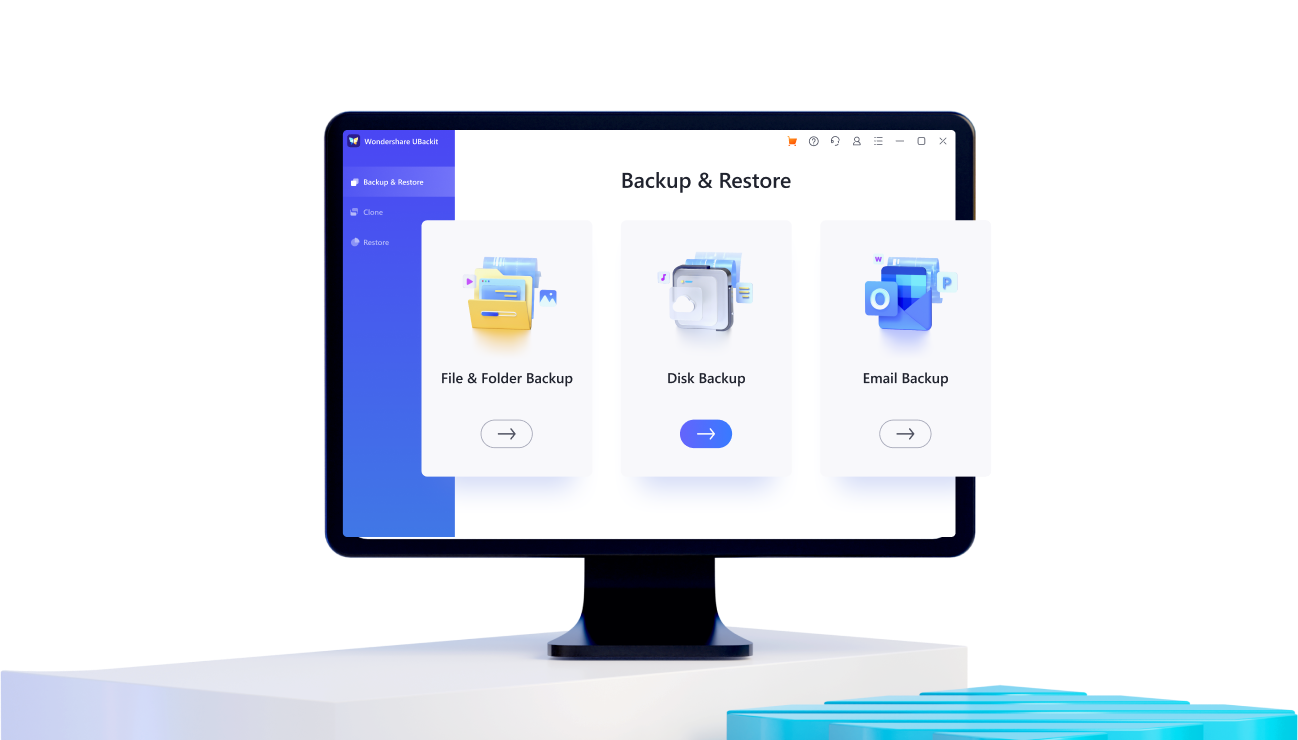


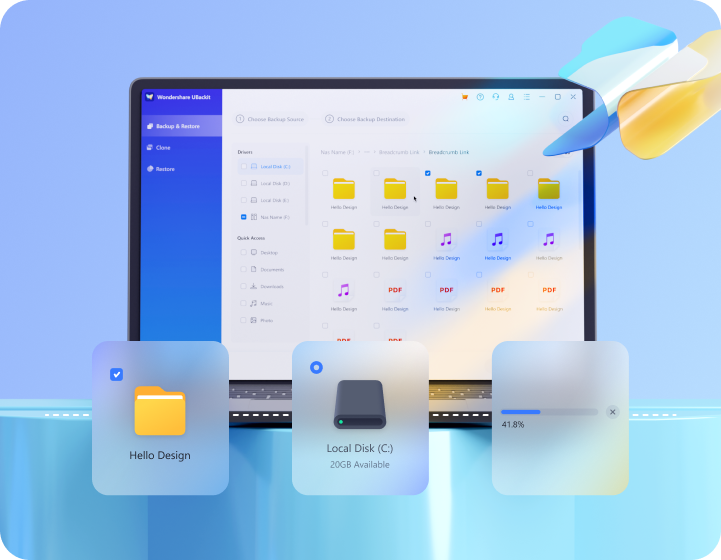


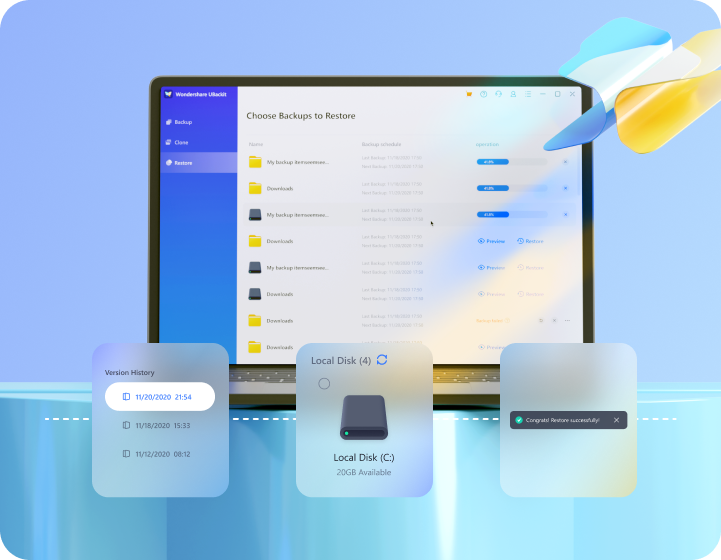


UBackit is becoming a favorite of mine. I needed to restore a file I deleted a few weeks ago and it worked perfectly. It was easy to backup, and the interface looks so great and simple to use, so I didn't have to look at the manual and figure out what to do. Great product!
Rosalin
Definitely the best investment ever! I am a YouTuber and my subscribers expect me to produce multiple videos within this week. I couldn't have afforded to lose vital video clips. Wondershare UBackit has saved me countless times and efforts! Thank you!!!
Bob
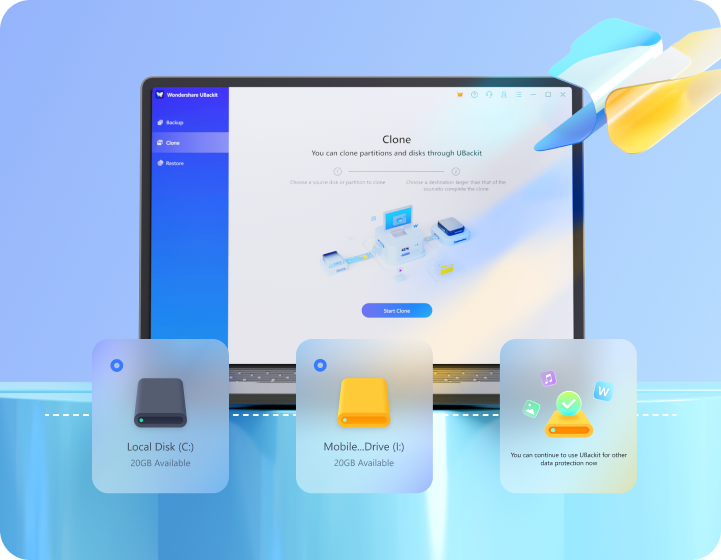
I have successfully cloned a disk through Wondershare UBackit. This backup copy helps me avoid symptomatic computer corruption and crash. I am so grateful for the efficient backup tool. And recommend all my friends to use the app.
Elizabeth


