How to Move Files from C Drive to D Drive in Windows?
Recently, I took my laptop in for repair. A new HD was installed, and tech installed partitions, neglecting to inform me. As such, as I downloaded files, I pressed "Install" without regard to which drive. "C:" is now FULL; how do I transfer files to "D," safely, and which files are OS that, I understand, must remain in C. Thanks
Be it the files, folders, system files, installed programs, or documents, you can transfer files from the C Drive to the D Drive through the file transfer tool. It helps to protect the data against data loss consequences. By moving the file to D drive, one can separate the installed programs from the operating system allowing it maximum space to run and perform destined functionalities.
As mentioned earlier, when your C drive is full, it is wise to transfer files from c drive to d drive. You need to decide which files should be transferred and which should not. System files cannot be moved from one drive to another. These should be kept with the system programs. While the others can be moved: Facebook, Photoshop, Movie Maker, installed games, etc.
There are two potential ways to perform the task. You can either move the unallocated space to C Drive to extend its capacity or go for transfer files from C Drive to D Drive. This article would explain all possible processes to transfer files from C Drive to D Drive in Windows 11/10/8/7. Here are the topics that would be discussed in detail.
When the task is to transfer files from C Drive to d drive, there are several ways in which you can perform the action. As mentioned above, you can aim to extend the space on the C Drive by moving the unallocated space or shifting files from one drive to another drive, to make room for the operating system to work correctly. Here are four of the prosed methods by which you can transfer files from C Drive to d drive.
Method 1. Transfer files from C drive to D drive via Drag and Drop
A straightforward way to move files from one drive to another is by the drag and drop technique. Drag one file from the C drive and drop it to the empty drive (D, E, or F). Here are the steps to follow:
Step 1 Launch the file explorer by clicking the option of the computer or this PC.
Step 2 In the file explorer window, locate all the files and folders you want to transfer to another drive. Right-click on all the files and folders and select the option of copy or cut in the drop-down menu.

Step 3 Once the files and folders are cut or copied, now navigate to the D drive and right-click on the drive to open it. Once opened, again right-click to launch the drop-down menu, and here select the option of paste. All the files and folders would then be pasted.
Apart from this technique, you can use the keyboard for performing this copy-paste or cut-paste procedure. Press Ctrl + C to copy and Ctrl + X to cut and Ctrl + V to paste. This drag-drop or cut/copy-paste technique can only be used for personal files. Once the files are transferred, delete the corresponding folder containing all the target files from the C drive to avoid redundancy.
Be aware that unexpected issues may occur during the file transfer process, such as sudden power failure or system crashes due to excessive file processing, which may result in data loss. Fortunately, there are methods to recover deleted files from the C drive if such situations arise.
Method 2. Transfer Files from C Drive to D Drive Use Wondershare UBackit
Apart from the regular procedures, one can always rely on third-party application software to perform the file transfer operation. While using the file transfer tool, one can get the data backed up automatically and incrementally.
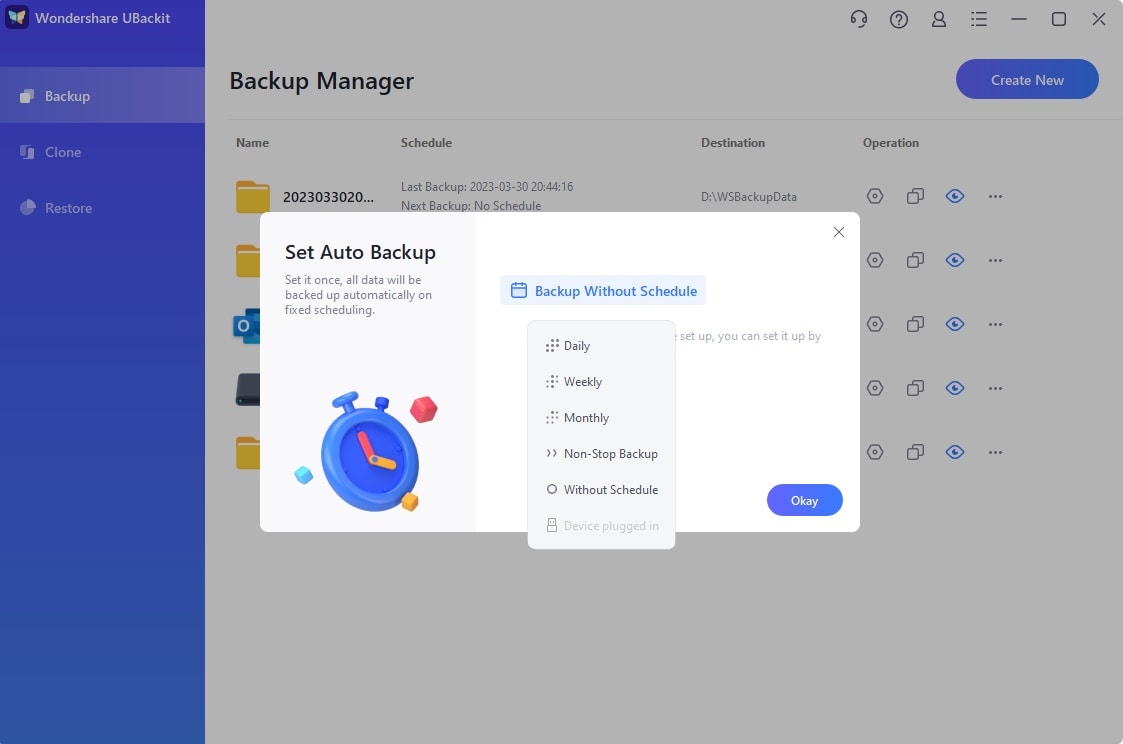
In this context, the Wondershare UBackit is the best software that can be used for the task. It carries a high-end automatic backup option, which helps you to schedule backup daily, weekly, monthly or non-stop. With it, you can transfer files and folders from C Drive to D Drive automatically on Windows.
Step 1 Launch Wondershare UBackit
After downloading and installing UBackit, launch the tool to your computer. Select Create New option from the screen. Then choose File Backup.
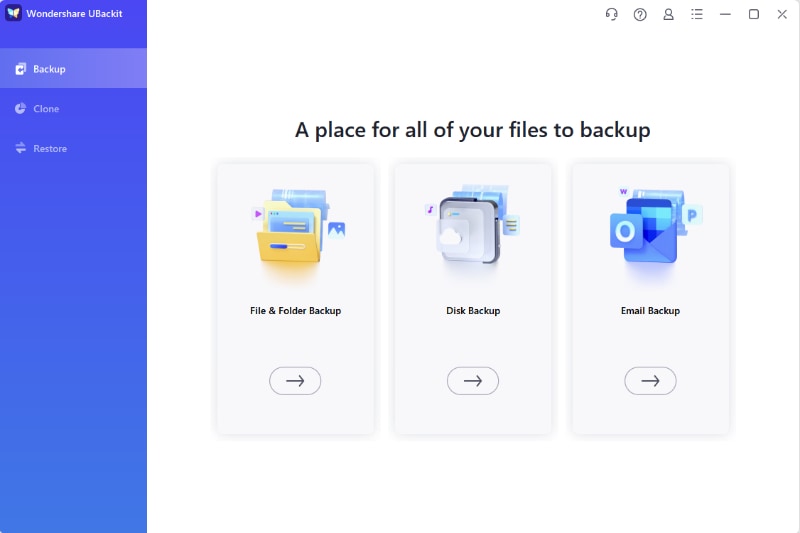
Step 2 Select Files/Folders from C Hard Drive
After that, select the files you want to transfer to the D drive from the C drive. Then click Select option at the bottom right.
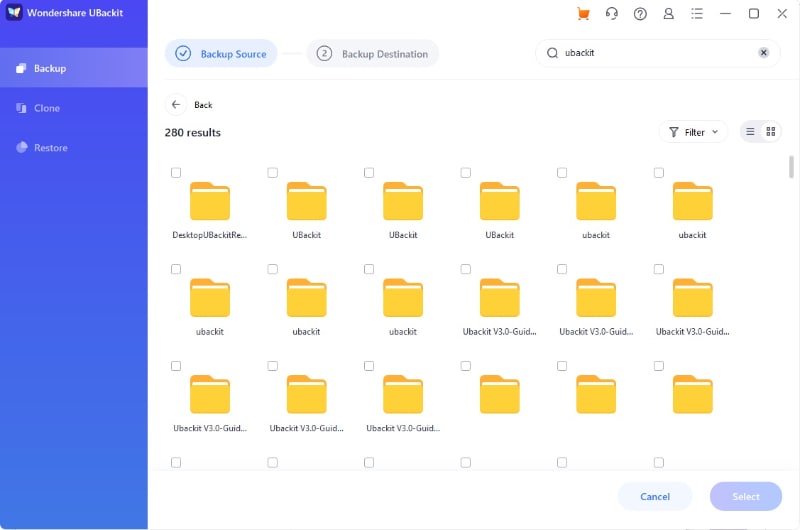
Step 3 Choose D Drive
Now, select D drive as the backup destination. And click Select option to start the process.
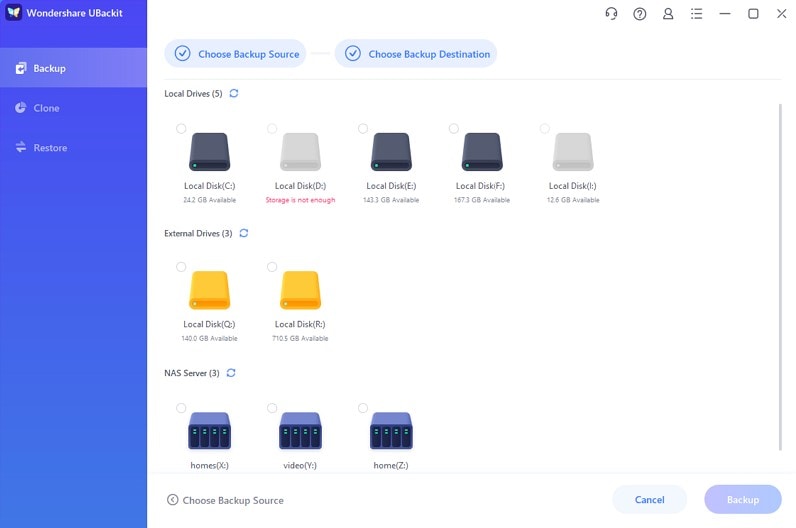
Step 4 File Backup Complete
Just wait till the backup process completes. You will receive an automatic notification once it finishes.
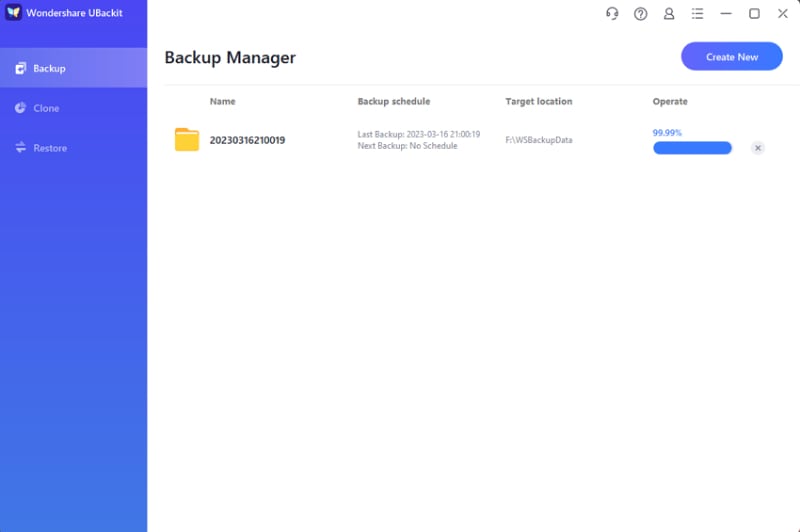
Step 5 Set Automatic Backup
If you want to set automatic backup, just click Schedule option. It offers daily, weekily, monthly and even non-stop.
As you consider transferring files from C Drive to D Drive with Wondershare UBackit , join us to celebrate 2024 World Backup Day. Let's take the pledge, and safeguard your data!
Method 3. Transfer files from C drive to D drive in Command Prompt
Command prompts are always there to serve your technical pursuits. Even for the task to transfer files from c drive to d drive, one can utilize the command prompt by entering the appropriate command line. Here are the steps to follow:
Step 1 Press Windows key + R simultaneously to launch the run box. Once launched, type CMD and click enter to continue.
Step 2 In the next command prompt box, type the command i.e., "copy c: \workfile.txt d:" to copy the files. Then type "workfile.txt" on the root of C drive to the root of D drive. At last, type "copy *.txt d:" to copy all text to D drive.

Method 4. Transfer files from C drive to D drive via Move feature
Move feature also act as a potential solution to how to move files from c drive to d drive. Here are the steps to follow:
Step 1 Press Windows key + E simultaneously to launch the windows explorer.
Step 2 Once launched, navigate to all the files and folders targeted to be transferred. Right-click on the files/folders, and in the drop-down menu, select the option of properties.
Step 3 In the next window, select the option of location and hit the move option.

Step 4 Now, select the location where you want to transfer the files. Lastly, click on Apply and Confirm to complete the action.
Hence, be it the spacing issue, potential drive failure, or system crash, all the conditions would lead you to transfer files from c drive to d drive. You can move the personal files or programs that are installed on the device. But when it comes to system files, you cannot transfer them from one drive to another. They should be kept with the system programs. You can act for file transfer by various techniques. This article explained four potential methods to transfer files from c drive to drive. Out of the four methods, one approach is to employ third-party application software. Wondershare UBackit is used as the recommended software to sync the files between the drives.
3981454 people have downloaded it


 ChatGPT
 Perplexity
 Google AI Mode
 Grok
Grok


Amy Dennis
staff Editor