How to Use Wondershare Recoverit

Brief Introduction
Recoverit Data Recovery for Mac can recover 1000+ types and formats of data from all storage devices in a variety of data loss situations.
The main file types can be photos, videos, audio, documents, archives, emails, and many more. The storage devices include Mac hard drives, NAS and Linux machines, external hard drives, USB flash drives, SSDs, HDDs, digital cameras, Drone cameras, SD cards, CF cards, etc. It’s fully compatible with Macs with T2/M1/M2/M3/M4 chip.
The most exciting thing is that the developers of Recoverit have overcome the video fragmentation problem for video recovery. You can use the patented Enhanced Recovery to recover full 4K/8K videos without corruption. It can also repair corrupted video files via its inbuilt video repairing tool.
Let’s check the features in detail and get to know why it is recognized as the #1 data recovery software.
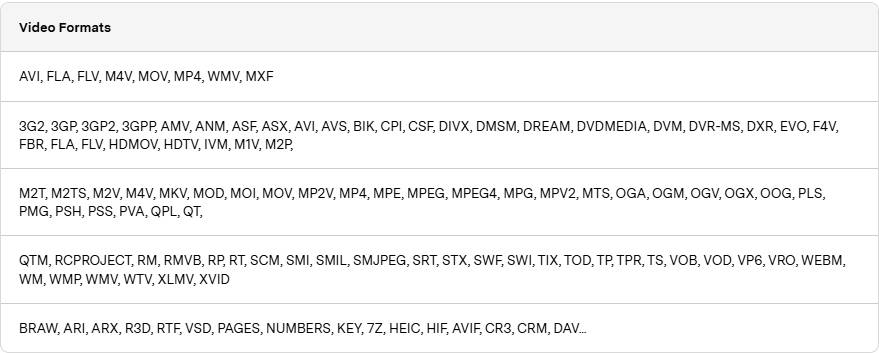
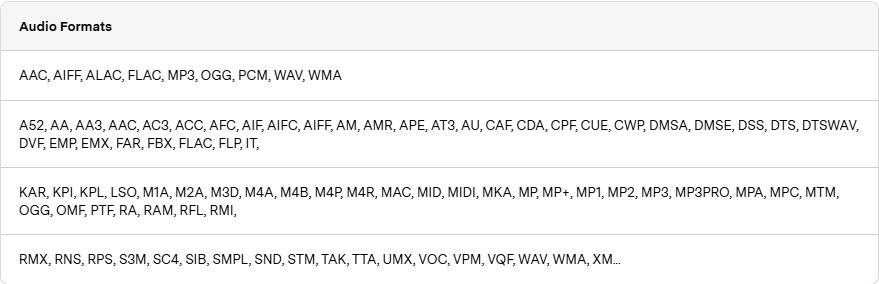
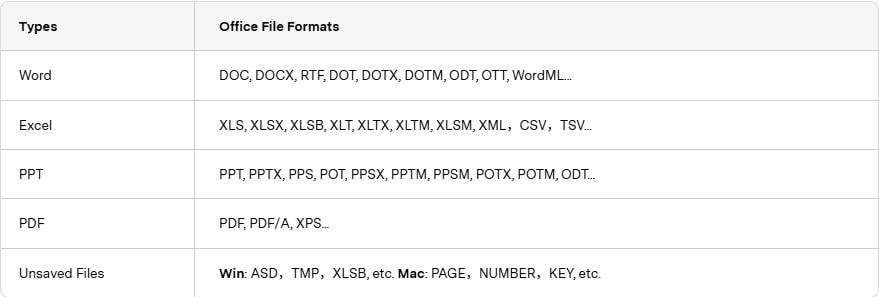
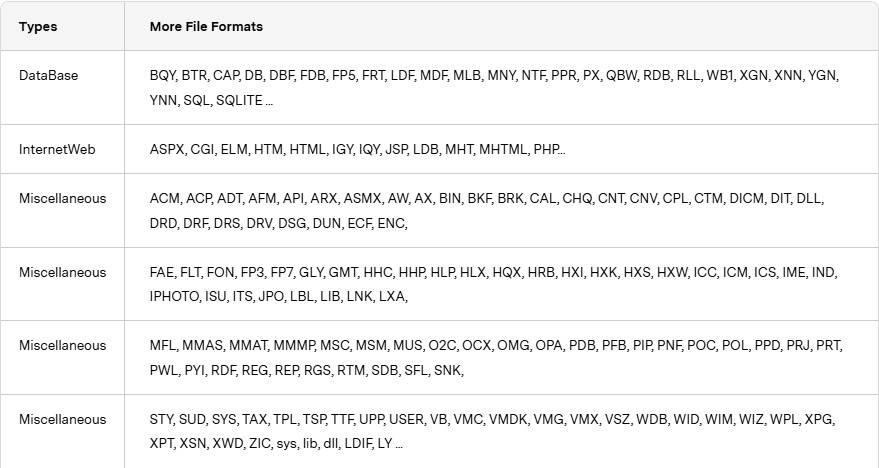
- Supports recovery of over 1000 file types and formats


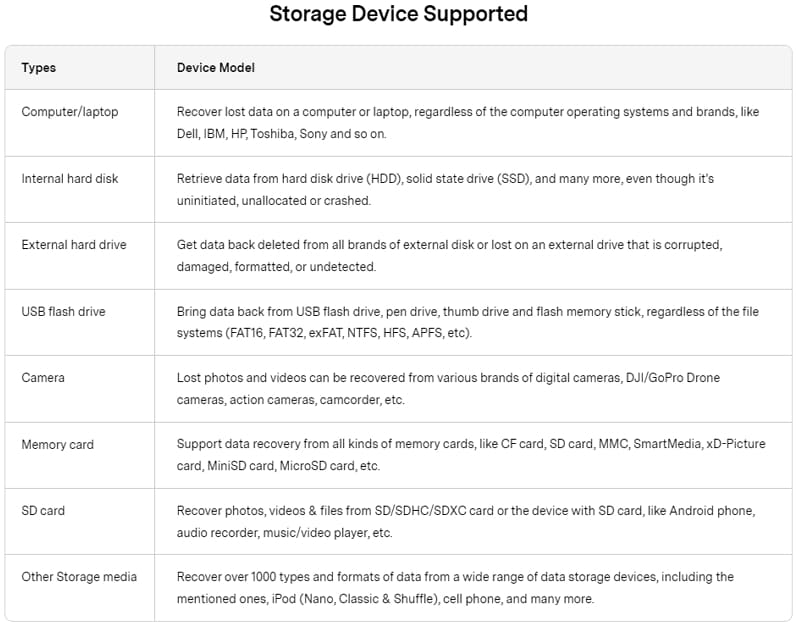
- Support data recovery from over 2000 storage media
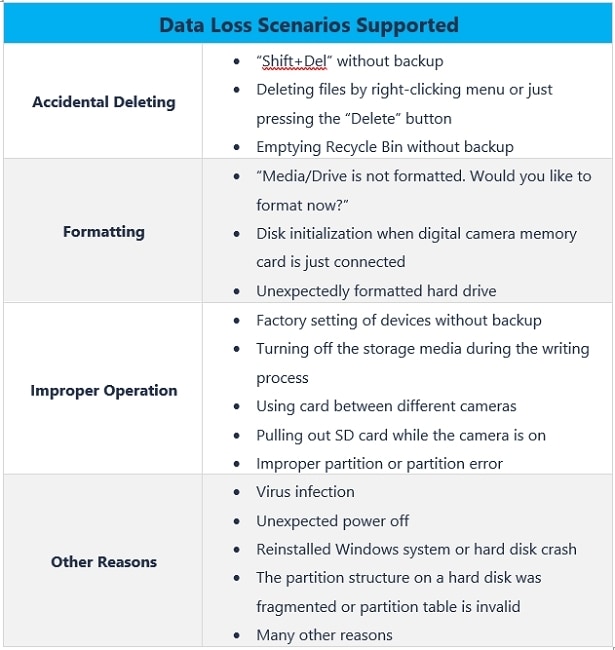
- Supports data recovery from over 10000 data loss scenarios, such as deletion, formatting, Mac system crash, virus attack, improper operation, etc.
- You can choose to recover a single file or multiple files.
- In addition to scanning an entire disk, specific file path scanning is also possible.
- You can recover data from a disk image to avoid wear and tear on your hard drive.
- The NAS data recovery works through a remote connection. You don’t need to dismantle your NAS server and take out the hard drives for recovery.
- Quick and deep scans are available for T2/M1/2/3/4-chip-protected Macs.
- You can preview the files before recovery to ensure you get the files you want. Moreover, if the photo and document files are damaged, Recoverit for Mac can repair them automatically during the previewing.
- Multiple search and filtering options are available to locate the desired files quickly.
- The scanning progress bar at the bottom shows you the scanning time left, the amount of files found, and the hard drive sectors that have been scanned.
- The video repairing tool helps you fix all kinds of corrupt, broken, or damaged video files.
- Works on macOS X 10.10 and later, Windows 11/10/8.1/8/7/Vista, and Windows Server 2022/2019/2016/2012/2008/2003
- Compatible with almost all Windows, Mac, and Linux file systems like FAT16, FAT32, exFAT, NTFS, ReFS, APFS, encrypted APFS, HFS+, encrypted HFS, HFSX, RAW, RAID, EXT2, EXT3, EXT4, BTRFS, JFS, etc.
To get the full list of supported formats, devices, and scenorioes, check the Recoverit's Tech Specs
NOTICE
Wondershare Recoverit does not support data recovery from:
- Physically damaged storage devices (with hardware failures).
- Files that have been overwritten by new data.
- Mobile devices (Android/iOS phones or tablets).
For physically damaged drives, we recommend consulting professional data recovery services.
How To Download/Install/Update Wondershare Recoverit for Mac
1System Requirements
To run Wondershare Recoverit for Mac, your computer needs to meet the following basic system requirements:
- Operating System: macOS 10.10 Yosemite to macOS 15 Sequoia.
- RAM: 2 GB minimum (4 GB recommended)
- Disk: 56MB minimum space for installing
- Processor: An Intel® Pentium® 4, higher, or equivalent processor
To see more details, please visit: https://recoverit.wondershare.com/tech-spec/
2Download Wondershare Recoverit for Mac
You can visit https://recoverit.wondershare.com/data-recovery-mac.html to download the trial version of Recoverit for Mac. Optionally, you can directly click the download button below.
3Install Wondershare Recoverit for Mac
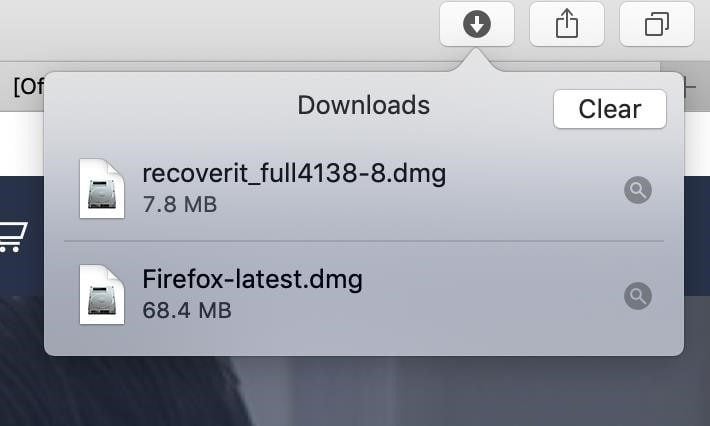
- Step 1. After downloading Recoverit for Mac, click “recoverit_full4138.dmg" to install the software on your Mac.
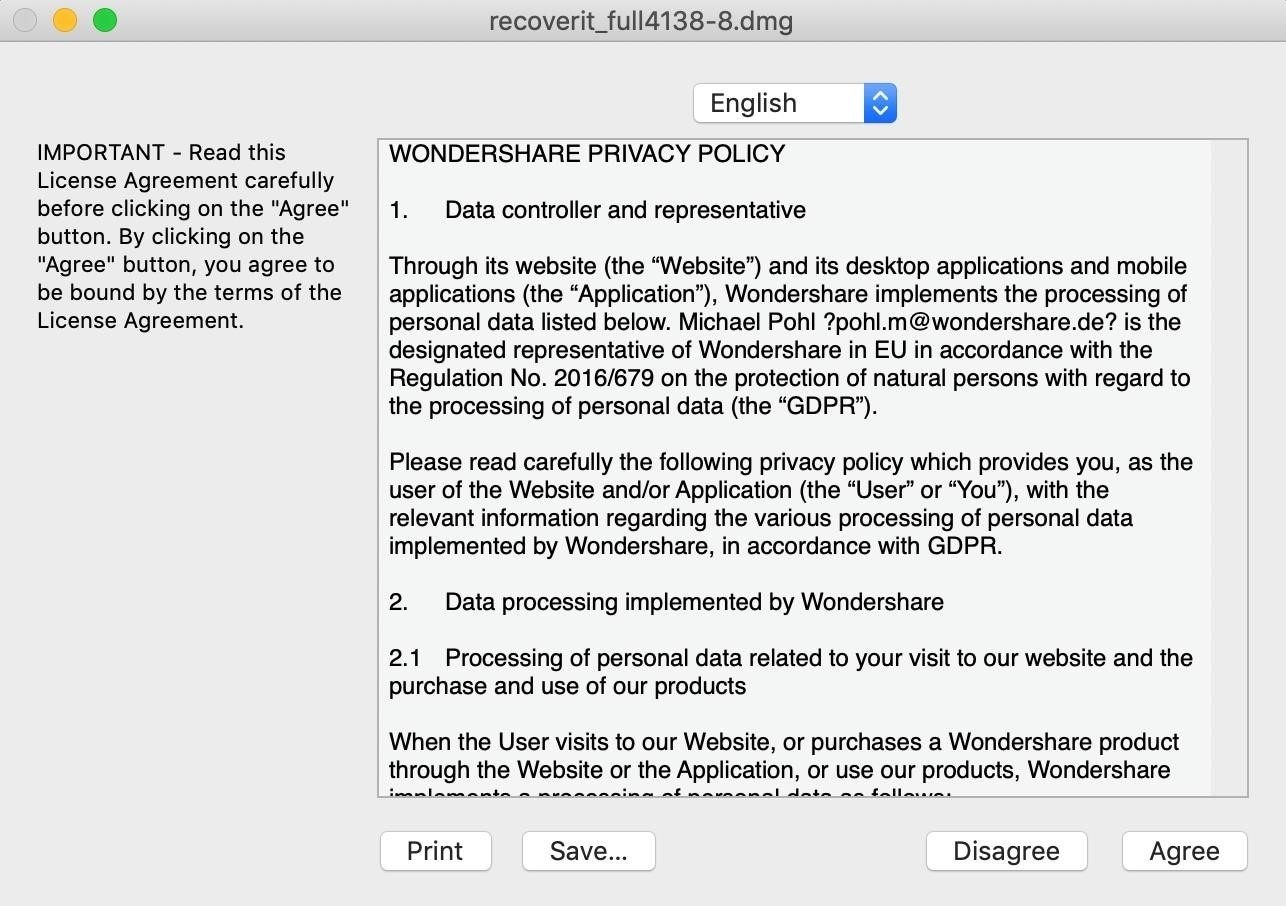
- Step 2. Agree to the privacy policy. Next, you can select the specific language of your choice, and English will be the one by default. Read Wondershare Privacy Policy and click “Agree” to confirm and accept it.
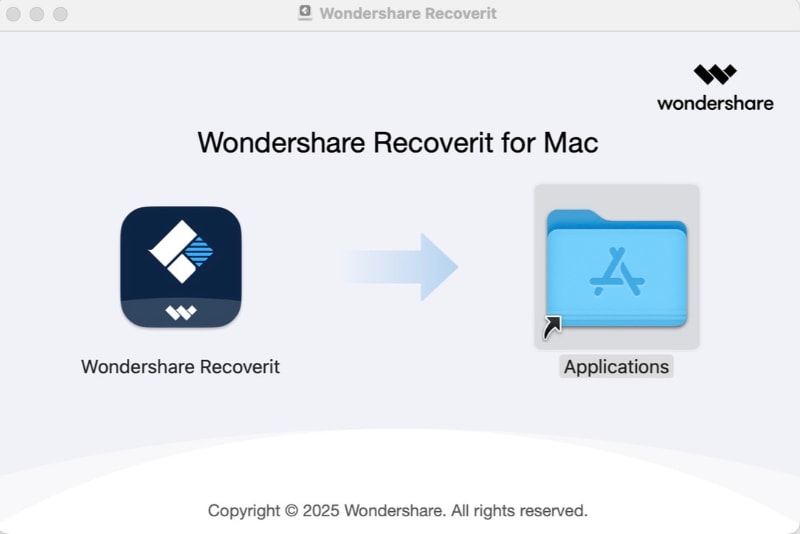
- Step 3. Drag Recoverit.app to the Applications. To make sure you can keep using Recoverit on your Mac, please move the .app file to the Applications.
4Launch Recoverit on Mac
To launch Recoverit Data Recovery for Mac, simply double-click the “Recoverit” icon on the Desktop. If it is not there, please go to “Finder” > “Applications” > “Recoverit" and double-click the software.
For those who set a password, please input the Mac password and press “Enter” or “Return” to launch Recoverit.
5Recoverit in Dark Mode
To apply with the Mac dark mode, Recoverit has also been updated with a dark mode.
When your Mac is in dark mode, you will get Recoverit with a black appearance, as the following screenshot shows. The Dark Mode will darken the color scheme, allowing the options to stand out.
Note: Recoverit currently doesn’t have a manual dark/light mode switch, but we will continue to update the product and make it included in future versions.

6Update Wondershare Recoverit for Mac
All users who buy a monthly, yearly, or perpetual plan for Recoverit enjoy the free update during the plan's validity period.
Click the Wondershare Recoverit icon on the top left corner and then choose the “Check for Updates” option. A window will show you which version you are currently using and whether it is the latest version.
You can always download the latest version of Wondershare Recoverit for Mac on the Recoverit official website. Installing it will replace the previous version automatically.
Register and Get the Full Version of Wondershare Recoverit for Mac
1Limitations of Wondershare Recoverit for Mac Trial Version
After downloading and installing Wondershare Recoverit for Mac, you only get the trial version of the software. The trial version has the following limitations:
- Data recovery: You can scan the data stored on your Mac computer or any other connected storage device for free. But if you want to recover and save the scanned data, you must upgrade the program first.
- File preview: You can only preview the 30s of each scanned video. (Previewing other file types are not limited.)
2Purchase a License for Wondershare Recoverit
To remove the limitations, you need to purchase a license to activate Recoverit. Please follow the below steps to start recovering data on Mac:
- Step 1. Find the Cart icon on the top right corner of the product window and click on it. Optionally, you can visit the Recoverit Official Online Store.
- Step 2. Follow the instructions on the store page to complete the purchase process.
- Step 3. You will get the instructions on how to activate Recoverit after paying successfully. Please go to your email inbox to find and complete the activation process.
3Register Wondershare Recoverit for Mac
To enjoy all the features of the paid version, check the registration information sent to you to activate the software after purchase. If you do not register, the product will still be a trial version, even if you have paid for it. The following is how to register Recoverit for Mac after purchasing the product.
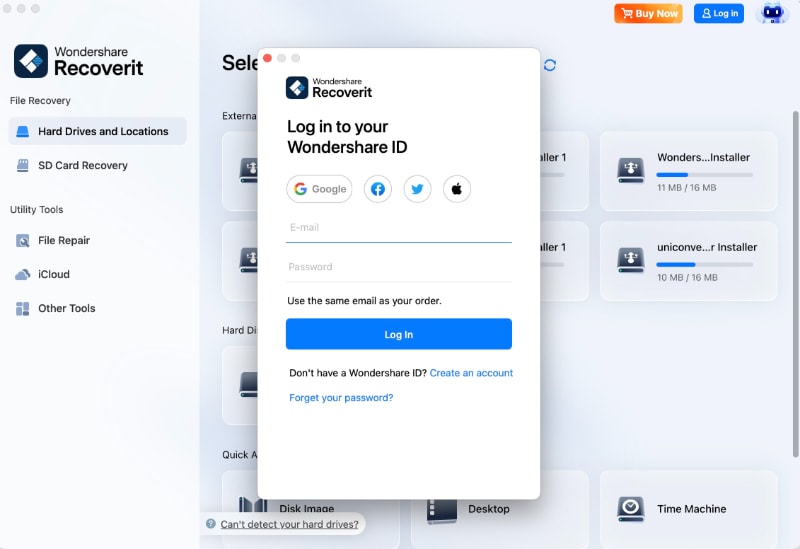
- Step 1. Launch Recoverit and click the "Log in" button in the top right corner.
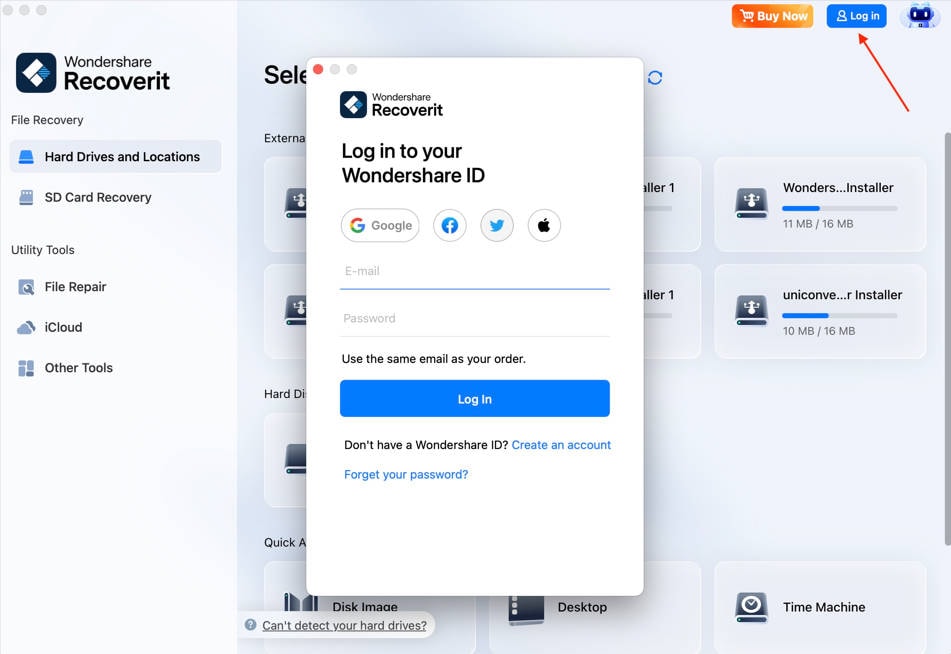
- Step 2. A login window opens; you can log in with your Wondershare ID to activate Recoverit.
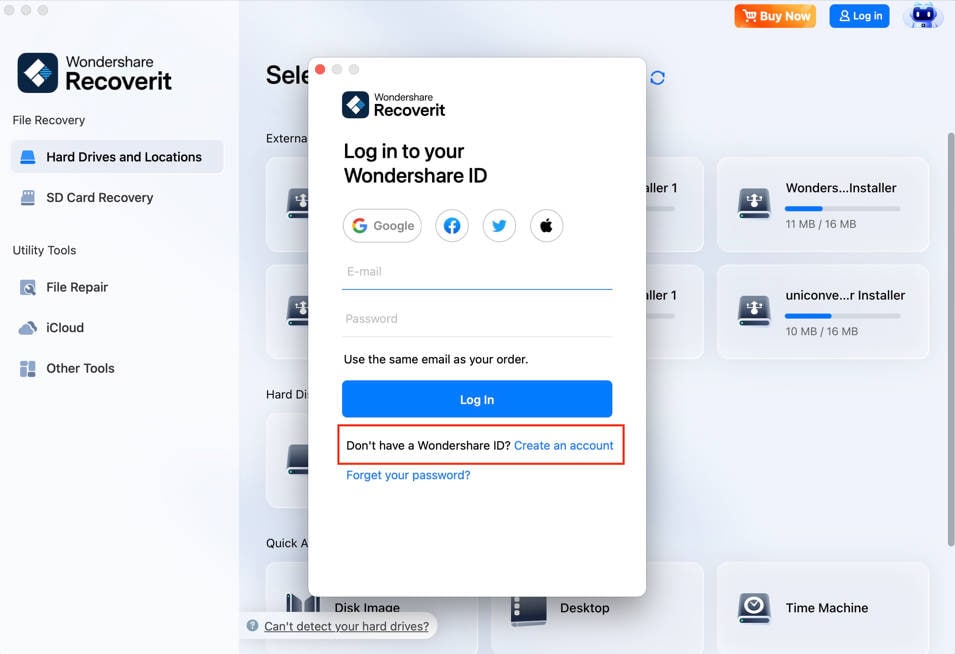
- Step 3. In case you register a Wondershare ID before the purchase, you can click "Create account" under the "Next" button. Then, follow the instructions to finish the registration and purchase process.
Recover Files from Mac
Generally, the steps for recovering data are similar no matter what kind of computer you own, Windows or Mac.
To recover data on a computer, please follow the 3 steps.
- Select a device
- Scan the device
- Preview and recover data
Step 1Select a device
To recover data from Mac computer, please select a drive under the "Hard Disk Drives" tab or "Desktop" under the "Select location" tab.
If you know the exact file path of your lost data, you can also choose "Select Folder" under the "Quick Access" tab.

Step 2Scan the location
Recoverit will start an all-around scan. With the advanced scanning and searching algorithm, all your lost, deleted or formatted data can be found.
You can pause or stop the scanning process if you find your data at any time.

If you wish to recover large-sized or complex videos, then you can also find the Enhanced Recovery feature in Other Tools on the bottom-left corner of the screen. This will perform a deep scan, particularly to recover lost videos. You can read further to know about this feature in detail.
1Pinpoint files during the scanning
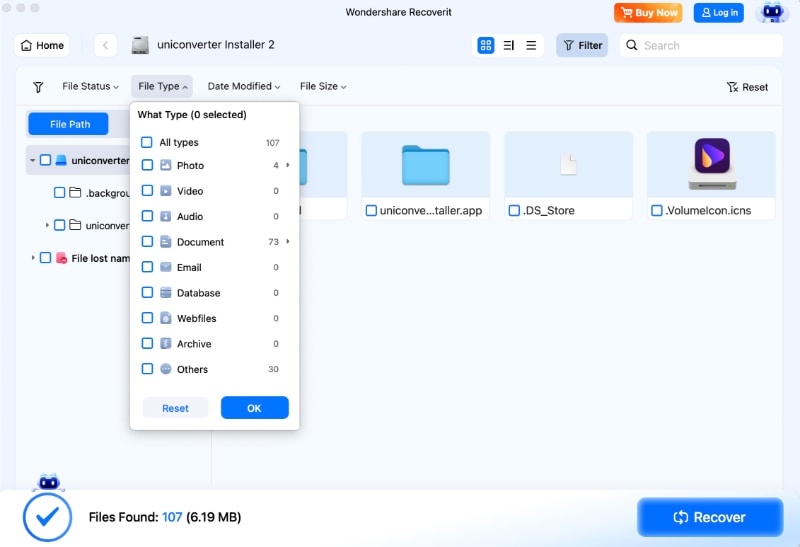
In case the results would yield an overwhelming amount of data, then you can filter the results. There is a panel on the right that can help you filter the results based on various parameters. You also can use the Search box to find the desired files by file type.
You also can use the Search box to find the desired files by file type.
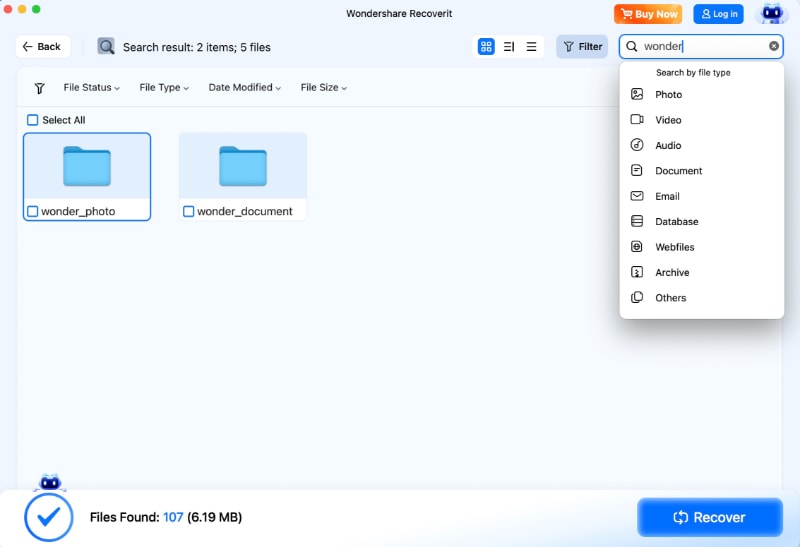
Moreover, you can also directly search the keywords in the right-up box. Then Recoverit will recognize all the files referred to the keywords.
2Pause or Stop the Scanning
Even if Recoverit starts to scan the selected location for your lost data, you can pause or stop it at any time. You can suspend the scanning temporarily by clicking , and the notice "Scanning Paused" will display on the progress bar. If you have found something you want, you can stop the process at any point by clicking on the stop button
 .
.
Step 3 Preview and Recover Files
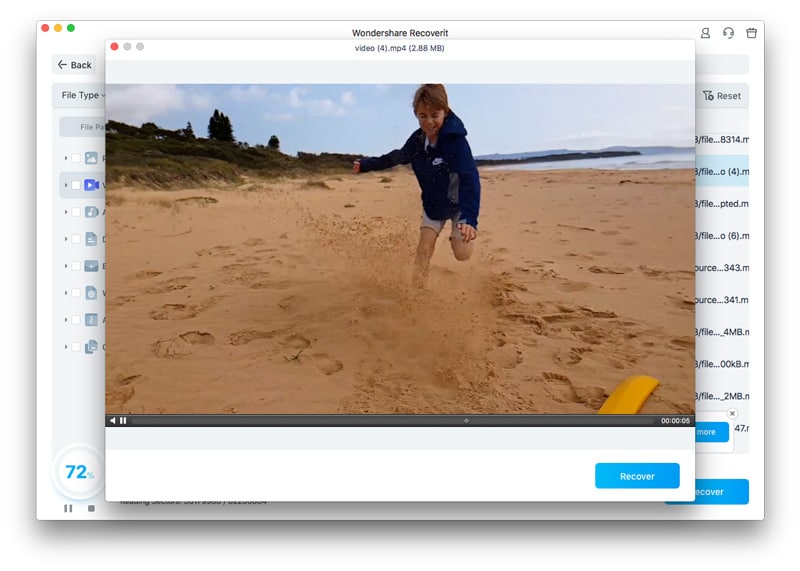
Recoverit allows users to preview the recoverable files before proceeding to the recovery step. If you are premium users, you can preview files with no limits. If you utilize the free version, you can still get a 10-second preview.
You can select the targeted files and click the "Recover" button to retrieve your files.
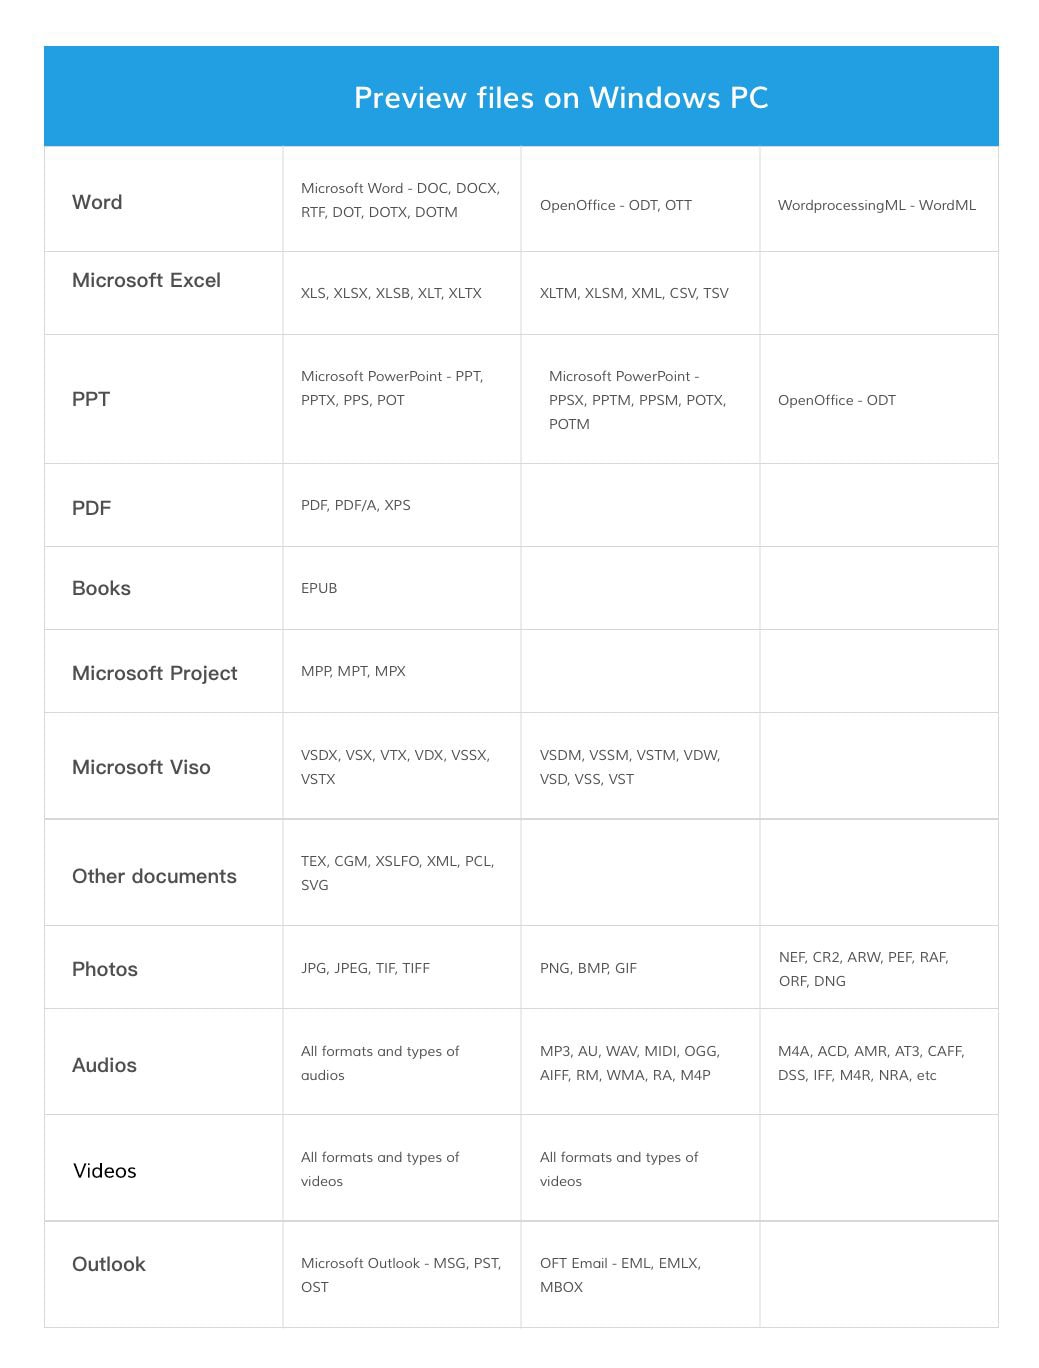
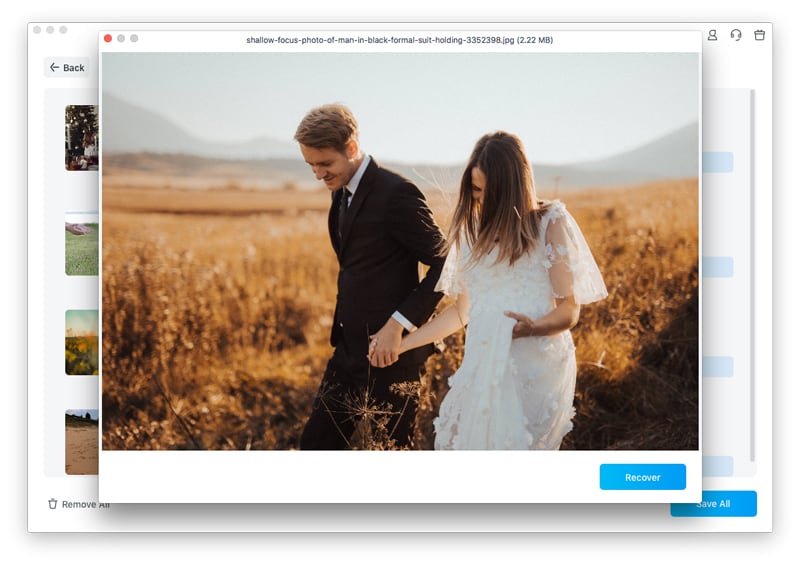
1 Preview files on Mac
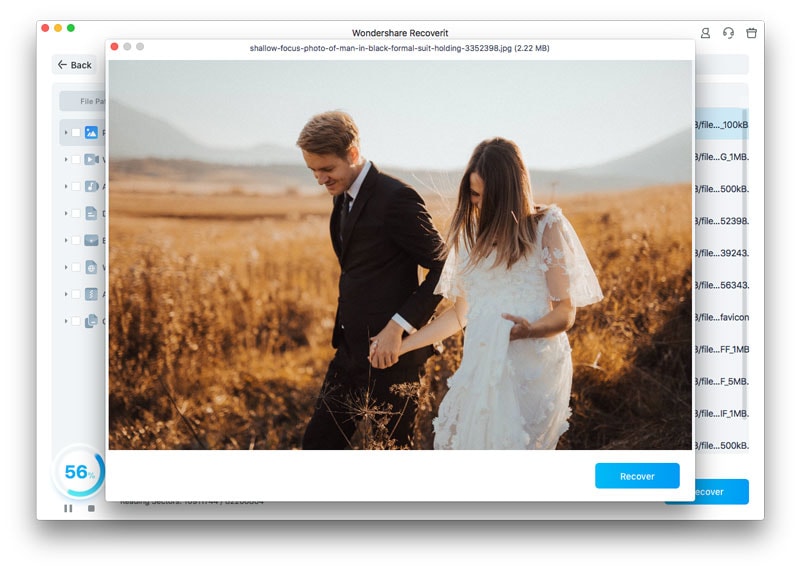
- Preview an image
You can preview and select multiple images to recover at the same time on the preview window. - Preview a video
- Preview an Audio File
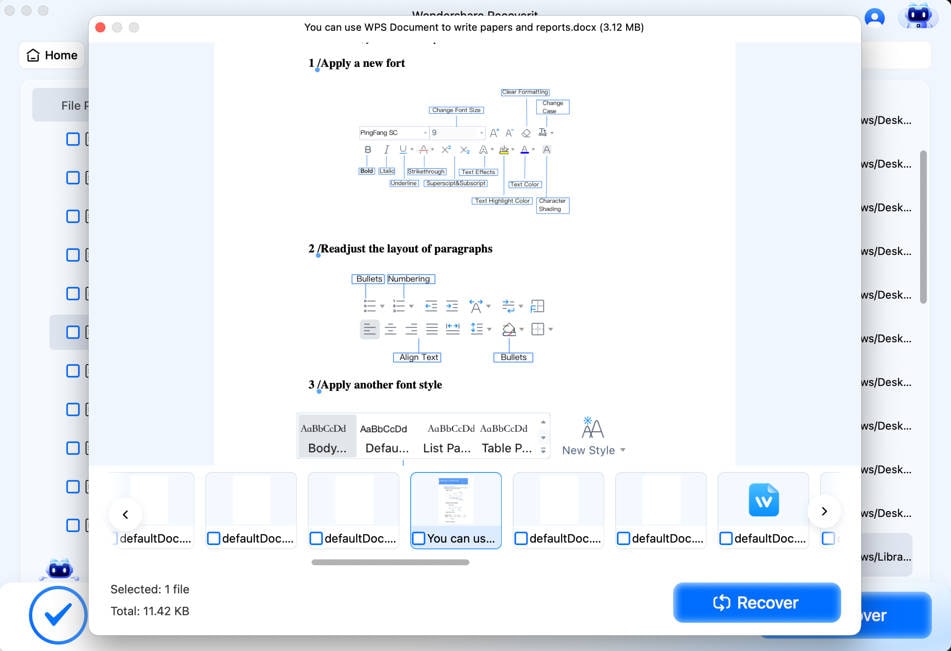
- Preview a Word Document
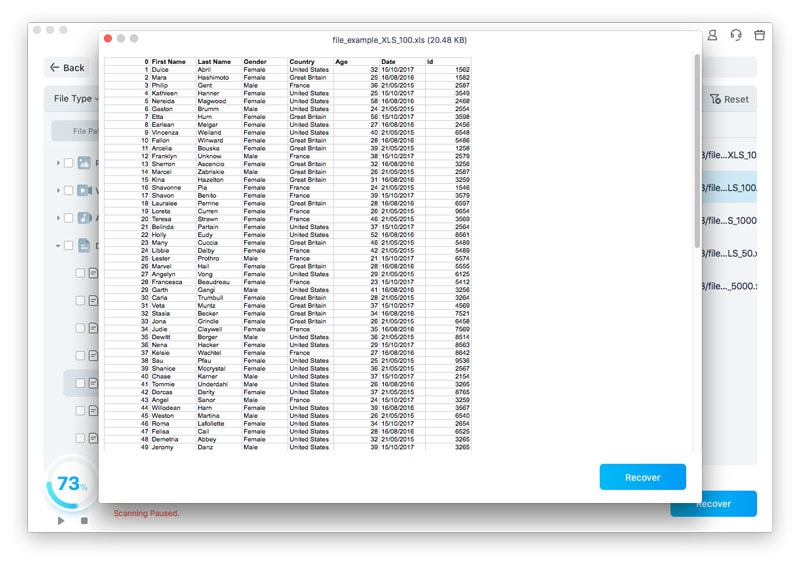
- Preview a Excel document
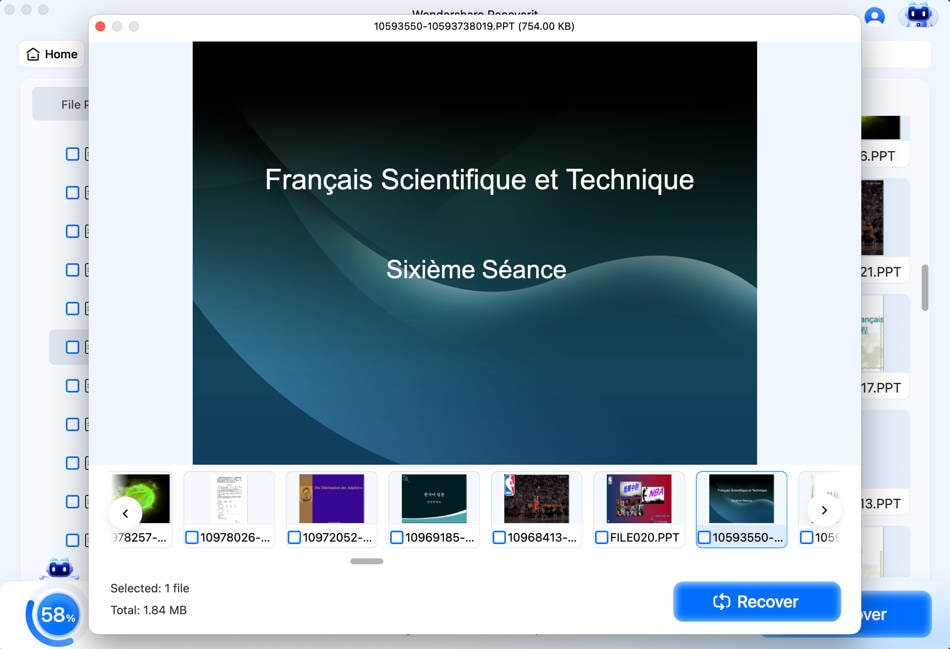
- Preview a PowerPoint document


2 Recover and save Mac files
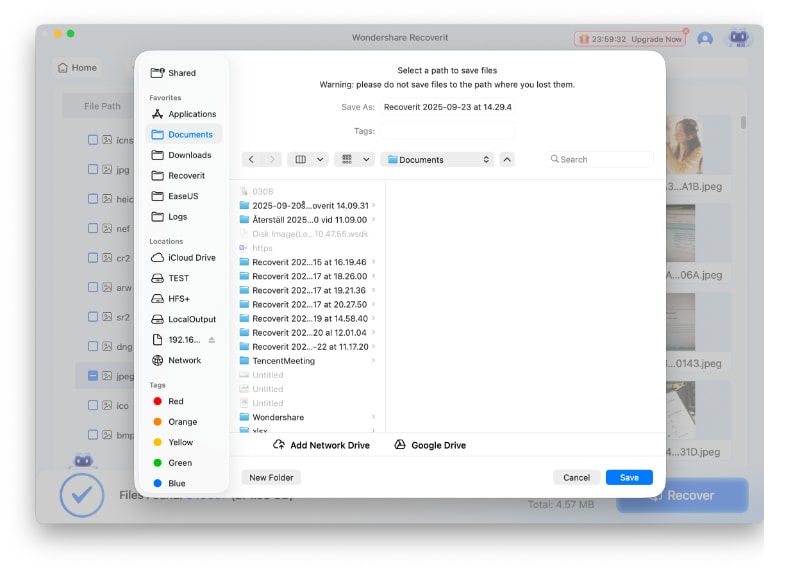
After reviewing the files and confirming they are what you want, you can now get them all back using Recoverit. Directly hit on the "Recover" button to retrieve your lost data back and choose a path to save the recovered files.
Please do not save the files on the hard disk where you deleted or lost the data before to prevent the overwriting of data.
Note: The steps are applicable for recovering data from Mac’s internal hard drive. If you need to get data back from Mac’s Trash, external devices or a crashed Mac, please read a little further.
Video Tutorial on Lost or Deleted Data Recovery on Mac
Recover Files from Emptied Trash
Every time you delete a file temporarily, it is moved to Mac Trash. You can usually go to the Mac Trash to restore it afterward. However, if you delete files permanently or empty the Trash, Recoverit becomes an indispensable tool for you to get them back.
The data present on the Mac Trash can come from different sectors, partitions, hard drives or even external devices connected on Mac. Thus, scanning the Mac Trash for all data types will require a lot of time and bring some burden on your Mac.
To fix the problem, Recoverit offers 2 kinds of recovery modes, namely all-around recovery and deep recovery. The all-around recovery mode is to scan some frequently used files in the Trash, while the deep recovery mode can do the deep scan and even dig out the system files.
Step 1 Select the Trash
To restore Trash and retrieve deleted files from emptied Trash, select the recycle bin under the "Quick Access" as the target location. Click "Start" to commence the scan.
Step 2 Scan the Trash
When it comes to Mac Trash recovery, there are two kinds of recovery modes. The all-around scan will be initiated first. It will take you a few minutes to finish it.
Can't find files on Mac Trash? Try All-Around Recovery.
If you cannot find the deleted or lost files, then you can try the "deep Recovery" option from the bottom of the interface. It will scan and search for more files from emptied Trash deeply, although more time is needed.
Sit back and wait as the application would scan your Mac and recover the data deleted from its Trash folder. You can preview your files and even halt the scanning process as per your requirements.
Step 3 Preview and recover your data
After the scanning, you can locate, preview and select files before recovery. Finally, click "Recover" to retrieve the files back.
1 Locate Files
Once the scan is completed, you can utilize the below features to locate some specific data more quickly.
- File Type: Filter results for specific file types, such as photos, multiple file types, or view all file types.
- Time: This will let you filter files for specific dates on which they were modified or created. Toggle between the features to show system files or hide system files.
- File Size: To view all files irrespective of their size or files of a specific size (like 100-500 MB).
- All Files: By clicking this, you can view all files or only view the deleted files.
2 Preview files with Recoverit
Recoverit supports previewing different types and formats of data, falling back on different options.
- Thumbnails
- The "Preview" button
- Double click a file
- Toggle between different preview modes
3 Recover and save files from Mac Trash
Then, you can select the targeted files and click on the "Recover" button to retrieve your data back from Trash.
After recovering files, please do not save them to the same location. A different location, like an external hard drive or any other source, is recommended.
Recover Files from SD Card
Wondershare Recoverit 14 for macOS delivers intelligent data recovery for SD cards, USB drives, and digital cameras from manufacturers like DJI, Sony, Canon, Nikon, and GoPro. The AI-enhanced system handles accidental deletion, formatting errors, and power failures while supporting professional formats including 16-bit RAW, ProRes, XAVC S, and HEVC/H.265.
Step 1 Select the SD Card
Launch Recoverit 14 on your Mac and select SD Card from the left navigation panel.
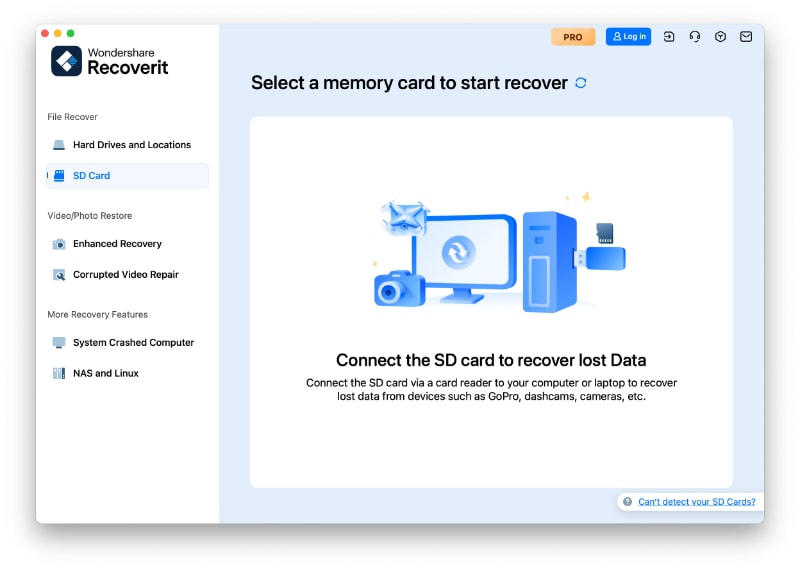
Connect your SD card, digital camera, or USB drive to your Mac using an SD card slot, USB-C adapter, or dedicated card reader. The AI-boosted device recognition automatically detects your hardware and configures optimal recovery settings.
If Recoverit fails to detect the SD card, click the "Can't detect your SD Cards?" option at the bottom right corner. It will show you how to fix the problem in steps.

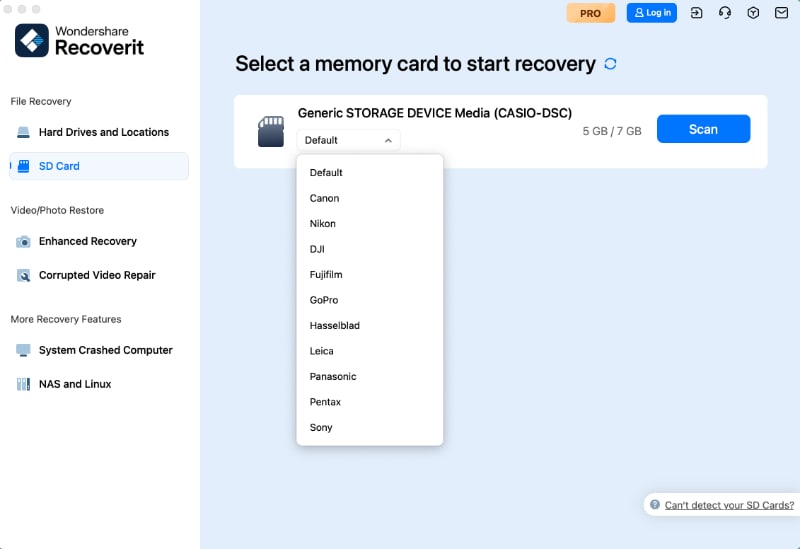
Step 2 Scan the SD Card
Select your storage device and click Scan to begin recovery. Recoverit 14 uses AI-accelerated scanning with advanced algorithms that intelligently analyze file structures and reconstruct device-specific data patterns for faster, more comprehensive results.

The smart recovery system automatically adjusts to your device type and file formats for enhanced precision. You can pause or stop the scan anytime once you locate your target files.

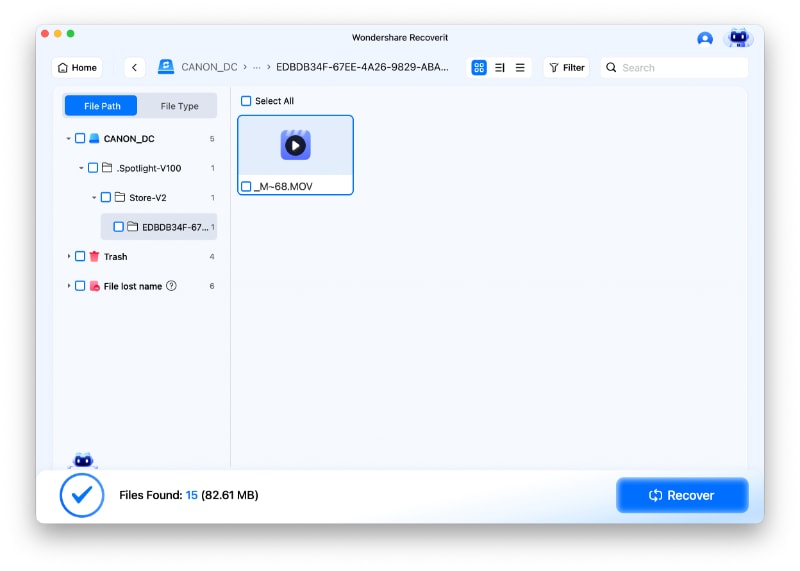
Step 3 Preview and Recover
Review your recoverable content through the built-in preview feature for videos, images, audio, and documents. The AI-powered preview provides accurate file identification and quality assessment, even for professional formats like 16-bit RAW, ProRes, and HEVC/H.265.
Select the files you want to restore and click Recover. Use Finder to save them to a different drive than your source device to prevent data overwriting.
Restore Data from External Devices
Once you find the data stored on an external device gets lost, don’t worry! Recoverit can help you recover lost data from an external media connected to your Mac computer. Regardless of the type and model of the external device, you stand a good chance of getting them back using Recoverit. For example, external hard disks, memory cards, cameras, music players, pen drives, etc.
Step 1 Select the external media
To recover lost or deleted files from an external media, you should first connect it into your Mac, and then choose it as the target location for data scanning and searching.
Step 2 Scan the removable media
An all-around scan starts once you make the choice. It usually takes a few minutes.
During the process, you can filter and locate files of your choice.
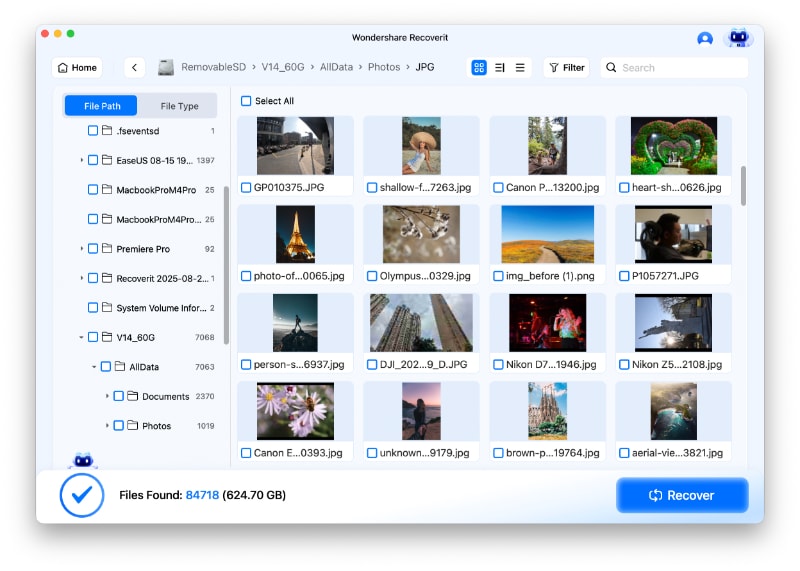
Step 3 Preview and recover files
After that, Recoverit provides the preview function for you before recovery. A variety of files can be previewed, such as pictures, videos, movies, audio, music, documents, and so forth.
Then, select one or more files you want to restore and click "Recover" to get all of them back.
Recover Files from Time Machine
The Time Machine feature on Mac is a built-in backup solution that allows users to create incremental backups of their entire system, including applications, system files, and personal files. Time Machine makes it easy to restore files, recover lost data, or even restore the entire system to a previous state. But sometimes, the backup data may get deleted accidentally. You can always rely on Recoverit to get the lost Time Machine backup back.
Step 1 Select Time Machine
Select Time Machine from the Recoverit interface. And ensure that the external hard drive where you stored the backup files with Time Machine is connected to your Mac.
It will automatically scan for the Time Machine backup files. Choose the backup folder where you lost the files to start scanning. Then, wait for the process to complete. If Recoverit fails to find the Time Machine backup files, you still can import them manually by clicking on Import the Time Machine backup file.

Step 2 Scan the Lost Files
Once you locate the files you need, you can pause or stop the scanning process. Additionally, the filter option on the header menu allows you to quickly find the files you need.

Step 3 Preview and recover files
Once the scanning is finished, preview the files before initiating the recovery process. Then, select one location to save the files.
Recover Data from iCloud
If you’ve accidentally deleted files from iCloud and need to restore them within 30 days, Wondershare Recoverit can help you retrieve photos, videos, contacts, notes, and more—even if they’ve been removed from the Recently Deleted folder.
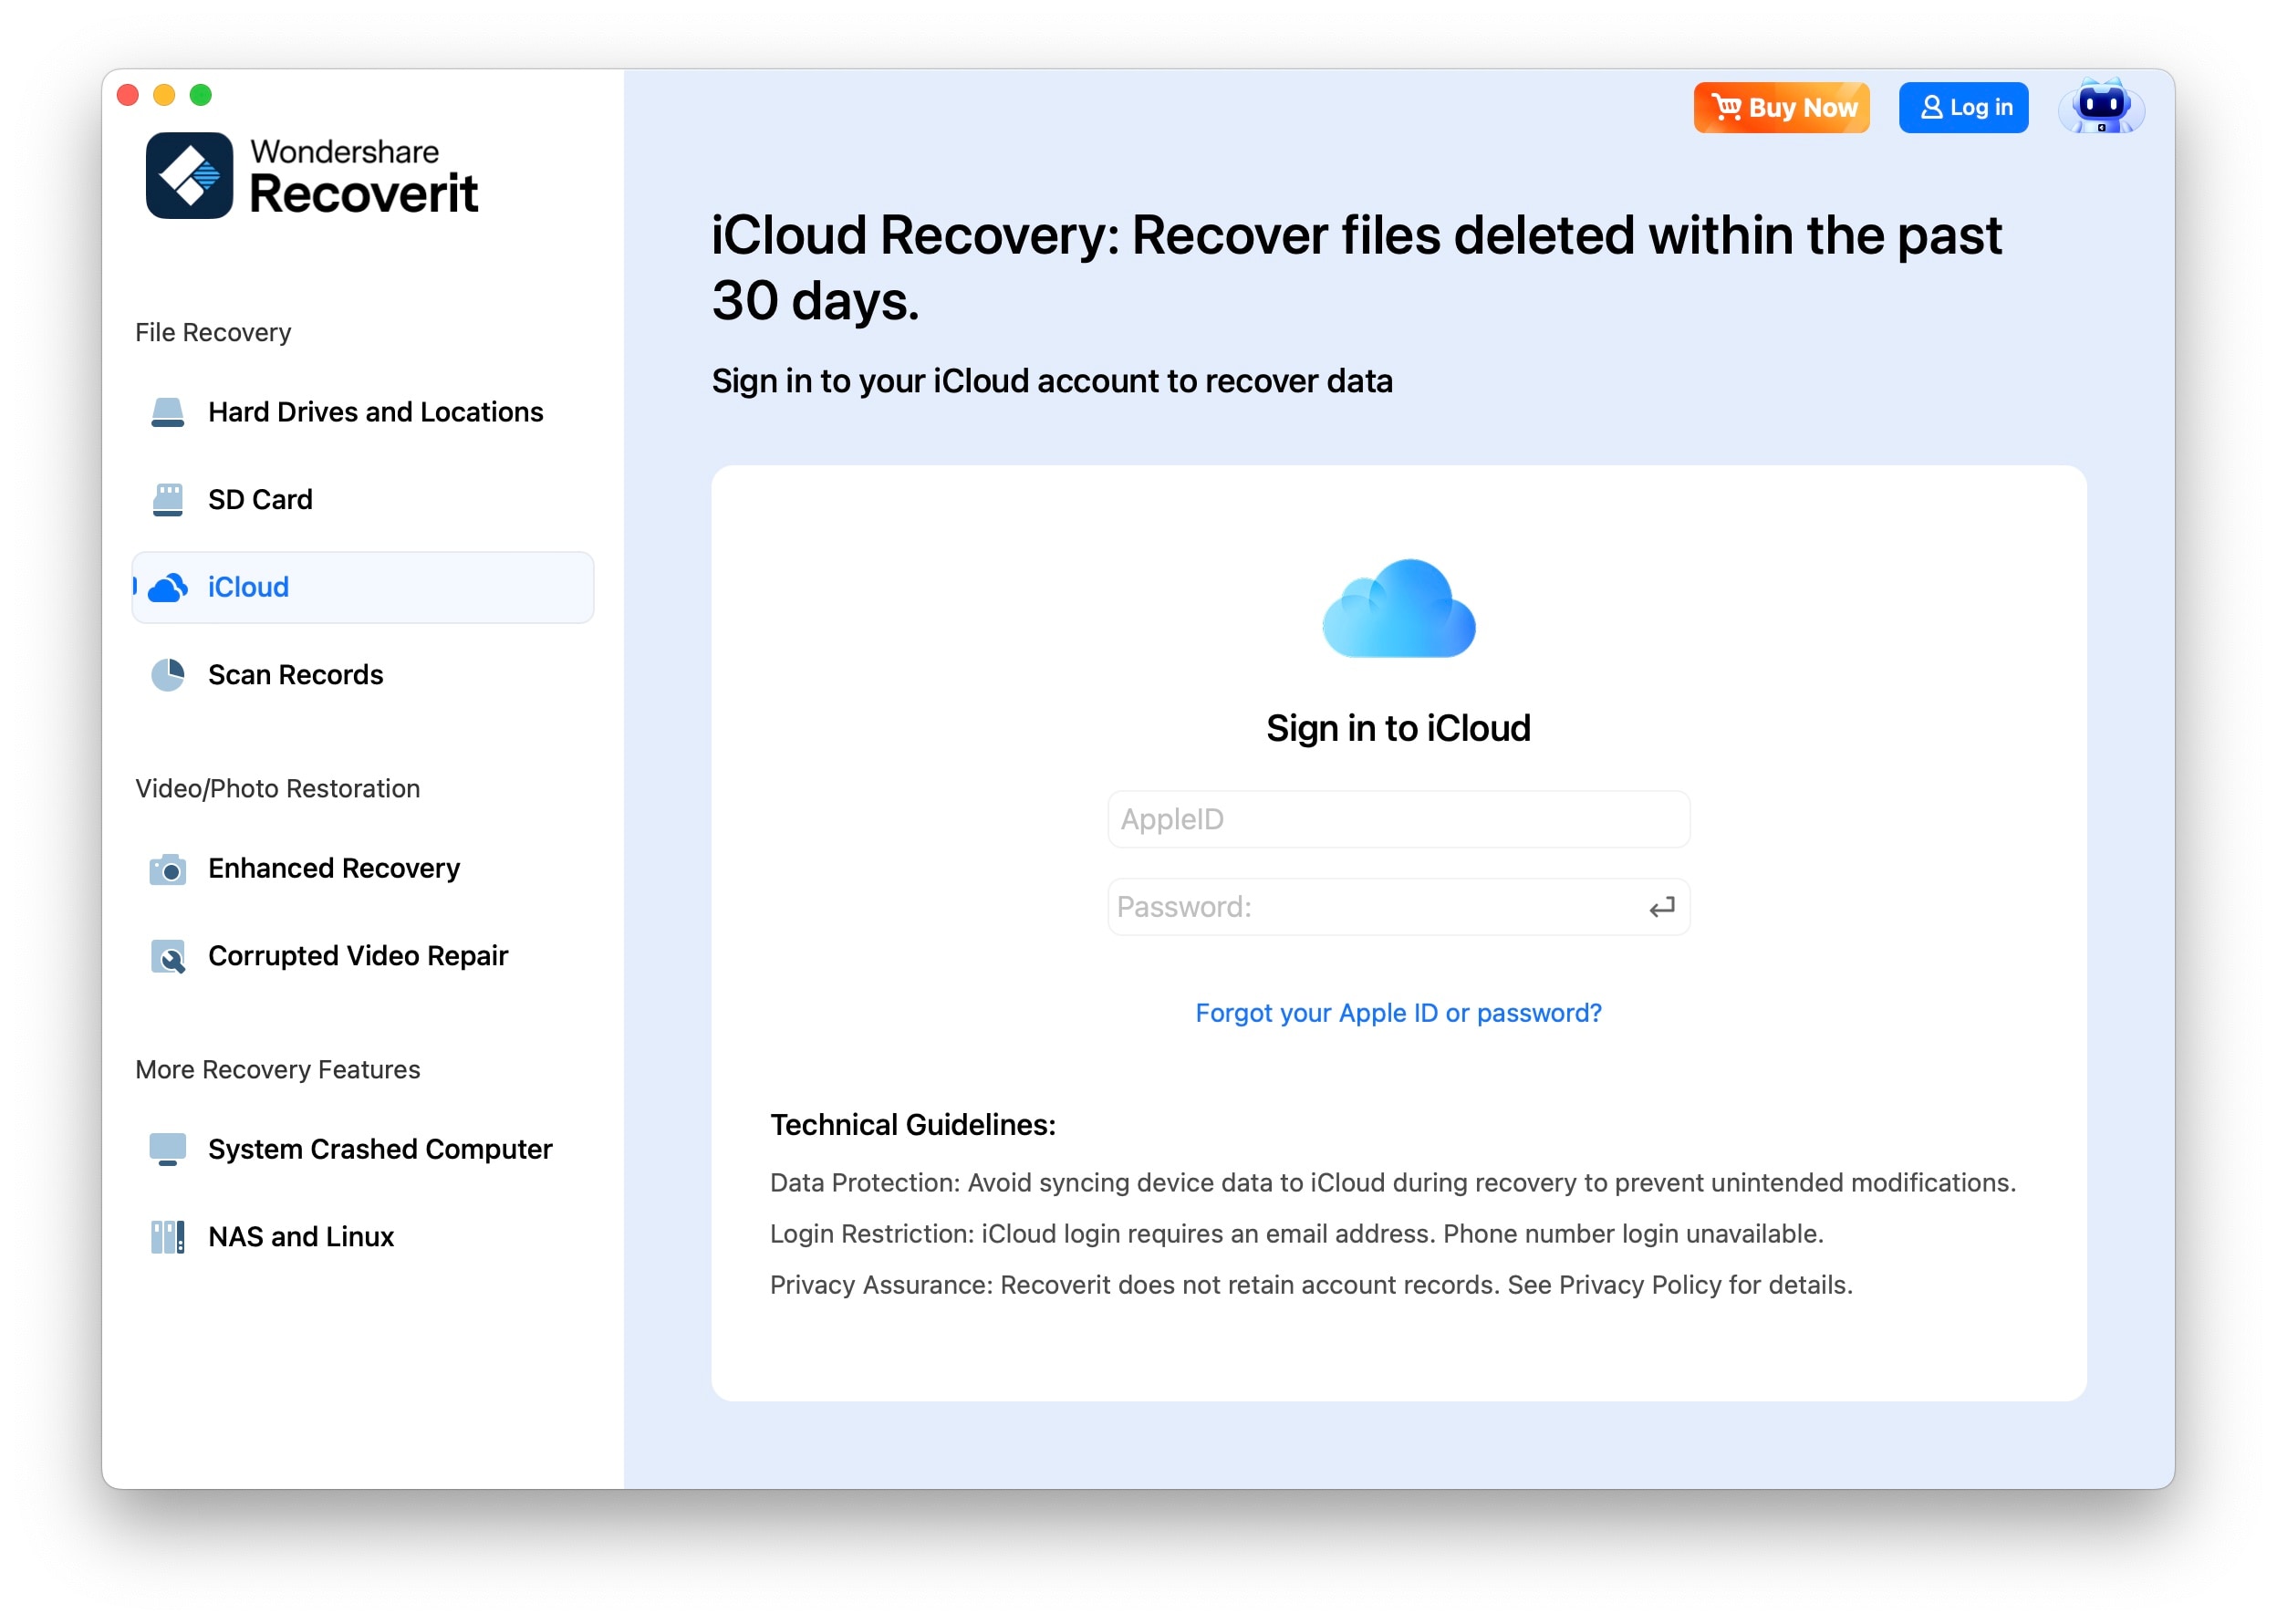
Step 1 Start iCloud Recovery
Launch Wondershare Recoverit on your computer and navigate to the iCloud section. Enter your iCloud ID and password to sign in to iCloud.
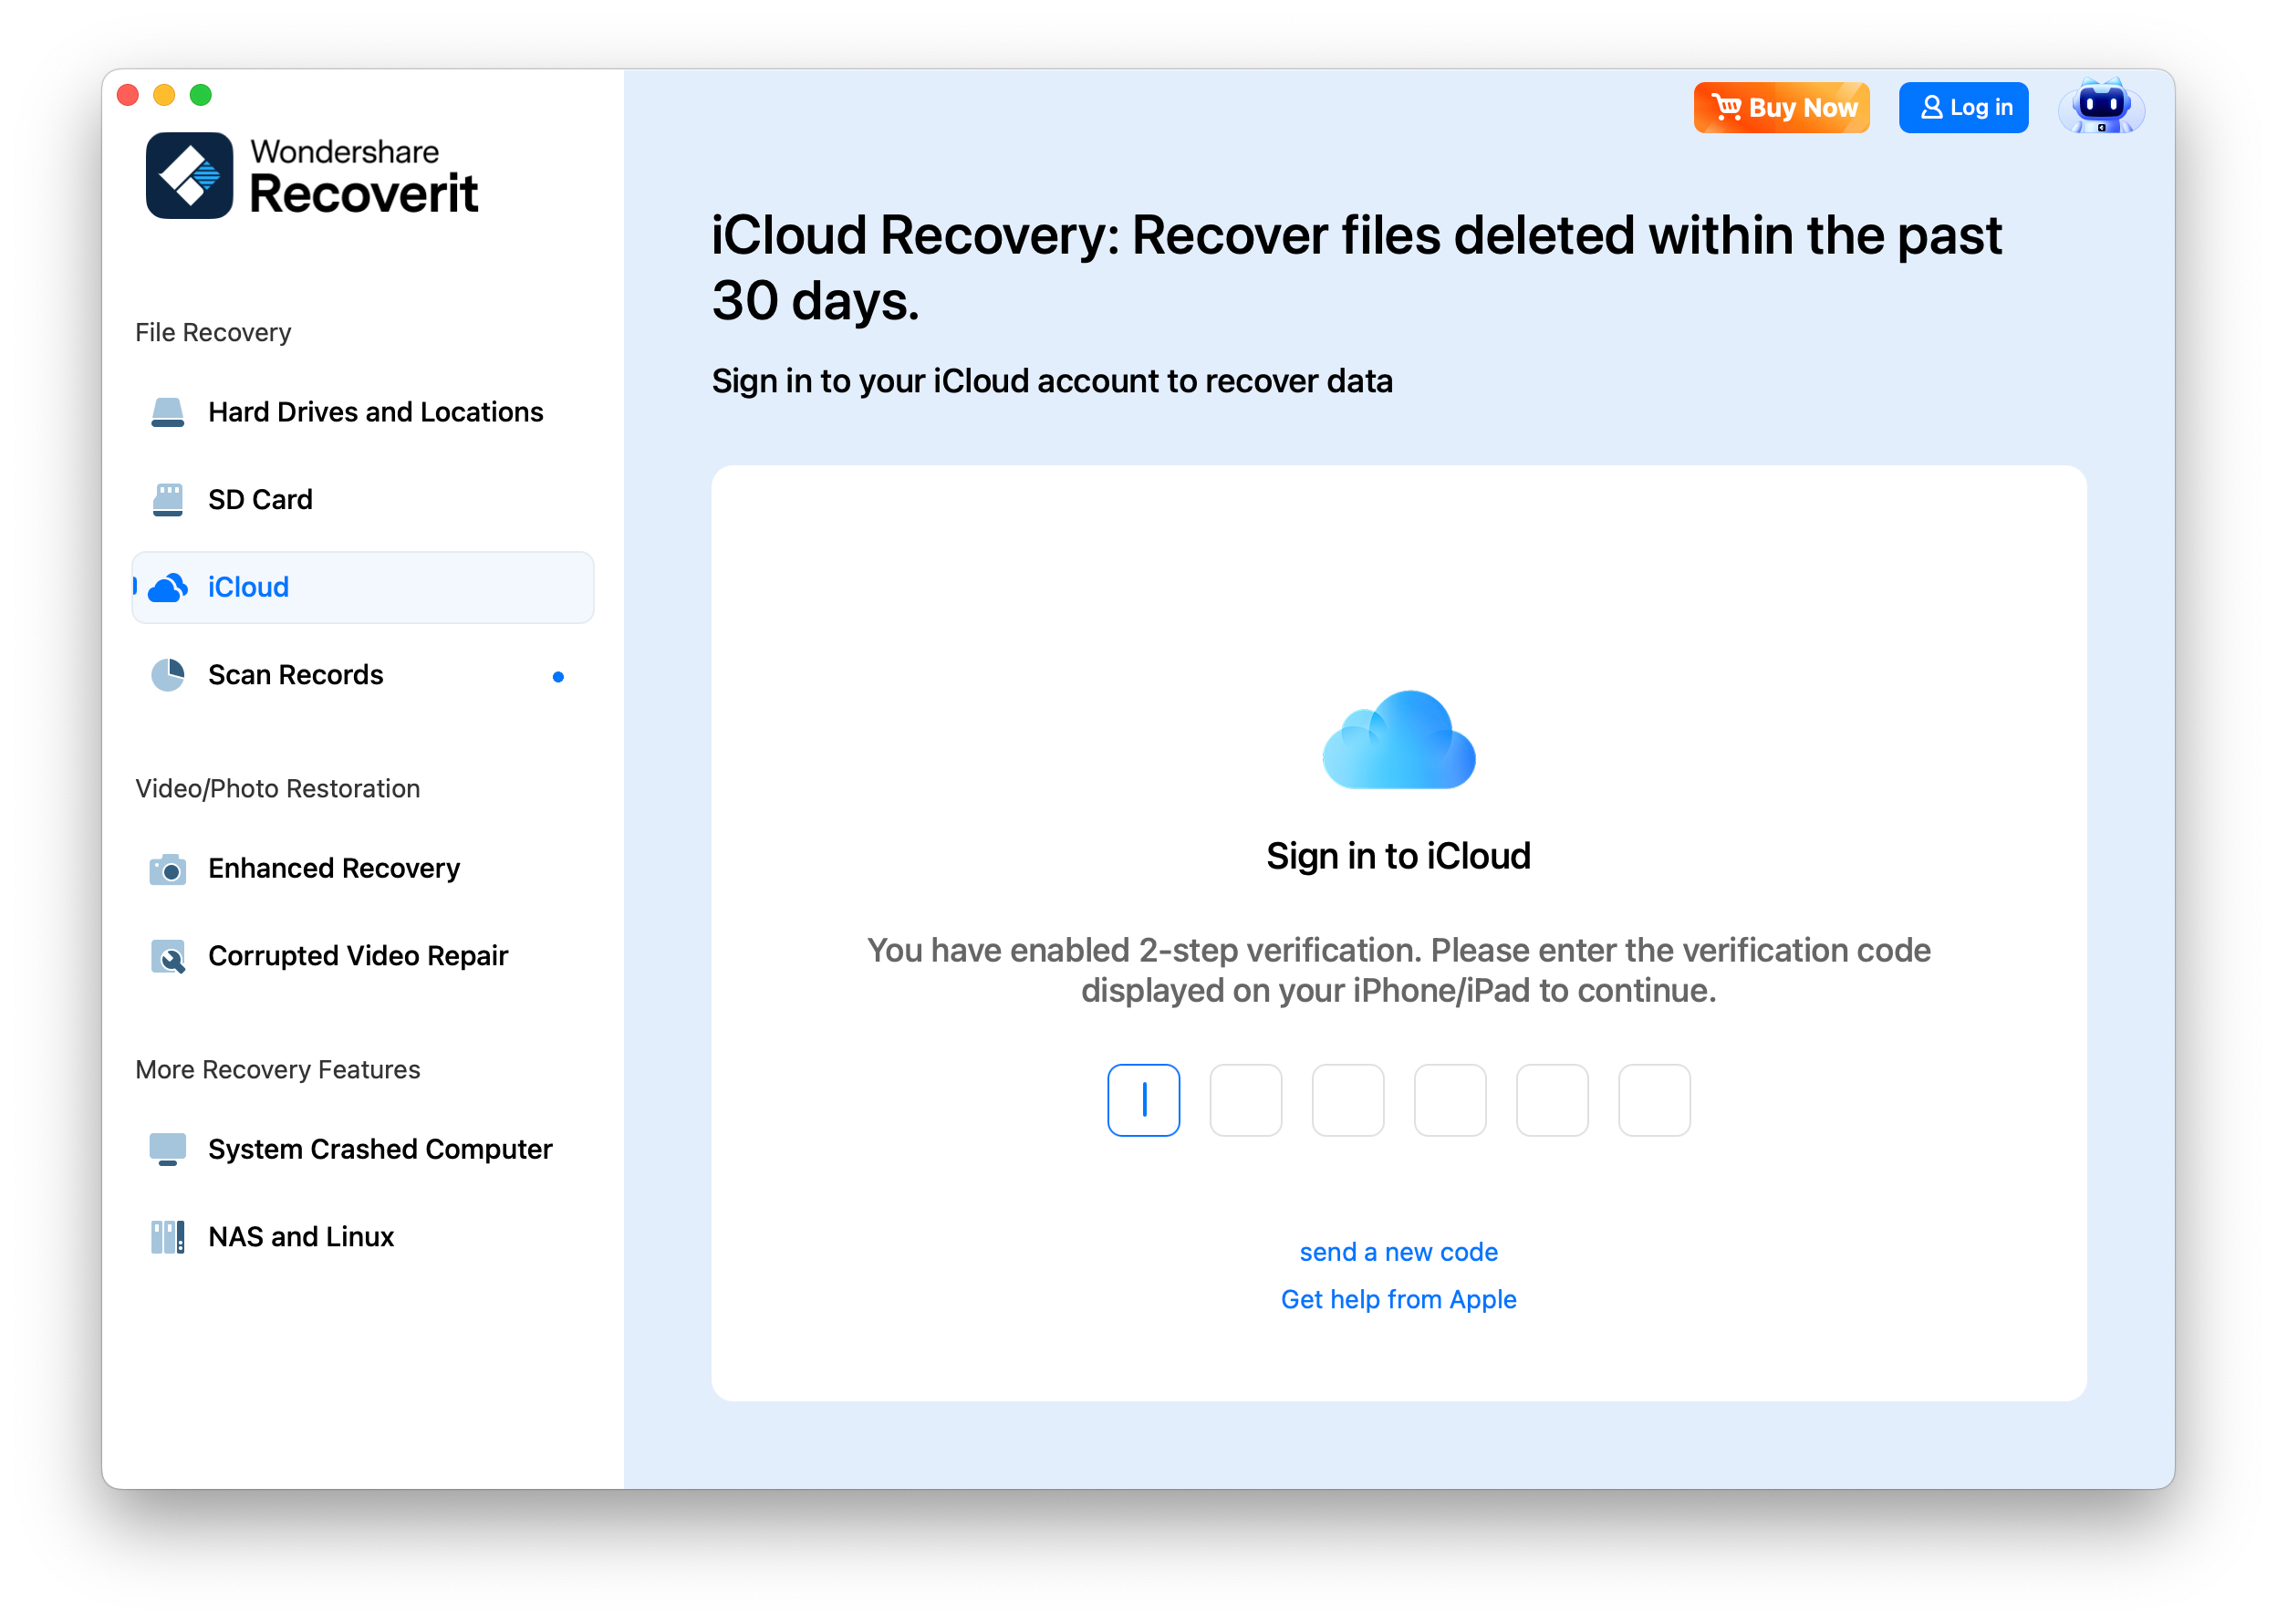
Step 2 2-Step Verification
If you have two-factor authentication enabled (recommended), you'll need to:
- Verify your identity with the security code sent to your devices(your iPhone/iPad devices).
- Enter the code in Recoverit to complete authentication.
Step 3 Scan iCloud for Deleted Files
Recoverit will perform a deep scan to locate lost or deleted iCloud data. The process may take some time, depending on your storage size.
- Pause or Stop: You can pause or stop the scan at any time.
- Filter & Search: Narrow down results by file type (Photos, Videos, Documents, Contacts, etc.).
Step 4 Preview and Recover iCloud Data
Once the scan is complete:
- Preview recoverable files (free version allows checking 10 seconds of videos or the first page of documents).
- Select the files you want to restore.
- Click "Recover" and save them to a secure location (not back to iCloud immediately to avoid overwriting).
NOTES
- iCloud’s 30-Day Limit: Deleted files are only recoverable within 30 days unless backed up elsewhere.
- Recoverit Supports: Retrieving lost photos, videos, contacts, notes, and more from iCloud due to accidental deletion, sync errors, or corruption.
Recover from Disk Image (Mac)
A mirror copy of your entire physical device or logical drive stored as a single or a set of files is known as the disk image. Recoverit has made it super easy for you to import existing and create new disk images of different storage devices. It enables you to recover data from several bad sectors or badly aged disks.
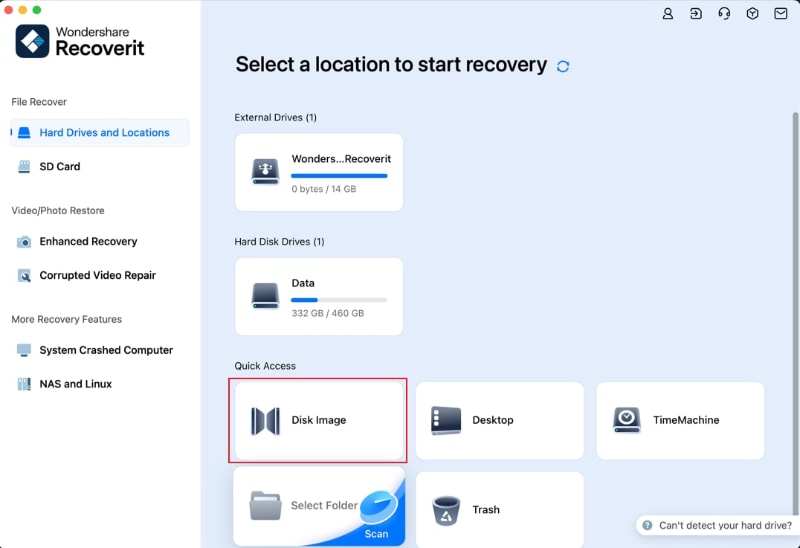
Step 1 Select the “Disk Image”
Open the tool and go to the “Hard Drives and Locations” option. Now, tap on “Disk Image.” You will find it under the “Quick Access” tab.
Step 2 Import Existing / Create a New Disk Image File to Scan
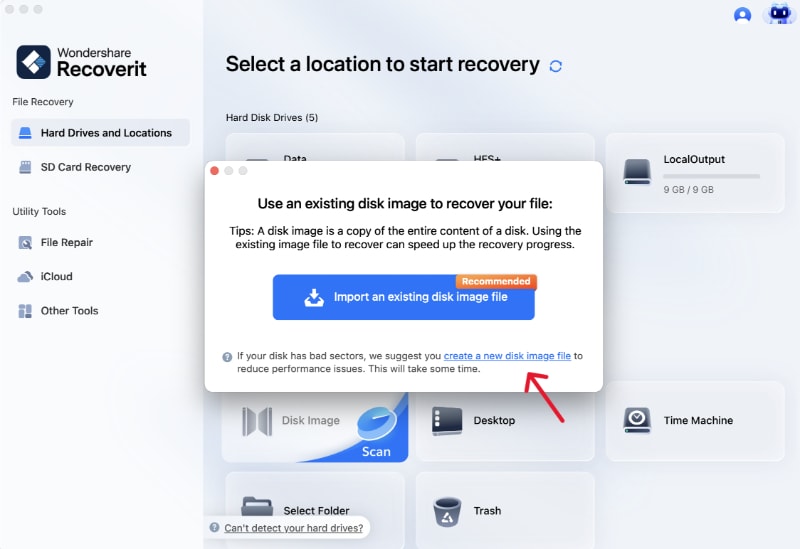
You have the option to import either the existing file or create a new disk image. “Situation 1” assists you in importing the existing disk image file, whereas “Situation 2” helps you create a new disk image.
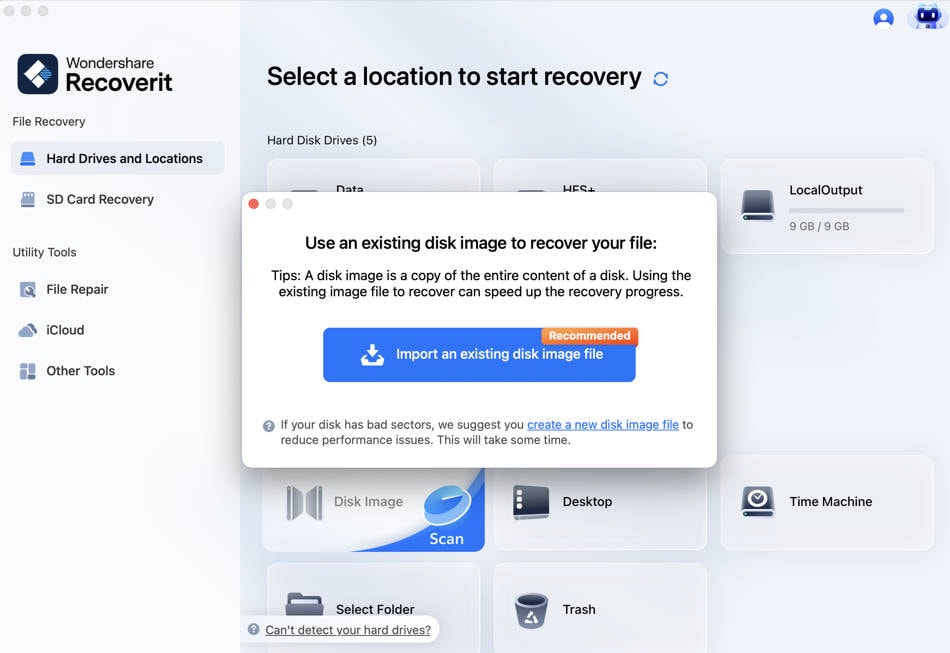
Situation 1: Import the Existing File
Make sure a disk image file exists on your computer before you proceed. Now, just hit the “Import an existing disk image file” button. It will allow you to import your disk image file.
Choose the existing disk image file and import it into Recoverit by clicking the “Open” button.
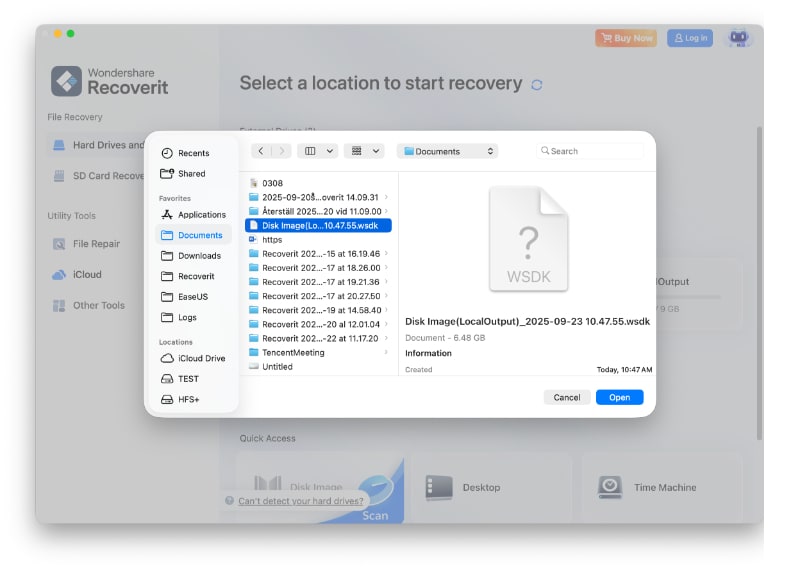
Now, Recoverit will check whether the file you uploaded is valid.
If the selected file is valid, Recoverit will import it automatically and display its details on your screen, as shown below.

Now, click the “Scan” button to allow Recoverit to scan the imported disk image file. Once the scanning is completed, move to Step 3 below.
If your system does not have an existing disk image file, and you want to create one, make sure you read through “Situation 2.”
Situation 2: Create a New Disk Image
Click on the blue-colored anchored link, saying “create a new disk image file,” as shown below.
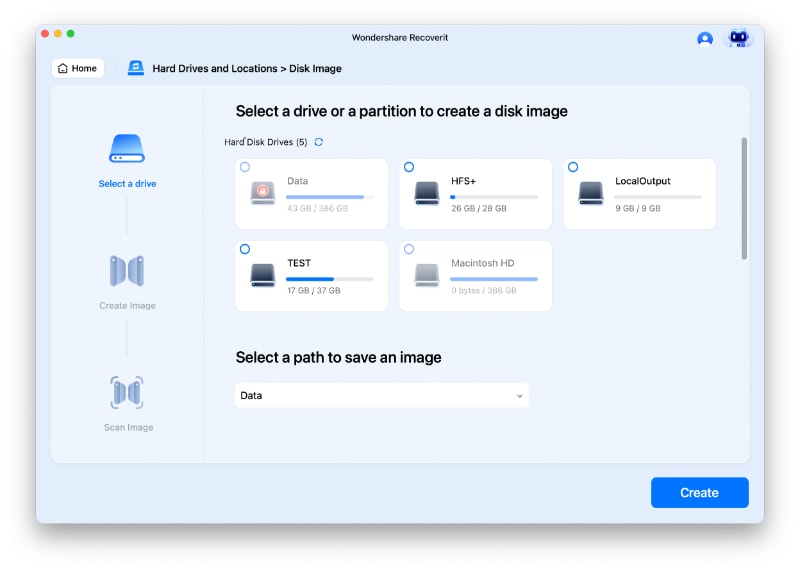
Now, you will see a couple of partitions on your screen. It is time to select a partition or drive to create a new disk image and choose a particular path to save it, as shown below. Then, hit the “Create” button.
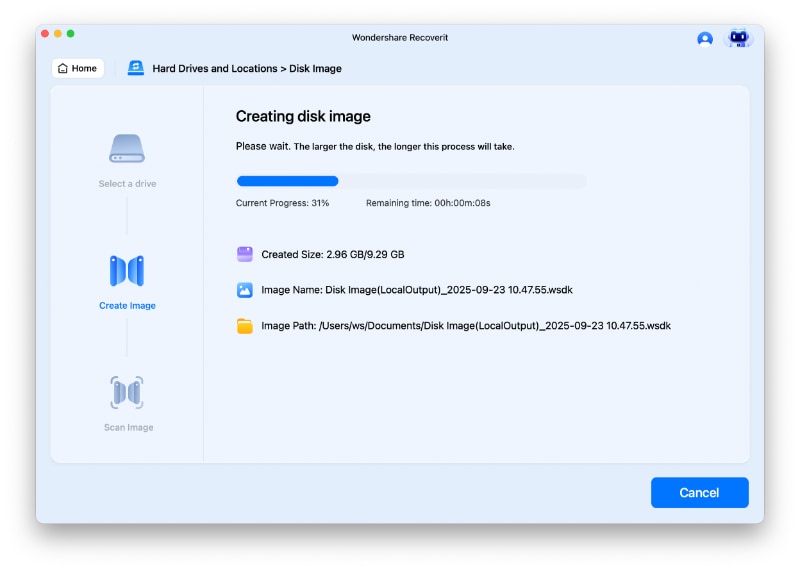
Recoverit will start the disk image creation process, and please wait some time until it finishes. Remember, the time may vary depending on the disk size.
A notification will appear on your screen when the creation is complete. You can see the details, like image size, name, path, and creation time.
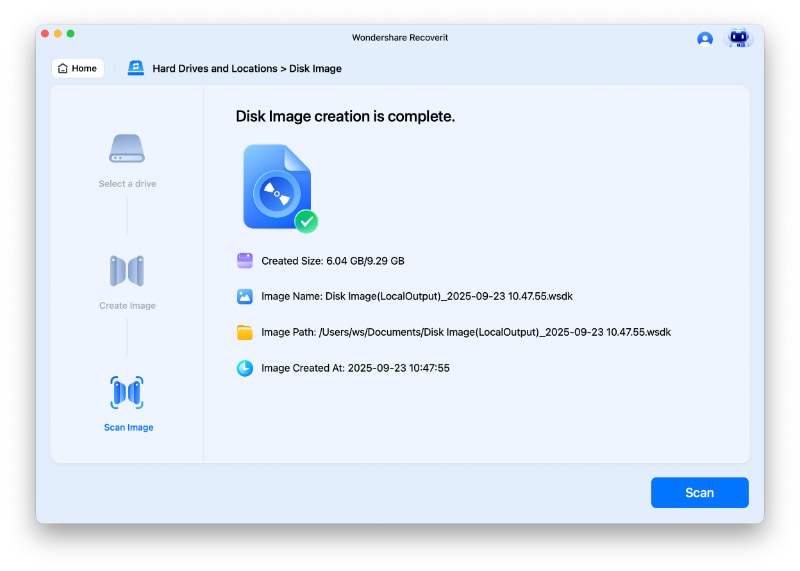
Now, tap the blue-colored “Scan” button, and Recoverit will start scanning the created disk image files.
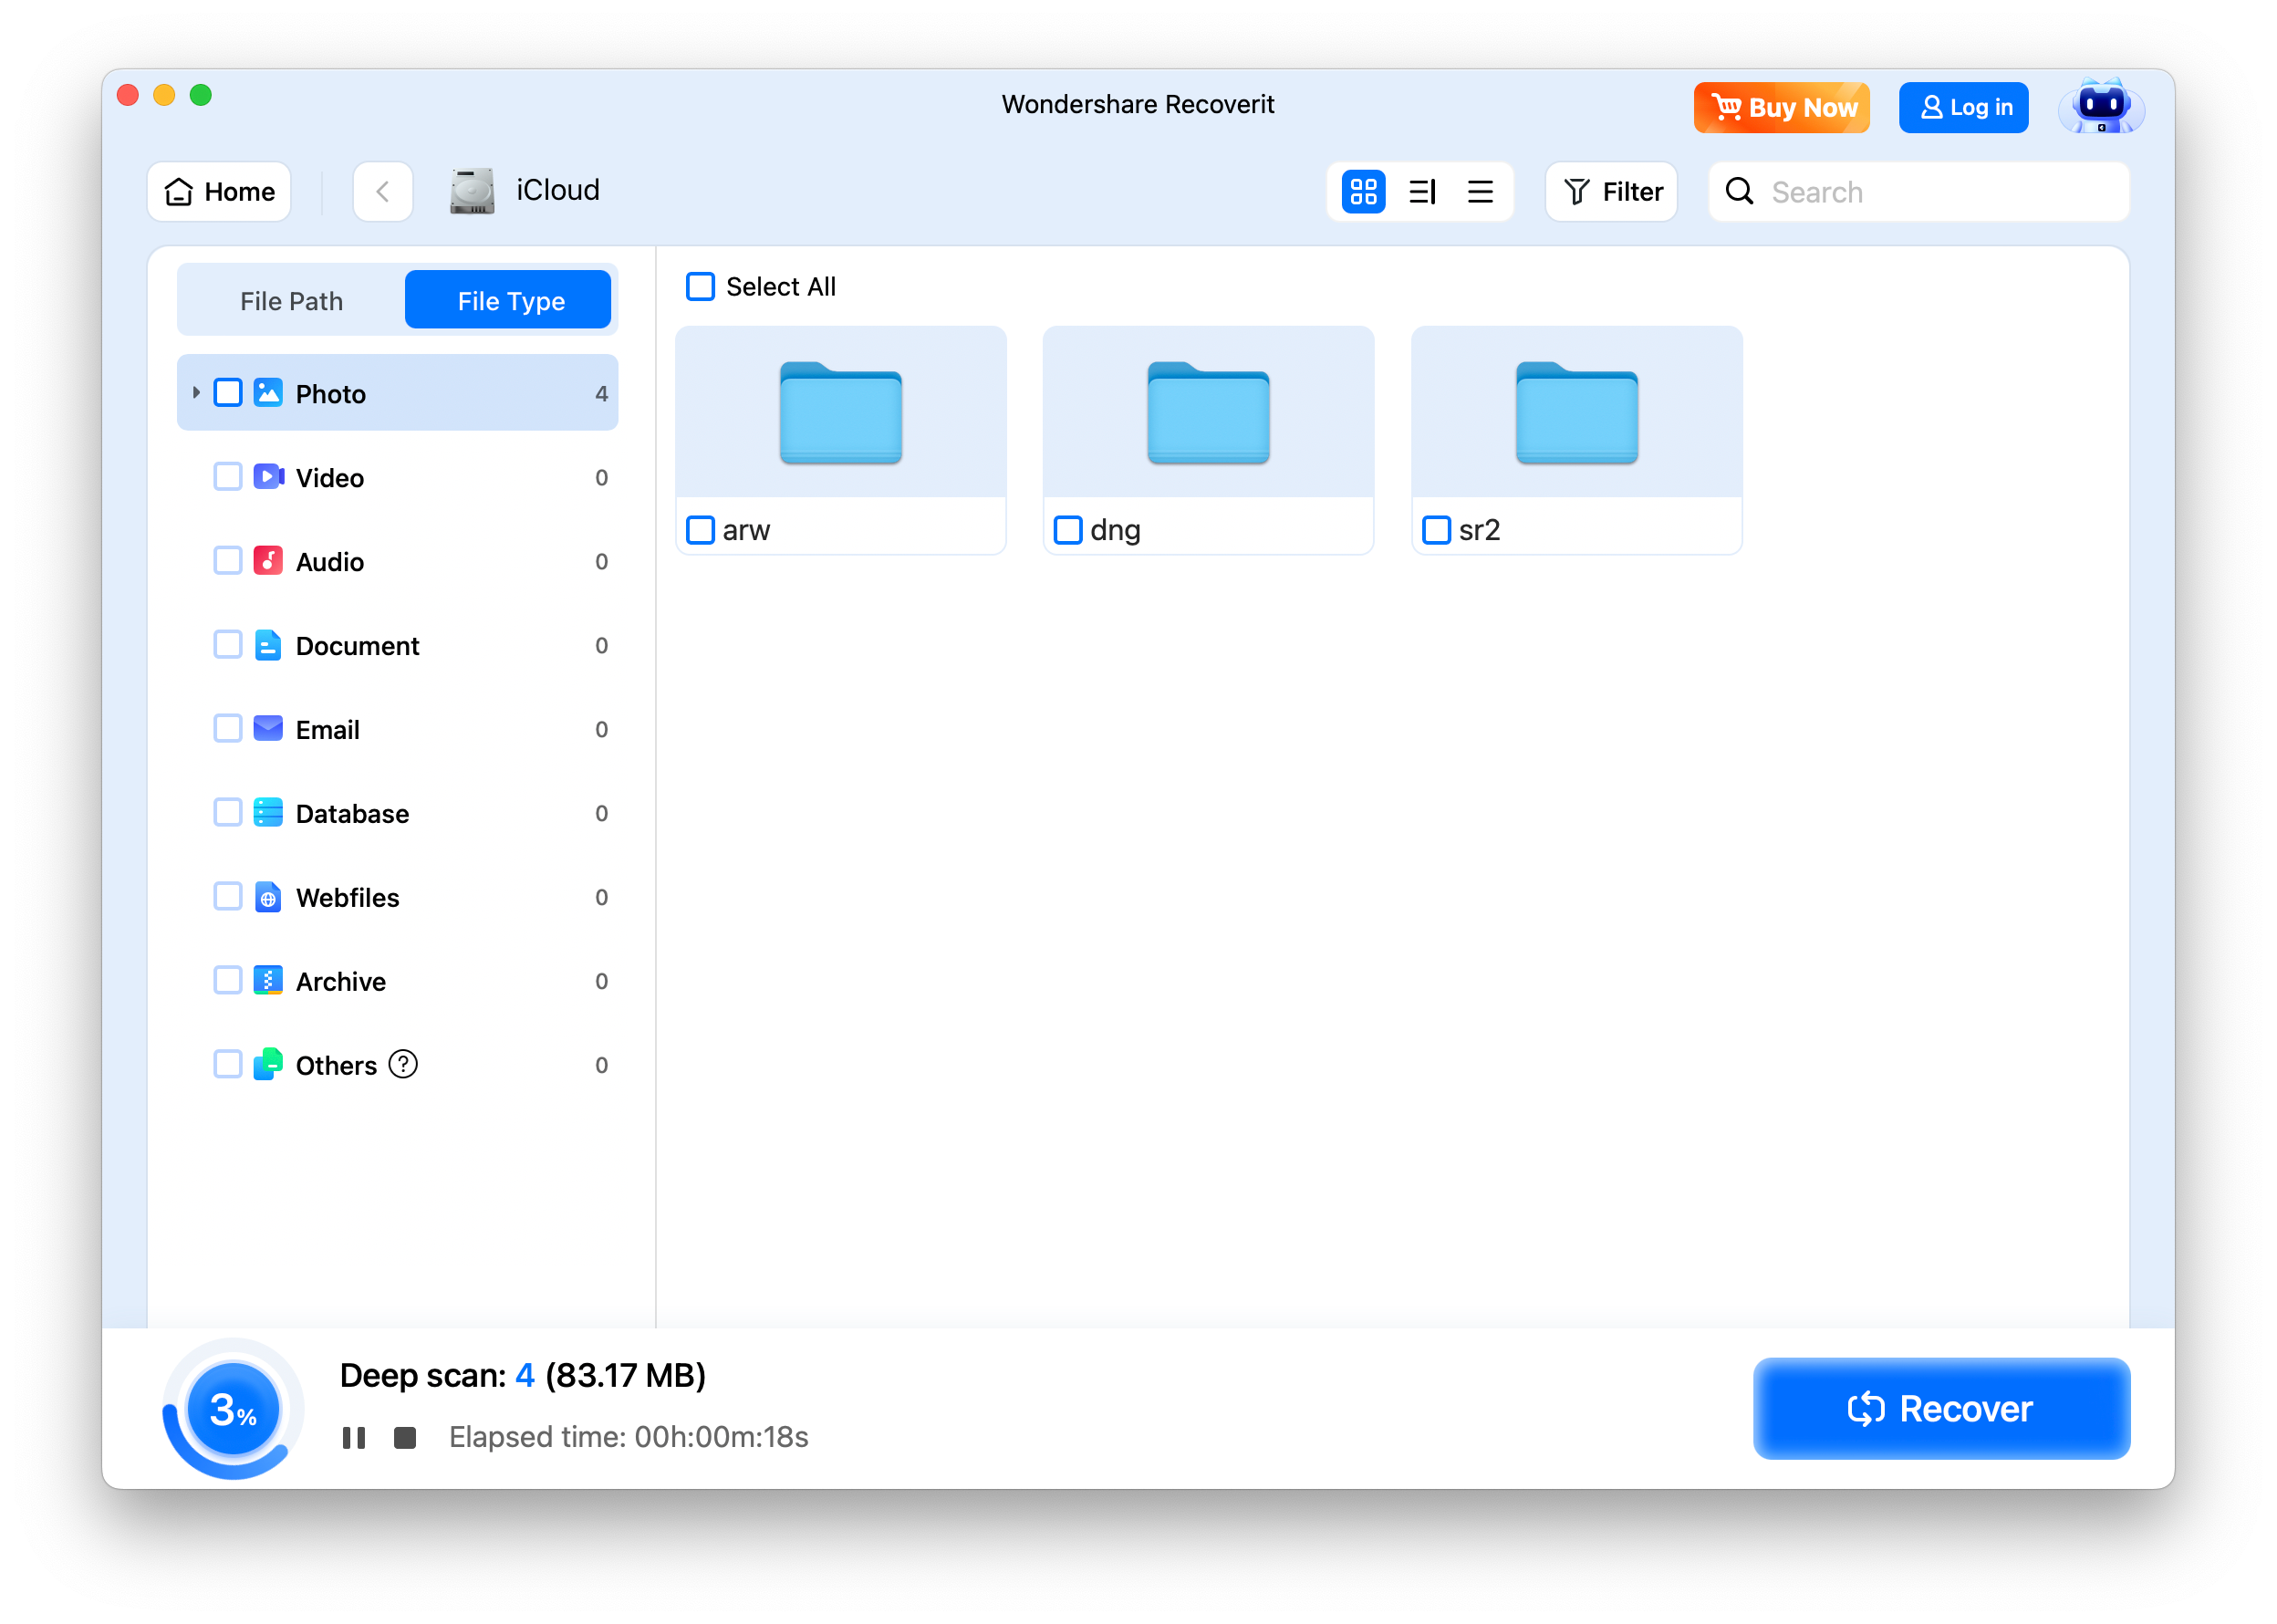
Step 3 Preview and Recover
You can see the scanning progress at the bottom of your screen. There is no need to wait for the scan to complete, and you can stop it at any time once you have found the correct file you wish to retrieve.
It is time to preview the files before you move toward recovering them. All you need is to tap on “Preview.”
Now, select a particular path to save your computer’s recovered disk image data files. Make sure the path you choose this time differs from where your files were deleted or lost.
The above steps will enable you to recover your data from the disk image in no time.
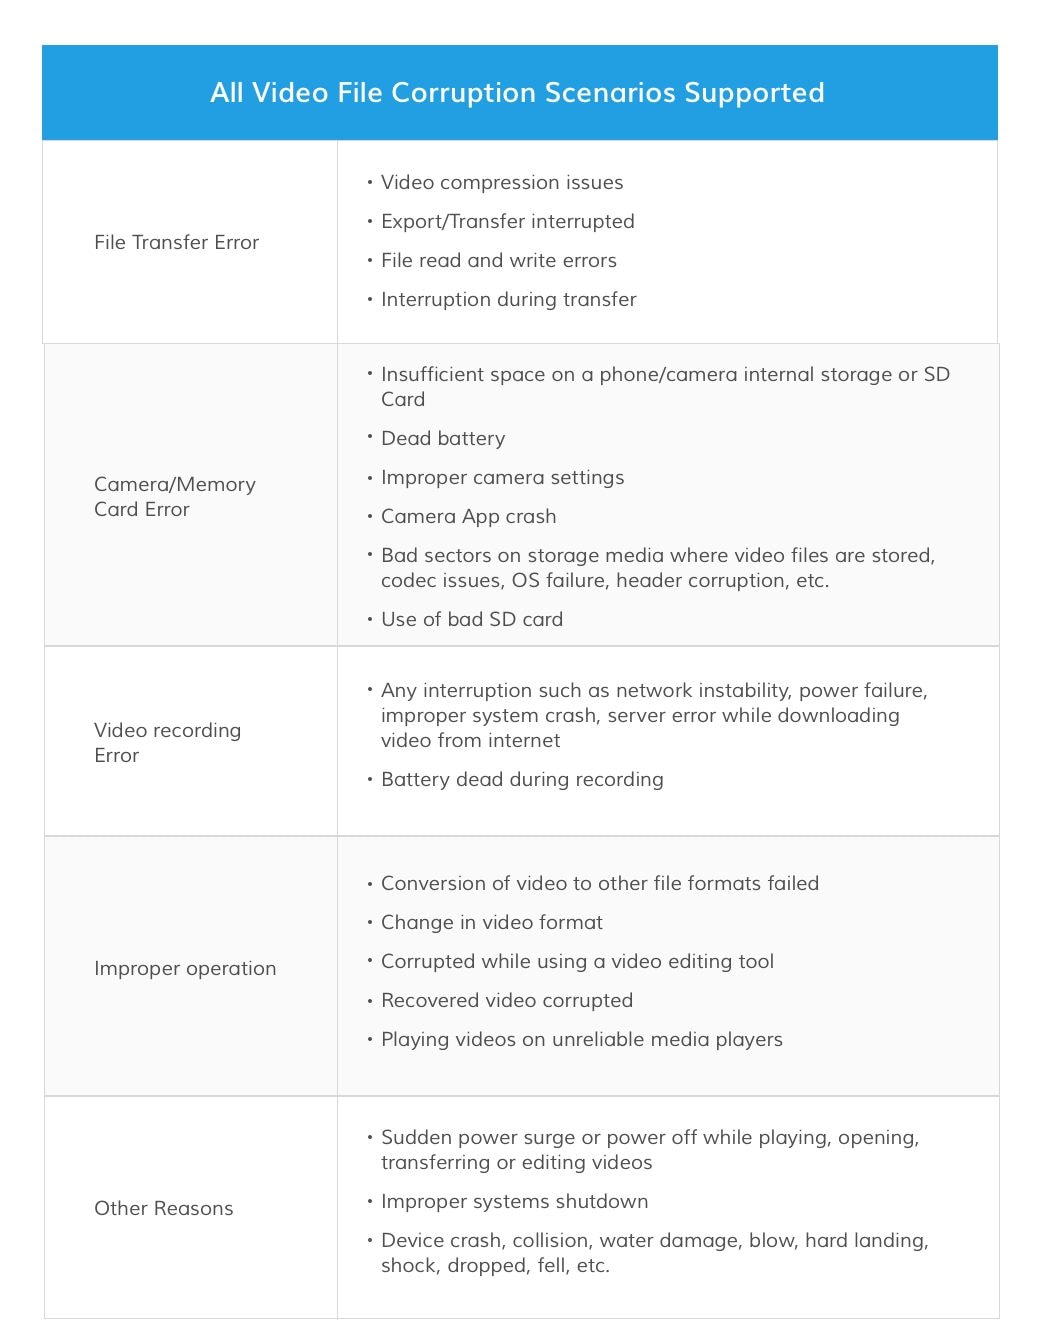
Repair Corrupted Files
Recoverit 14 for macOS transforms from a video-focused repair tool into a comprehensive digital content restoration suite. This major update delivers complete solutions for corrupted videos, photos, and documents while introducing advanced AI-powered photo enhancement capabilities specifically optimized for Mac users.
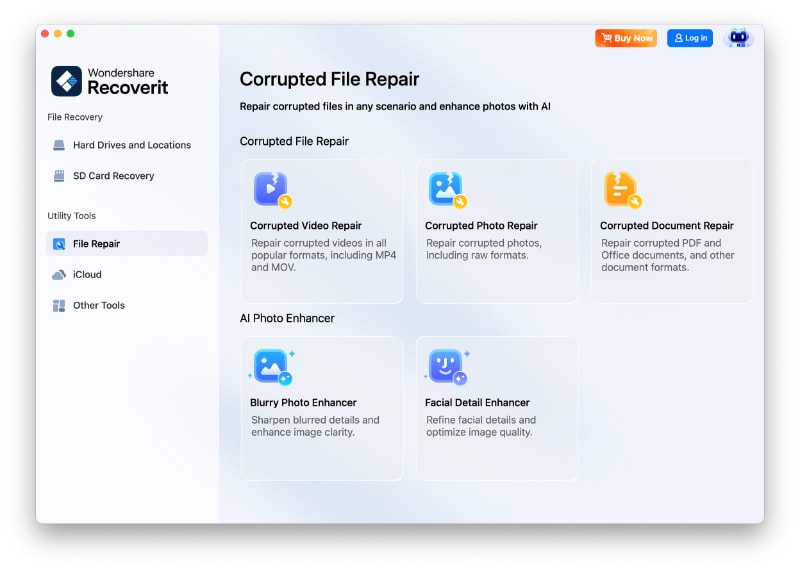
Building upon previous versions that handled only video file corruption, Recoverit 14 for Mac now includes:
- Video Restoration: Deleted files are only recoverable within 30 days unless backed up elsewhere.
- Photo Repair: Retrieving lost photos, videos, contacts, notes, and more from iCloud due to accidental deletion, sync errors, or corruption.
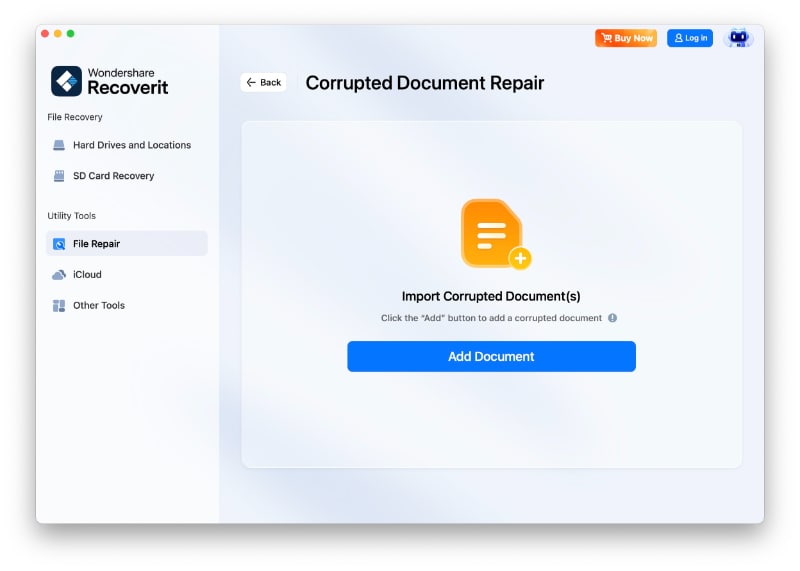
- Document File Repair: Restores damaged PDFs, Word documents, Excel files, PowerPoint presentations, and other office formats.

Recoverit 14 features a streamlined workflow that works consistently across all file types. Whether repairing videos, photos, or documents, Mac users follow the same three-step approach.
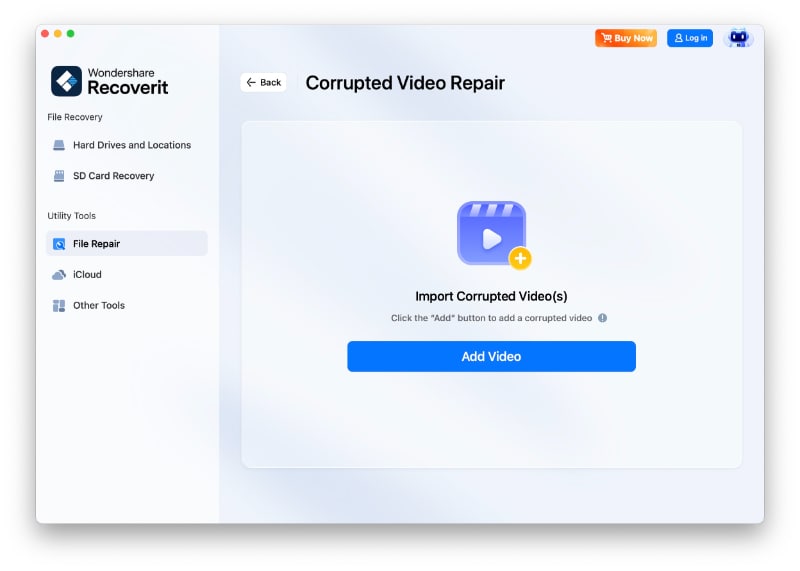
Step 1 Import Corrupted Files
Launch Recoverit 14 on your Mac and select the appropriate repair module from the left sidebar. Click "Add Files" (displayed as "Add Videos," "Add Photos," or "Add Documents" based on your selection) to open Finder and browse for your corrupted files. The application supports batch processing, allowing you to select multiple files simultaneously for efficient restoration.

Step 2Repair Corrupt Videos
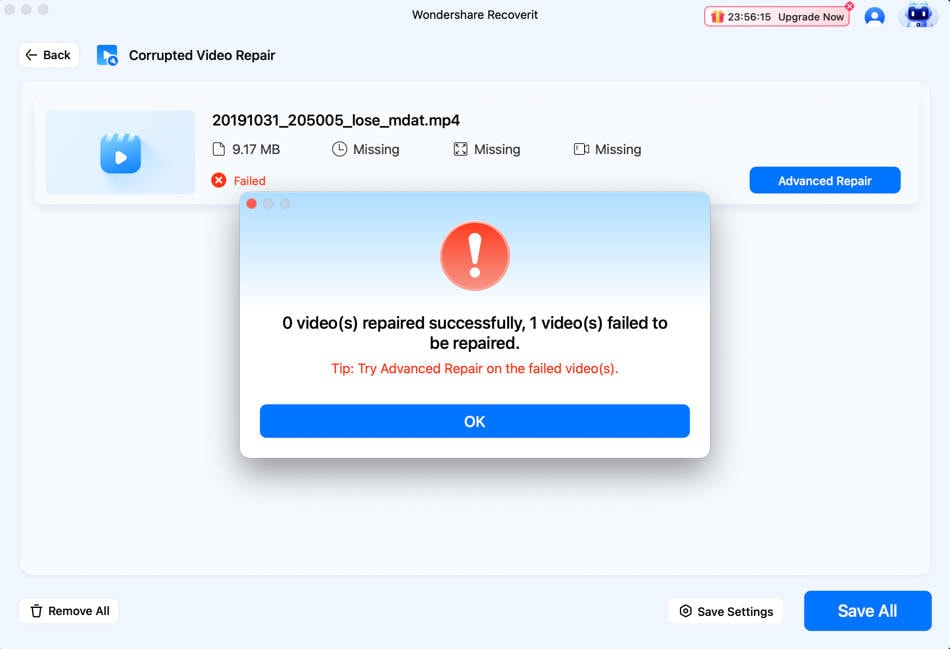
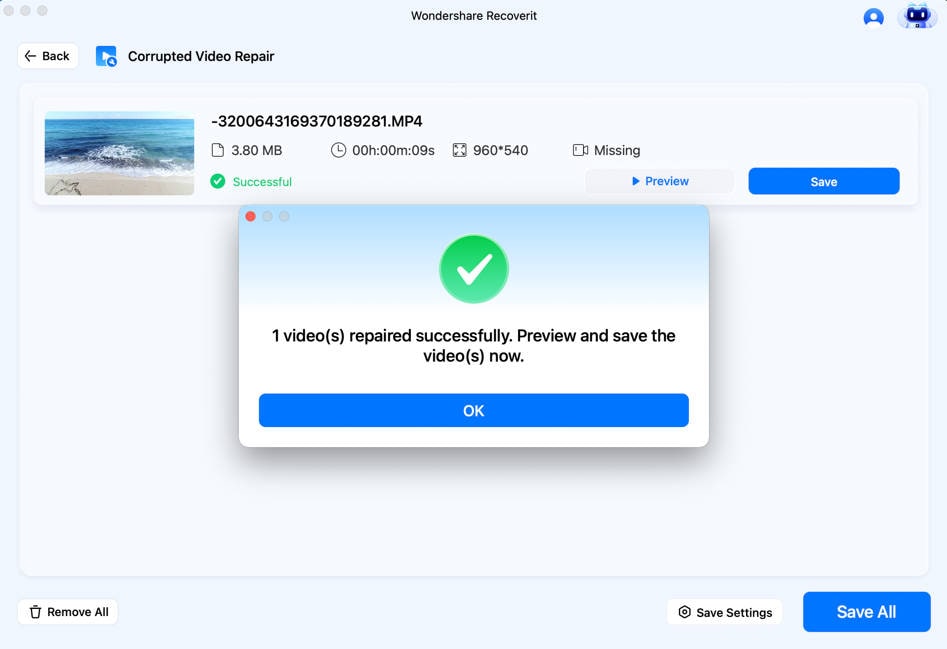
Click "Repair" to begin the restoration process. Recoverit 14 analyzes and reconstructs files using algorithms optimized for each file type. Monitor progress through the on-screen indicator, then use "Preview" to verify repair quality—play back videos, examine photo clarity, or review document content and formatting.

1 Preview the repaired video
Once the repairing process is completed, you can preview the results on the interface. Just click the Play button to prevew it.
2 Advanced repair (add a sample video)
When standard repair proves insufficient, select "Advanced Repair" and add a sample video—an intact file of the same format, ideally captured with the same device—to guide the enhanced restoration process and improve recovery success for extensively damaged files.
1 Add a Sample Video
To perform the advanced video repair, you need to first add a sample video to the application. The sample video should be of the same format as the corrupted video file and shot on the same device as well. The application will let you browse your Mac’s directory to add the sample video.

2 Repair Corrupted Videos
Once the sample video is added, just start the video repair process and wait for a while as the advanced repair might take longer to repair your video file.
Step 3Save the repaired videos
In the end, you can just preview the video repairing results on the interface and save it on the location of your choice. A browser window will be launched, letting you save the repaired videos to a secure location on your Mac or any other source.
AI-Powered Photo Enhancement Tools
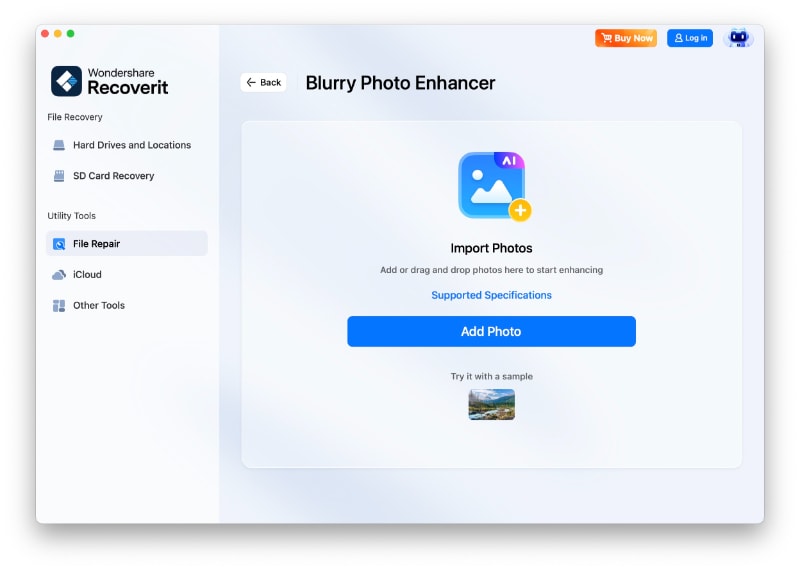
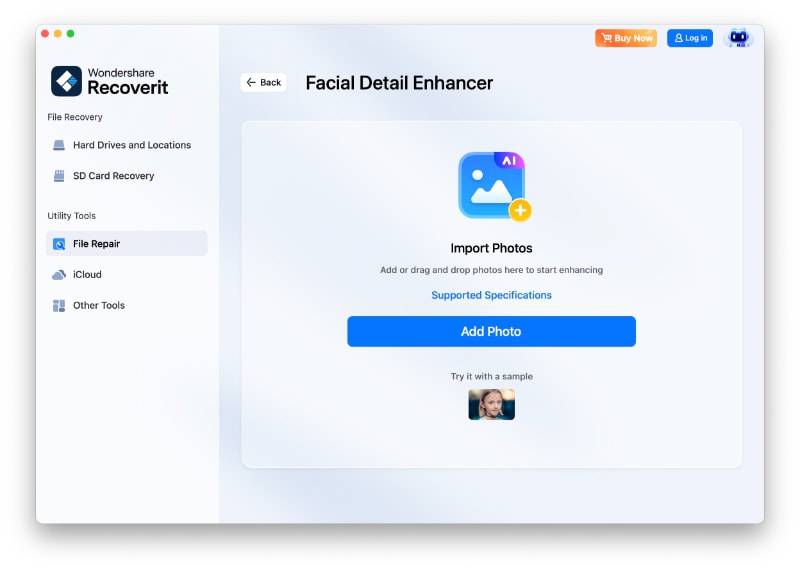
Within the Photo File Recovery section, Recoverit 14 introduces two sophisticated AI enhancement features:
- Blurry Photo Enhancer: utilizes machine learning algorithms to sharpen soft details and improve low-quality images. This tool intelligently reconstructs information lost due to camera shake, motion blur, poor focus, or low-resolution capture, transforming unusable blurred photos into clear, presentable images.
- Facial Detail Enhancer: specializes in portrait optimization, combining facial recognition with detail enhancement technology. It identifies faces within images and applies targeted improvements to facial features, skin texture, and overall portrait quality while preserving natural appearance.
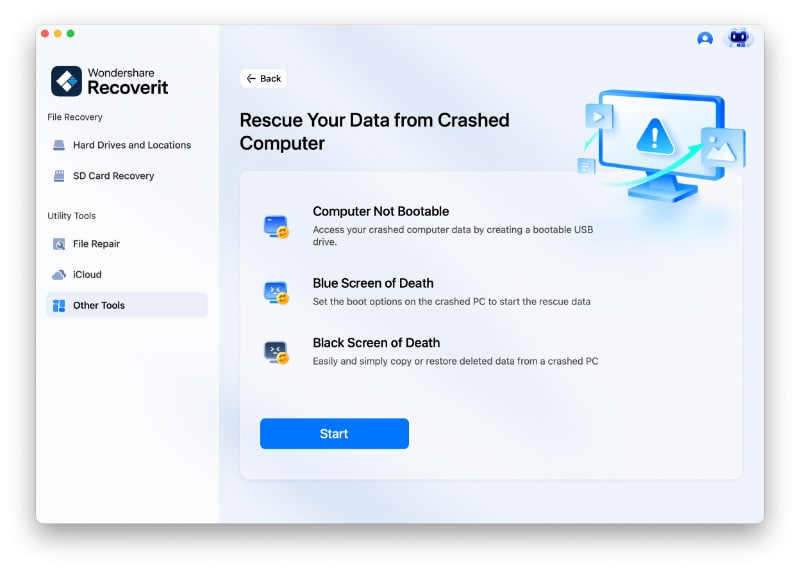
Recover Data from Crashed Mac
Mac computer is less vulnerable to system crash compared to Windows computer. However, it does not mean the Mac crash will never happen. To recover data from a crashed or unbootable Mac, you need to boot it up at first.
Step 1 Preparations for Mac Crash Recovery
- A blank USB flash drive
- A new computer that is working normally
- Connect the bootable media to the new computer
Step 2 Create a bootable media
To recover lost data on a crashed Mac, you have to use Recoverit to create a bootable drive for starting the Mac up. The below steps can help you do that.
1 Select Mac Crash Recovery
The first step is to launch the data recovery software on the new computer and choose "Recover from Crash Computer" under the last tab. Click "Start" to go on.
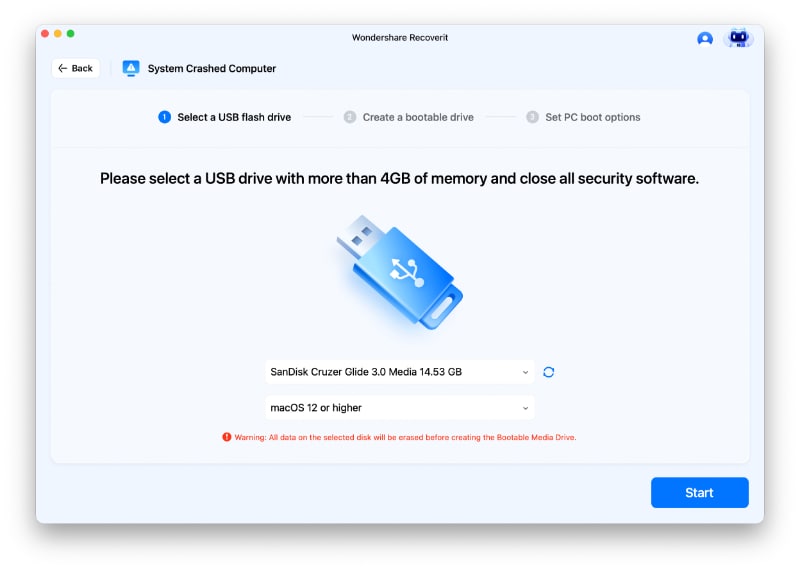
2 Select a USB drive
Recoverit can be used to create a bootable media to help you extract data from a crashed system.
Please insert a USB drive to create a bootable media drive. Once you connect it to your working computer, it will show in the drop-down box. Insert more than one external drive? Click the arrow to view the drop-down menu and choose a blank one. Click "Start" to go on.
3 Backup and format data
To ensure enough space on the USB drive, it will be formatted, and thus, all the data present on it will be wiped. So back up important files in advance.
Click "Format" and the next interface will show you the procedure for formatting the USB drive.
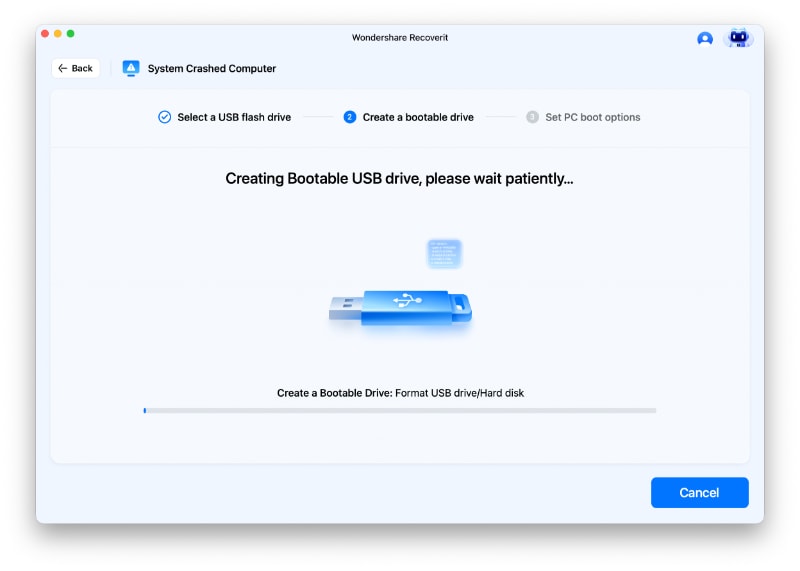
4 Creating the bootable media
After the drive formatting, Recoverit starts creating the bootable media drive on Mac. During the process, do not remove the USB flash drive out of your Mac computer.
5 Finish creating bootable media
Usually a few minutes later, the bootable USB flash drive will be created. Then there will be a guide for you to boot your crashed Mac.
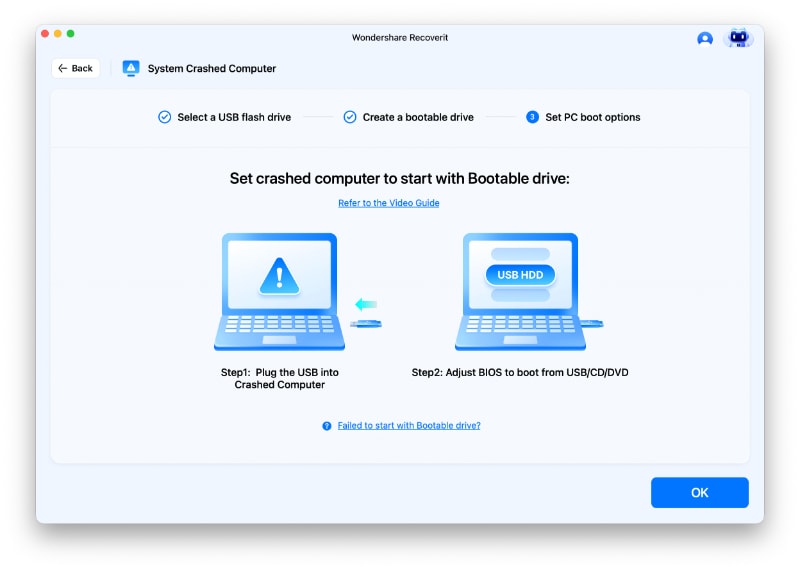
6 Boot crashed Mac from USB flash drive
- Plug in the bootable media drive to the unbootable Mac.
- Press and hold the Option key when restarting the computer.
- Select Recoverit Bootable Media Drive when it appears.
Step 3 Recover data from crashed Mac
- After finishing the above steps, select files to copy.
- Connect a good hard drive to the crashed Mac.
- For the destination, choose the hard drive you connect, and click “Start Copy” button. Then the screen shows the process of copying data from the crashed Mac to the hard drive.
- When the copying process is finished, it will show “Copy files completed!”.
Recover Data from NAS Server (Mac)
Malware infection, power failure, OS errors, overheating, and accidental formatting are the top reasons why you lose your sensitive data from NAS devices. No matter what the scenario is; the Wondershare Recoverit NAS Recovery feature helps you get out of this trouble remotely without unplugging NAS hard drives. This feature is highly compatible with Iomega StorCenter, BTRFs-based NAS servers, LaCie, QNAP, Netgear ReadyNAS, Western Digital, and other similar NAS devices.
Step 1 Choose the “NAS Recovery” Mode
Launch Recoverit once you download and install this software on your system. Go to the left bar from the main interface, look for Other Tools, and enter this mode to find Nas and Linux. It is time to search for NAS devices. For this, tap on the “NAS Recovery” - a blue-colored button at the bottom of the Recoverit window.

Step 2 Connect Your NAS Device
As soon as the search gets completed, you will see the detected NAS devices on your screen. They will be displayed under the “NAS Servers” section.
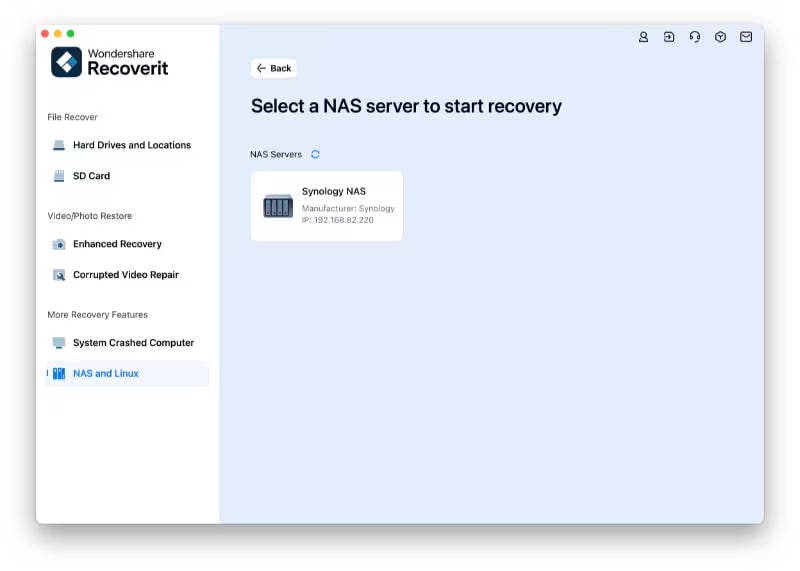
Tap on the desired NAS device you want to recover lost or deleted files.
Now, provide your IP and Port along with your User Account and Password to remotely connect your NAS device. After providing the requested information, click on the button - Connect - to proceed.

After the connection is established, an automatic scan will get enabled to search for the lost data in the selected NAS device.
In case you failed to connect the NAS server, you can go to Solutions For NAS/Linux Connection Failed Issue to find the desired solution.
Step 3 Scan and Recover
Wait until the scanning gets completed. To see the scanning progress, you can look at the bottom bar of the software screen.
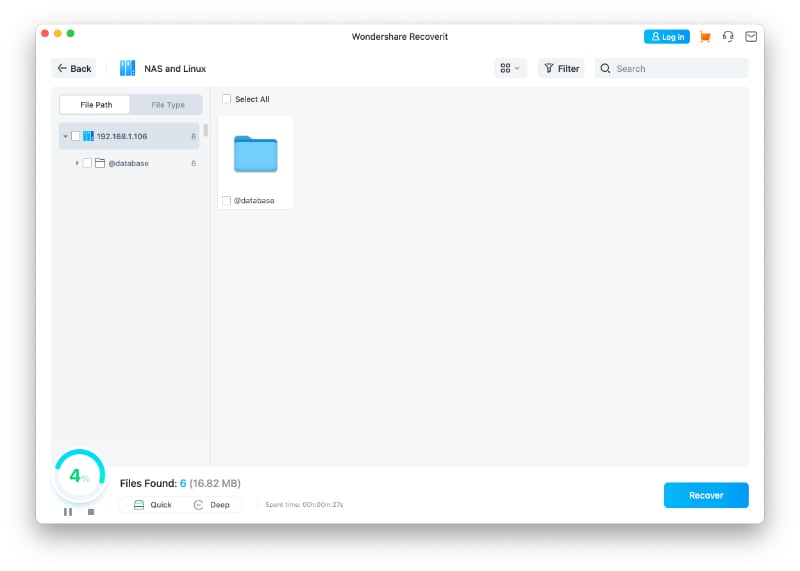
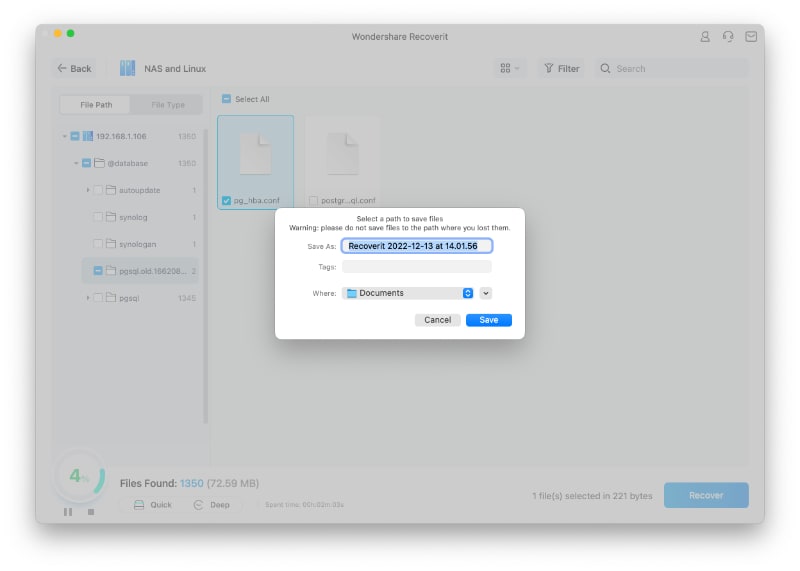
Now, tap on the “Preview” option to view the files before restoring them. It allows you to verify whether Recoverit has found the right file for you. Once you are satisfied, hit the “Recover” button, and the program will start restoring your data.
Now, select a new location (compared to the one where your sensitive data was lost or deleted) to save the restored stuff.
Have you followed all the above-listed steps carefully? Congratulations! Your lost data is back.
Recover Data from Linux Computer (Mac)
Though Linux is an incredible operating system for professionals, it is vulnerable to data loss. There is where Wondershare Recoverit comes in to swim your worries away. It is an efficient Linux data recovery tool that performs smooth scanning and ensures precise recovery of Linux data files. It offers great support for the Ext4 file system. Within 3 simple steps, Recoverit restores your damaged or lost data.
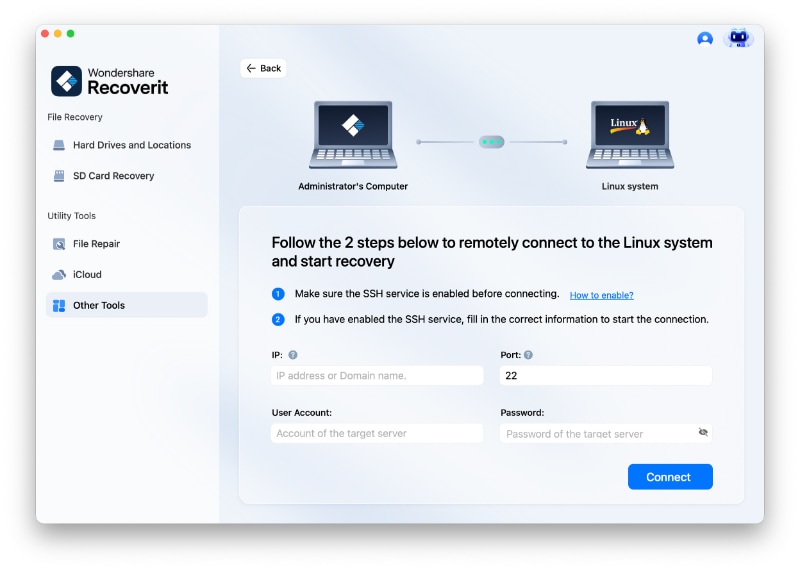
Step 1 Choose the "Linux Recovery"
Download Recoverit, install, and open the software on your system. You will see the below window on your computer’s screen. Go to the left pane and click on “NAS and Linux." Press the button "Linux Recovery."
Step 2 Connect Your Linux Computer
Put IP, Port, User Account, and Password in the respective sections to establish a connection remotely. Right after providing the desired information, press the “Connect” button at the bottom-right corner of the window.
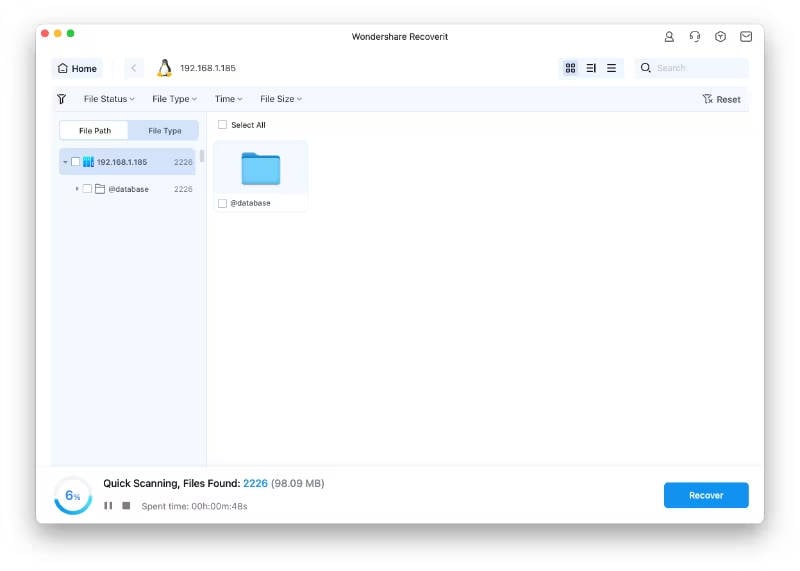
Wait for a while until a connection is successfully established. Once done, automatic scanning will be started to find the data files you lost earlier.
Step 3 Preview and Recover Lost/Deleted Files
Again, wait until the program finds you deleted or lost files. The scanning time may vary depending on the data size you wish to get back on your Linux computer. You can look at the bar at the bottom to view the scanning progress (45% in this case). You don’t have to wait for the complete scanning; instead, you can pause it anywhere in the middle as soon as Recoverit finds the file you want to restore.
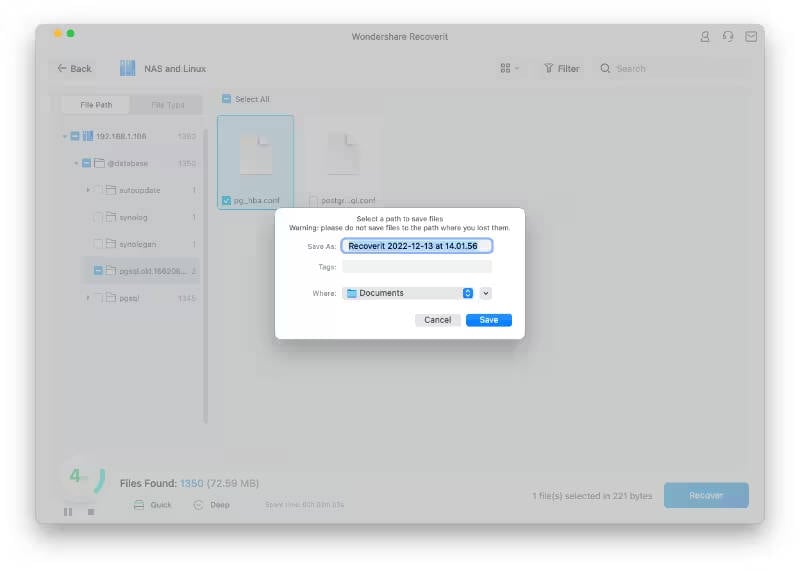
Now, you will be able to preview the data files before you recover them. This feature sets Wondershare Recoverit apart. If you have previewed the right stuff, it is time to hit the “Recover” button.
Now, browse and select the path to save the restored data, and click the “Recover” button. Doing this will help you save the recovered files on your Mac computer. Don’t forget to select a different location compared to where the files were lost.
Enhanced Recovery: Get Your Lost or Damaged Photos/Videos/Documents Back on Mac
Are you worried about recovering your lost or damaged videos/photos/documents on your Mac? Recoverit “Enhanced Recovery” will surely lend a helping hand. Quick and deep scans help you recover data from all storage devices, including Seagate, Sony, SD Card, GoPro, DJI, etc.
Due to the large sizes, the drives store HD videos in different fragments. Usually, data recovery tools only restore fragmented videos, which is annoying. The Enhanced Recovery feature helps Recoverit collect different fragments and match them all to recover a full video. It supports HD, UHD, 4K, and 8K video recovery.
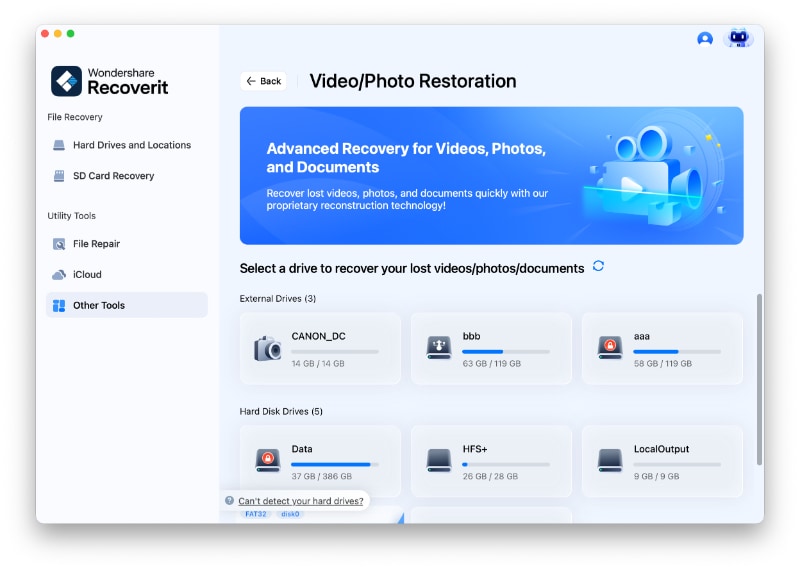
Step 1 Select “Enhanced Recovery” Mode
Open Wondershare Recoverit once it is downloaded to your system. Click on the “Enhanced Recovery” feature on the left side of the main interface.
You will see both external drives and hard drives on your computer’s screen. Select the right drive where you lost your photos or images.
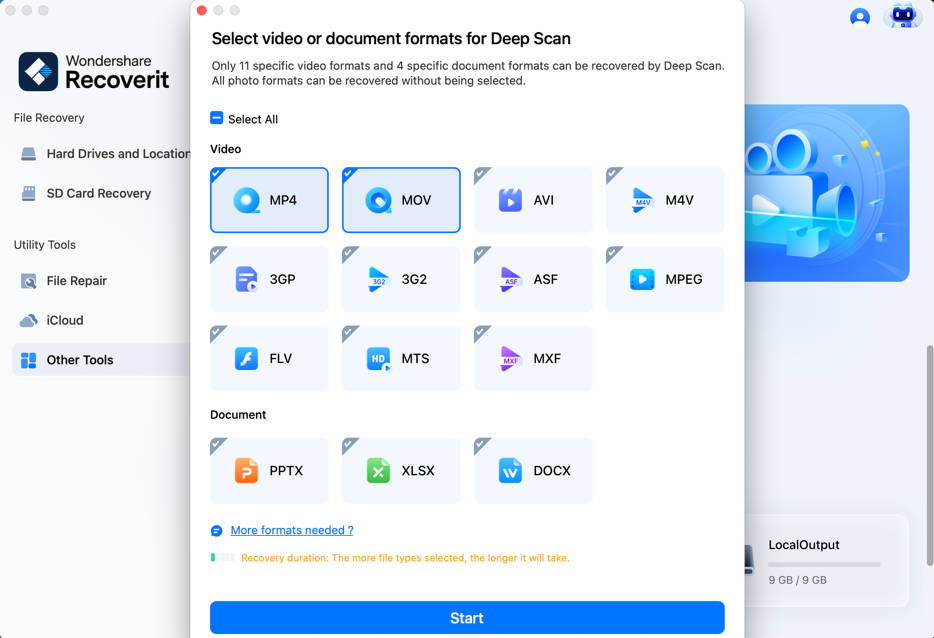
Now, choose the desired file format to restore your videos/photos/documents on Mac.
- Recoverit will consider MP4 and MOV as the default file formats.
- The scanning time will increase if you select more formats.
Right after you select the desired format, click the “Start” button.
Step 2 Complete Quick and Deep Scan
Recoverit will perform “Quick Scan” and “Deep Scan” to locate your lost or damaged videos/pictures. Quick Scan performs scanning for all files and renders source files only (e.g., video fragments). At the same time, Deep Scan scans the selected format to collect and match all fragments to ensure full video recovery; therefore, it takes a bit longer than Quick Scan.
You will be able to see the scanning progress at the bottom of the Recoverit screen. The image below shows 45% scanning has been done so far. If you find the desired files you wish to restore before the scanning is completed, you can stop it over there.
Don’t forget to preview the scanned data before recovering. Doing this makes sure you restore the right videos/photos on Mac.
Step 3 Preview and Recover
Here, you can preview photos or videos you lost earlier. It is time to mouse over the thumbnail and tap on the “Preview” button
 . It will enable you to preview the data you want to get back.
Remember, you can preview videos of up to 30 seconds only, whereas there is no limit to preview photos.
After previewing your video/photo, the next step is to recover it. For this, click the “Recover” button, and it will help you restore your data. Now, browse your computer to select the location and save the restored photo/video.
We highly recommend you save the recovered file in a different location than the one it was damaged or lost. Give the Recoverit “Enhanced Recovery” feature a try today. You will be happy to see the outcomes.