
Disk Partition Manager for Windows

What Can UBackit Partition Manager Solve?
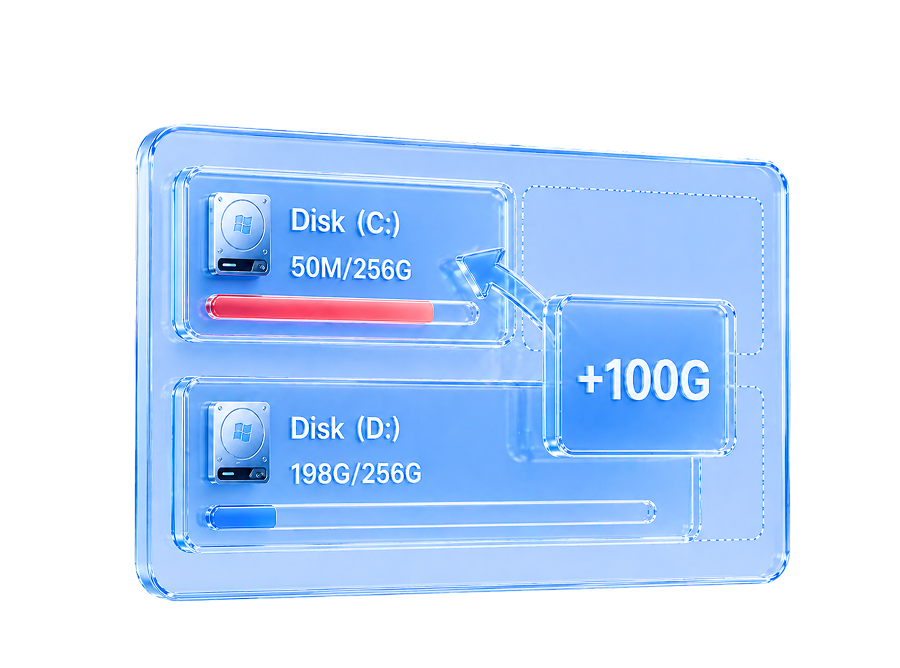
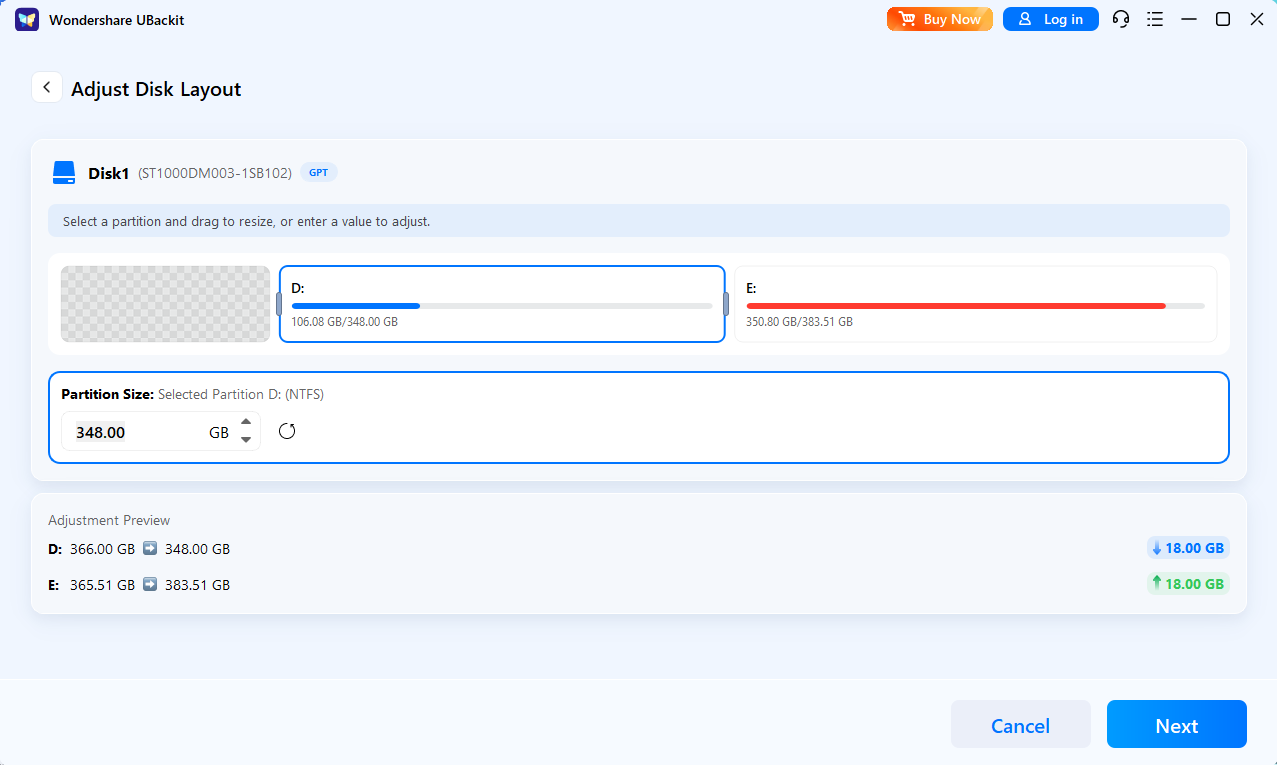
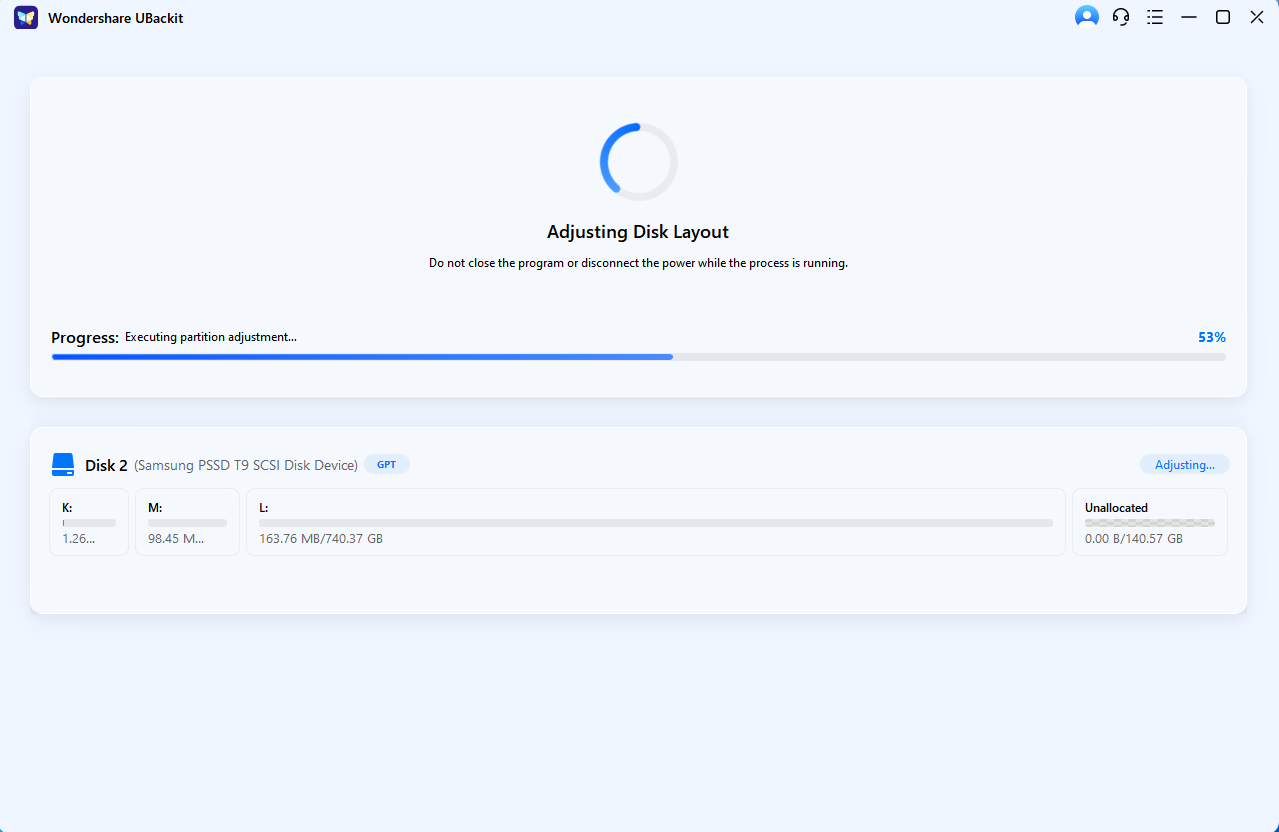
Partition Management
Resize and reallocate partitions to optimize disk layout and resolve low space issues without losing data.
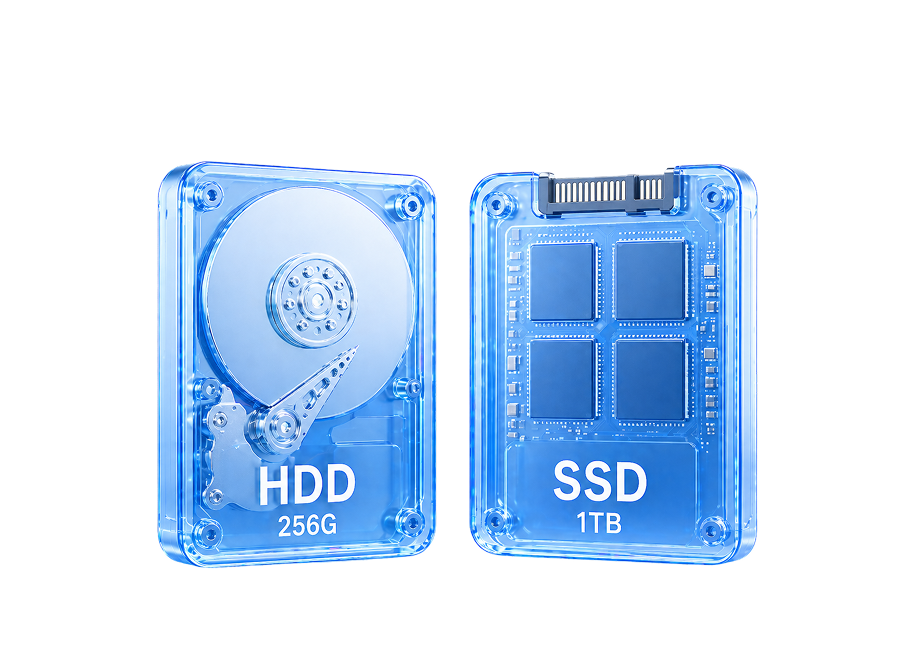
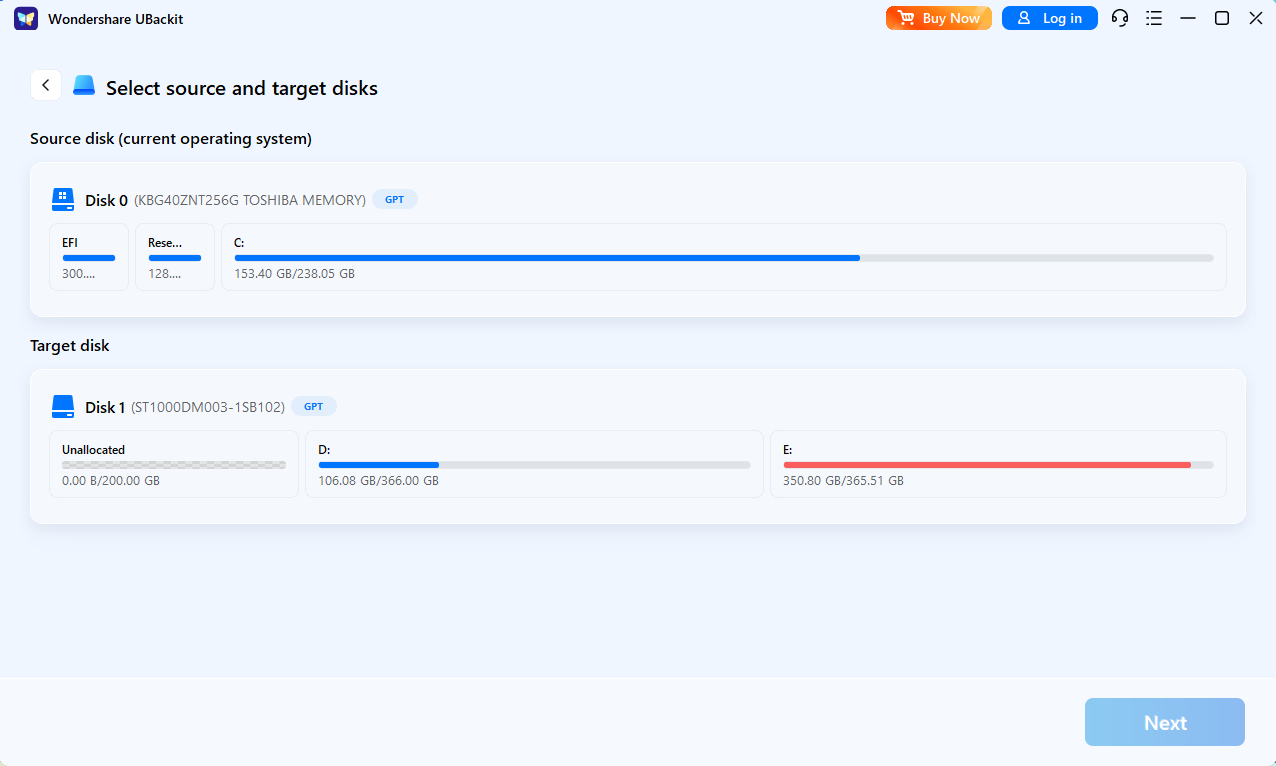
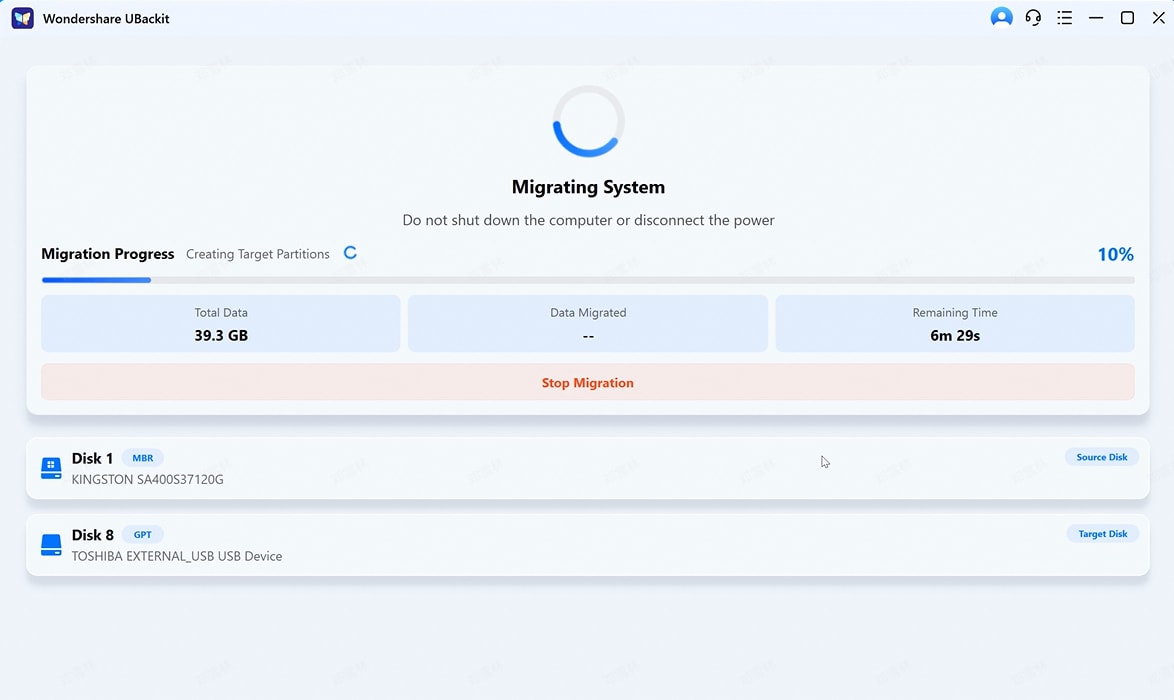
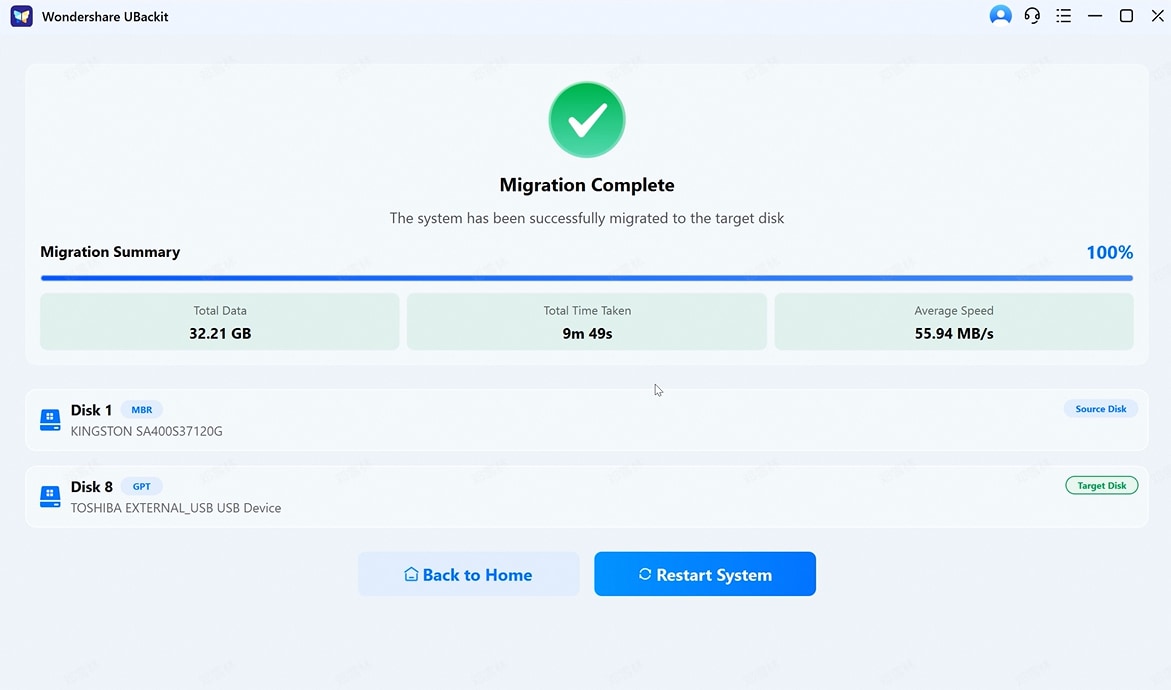
System Migration
Migrate the operating system to an SSD or larger drive for seamless hardware upgrades without reinstalling Windows.
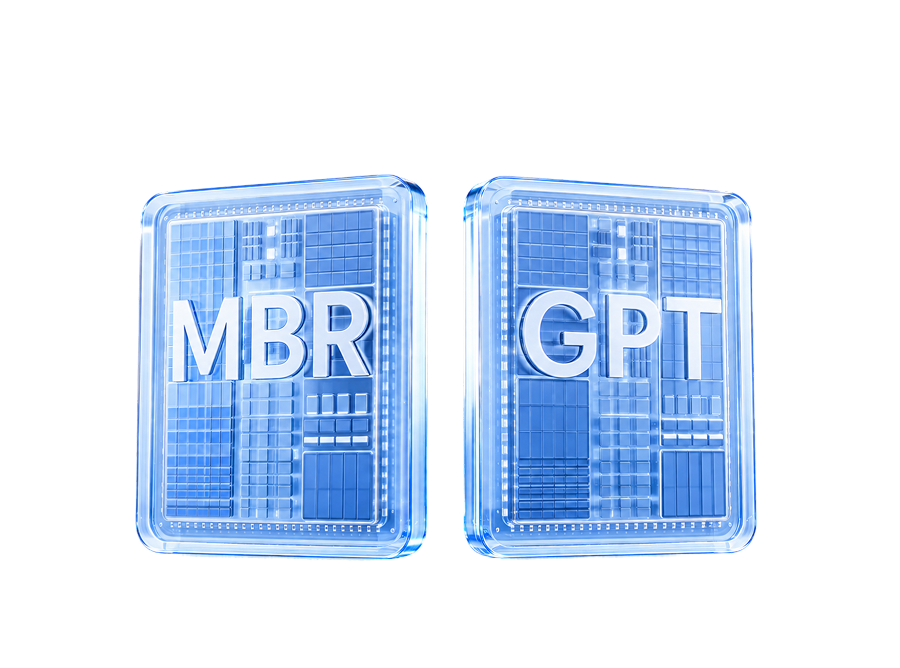
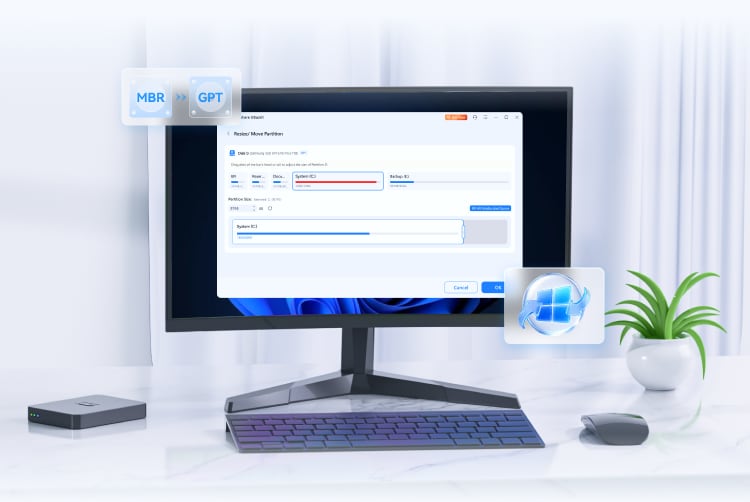
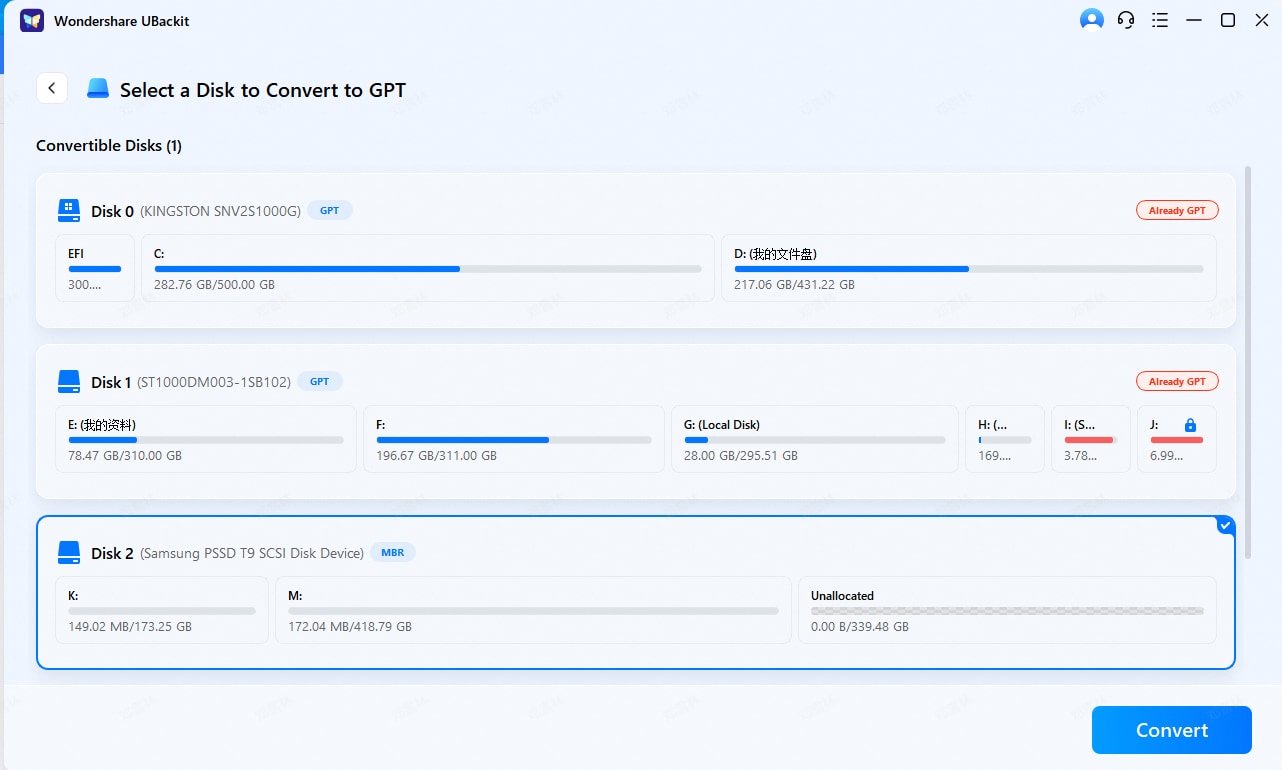
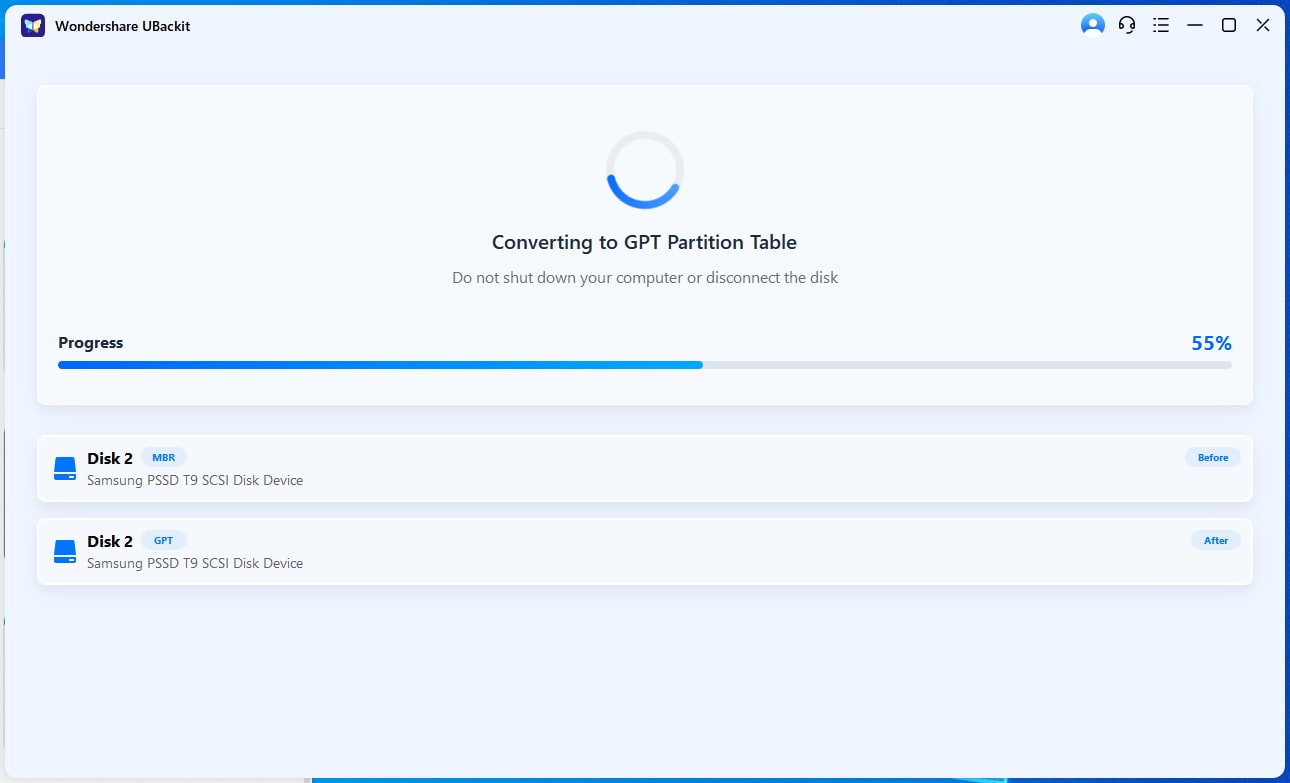
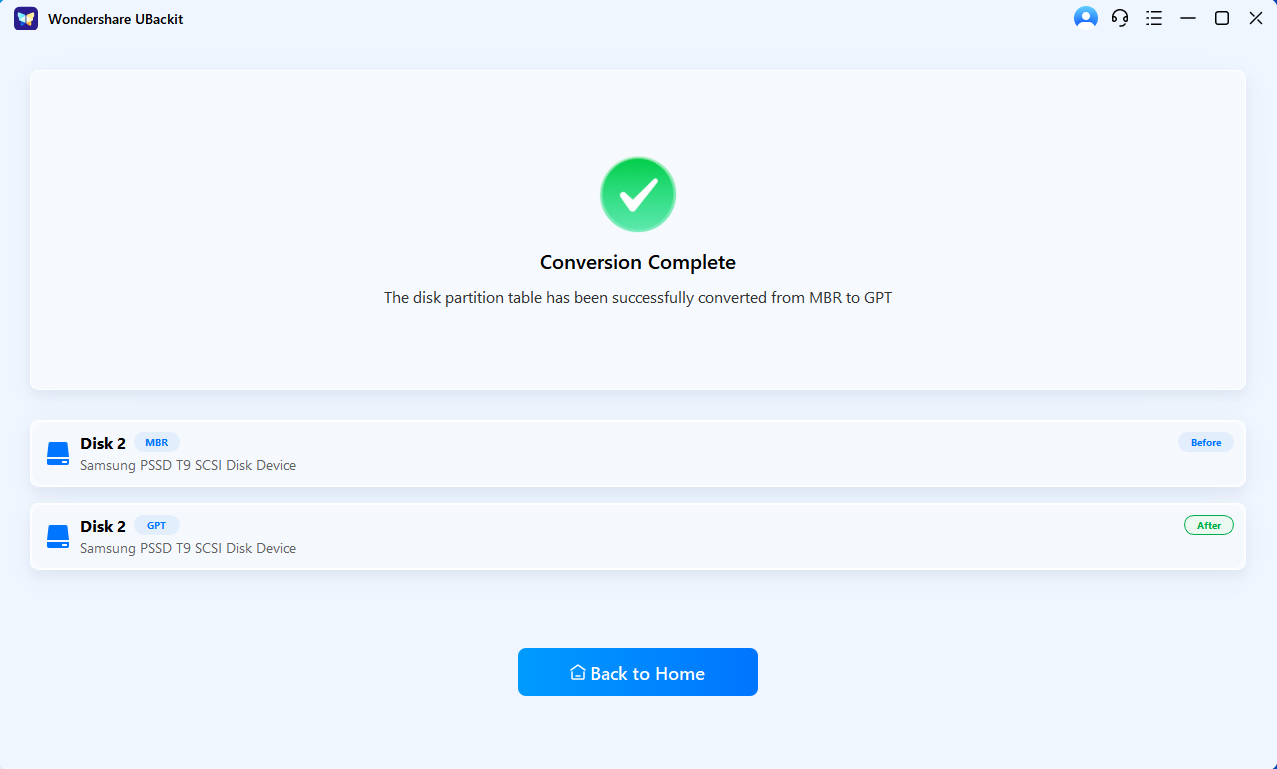
Converter MBR to GPT
Convert disk from MBR to GPT without data loss to meet UEFI and Windows 11 startup requirements.
Partition Management
Resize and reallocate partitions to optimize disk layout and resolve low space issues without losing data.
System Migration
Transfer your Windows system to a new SSD or larger drive seamlessly without data loss.
Converter MBR to GPT
Convert disk partition table from MBR to GPT to meet Windows 11 and UEFI boot requirements.
Common Scenarios for
Disk Partition


Expand the C drive to resolve low disk space issues and ensure smooth system performance.

Reallocate unused or unallocated space to improve overall disk utilization and organization.

Migrate data or system from HDD to SSD for faster performance and improved responsiveness.

Migrate your system or data to a new drive when the original disk shows signs of aging, errors, or potential failure.

Convert disk partitions and optimize layout to meet GPT and UEFI requirements for Windows 11.

Convert partition style and manage disk space to fully utilize large-capacity drives beyond 2TB limits.


Key Features for Disk Partition Manager
Partition Management: Optimize Disk Space with Ease
Reallocate and adjust disk space without deleting data or reinstalling the operating system. Improve disk layout and resolve low disk space issues efficiently.
- Resize partitions (extend, shrink, or reallocate space) with flexibility
- Allocate unallocated space to any target partition
- Optimize overall disk layout for better space utilization
- Perform all operations without deleting partitions or losing data
System Migration: Upgrade Your Drive Without Reinstalling Windows
Migrate your entire Windows system to a new SSD or larger hard drive without reinstalling the OS, applications, or changing your workflow.
- Automatically detect the current system disk and boot structure
- Migrate Windows OS and all critical boot partitions completely
- Ensure the new drive is fully bootable after migration
- Support system transfer to SSDs or larger capacity drives
Conversion: Convert MBR to GPT Without Data Loss
Upgrade your disk from MBR to GPT without formatting or reinstalling the system. Meet Windows 11 and UEFI boot requirements and securely.
- Automatically detect the current partition style (MBR or GPT)
- Convert MBR to GPT without wiping data
- Ensure compatibility with UEFI boot mode
- Prepare your system for Windows 11 upgrades and modern hardware
Why Choose Wondershare UBackit
| Feature Description |
|
EaseUS Partition Master | 4DDig Partition Manage | Minitool Partition Wizard |
|---|---|---|---|---|
| User Experience | Easy to Use | User Experience | Easy to Use | Relatively Complex |
| Resize / Move / Extend Partition | ||||
| Clone Disk | ||||
| Migrate OS to SSD/HDD | ||||
| Convert MBR to GPT | ||||
| Supports 10 Major Motherboard Brands | ||||
| Estimated Operation Time / Progress | ||||
| Feedback Channel | ||||
| Smart Customer Support / AI Support | AI Assistant + Customer Support | AI Assistant + Customer Support | None | None |
| Data Integrity | High Integrity | High Integrity | Medium Integrity | High Integrity |
| Success Rate | High Success Rate | High Success Rate | High Success Rate | High Success Rate |
| Download & Installation Convenience | Easy Download Access | Complicated Download Process | Easy Download Access | Complicated Download Process |
| Pricing | $15.99/month | $29.95/month | $18.95/month | $59/year |
| Number of Licensed Devices | 2 Devices | 1 Device | 1 Device | 1 Device |
Supported OS:
Windows 11, Windows 10, Windows 8.1, Windows 8, Windows 7, Windows Vista, Windows XP
Supported File Systems
NTFS, EXT2/3/4, FAT12/16/32, ReFS, exFAT
Supported Storage Devices
HDD: Parallel ATA (IDE), Serial ATA (SATA), External SATA (eSATA), SCSI, IEEE 1394 (FireWire)
SSD: SATA SSD, M.2 SSD, NVMe SSD, Large Capacity Hard Disk(GPT and MBR Disk)
Removable Devices:
USB 1.0/2.0/3.0, flash drive, memory card, memory stick etc.
SCSI, IDE and SATA RAID Controllers, RAIDed Configurations (Hardware RAIDs)

Partition Manager FAQs
Can I migrate Windows to SSD without reinstalling?
Can I resize partition without losing data?
How do I extend the C drive?
Can I convert MBR to GPT without data loss?
What should I prepare before cloning a disk?
What should I prepare before resizing a partition?
Will OS migration transfer the whole disk or only system files?
Hot Topics
Comprehensive How-to Guides
Want to learn more about Partition Recovery?