What Command That Can Be Used to Manage Hard Drives, Partitions, and Volumes
After encountering a hard-drive related issue on Windows, the majority of users turn to Disk Management Tool for a solution. While it can help you in several situations, Disk Management isn't as powerful and as effective as Diskpart, a utility that can help you fix a wide variety of hard-drive/volume partition related problems.
Diskpart is an extremely useful utility that uses a special set of commands to perform a specific operation on your hard drive. So, in today's guide, we've answered the most common query regarding Diskpart, i.e., What command that can be used to manage hard drives, partitions, and volumes.
Creating a Partition Using Diskpart
The most basic operation you can make on a hard-drive is to create different partitions on a clean hard-drive. Whether you've recently formatted the Windows built-in hard-drive or want to create partitions in an external hard-drive using Diskpart Create Partition command.
Step 1 - Press "Windows+X" and click "Windows Powershell (Admin)".
Step 2 - Type "Diskpart" to launch the Diskpart tool on Windows.
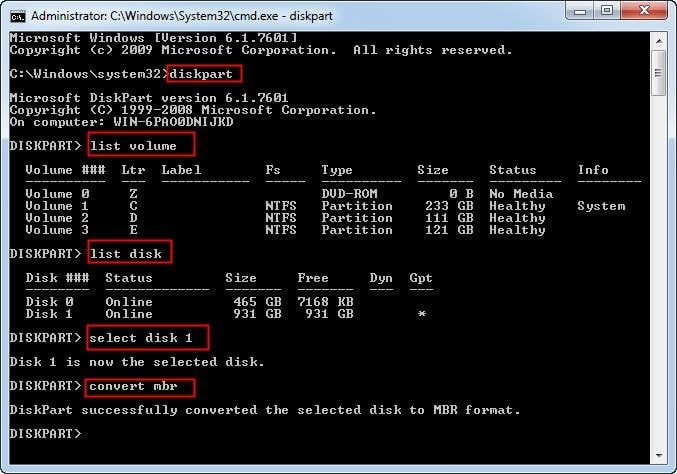
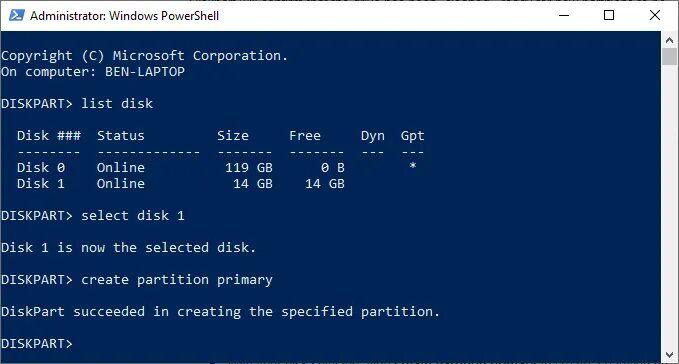
Step 3 - Now, type "List Disk" to display the entire partitions information. Select the disk for which you want to create a new partition using the "Select Disk" command.
Step 4 - Now, create the partition using the "Create Partition Primary Size = X" command. Replace "X" with a specified size for the partition.
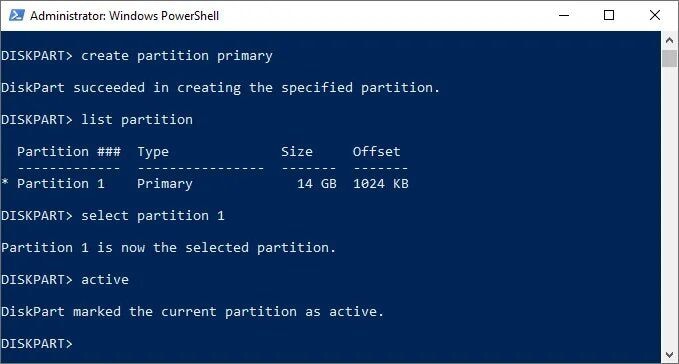
Step 5 - Again use the "Select Disk" command to select the newly created partition. Now, type "Active" to set the partition as active otherwise you won't be able to use it.
Step 6 - Once the partition is active, type "format fs=NTFS label=Y quick" to format the partition in NTFS format.
That's it; Windows will automatically create a new partition and assign it a letter as well.
Deleting a Partition Using Diskpart
You can also use Diskpart to delete a partition. When you have too many volume partitions it becomes a hassle to manage the entire data. So, it's better to delete small partitions and convert them into free space.
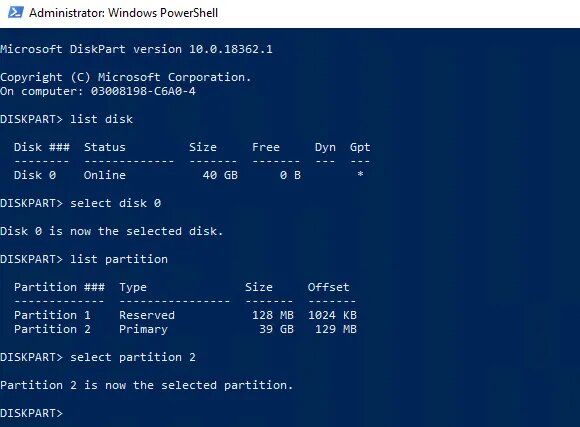
Step 1 - Again, select the specific disk using the "Select Disk" command.
Step 2 - Now, type "list partition" to see different partitions. Use "Select Partition X" to select the partition you want to delete. Replace "X" with the partition number.
Step 3 - Now, simply type "Delete Partition" and confirm your action to completely delete the select partition.
Once the partition is deleted, it'll be converted into free space and you can utilize it to extend an existing partition's size.
Wiping a Disk Using Diskpart
If your external hard-drive or USB flash drive has run into some unexpected error, the most optimal solution is to completely wipe-off the drive using Diskpart. Wiping off will remove each volume and partition, converting the entire hard-drive into one free space. To do so, you'll have to use the "clean" command, a popular command that can be used to manage hard drives, partitions, and volumes.
Step 1 - Use the "Select Disk" command to select the specific disk that you want to delete.
Step 2 - Only proceed further if you're sure that you want to wipe-off the disk completely. This will remove everything from the hard-drive so it's better to take a prior backup. Now, type "Clean" to completely wipe-off the entire hard drive.
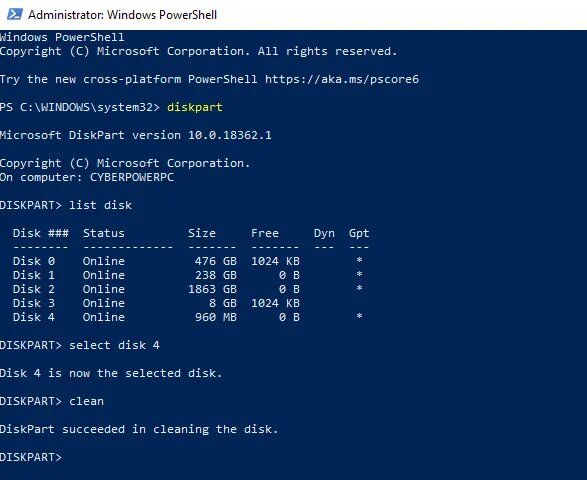
Step 3 - You'll see a confirmation message that Diskpart has successfully cleaned the drive.
Formatting a Disk Using Diskpart
There are several situations when you'll be required to format a specific disk, mainly after when you've cleaned a disk or created a new partition using the "Create Partition" command. Apart from the conventional methods, you can also format a disk using Diskpart.
Step 1 - Once the drive is successfully cleaned or the new partition is created, type "List Disk" to list all hard-drives.
Step 2 - Now, use the "Select Disk" command to select a specific disk that you want to format.
Step 3 - Type "format fs=ntfs" to format the selected disk in NTFS format. You can also replace "NTFS" with "FAT" if you want to format the disk in the "FAT" file system. Press Enter and this will initiate the formatting process.

Extending a Partition Using Diskpart
If there's free space on your hard-drive, you can utilize it to extend the size of an existing volume using Diskpart's "Extend" command. It's an extremely useful command that can be used to manage hard drives, partitions, and volumes.
Step 1 - First of all, select the particular disk using the "Select Disk" command.
Step 2 - Now, type "List Volume" to see the entire volume information. Use "Select Volume (Volume Number)" to select a specific volume whose size you want to increase.
Step 3 - Type "Extend" and Diskpart will enlarge the partition size to the maximum size available. In case there's no free space on your hard-drive, Diskpart will display an error message saying "Extend command can't work".
Complete All Diskpart Commands Using One Tool
Even though Diskpart is a powerful utility, it has certain drawbacks that are most likely to repel people from using it. First of all, Diskpart completely runs in a "Command Line Interface" (CLI), which means you'll have to type commands for every single operation.
More importantly, Diskpart has too many commands to perform different disk operations and it is not easy to memorize all of them. That's why users look for an alternative that can help them perform all the Diskpart operations without having to write commands manually.
If you're also looking for a similar solution, we recommend using AOMEI Partition Assistant. It's a free disk partition management software that's specifically designed to replace commands that can be used to manage hard drives, partitions, and volumes with a GUI-enabled tool.
Whether you want to create a new partition, extend partition size, or even delete a partition, the AOMEI partition assistant will help. And, since the tool works with both GPT and MBR style disks, you can perform disk operations on different types of hard-drives including hard-drives, SSD drives, USB flash drives, etc.
So, let's quickly take you through the process of performing different disk operations using AOMEI Partition Assistant.
Create a New Partition
Follow these instructions to create a new partition using AOMEI Partition Assistant.
Step 1 - Install and launch AOMEI Partition Assistant on your Windows system.
Step 2 - Now, Right-click the unallocated space and select "Create Partition".
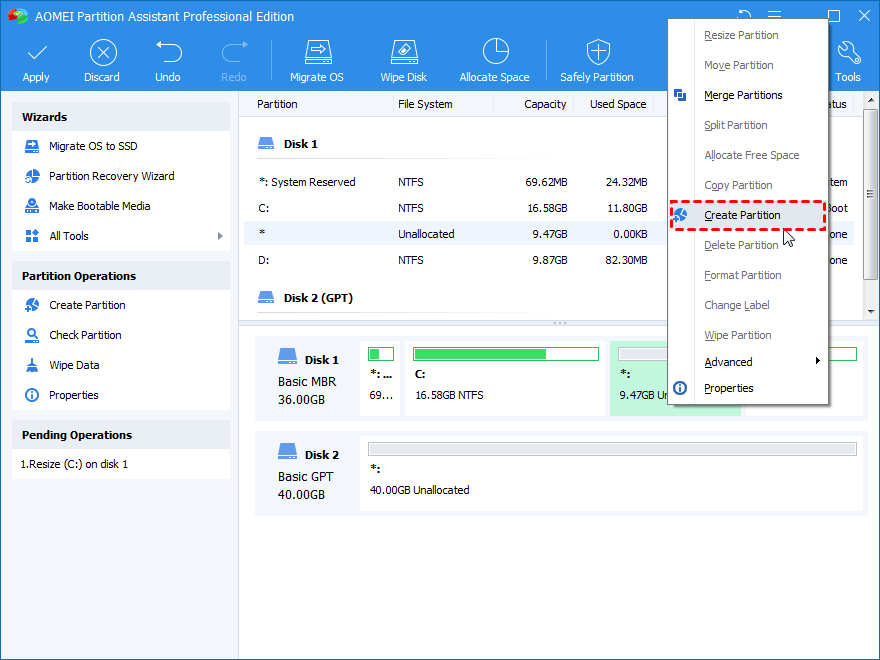
Step 3 - A pop-up window will appear on your screen. Click "Advanced" in the bottom-left corner to provide detailed information for the new partition.

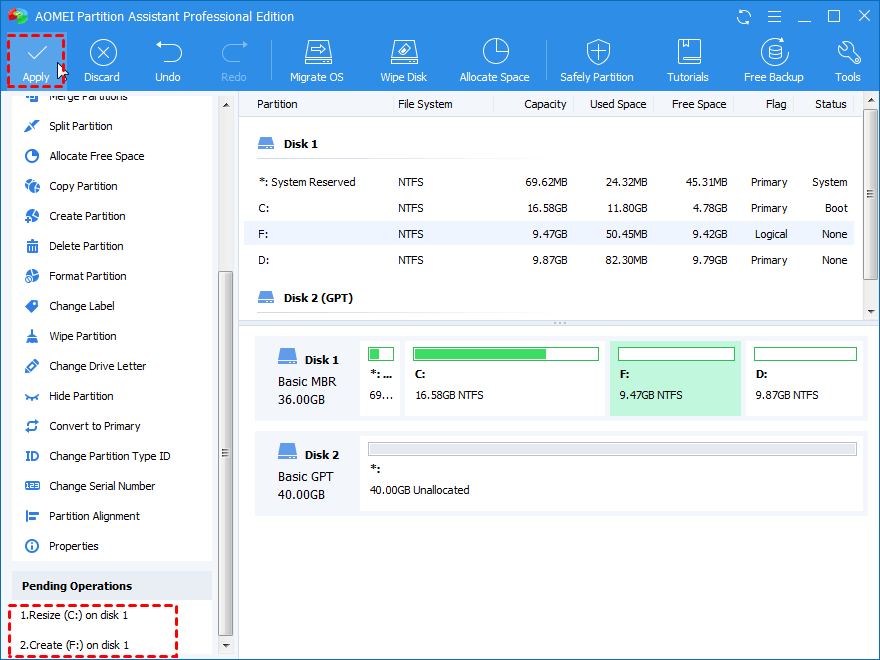
Step 4 - Now, press "Ok" and the task will get listed under the "Pending Operations" tab. Now, simply click "Apply" to save your changes. That's it; the new partition will be created and the tool will automatically assign it a drive letter.
Delete a Partition
Follow these steps to delete a partition using AOMEI Partition Assistant.
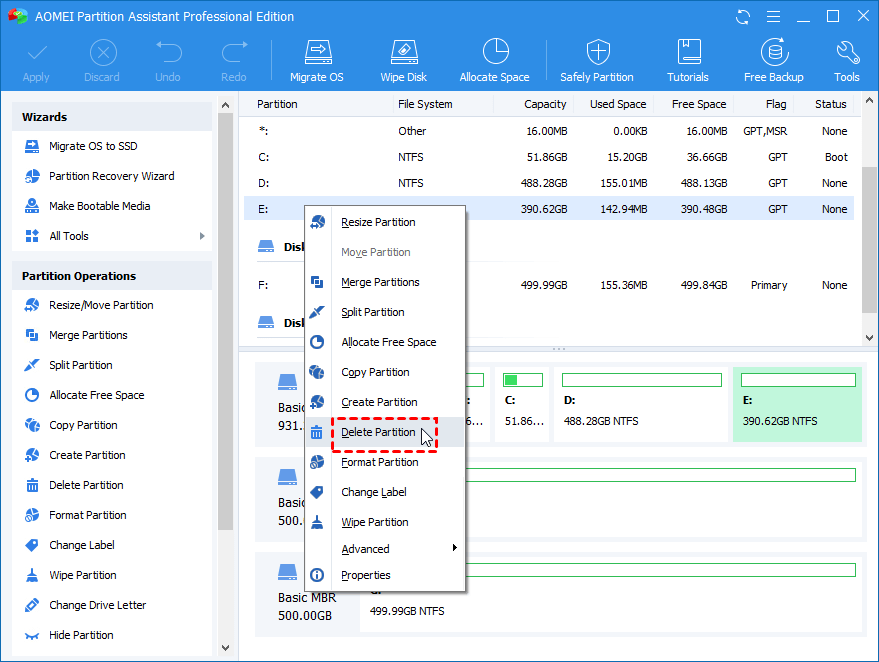
Step 1 - Launch AOMEI Partition Assistant and right-click the partition that you want to delete.
Step 2 - Click the "Delete Partition" option.
Step 3 - In the pop-up window, you'll have two different deleting options.
- Delete Partition Quickly will delete the partition but the data can be recovered later on.
- Delete Partition and Wipe Data on It will completely wipe-off the partition. In this case, you won't be able to recover the data.
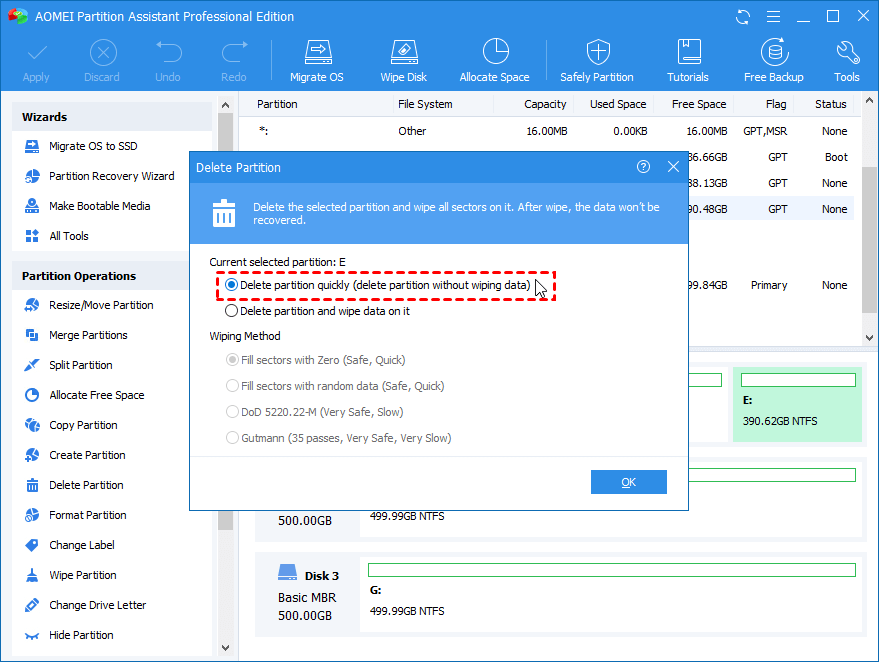
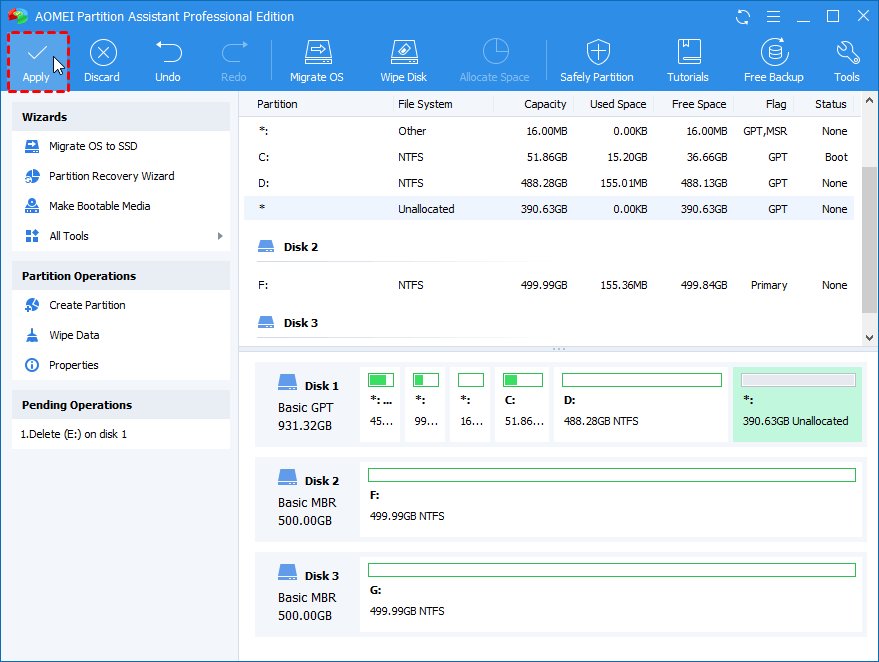
Step 4 - Choose the right option as per your preference and click "OK". Once the task is scheduled in the "Pending Operations" window, click "Apply" to delete the selected partition.
Format a Partition
Follow these steps to format a partition using AOMEI Partition Assistant.
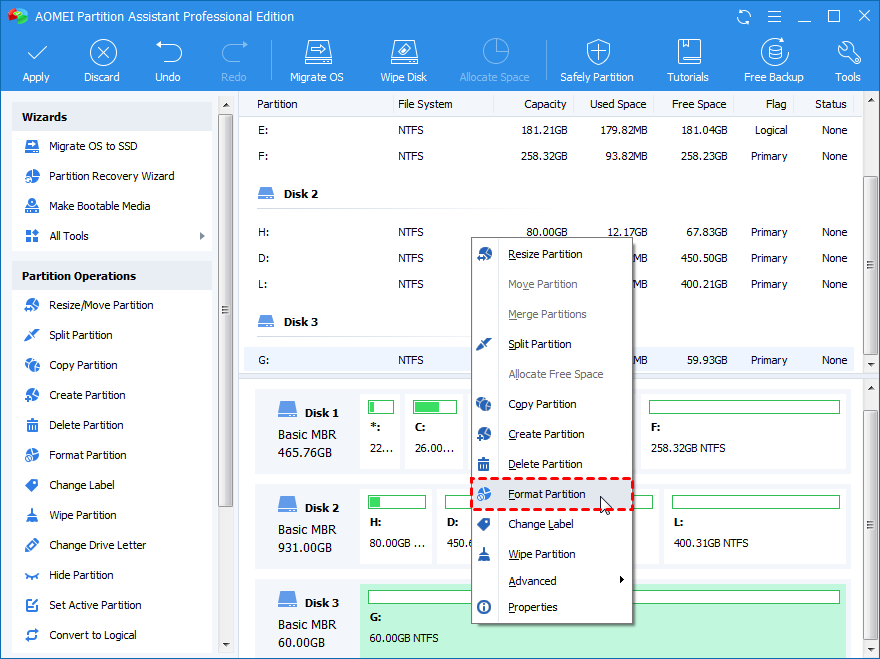
Step 1 - Launch AOMEI Partition Assistant and right-click the partition that you want to format.
Step 2 - Select "Format Partition" and a pop-up will appear on your screen.
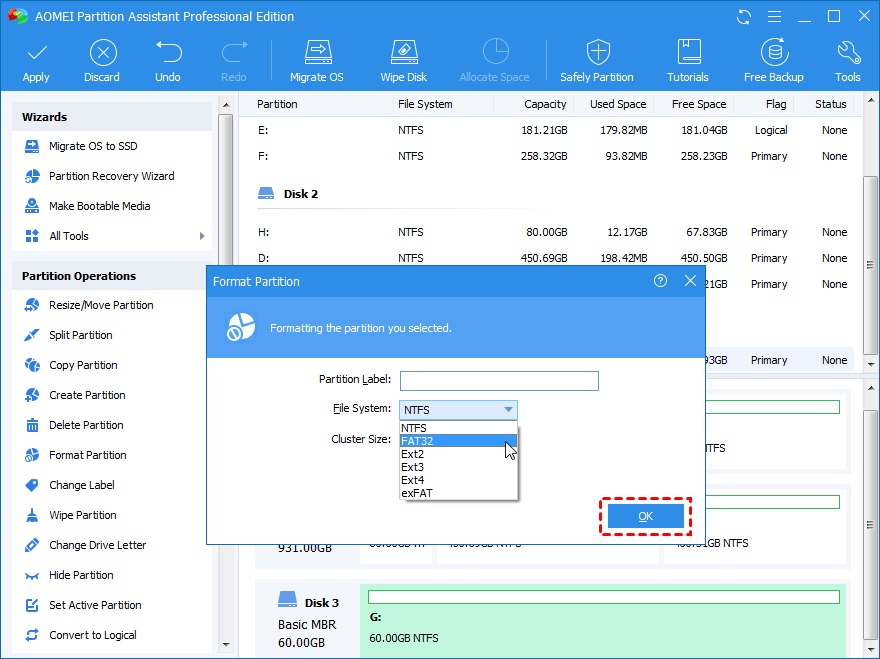
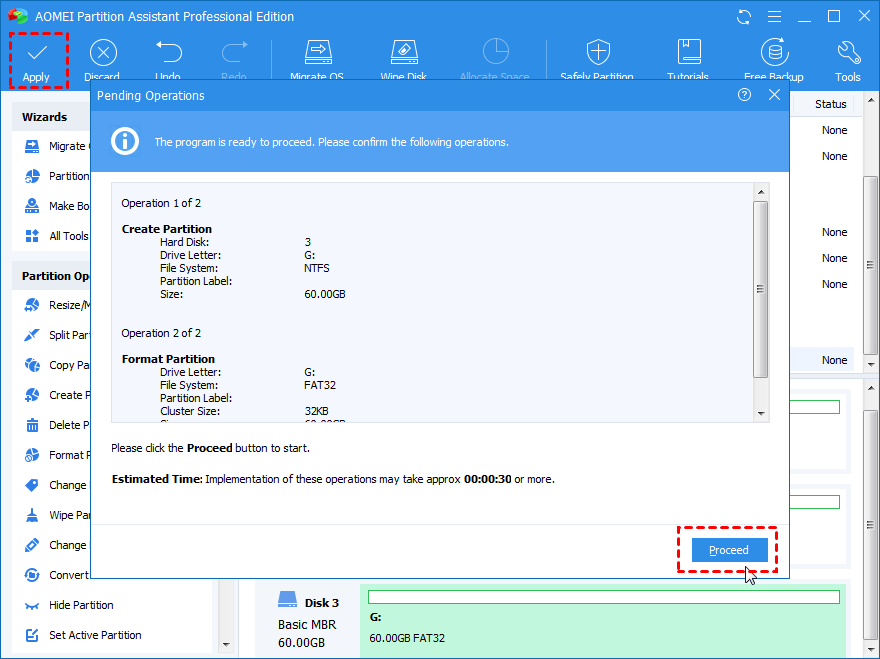
Step 3 - In the pop-up window, you can provide the format information such as the label and file system. You can format the partition in different file systems including NTFS, FAT32, FAT, etc. Once the information is entered properly, click "Ok".
Step 4 - Click "Apply" in the main interface and select "Proceed" in the next window to format the selected partition.
Extend a Partition
Finally, you can also use the AOMEI Partition Assistant to extend the size of an existing volume. Follow these steps to extend partition size using AOMEI Partition Assistant.
Step 1 - Launch the Partition Assistant and you'll see the entire disk information. If there's an allocated space, it'll be listed here as well.
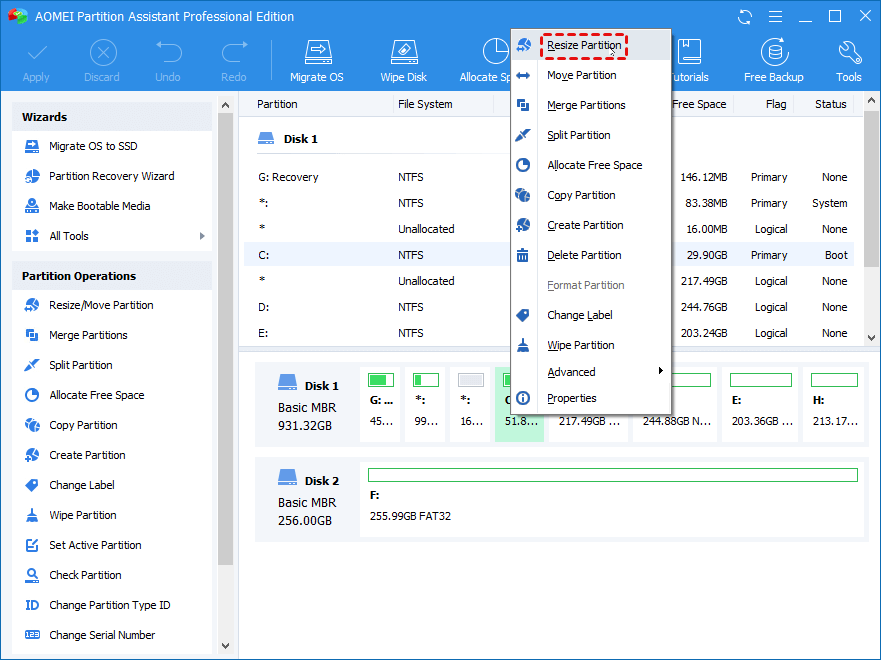
Step 2 - Now, right-click the partition whose size you want to increase and select "Resize Partition".
Step 3 - In the pop-up window, place the pointer on the right border of the partition and drag it to the right to extend the partition size.
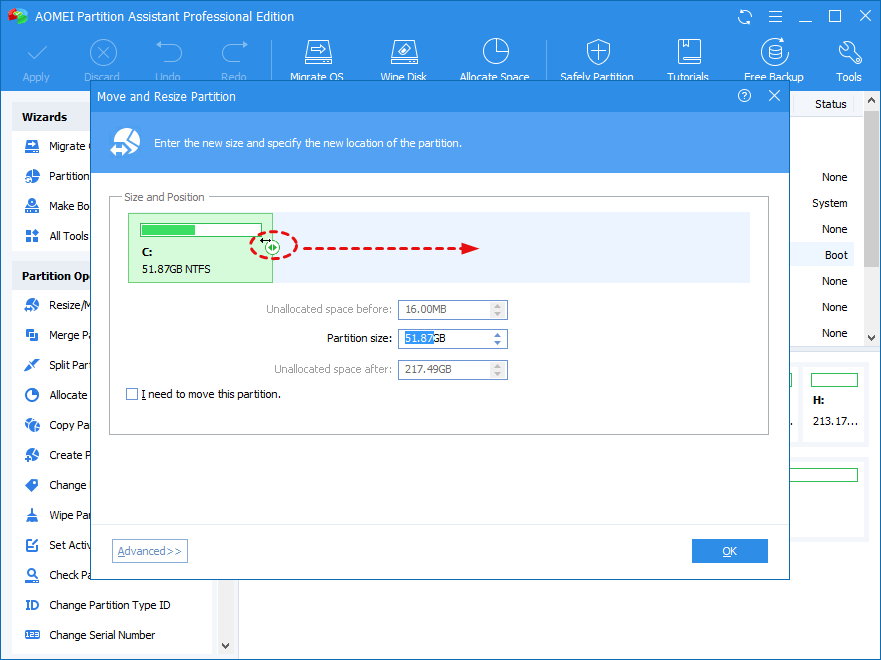
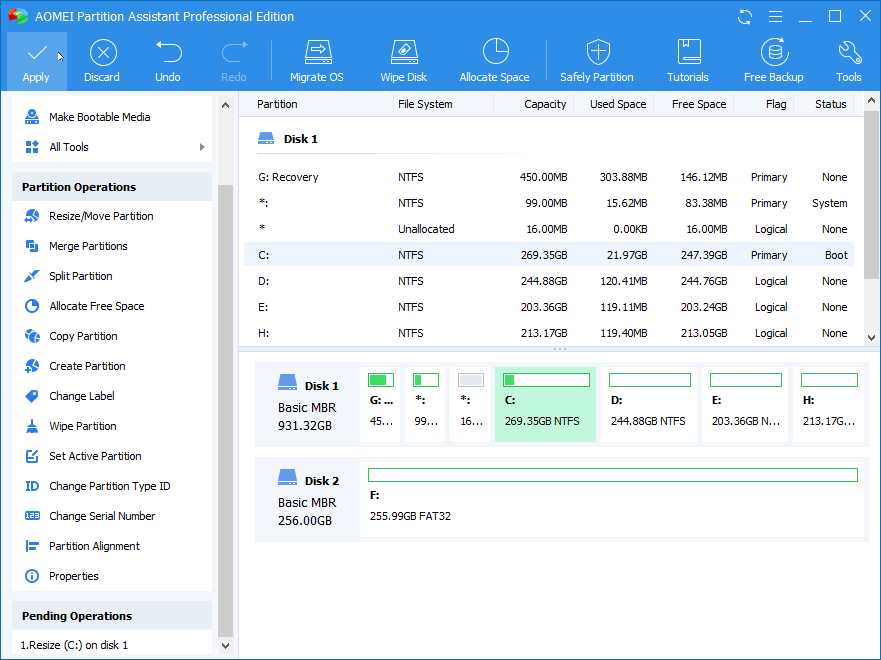
Step 4 - Click "Ok" and tap "Apply" in the main interface to execute the operation.
Conclusion
Irrespective of the disk-related error you've encountered, the Diskpart command can be used to manage hard drives, partitions, and volumes immediately. However, if you're looking for a reliable solution with an easy-to-use interface, install AOMEI Partition Assistant and it'll help you quickly perform different disk operations without having to write any commands manually.
Partition Solutions
- Manage Your Partition
- Fix Partition Errors
- Partition Tips


Theo Lucia
chief Editor