
 TL;DR:
The built-in Mac Disk Utility safely handles basic resizing and formatting for APFS and HFS+ drives, but advanced operations like merging partitions, recovering lost drives, or resizing Boot Camp volumes require third-party software like Paragon Hard Disk Manager or GParted.
● Paragon Hard Disk Manager ($39.95) is the optimal paid solution for modern Macs running macOS 10.12 or later because it fully supports APFS, a critical file system compatibility missing in alternatives like iPartition and Stellar Partition Manager.
● GParted offers versatile open-source file system support for formats like BTRFS, EXT, and NTFS, but it features an outdated interface and requires users to boot externally through a USB or CD.
● Legacy free utilities carry severe operational limits; Fdisk is restricted to command-line usage with a maximum 64GB disk space capacity, while Partition Magic Mac has permanently ceased all software updates.
Ask AI for a summary
 ChatGPT
 Perplexity
 Gemini
 Claude
 Grok
Grok
Partitioning your Mac’s hard drive is an effective way to organize and manage your data. With a reliable Mac partition manager, you can easily create, delete, merge, or resize partitions to optimize your system. Whether you're looking to install a second operating system or recover lost data, the best Mac partition manager tools make it easy to manage your disks without hassle. These tools offer both free and paid solutions to meet your needs, helping you perform tasks like partition recovery, expansion, and more. Always remember to back up your files before partitioning your drive to avoid the risk of data loss.
This comprehensive discussion will encompass the following aspects.
The 9 Best Partition Manager Comparison Chart to Help You Quick Choosing
Key features of a partition manager define whether the tool can resize, create, delete, shrink, merge, or recover partition or not. Whether you want to recover your disk drive or resize your existing partition, you must opt for the best partition manager tool aligned with your requirements. Commonly, partition tools are classified on the basis of their price, supported formats, GUI provision, presence of key features, and compatibility with different macOS versions. The following are the Top 9 tools selected based on the above elements.
Tool Name |
Price |
GUI Interface |
Supported Partition |
Compatibility |
| GParted (GNOME Partition Editor) | Free | Yes | BTRFS, EXT2/3/4, FAT16/32, NILFS2, NTFS, REISERFS, UDF, XFS, | macOS 10.06 or later |
| Disk Utility | Free | Yes | APFS, HFS/HFS+, FAT, exFAT | macOS 10.13 & later |
| Partition Magic Mac | Free | Yes | APFS, HFS/HFS+, FAT, exFAT | macOS 10.06 or later |
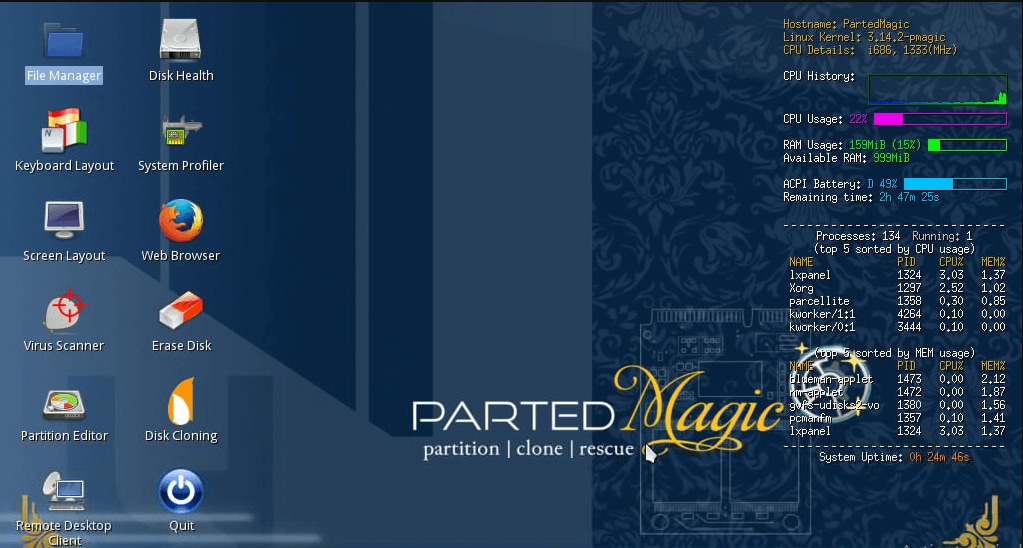
| Parted Magic | Free | Yes | NTFS, HFS, APFS | macOS 10.6 or later |
| VolumeWorks | Free | Yes | HFS+, NTFS, FAT, exFAT | macOS 10.13 & later |
| Fdisk Tool for Mac | Free | No | HFS+, FAT, NTFS | macOS 10.8.3. |
| iPartition for Mac | Free, $89 for Pro, $499 for Enterprise version | Yes | HFS+, FAT, NTFS | macOS 10.11.6 or later |
| Paragon Hard Disk Manager for Mac | $39.95 | Yes | APFS, HFS+, NTFS, ext2/3/4, FAT, exFAT | macOS 10.12 Sierra or later |
| Stellar Partition Manager | $39.00 | Yes | HFS+, FAT, NTFS | macOS 10.9 or later |
Note: Partition Magic Mac tool has stopped updating.
The 9 Best Partition Manager Detailed Infos
1. GParted (GNOME Partition Editor)
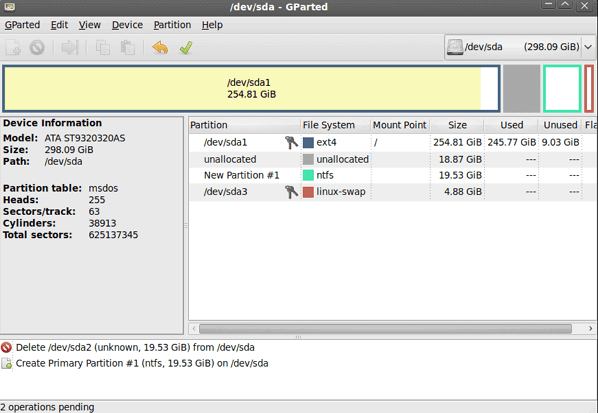
GParted is an open-source platform to copy, move, resize, or clone any partition without the trouble of your data getting dissolved. Its versatility and compatibility with all major OS versions make it worth using for disk partition.
Additional Highlights |
Explanation |
| Recover Lost Partitions | GParted enables you to recover all or specific partitions from your drive, assisting you in gaining access to lost partitions. |
| Bootable Through USB or CD | You can run and access GParted even through GParted Live, a Linux distribution that allows you to manage disk partitions. |
Operation Steps
- Download and run the Gparted software on your Mac.
- Select the Hard Disk option from the dropdown list.
- Right-click on the unallocated volume; click on the “New” option.
- If you want to format the existing Partition, right-click on the Partition and select “Format”.
- Click “Add” to add a new Partition. A popup will appear asking to apply changes.
- Click on
Pros
Free
Versatile
Extensive file system support
Compatible with a range of OSs
Cons
Outdated interface
It can be booted only
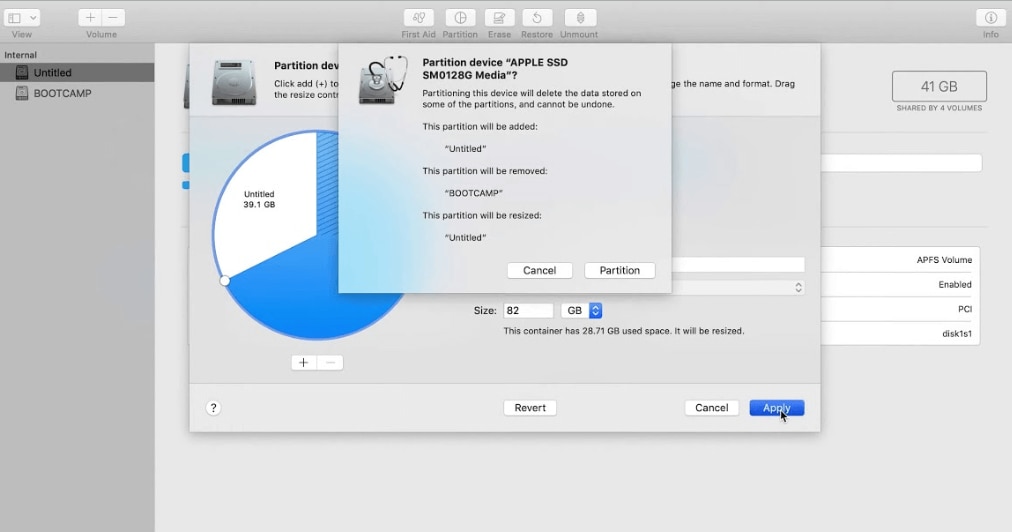
2. Disk Utility
Disk utility is a built-in tool available in all Mac OS versions to carry out disk partitions. This software is pretty easy to use; even if you are not a tech expert, you can still resize, compress, or expand your disk drive quite conveniently.
Additional Highlights |
Explanation |
| First Aid | Disk utility solves all your partition-related problems by offering a First Aid button. Just tap once and fix all your issues. |
| SMART Status Check | You can monitor the health of your disk drive through the SMART status check option to prevent data loss. |
Operation Steps:
- Open Disk utility in your Mac
- It will show a complete list of disk drives you have on your device.
- Choose the disk you want to partition.
- Tap on the Partition button and select the size of your Partition.
- Click Apply. A new partition will be added.
Pros
Simple and user-friendly
Completely free
Fixes partition issues
Cons
You cannot split or merge partitions
It lacks advanced features
Video Tutorial - How To Partition External Hard Drive in macOS M1 With Disk Utility
3. Partition Magic Mac
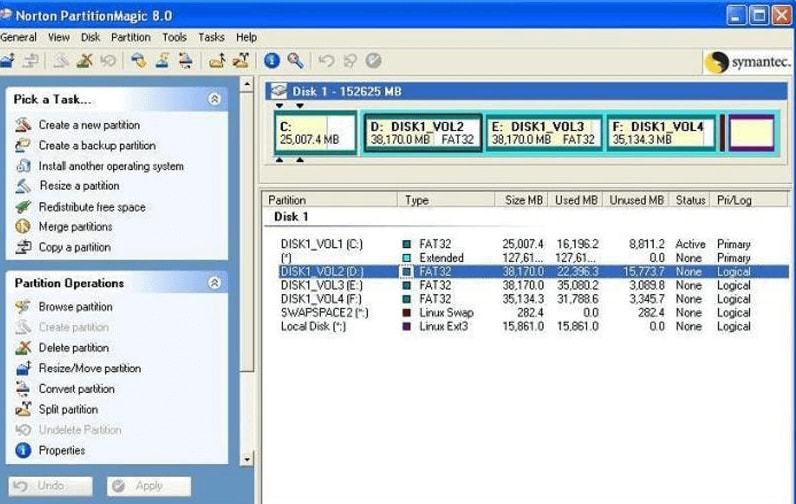
Partition Magic Mac is a reliable disk partition tool with almost all the necessary features. This software allows you to create and mix partitions, arrange data, create storage space, perform multitasking, and so on.
Additional Highlight |
Explanation |
| Current Status Saving | Partition Magic Mac allows you to save the current state of your partition operation if the power cut happens in the middle of the process. |
Operation Steps:
- Download the Partition Magic for Mac
- Select the drive you want to shrink to create a new partition
- Specify the name and volume of the new Partition and click OK.
Pros
Create, resize, modify, or delete a specific partition
Recovers lost partitions
Cons
The interface is a bit tough
Some operations may be time-consuming
Tip: Want to recover deleted or lost partitions on Mac quickly? Wondershare Recoverit can help you recover your deleted or lost partition in 3 easy steps.
4. Parted Magic
Parted Magic is another intelligent disk partitioning software for Mac OS. It helps you to do partitioning without any hassle; you can easily resize, create, or relocate partitions without causing any harm to your existing data.
Additional Highlights |
Explanation |
| Disk Cloning | You can clone a partition to replicate its entire data. You can then delete the cloned Partition. |
| Recover lost Partition | Parted Magic allows you to recover lost or deleted partitions without any hassle. |
Operation Steps:
- Download and boot the software.
- Go to the Partition Editor option on the left side of the window. It will display the total space of the disk drive.
- Right-click on the Partition and select Resize.
- Select the size of your Partition by moving the Size slider.
- Click Apply.
Pros
Resize, copy, and relocate any partition
Cons
Setup is a bit difficult
5. VolumeWorks
VolumeWorks is one of the most commonly used disk partition tools used in Mac. It allows you to easily manage your hard disk by merging free spaces. You can resize, build, destroy, shrink, hide, unhide, or shift disk partitions through this excellent partition manager.
Additional Highlights |
Explanation |
| Hide/Unhide partitions | You can hide your partitions if you want to share your MacBook with your friend. |
| Partition without formatting | You can resize or shrink your Partition without losing the data contained in that Partition. |
Operation Steps
- Launch VolumeWorks software for Mac.
- Select the Hard Drive option to carry out the disk partition.
- A dialogue box will open, showing “Create a New Partition.”
- Utilize the slider to adjust the volume of the new partition.
- Click OK. A new partition will be added to your drive.
Pros
Excellent customer support
It’s easy to hide/unhide Partition
Cons
Consumes a considerable amount of Mac resources
6. Fdisk Tool for Partition
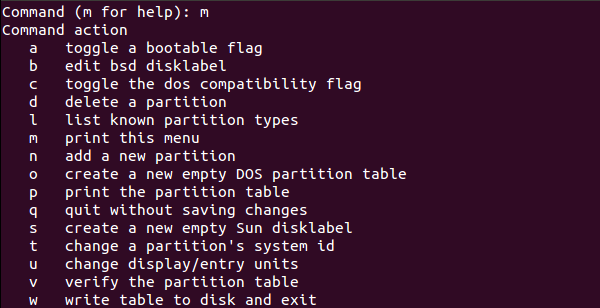
If defined in simple words, FDisk Tool is a command line utility used to carry out disk partitions. Basically, it allows you to manage your partitions by performing different disk management tasks. Using the Fdisk partition tool, you can create, delete, format, merge, or even shrink your disk drive.
Additional Highlights |
Explanation |
| Partition offset calculation | FDisk accurately calculates the partition offsets of extended disk partitions. |
| Partition end information parsing | It divides partition end information into correct variables. |
Operation Steps
- Install Fdisk for Mac.
- Activate Fdisk by entering into command mode to perform various operations.
- You can now use letters to do multiple actions. Type “m” to get an array of commands.
- Use the “d” command to delete specific partitions to make space for the new one.
- Now, use command “n” to create a new partition.
- After this, Fdisk will ask which type of partition you want to make, either primary or logical.
- Press Enter, depending upon your choice.
Pros
Hassle-free organization of your hard disk
You can merge, shrink, create, clone, or delete a specific disk partition
FDisk doesn’t offer any paid plan
Cons
FDisk cannot manage disk space of more than 64-GB
Outdated and unavailable for the latest Windows and macOS versions
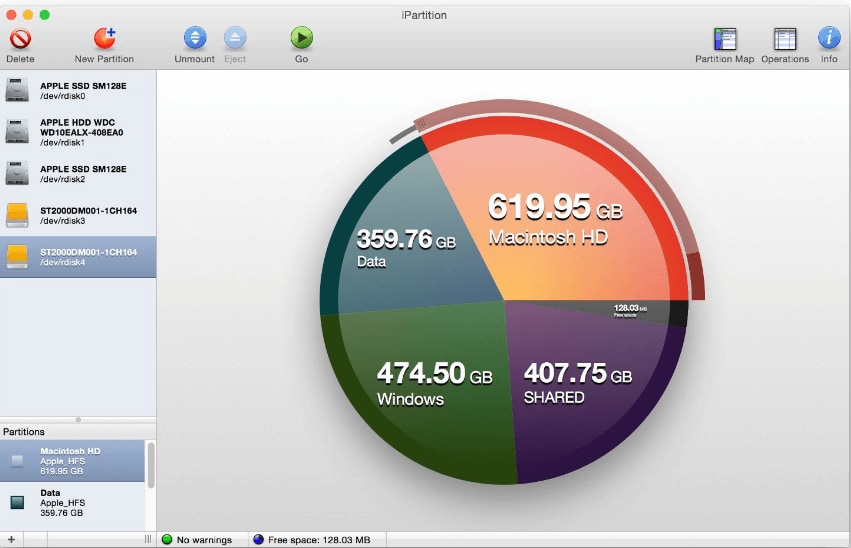
7. iPartition for Mac
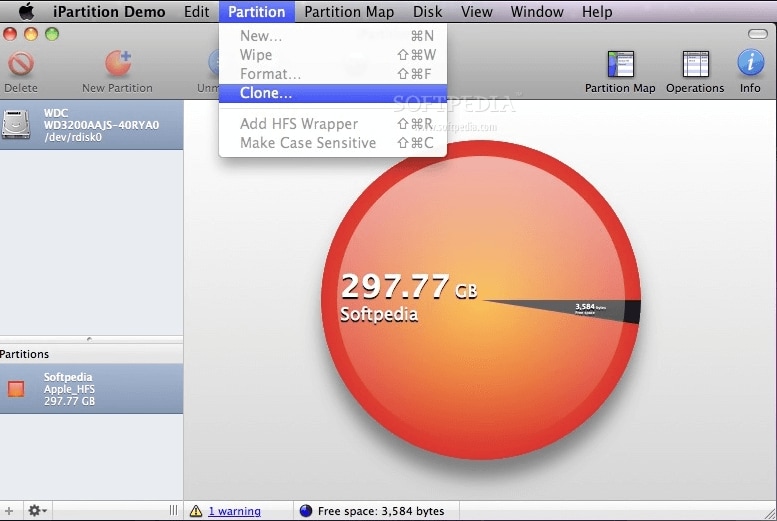
iPartition for Mac allows you to easily handle your Mac partitions through a visual representation of your drive space in the form of a pie chart. This software will show the exact size allocated to each division; you can destroy, delete, create, or merge your disk partition in no time using iPartition.
Additional Highlights |
Explanation |
| External and internal drives partition | Whether it’s an eternal, internal, or removable drive, iPartition facilitates you to carry out the disk partition. |
| Boot Camp resizing | Boot Camp volume is easy to resize using this tool, regardless of your OS. |
| Partition without formatting | You can change the size of a specific disk partition without losing data, even if it contains data. |
Operation Steps:
- Download and run the iPartition.
- Go to the Storage option, and a Pie chart will appear. The dark color represents used space, while the light shows the unused volume.
- Right-click on Storage and select Create Partition.
- It will show a popup containing a Size slider. You can adjust the size of the new Partition using this slider.
- Now, tap on the Go button at the top of the interface.
Pros
Supports a range of file systems
Pie chart representation of disk space
Supports both external & internal Partitions
Helps to recover lost and deleted partitions
Cons
Doesn’t support the APFS file system
8. Paragon Hard Disk Manager for Mac
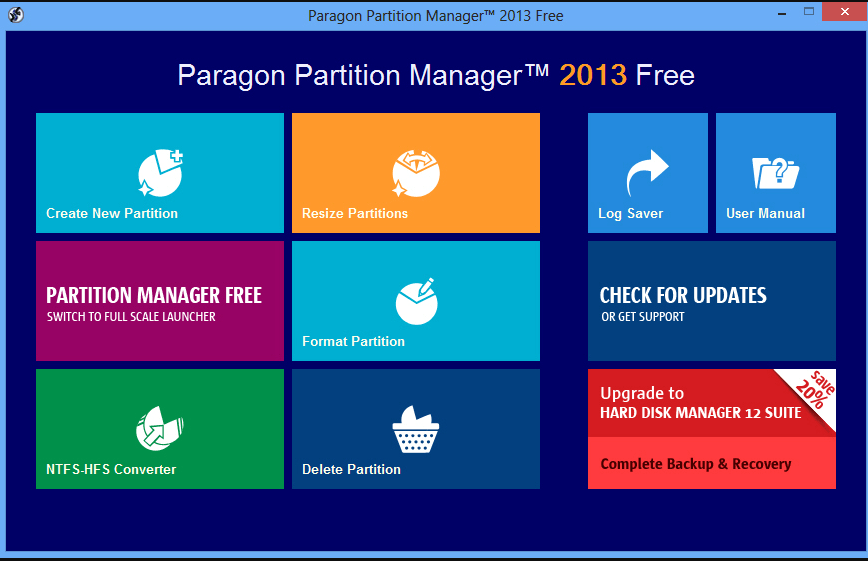
Paragon Partition Manager for Mac allows you to resize and reuse your partition as a one-stop solution for all your partition problems. It also helps to recover a lost or hidden partition. Additionally, the tool’s functions encircle data protection and recovery, disk cloning, Boot Camp Management, secure data wiping, and much more.
Additional Highlights |
Explanation |
| Data Recovery | Paragon partition recovers all or specific data from your disk drive within a few clicks. |
| Secure File deletion | Paragon partition manager ensures the permanent deletion of your data so it can’t be recovered using recovery software. |
| Boot Camp Resizing | It quickly resizes Boot Camps volumes to expand space by borrowing space from your Mac partitions. |
Operation Steps:
- To create a partition via Paragon Manager, right-click on the unallocated space and select Create Partition.
- By default, the created Partition will take up all unallocated areas.
- Utilize the Size Slider or Text box to specify a specific partition size.
- Name the Partition and specify the file system for the resulting Partition.
- Uncheck the format box if you don’t want to format your Partition.
- Click on Apply.
Pros
Recovers deleted or lost partitions
Resizes partitions
It supports almost all file systems
Cons
Provides same features like free software available in market
9. Stellar Partition Manager
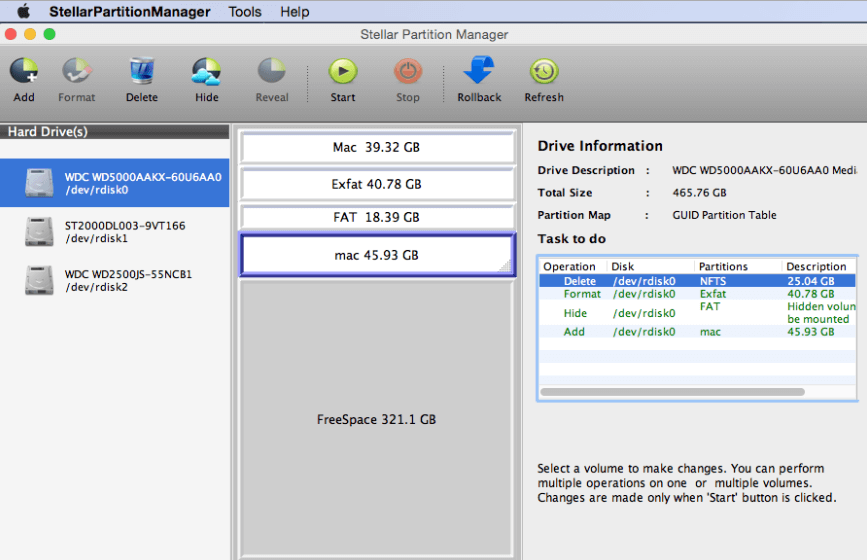
If you are having trouble resizing your Partition, try Stellar Partition Manager. Using Stellar Partition Manager, you can easily resize, create, shrink, hide/unhide, or delete your disk partition. The software actually creates new volume by combining free blocks of spaces scattered across your disk drive.
Additional Highlights |
Explanation |
| Hide Partition | You can hide your personal or important data to prevent data loss or accidental formatting. |
| Creating Bootable Media | Stellar Partition Manager lets you form a bootable drive if your Mac resists booting. |
Operation Steps:
- Download the Stellar Partition manager software
- Choose the Hard Drive option from the left side to create a new partition.
- A dialogue box named “Add New Volume” will appear.
- Name the newly created volume and adjust its size by moving the slider.
- Click the OK The new Partition will be added and displayed along with the existing Partition.
Pros
Creates bootable media
Disk partition hiding and unhiding
Both external and internal disk partitions’ management
Cons
Doesn’t support the APFS file system
How To Choose the Best Mac Partition Manager for You?
Are you overwhelmed by the immenseness of choices presented to you? If you can’t decide how to choose the best partition tool for you, keep these aspects in mind.
1. Price
When choosing a Mac partition manager, it is best to consider the price factor. Sometimes the features of software depend on whether it’s free or paid. It is not always the case because some free software also provides the same features as the paid ones.
2. Supported partitions
All partition manager tools do not support every file system. Even some commercial partition software doesn’t have this feature. So, always consider the supportability factor while picking the right partition tool.
3. Compatibility
All disk partition managing tools are not compatible with the latest versions of Mac OS. Some software has many features but doesn’t comply with your OS version. Hence, take a minute to think about the compatibility factor before deciding.
4. Features
Mac OS already has a built-in disk partition manager named Disk Utility. So, there is no need to squander money on software that doesn’t offer the additional feature. Your purpose for using a third-party management tool should be your prime focus.
5. Usability
Usability is an essential factor to consider while selecting a partition manager. Some tools are designed for experts or tech-savvies, while some are intuitive to intermediate users. Therefore, don’t mess your mind with complex software if you are not capable enough to tackle a technical situation.
6. Security
The software you choose should be bug-free to prevent data loss during disk partitioning operations such as resizing or cloning. Moreover, make sure that it doesn’t contain any malware or adware.
7. Customer support
If you have decided to spend money on paid disk partition managers, firstly confirm the efficient customer support service of the respective company. You should have extensive knowledge and proper know-how. Moreover, you must have someone to contact or approach whenever you are entangled in an issue.
8. Additional Features
Looking for additional features is not bad, but it would be best to consider whether a program offers lost partition recovery or not in the first place. However, looking for additional software features becomes crucial before making a purchase, especially in the case of paid software.
Wondershare Recoverit –Safe & Reliable Partition Recovery Software
If you accidentally deleted or lost your Mac partition, use Wondershare Recoverit. It is a highly recommended partition recovery software due to its extremely accurate partition recovery results.
More Related: The 5 Best Partition Recovery Tools for Mac
Conclusion
The market is full of an endless array of partition managing software; however, it is necessary to choose the best tool appropriate for you. It is good to use built-in Disk Utility for primary partition operation; however, you can opt for an external disk partition manager for advanced features.


