How to Copy Files to External Hard Drive?
Q: How to copy files to external hard drive?
"I have a computer at my place, which I'm using for many years now. I have an immense amount of data on my computer. I'm always stressed about keeping the data safe. I have a lot of academic and personal data which includes my memories of the past three years. I want to know if there is a simple way that I can copy files to an external hard drive as my storage is becoming scarce. I want to know the easiest way to copy a bulk of data from my computer to an external hard drive. I'm looking for an efficient way to do that, as I can't afford to lose any data."
It is quite obvious that in this era, data is very valuable to everyone. Making a copy of files to an external hard drive is essential for every individual using a computer. Luckily, in this guide, you will have facile solutions that are applicable in multiple situations. Furthermore, you will have Wondershare UBackit at your service to copy files to the external hard drive. In short, every question in your mind is answered in the guide, you just need to read the guide with great focus.
Transfer Files to External Hard Drive Through Traditional "Copy" & "Paste"
We will start with the easiest and the most utilized method to transfer files to an external hard drive. You don't have to go through any hectic techniques to fulfill this method, just follow the instructions;
Step 1 Connecting the Hard drive
First of all, you need to turn on the computer. Then, you are required to determine the connection type for the hard drive and your particular computer. If there is a need for an adapter, you should certainly get one. Once, you have the adapter, attach it on side of the cable to the external hard drive and one to your computer. Before proceeding, you can format your hard drive if it is required.
Step 2 Adding files on Windows
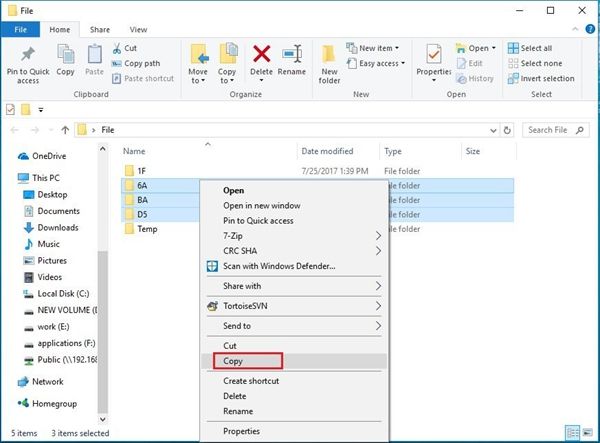
After the connection is successful, open the file explorer and search the folder of the files you want to copy. Now, highlight the files you want to transfer and right-click to copy the files or press "CNTRL C". Now, double-click on your external hard drive's name and paste the copied files here. The duration of file transfer will depend upon the size of the data. Once it is completed, remove the hard drive.
Step 3 Adding files on Mac
If you are using Apple products, the procedure is quite the same for it too. Open finder highlights the files that you want to transfer and copy them. Furthermore, click on the external hard drive and then the Edit menu item option and click "paste items" to wait for the procedure to end. Once it is finished, click on the "eject" button by right-clicking the external hard drive name. The transfer time usually depends on what type of cable and port you have on your computer.
Copy Files to External Hard Disk Using Command Prompt
We have gone through the simplest way to transfer files to an external hard drive. Yet, there is another utility given by windows named "Command prompt" you can use this to consume less time in transferring files to an external hard drive. Follow the steps;
Step 1 Open the computer and connect your hard drive properly with it.
Step 2 Open the command prompt from the search bar.
Step 3 Use this command to copy the files from the computer to the external hard drive;
"C:\User/desktop\Example\.txt F:\backup\Example.txt" In this "C" must be the destination from where you want to copy the data and "F" must be your external hard drive, where you want to paste the data.

Step 4 Make sure you select the right drives to copy and paste data, as a single mistake can put you in deep trouble. Wait for the procedure to end and remove the hard drive and close the command prompt window.
File History Image Files to The External Hard Drive
The window never lets you depend upon any other utility. File history is a Windows built-in tool that is capable of transferring data from a computer to any external storage device. You can easily rely on this tool for easy data transfer. Follow the instructions to use file history.
Step 1 Turn on your computer and go to the control panel. Over here, search "file history" and open it.
Step 2 Furthermore, click on the option of "Add a drive" to search for the external hard drive and select it as the destination folder.
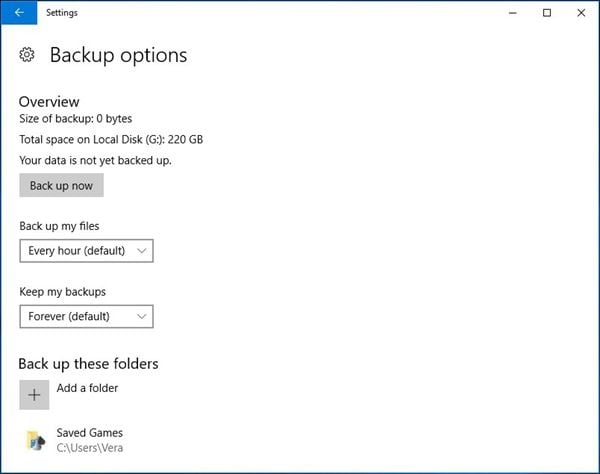
Step 3 Now, turn on the task schedule to regularly copy your valuable data. If you want to exclude some file from this procedure and allot a certain backup period or to keep saved versions of file backup image, you can utilize the "Advanced settings"
Step 4 Still, file history can backup a certain amount of data and has particular limitations which you can see in the limitations of backup windows.
How to Backup Files to External Hard Drives Using Wondershare UBackit?
From the above sections, you have learned the ways to backup files through Windows in-built utilities. And there is the third method. You can use Wondershare UBackit to backup files to external hard drives. UBackit has the four traits.
- Backup your files, folders from the hard drive in three simple steps.
- Set an automatic backup schedule to free you from data loss worries.
- Filter your documents, photos, audio, videos, and programs to make the backup process quicker and easier.
- Monitor the storage, protect the backup environment, and notify backup schedule intelligently.
How to Backup Files to External Hard Disk?
Step 1 Launch Wondershare UBackit
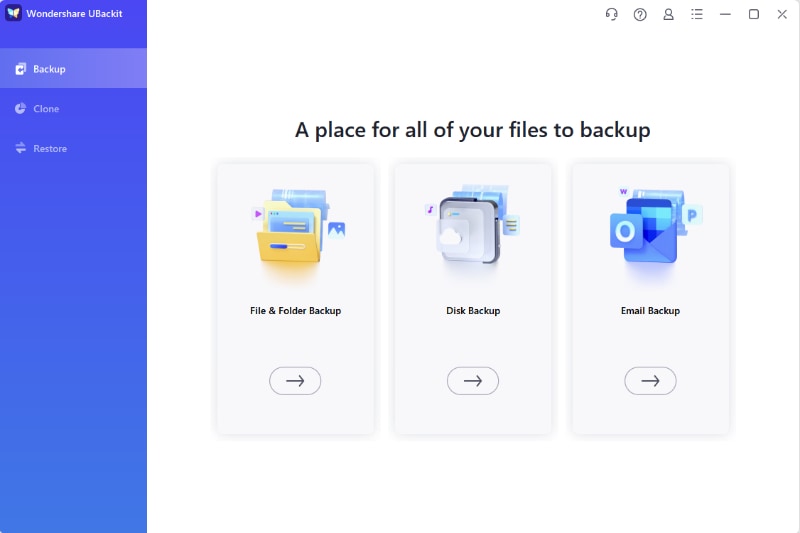
After downloading and installing Wondershare UBackit on your computer, launch the app and select the Create New option from the screen. Then, click File Backup.
Step 2 Select Files/Folders from Hard Drive
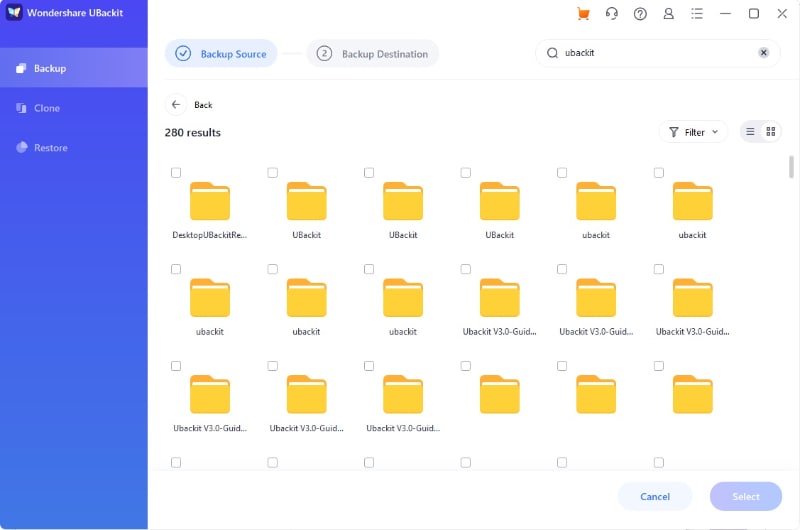
Next, select the files/folders you want to backup. Then click Select to continue.
Step 3 Choose Backup Destination
After that, select the backup destination where you want to save the files. And click Select to start the backup process.
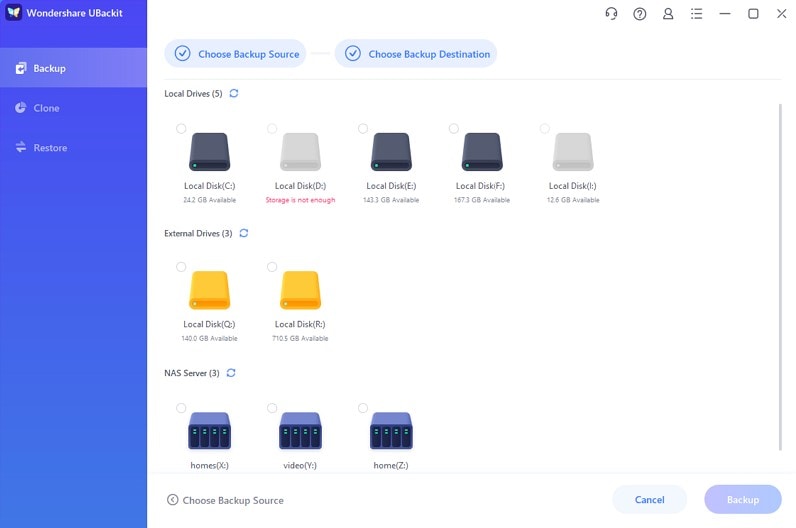
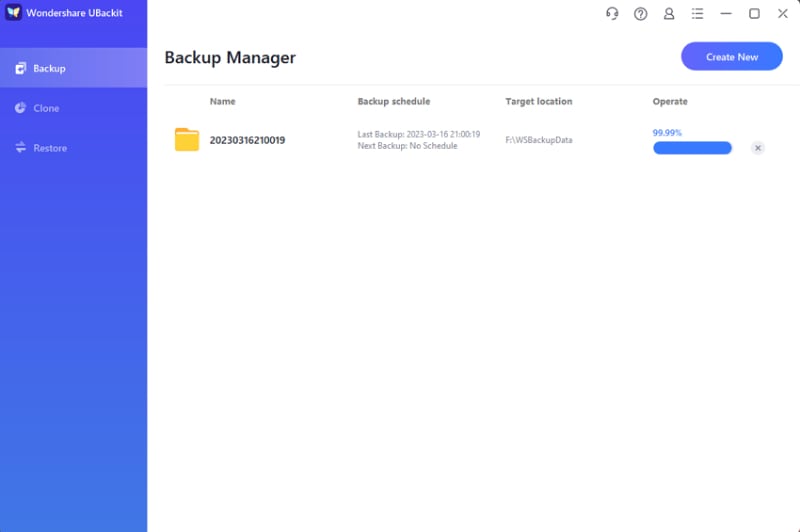
Step 4 Complete The Backup Process
The backup process will complete after a few seconds or minutes, which depends on the size or volume of the file/folder.
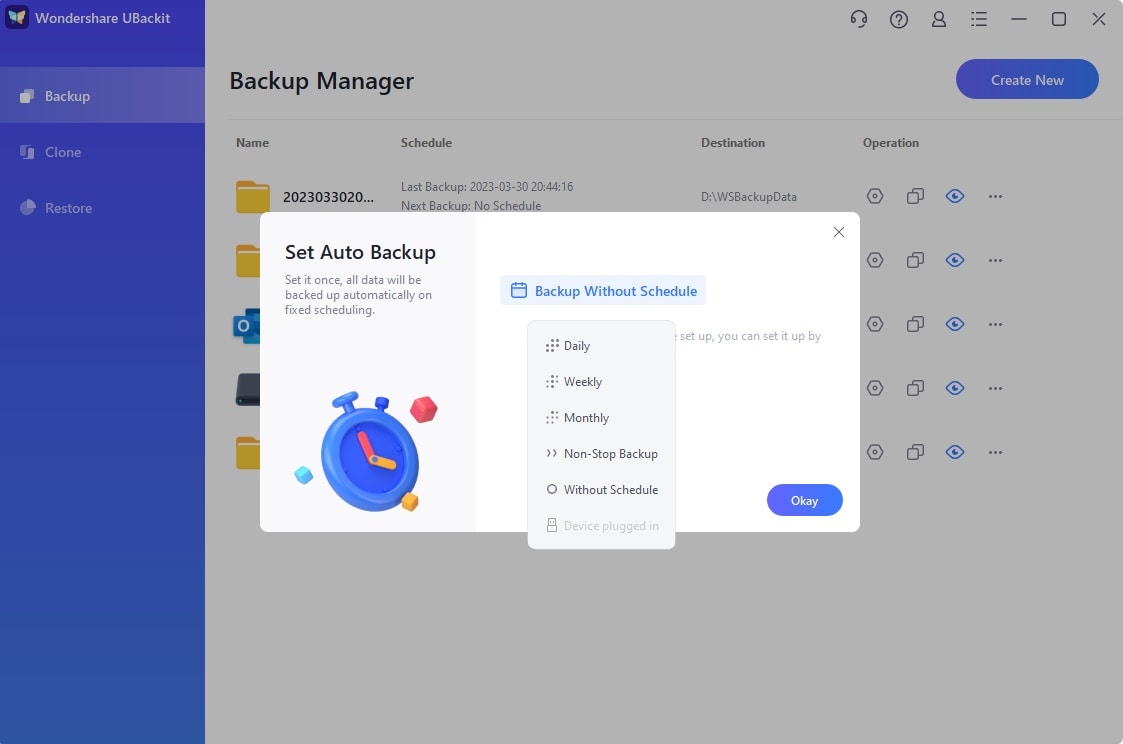
Step 5 Set Automatic Backup Schedule
You can find three options at the bottom of the backup folder: Schedule, Backup and View. Click Schedule, then can schedule your backup daily, weekly, monthly, and non-stop according to your demand.
Conclusion
No one can certainly afford to lose their data, this is why everyone person strives to copy the data to external storage to keep it safe. There are many other situations like some people run out of storage and use the external hard drive to copy the significant data. Well, data is vulnerable to many misadventures like virus attacks and system crashes. Copying the data on an external hard drive creates a lot of ease. Still, you need to follow the methods step by step rather than jumping onto the last one. In the end, all you need is the astonishing Wondershare UBackit to make all the procedures reliable and easy for you.
Data Backup Services
- Computer Backup
- Hard Drive Backup
- Mac Backup
- Cloud Backup


Amy Dennis
staff Editor