
 TL;DR:
Synology Cloud Station is an officially discontinued NAS file-synchronization tool that has been replaced by Synology Drive, though it remains functional and receives security updates exclusively for users on the 1.2x SRM platform.
● Transitioning to the successor, Synology Drive Server, requires a NAS running DSM 6.2.3 or higher and introduces advanced capabilities like web portal file management and download restrictions for sharing links.
● Upgrading to Synology Drive versions above 3.0 permanently drops support for legacy Cloud Station applications, requiring a complete switch to the Synology Drive Suite and ensuring PC compatibility with DSM 7.0 or higher.
● The Synology DS cloud mobile counterpart remains available for configuration via a QuickConnect ID, allowing users to sync folders bidirectionally, exclude specific file types, and retain up to 32 historical file versions on the host server.
Ask AI for a summary
 ChatGPT
 Perplexity
 Gemini
 Claude
 Grok
Grok
Accidentally deleted or lost important files in Synology NAS?
No worries. Wondershare Recoverit can get back your lost NAS files within 3 steps. The ultimate and professional NAS data recovery software is totally reliable and 100% safe.
Synology is quite popular and has many enterprises, office, and home application tools. All of these tools are powered by the Synology DiskStation Manager operating system. This manager offers many free apps to users, and one of them is the Synology Cloud Station.
As the name implies, Cloud Station provides businesses and users with their cloud to save and sync files. You can use Synology Cloud Station in many ways, but not all users know how to do so. In this article, we’ll walk you through Synology Cloud Station and how you can effectively utilize it from your home or on a mobile device in any location of your choice.
In this article
Part 1. What Is Synology Cloud Station?
Synology Cloud Station is a file-sharing application that allows users to synchronize files between Synology NAS and mobile devices or a centralized Synology NAS and several computers. Its operation is quite similar to Google Drive and Dropbox. However, like those two, there’s no monthly fee for large data usage, and the only limitation on data is the limited capacity provided on a given NAS.
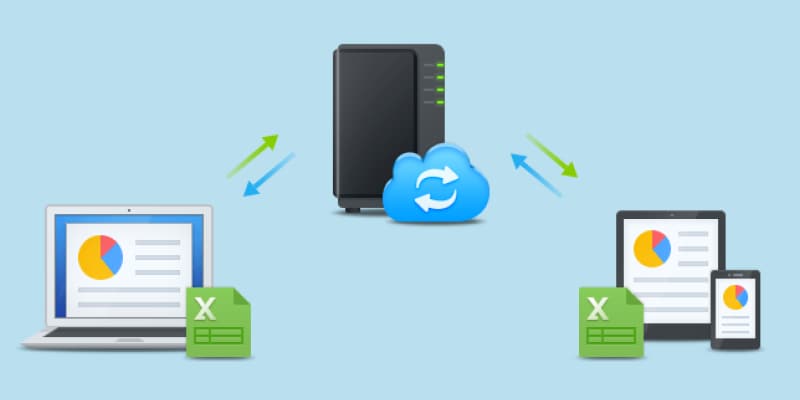
To sync your data across several devices, you must use a Synology NAS as your host server while the remaining devices serve as client devices. All data stored on the Synology Cloud Station server usually stays on the NAS or on-premises, and you can share it across various operating systems and mobile devices.
Cloud Station allows users and administrators to share files by simply sending links to the folder or file. In addition, you can protect the file by adding password protection or setting up an expiration date on the link.
One of its benefits is that Synology Cloud Station drive retains up to 32 versions of your file history. Therefore, if anything gets lost, you can easily retrieve it. You can also use this application to check who accesses and changes files stored on the device.
Different Versions of Synology Cloud Station
There are two versions of the Synology Cloud Station for PC and mobile devices. You must install Synology DS cloud app for your mobile phones, while the Synology Cloud Station Server works for desktops. The Synology DS Cloud app allows you easily sync files between the Synology NAS and mobile devices. Downloading it is easy; you can find it on the iOS App Store or the Android Google Play Store.
There have been over 15 updated versions of the Synology Cloud Station to improve its many features and optimize its use on various operating systems. First, you need to install the package on the host server to use the Cloud Station Server. Afterward, you can install the client utility on all devices you want to sync.
Key Features of the Synology Cloud Station
Many features make the Synology Cloud Station quite popular amongst users, and some of them are:
- Automatically stores files between mobile devices, Synology NAS, and various PC operating systems
- Syncs multiple shared folders up to 100,000 folders
- Keeps 32 historical versions of files with differing data
- Acknowledges and respects Linux and ACL permissions
- You can sync encrypted share folders
- Features a client list to view connected devices
- Easy restoration of file versions from Synology Cloud Station server and PC clients
- It supports hole punching.
- Provides live syncing status and progress on clients and Cloud Station server
- Offers privilege settings that allow selected users to access files on the Cloud Station
Part 2. How To Setup Synology Cloud Station
When you have Synology Cloud Station on your Synology NAS, creating a personal cloud service where you can store all crucial data is easy. This Synology Cloud Station Server is accessible from anywhere with your smartphone, computer, or even tablet. In addition, it synchronizes your files so that when you make changes to a file on one device, the change appears on every other connected device.
However, you first have to set it up to utilize this tool. Setting it up requires a Synology NAS, installing the most recent DiskStation Manager version, a QuickConnect ID, and a Windows or Mac computer. Once you have these, follow the steps below to set up the Synology Cloud Station.
Step 1: Log into the Synology NAS and navigate to the Package Center.
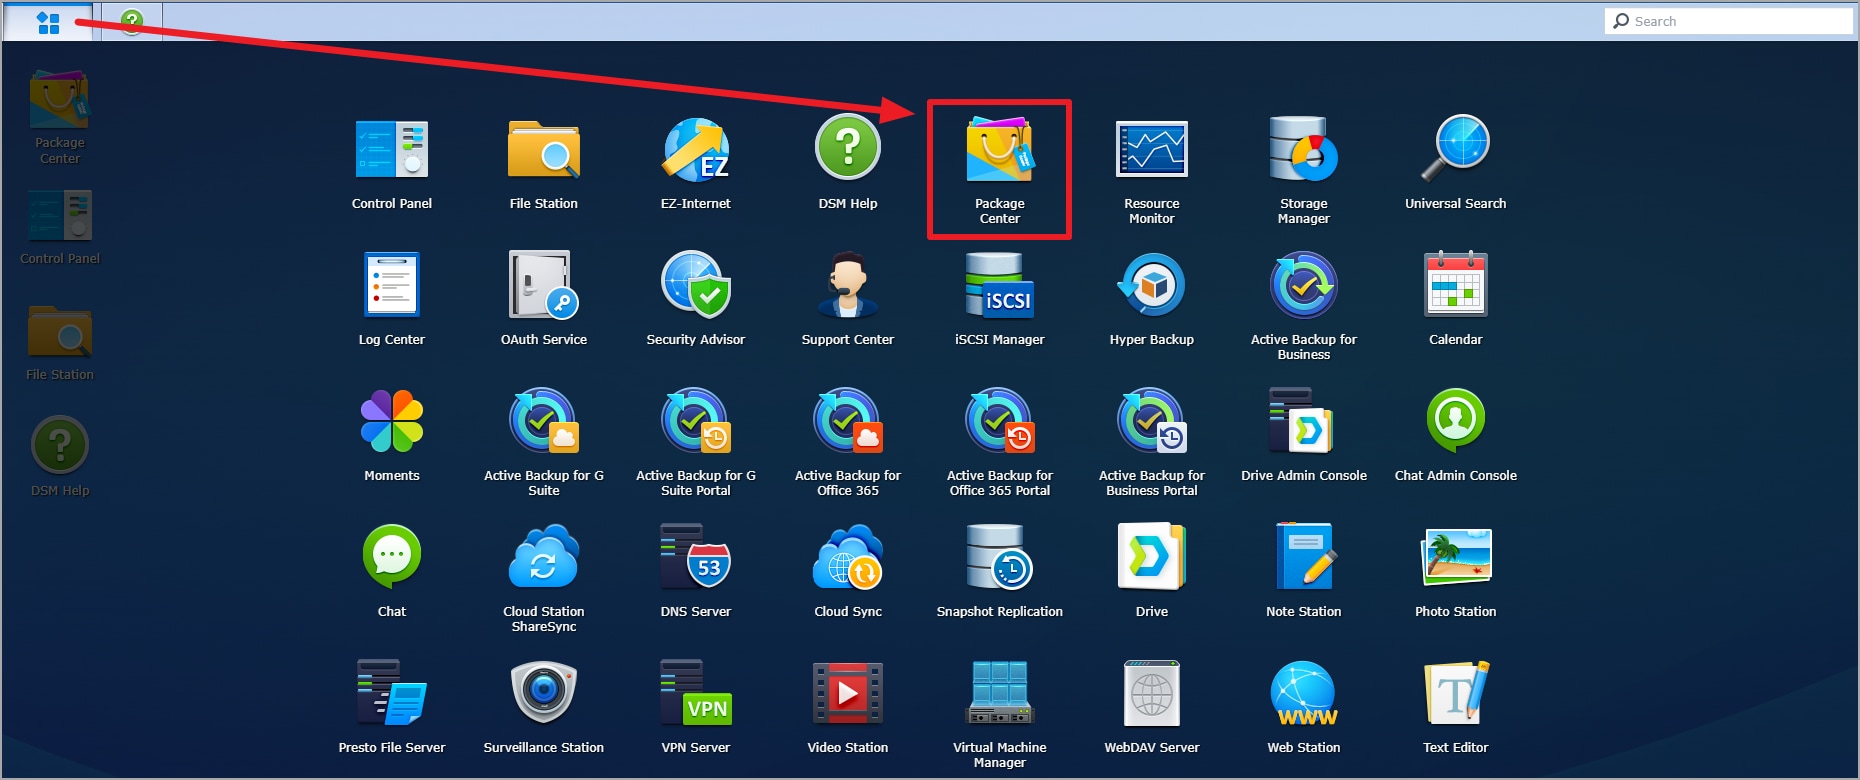
Step 2: Use the search bar available to search Cloud Station and click the result to proceed.
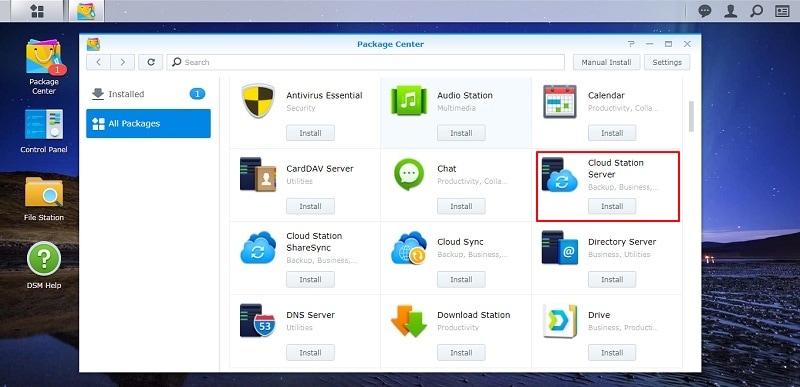
Step 3: Now, click install, and the installation process of the Cloud Station will begin. Once the installation process is complete, it will appear on the menu.
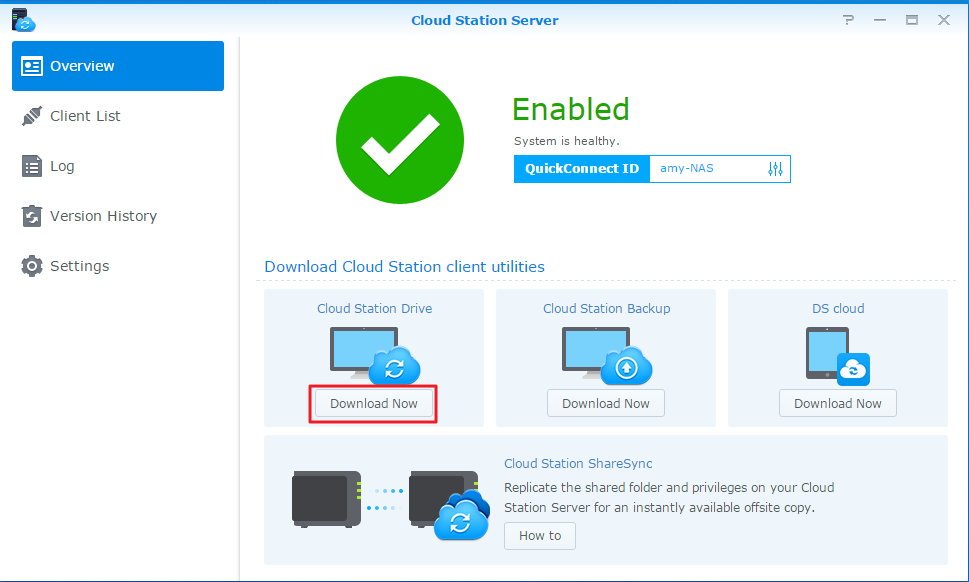
Step 4: Open the app, and then on the screen, check the box to Enable Cloud Station.
Step 5: You can now proceed to set up your computer by visiting the Synology website and entering the model number of your Synology NAS
Step 6: The Cloud Station Drive will appear on the screen; select download and then click ‘exe’ for Windows or ‘dmg’ for a Mac user.
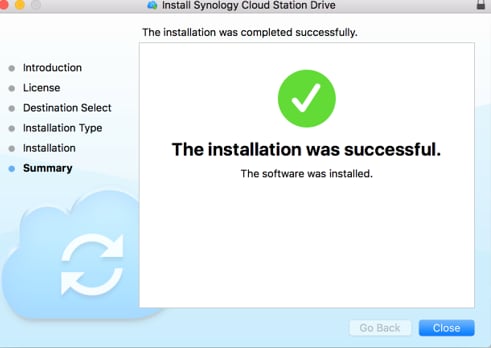
Step 7: Store the installation file on your PC and begin the installation process.
Step 8: After installation, choose English as your preferred language and where you would like to save the Synology Cloud Station Drive Software.
That’s all you have to do. Now, you can easily share files through the Synology NAS.
Part 3. How To Sync Files Between Synology NAS and Computer via Synology Cloud Station Server
After setting up the Synology Cloud Station, you can now sync files between Synology NAS and their computer. Below are the steps you need to follow.
Step 1: After the installation process, launch Cloud Station Server to proceed.
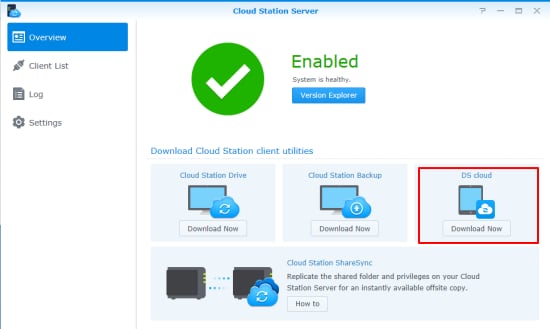
Step 2: In the Overview tab on the app, click the button beneath the Cloud Station Drive to download the right app for your operating system.
Step 3: Launch the installer on your PC and follow the instructions provided to install Synology Cloud Station Drive on your PC.
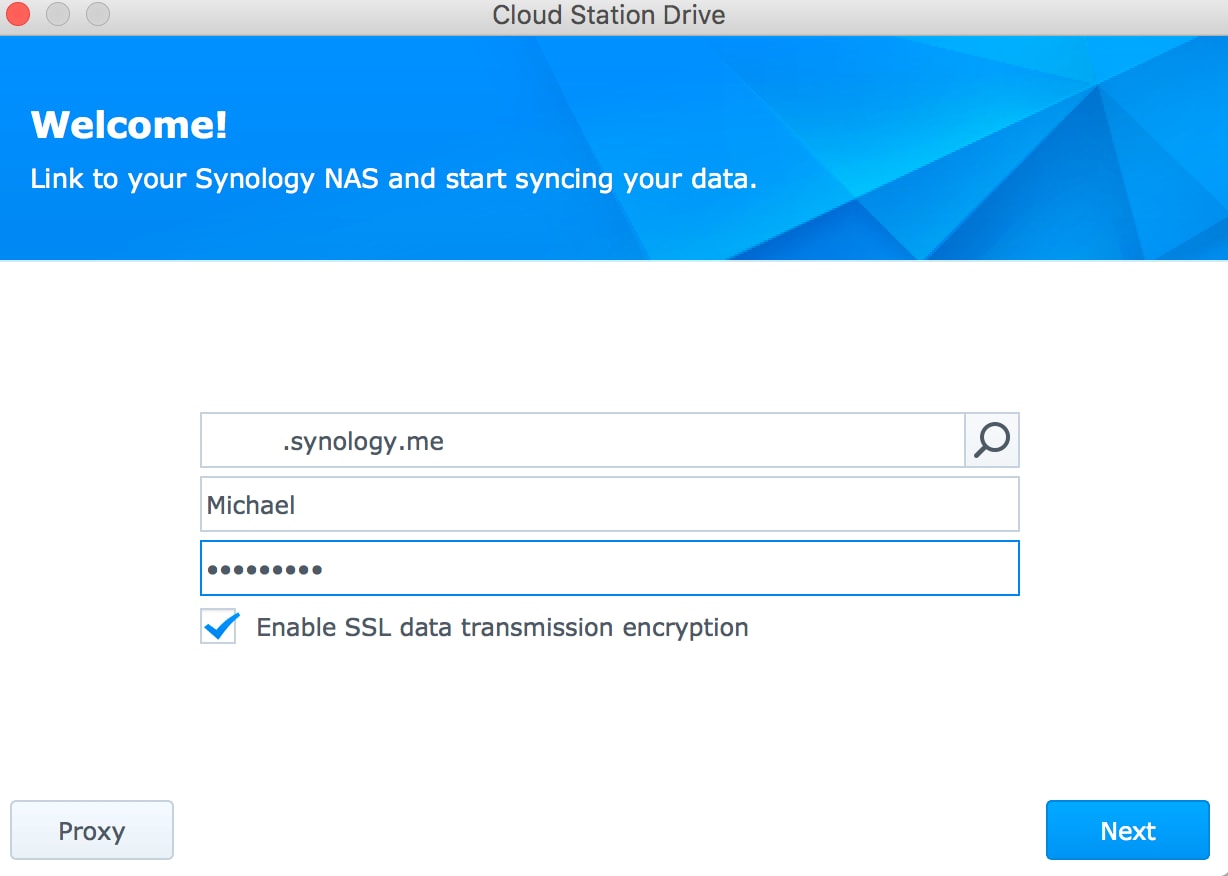
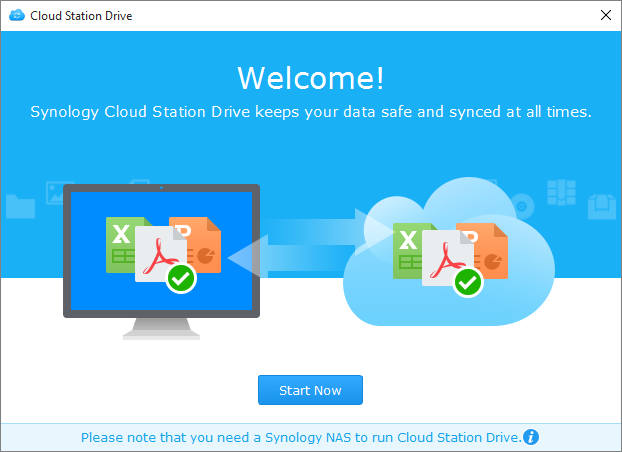
Step 4: After installing, run the Synology Cloud Station on your computer and click Start Now to proceed.
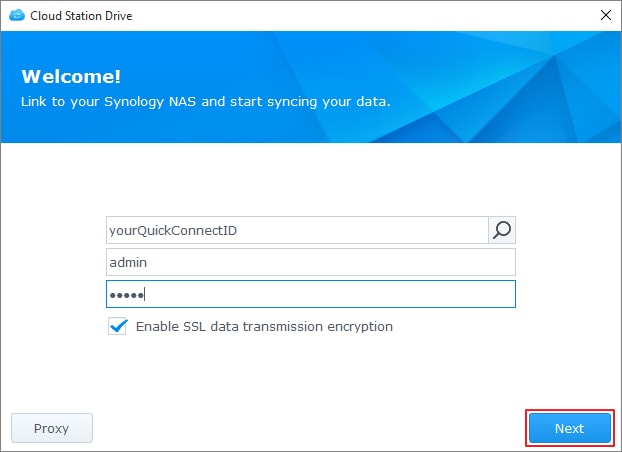
Step 5: Provide QuickConnect ID (or the address for the Synology NAS running cloud station), the password, and a username. If you don’t have the address, you can use the search icon provided to search for IPs within your LAN. After entering the required information, click Next to proceed.
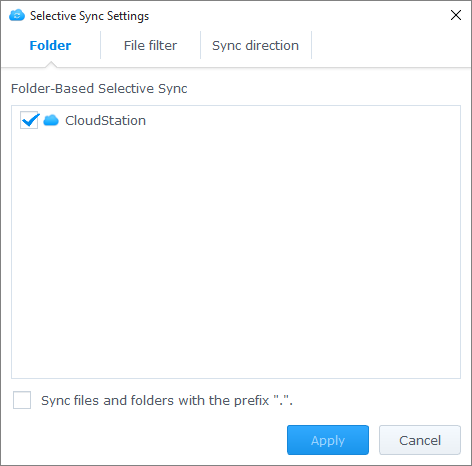
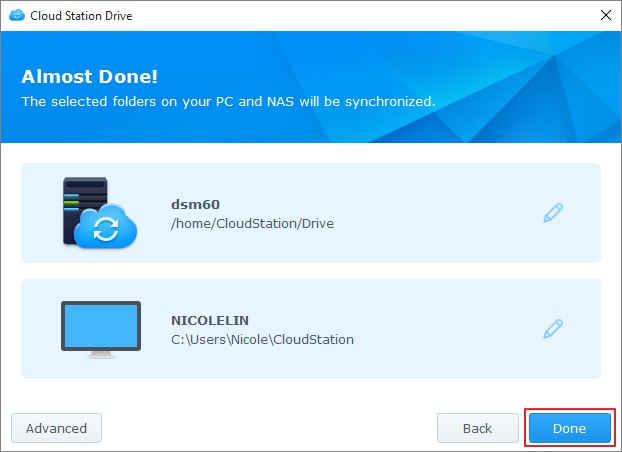
Step 6: Choose the folders you want to synchronize on your Synology NAS and the computer by hitting the Edit icon. You can click the Advanced button to configure the sync setting.

Step 7: Uncheck the folders you don’t want to sync.
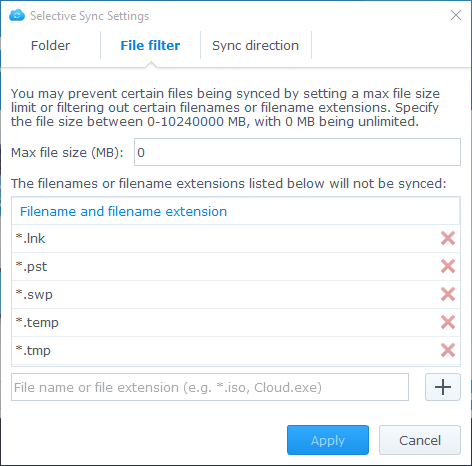
Step 8: You can also set a maximum file size or blacklist some file names or types to ensure they don’t get synced.
Step 9: Choose whether you want to download data from your Synology NAS or you would prefer to sync bidirectionally
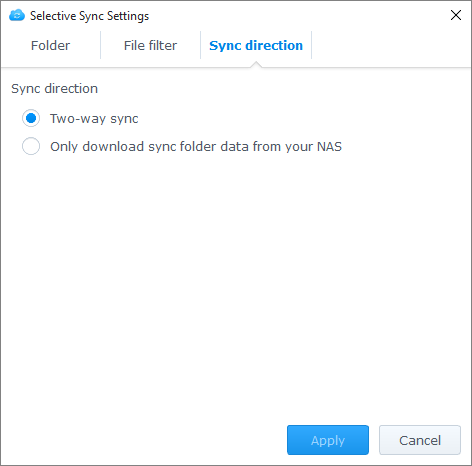
Step 10: Once you select your preferred option, hit the Done button to complete the setup process.
Step 11: The Synology Cloud Station icon will be available on your tray. Click the system tray icon to open the tray menu whenever you want to view the progress and status of your files.
Step 12: If you want to launch the Synology Cloud Station, click Main App.
Step 13: When it launches, it will show you some tips on utilizing cloud station and provide online tutorials to help you learn more information.
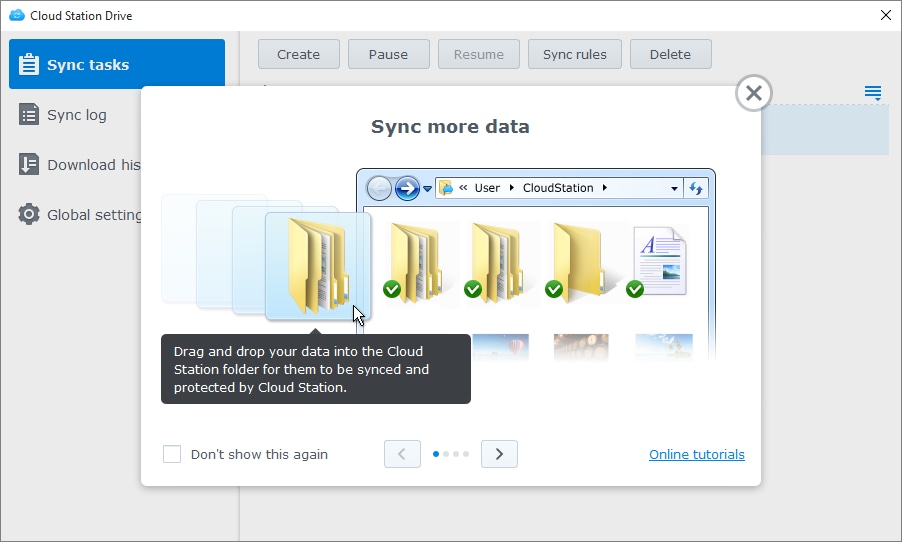
That’s all you must do to sync files between Synology NAS and your PC through the Synology Cloud Station Server. You can easily manage your sync tasks in the Synology Cloud Station Drive.
Part 4. How To Sync Files Between Synology NAS and Mobile Phones Via Synology DS Cloud
Although the Synology NAS facilitates data syncing, it’s easy to lose data. Although you can carry out Synology NAS data recovery, an effective way to ensure you always have access to your data is by syncing files with your mobile phone through Synology DS Cloud. This also comes in handy if you work on multiple devices throughout the day and need to keep your digital life organized.
Rather than choosing to back up Synology NAS to external hard drives, syncing with your mobile phone ensures access to your files at all times. DS Cloud is Synology Cloud Station Server’s mobile counterpart that provides a seamless syncing of folders between the Synology NAS and Android devices. In this section, we’ll be exploring the steps to follow when syncing files between Synology NAS and mobile phones through the Synology DS Cloud; let’s take a look.
Step 1: You can follow the above steps to install Cloud Station Drive on your PC.
Step 2: Download the Synology DS Cloud on your Mobile Device and set it up to proceed.
Step 3: If you’re using DS Cloud for the first time, link it with the Cloud Station Server by clicking login.
Step 4: You must provide your mobile device’s name, the QuickConnect ID or Address, password, and account name.

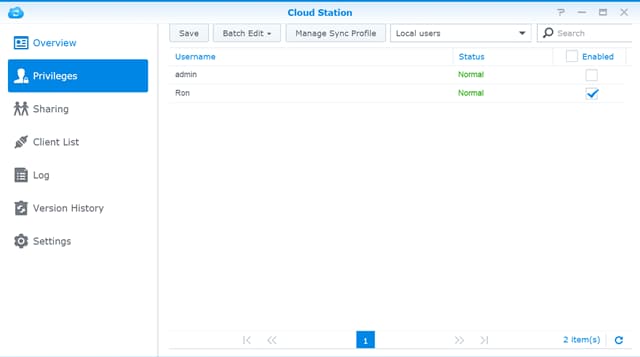
Step 5: If your username and password are down, you can use your computer to log into DiskStation Management with an administrator account. Next, go to Cloud Station Server and choose Privilege to provide yourself with access privileges.
Step 6: After a successful connection, choose the folder on your Synology NAS that you want to sync to your Android device.

Step 7: Choose a folder on your mobile phone or create a new one to sync. It will sync the files on your Synology NAS to the selected folder. If you have an SD card, you can create a folder on the card to prevent the consumption of too much storage space on your mobile device.
Step 8: Now, you can control the synced files by enabling or disabling the option to Sync Subfolders. You can also set a maximum file size or choose syncing formats to prevent some files from syncing.

Step 9: Once you’re done, hit the Done button to start syncing files between your Synology NAS and mobile phone through the Synology DS Cloud.
More Related: Backup Synology NAS to Cloud
Part 5. Important: Synology Cloud Station Is Officially Discontinued!
Many users have asked, ‘is Synology Cloud Station still available?’ Unfortunately, the answer to that is No. In 2021, Synology announced its discontinuing support for Synology Cloud Station Server, Cloud Station Backup, Synology Cloud Station Drive, and the Cloud Station ShareSync on the DSM Platform. These packages are no longer available to download through the Synology Package Center.
However, for users on the 1.2x SRM platform, these packages will remain available and will continue receiving new security updates. In addition, the Cloud Station mobile app alternative, Synology DS Cloud, will remain available on the Synology Package Center and receive new security updates. This Synology Cloud Station Server will be succeeded by a new and improved application known as the Synology Drive. This new application covers all the original vital functionalities and several new features to ensure optimal performance.
Synology Cloud Station Successor – Synology Drive
Although the Synology Cloud Station server is discontinued, Synology Drive continues to serve users at home, in offices, or enterprises. As the successor of Synology Cloud Station, Synology Drive offers access to the main functions of Cloud Station. However, it also provides users with several more functions, like a web portal for file management. Additionally, users can manage and successfully synchronize the files shared by others.

Synology Drive allows users successfully sync files between their devices and the Synology NAS. You can easily sync and share files on the premises for those using the Synology device from the 24-bay FS6400. The Synology Drive Server is compatible with Windows, Linux, and Mac devices. It also supports iOS and Android mobile devices. The Synology Drive is available on Synology NAS devices that support DSM 6.2.3 and higher. You can confirm its compatibility with your device by visiting the Synology Package Center.
Differences Between Synology Drive and Synology DS Cloud
Although they are quite similar, many features set the Synology DS Cloud apart from Synology Drive. The table below compares the two applications to help you understand their differences; let’s take a look.
Synology Drive Server |
Synology DS Cloud |
|
| 1 | Allows you to manage files shared by others | You can only manage files shared by you |
| 2 | Allows users to restrict the download of sharing links | Users cannot restrict downloading sharing link |
| 3 | Easy exportation of logs | Cannot export log on Synology DS Cloud |
| 4 | Easy web portal file management | Available for mobile devices alone |
| 5 | It offers the ability to share files through private networks | There is no private cloud feature for businesses |
Things To Consider Before Upgrading From Synology Cloud Station to Synology Drive
Before making the switch from Synology Cloud Station to Synology Drive, there are several factors you need to consider, and they include the following:
- Compatibility with the Synology Drive Suite: You need to ensure your PC is compatible with the DSM 7.0 or higher for Synology Drive to run on your PC.
- Browser Support: Not all browsers are supported by the Synology Drive application. Therefore, checking the DSM system requirementand ensuring your browser is supported is essential.
- Synology Drive Version: The Synology Drive Version you opt for determines its compatibility with the Synology Cloud Station Drive and Synology DS Cloud. For versions below 3.0, it will continue to work in connection with these apps even after upgrading to Synology Drive Server. However, for versions above 3.0, Synology will no longer support Cloud Station Suite applications after the upgrade. Therefore, you will have to switch to the Synology Drive Suite entirely to ensure compatibility.
- Application Replacement: When you choose to make the upgrade, it will safely migrate the data and settings of the Synology Cloud Station Suite to the Synology Drive Server. It will also scan for file changes and re-sync your files to effect any changes found.
Summing Up
The Synology Cloud Station is a free syncing app with the DiskStation manager. With it, you can share and sync files across various platforms. Although it has been discontinued, it is still available on some DSM versions. This article explained how you could sync files on your computer and mobile phones through the Synology Cloud Station. You can also upgrade to its successor, the Synology Drive, for more functionalities.
For Windows XP/Vista/7/8/10/11
For macOS X 10.10 or later


