Getting The High Definition Audio Device Not Working Error on Windows 10? Here’s How You Can Fix It!
"There is something wrong with the audio driver on my Windows 10 PC, as it stopped working. Can someone tell me how to fix the high definition audio device error on Windows 10?"
If a similar query about audio devices has brought you here, then you are in the right place. Ideally, audio devices are important in any Windows system to provide the right sound. Though, if there is an issue with them, then you can get unwanted issues with the audio device for Windows 10. Don't worry – the high definition audio device not working is a common problem, and it can easily be fixed. In this post, I have listed some of these smart audio device fixes for Windows 10.
Part 1: High Definition Audio Device Not Working: What's the Problem?
Most of the latest Windows systems support high definition audio components in them. Though, while playing an audio or video file on it, you can encounter the audio device not working problem. In this, a yellow warning prompt is displayed and when we click on it, the following window displays an error (mostly with code 10).
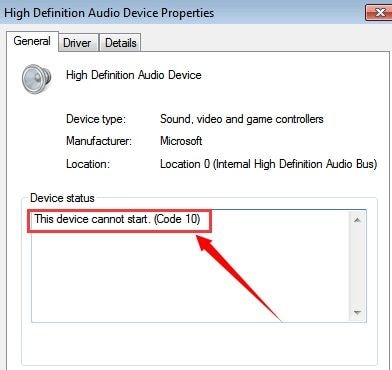
This happens due to a malfunctioning or no high definition audio device on Windows 10. That is, the sound card can be missing or not functioning in an ideal way. There can be an issue with the audio driver as well that can make the audio device for Windows 10 malfunction. To listen to audios in high-quality again, we need to overcome this error.
Part 2: How to Fix the "High Definition Audio Device Not Working" Error?
The good thing is that getting the high definition audio device error on Windows 10 is not a critical error. In most of the cases, the audio device for Windows 10 can easily be fixed by following these suggestions.
Method 1: Update your Audio Device Drivers
This is one of the easiest methods to fix the audio device manager issues in Windows 10. If you have not updated the audio drivers on your system or the update was halted in between, then it can lead to the audio device not working problems in Windows 10. To fix the high definition audio device not working, just update the audio drivers in the following way.
Step 1. To open Device Manager on your system, go to the Start menu and look for "Device Manager". You can also launch the Run prompt and enter the "devmgmt.msc" command.
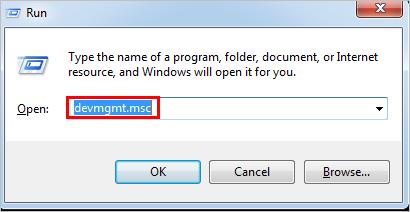
Step 2. Once the Device Manager window will be opened, you can view all the installed drivers. Just expand the sound, video, and game controllers section (or the audio/sound field) and select the installed driver.
Step 3. Right-click it and choose to Update the Driver software. If you want, you can also uninstall the driver first and later choose to install it again.
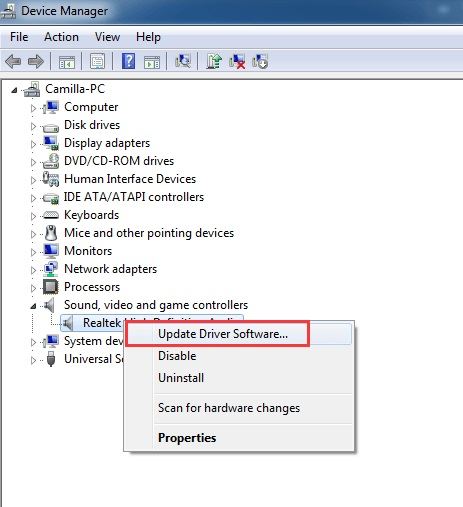
Step 4. This will launch an installer window on the screen. You can choose to look up for updates and follow a simple click-through process to upgrade the audio drivers.
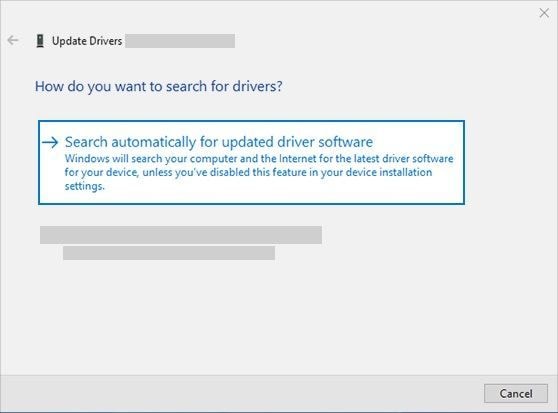
Once the audio drivers are updated or installed successfully, you can restart your Windows system
Method 2: Reset the Audio Drivers
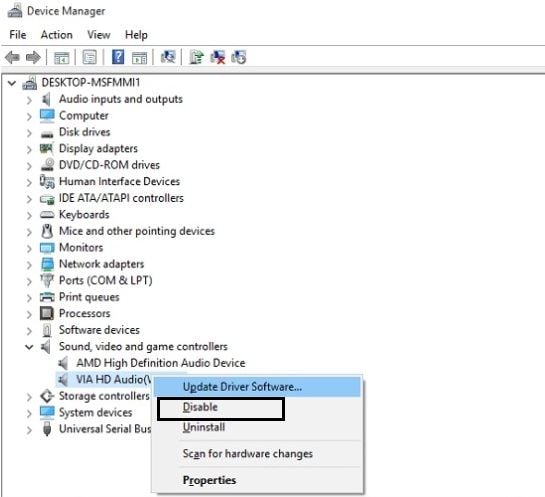
If the audio drivers are already updated on your system, then you can try to reset them instead. This would be a quick fix for the audio device not working issue, and it won't harm your system as well. Just launch Device Manager and select the installed audio drivers from here. Right-click and choose to disable the installed audio driver at first. Afterward, wait for a while and follow the same drill, but enable the driver instead.
Method 3: Replace or Fix the Sound Card
Sometimes, there could be a hardware-related issue with your system as well that can cause the audio device for Windows 10 to malfunction. To resolve this, you can check the functioning of its sound card. If you want, you can carefully disassemble your system, take out the sound card, and insert it to another computer. In this way, you can check whether the sound card is working or not.
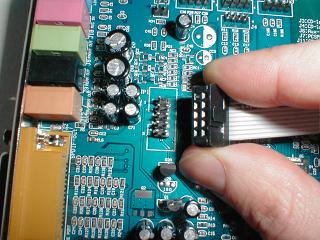
If it is not working properly, then you can try to get it fixed by an expert or just get a new card for your PC as well. Furthermore, you can just visit an expert if you don't want to take any risk with the hardware of your system. You can also learn how to fix HP laptop audio not working issue.
Video Tutorial on How to Recover Files on Windows 10/8/7 Easily?
Part 3: Bonus Tip: Recover Lost Audio Files from Computer with Recoverit
While fixing the high definition audio device error on Windows 10, you could have lost or corrupted some files. Well, in this case, I would recommend using a reliable recovery tool for windows, like Recoverit Data Recovery. Developed by Wondershare, it provides a fast click-through process to recover data from various sources. It supports all the major types of audio formats and even lets us preview our files. You can recover data lost under different scenarios by following these basic steps:
- Recover corrupted files from the computer, USB hard drive, memory card effectively, safely, and completely.
- Supports to restore corrupted files and loss due to virus attack, the program crashes or computer loses power.
- Recover any data and file types with a high success rate and without any quality loss.
- Supported OS: Windows 11/10/8/7/XP/Vista and Mac OS X 10.10 - macOS 13 (Ventura).
Step 1: Select where to scan
Firstly, install and launch the Recoverit Data Recovery application on your Windows 10 as soon as you lose any important file. From its home, you can select a folder, partition, or drive to scan and click on the "Start" button.

Step 2: Wait for the scan to be over
Afterward, you can sit back and wait for a while as Recoverit would try to get back your lost audio files. If you have already got your data back, then you can halt or stop the process in between.

Step 3: Select and save your audio files
Once the process is completed, you can view all the extracted data, listed under various categories. To save your time, you can use the filter option from the sidebar and search for specific files easily.
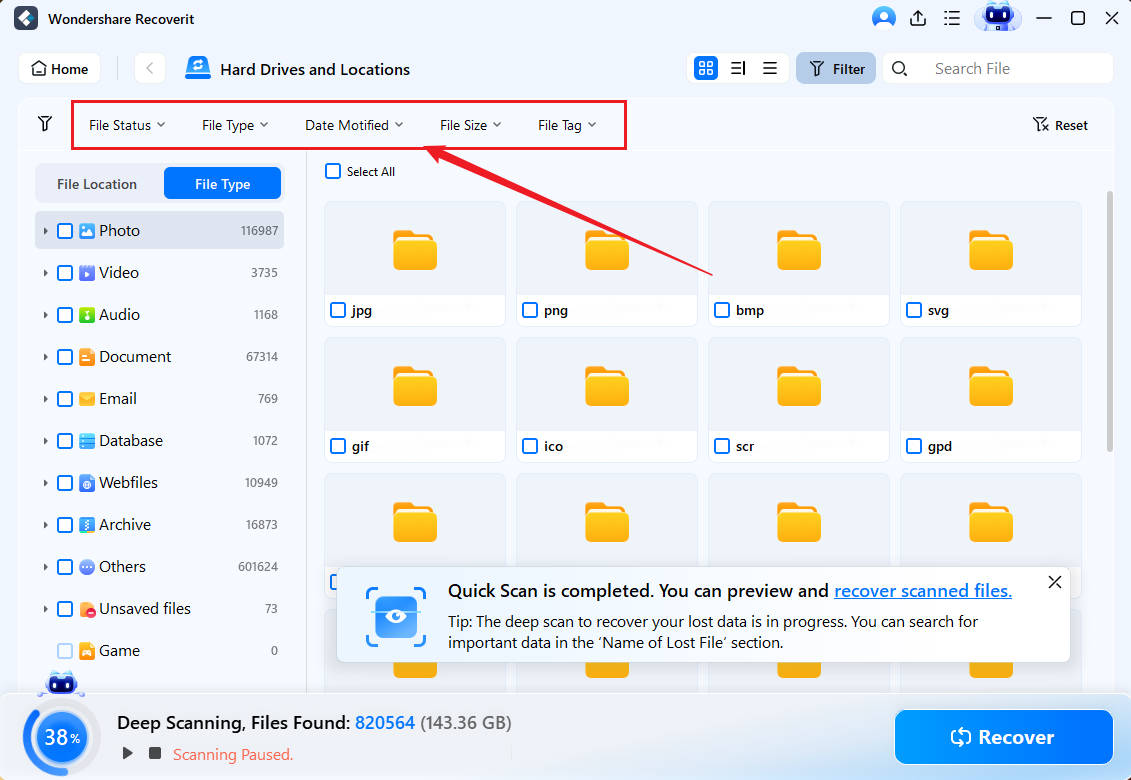
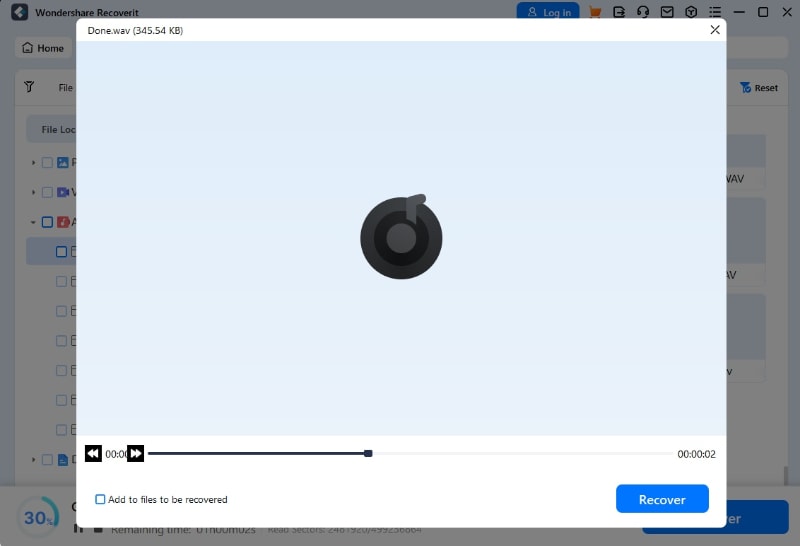
In the end, just preview and select the data that you wish to get back. Click on the "Recover" button to get a browser window so that you can save the selected files to the location of your choice.
That's a wrap everyone! This brings up to the end of this quick and informative guide on how to fix the audio device for Windows 10. You can check the audio drivers or the sound card to resolve the high definition audio device error on Windows 10. In the process, if you end up losing some audio files, then consider using Recoverit. It is a tried-and-tested solution that can help you recover all kinds of audio and other media files seamlessly.
People Also Ask
-
How do I fix high definition audio controller code 10?
Check if the Windows Audio service is started as this error could occur if it is not started. Launch the "Run" dialog box and enter the command "services.msc". Check the "Status" of "Windows Audio". If it isn't running, then choose to "Start".
-
How do I get my sound back on Windows 10?
Check your external speakers with another device other than your Windows 10 to be sure they are not the problem. Using "Device Manager", click on the "Driver" button and choose to "Update Driver" to fix the sound.
-
Why did my sound suddenly stop working?
Your sound suddenly stopped working because of possible scenarios such as the following: the PC has been muted through hardware such as the speakers and the volume has been turned down, the Windows volume icon has been muted, or internal speakers are not working.
Computer Data Recovery
- Windows PE
- System problems
- PC Errors


 ChatGPT
 Perplexity
 Google AI Mode
 Grok
Grok


David Darlington
staff Editor