How to Create a Windows PE Bootable USB Drive?
Windows Preinstallation Environment is a lightweight operating system that provides minimum services to its users. Though, it can readily be used to install a primary operating system, troubleshoot, or perform recovery operations. To use Windows PE, you need to create a USB bootable device. It doesn't matter if you wish to boot your system via a CD/DVD or USB flash drive – you need to create a bootable disk. In this post, we will teach you how to create USB bootable in no time.
What is Windows PE?
The Windows Preinstallation Environment provides a fast and easy way for users to run the installation of primary Windows. It was initially launched with Windows XP and has been a vital part of every version of Windows since then. The lightweight environment runs on its own and has TCP/IP components as well to maintain network communication. Besides providing an ideal environment to install Windows, it can also be used to provide troubleshooting options or perform recovery of system data. Since it can easily be loaded from a USB drive or CD Rom, it is used on numerous occasions.
Step 1: Prepare a USB Drive
The first step to learn how to create a USB bootable with Windows PE is to prepare a USB drive. It can be done by following these steps:
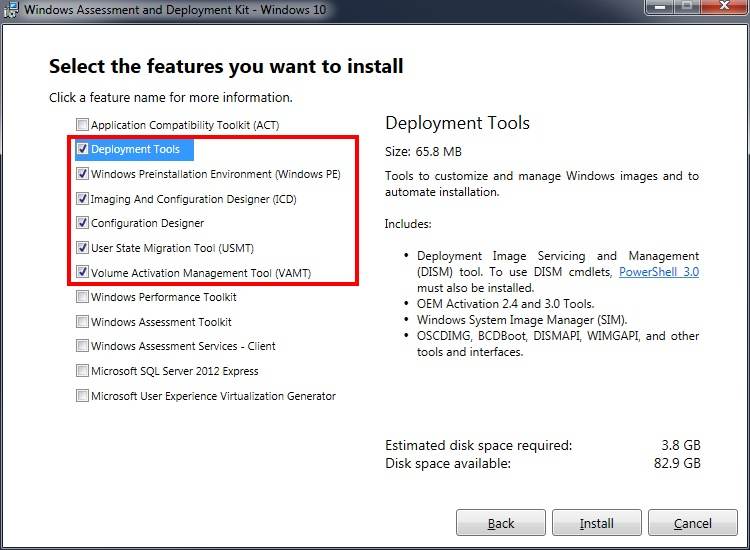
Firstly, you need to download Windows ADK here, or get it from its official website. It includes essential deployment tools and the Windows Preinstallation Environment. To create the bootable WinPE USB or ISO, we only need Deployment Tools and Windows Preinstallation Environment.
Step 2: Create Multiple Partitions on Your USB drive (Optional)
If you are using Windows 10 (1703 version), then you can create multiple partitions on a single USB. It can also be a combination of NTFS and FAT32. The command "MakeWinPEMedia" can be used to format a USB as FAT32 with a limit of 4 GB file size. In this way, you can use the same USB drive to store information as well as to boot it via Windows PE.
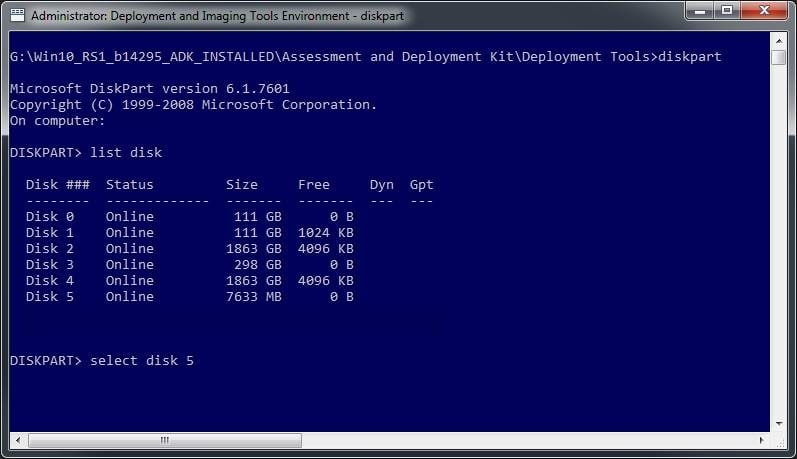
We have taken the assistance of the "diskpart" command to achieve it. Simply follow this code to partition your drive in FAT2 and NTFS. The NTFS partition can be used as an available space while 2 GB of storage has been allocated to FAT32 for Windows PE in this case.
diskpart
list disk
select <disk number>
clean
rem === Create the Windows PE partition. ===
create partition primary size=2000
format quick fs=fat32 label="Windows PE"
assign letter=P
active
rem === Create a data partition. ===
create partition primary
format fs=ntfs quick label="Other files"
assign letter=O
list vol
exit
If you are using an earlier version of Windows 10 (before 1607), then you won't be able to create different partition types. Therefore, to create a bootable disk in this case, you need to work on a single partition. The "MakeWinPEMedia" command will format your drive entirely as FAT32. This will support the booting of any BIOS kernel. Additionally, it will support the file size of 4 GB at max. Once it is done, you can use the "MakeWinPEMedia" command to format the USB drive and make it ready for Windows PE.
Step 3: Create a WinPE drive
After preparing your USB drive, you need to take some needed measures to create a WinPE drive. To create a USB bootable drive with Windows PE, follow these steps:
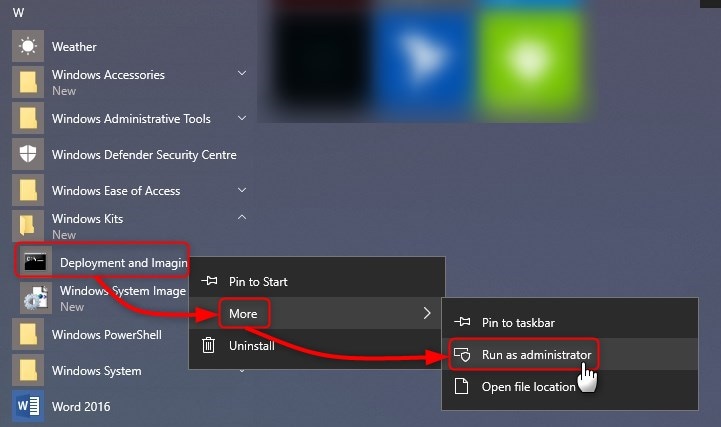
1. To start with, launch the Windows Deployment and Imaging Tools Environment that you have already downloaded. Make sure that you run it via administrator.
2. Now, you need to create a copy of the Windows PE file. This can be done by using the "copype" command. You can have the arm, x86, or amd64 format. A sample code would be like: "copype amd64 C:\WinPE".

If you are creating WinPE for a 32-bit computer, just replace amd64 with x86, that is, the code will be "copype x86 C:\WinPE"
3. Great! You are almost there. Now, you can just install the Windows PE to your attached USB drive. A sample command can be "MakeWinPEMedia /UFD C:\WinPE P:" You can replace the letter of the drive with your drive name as well. Needless to say, this will automatically format your drive.
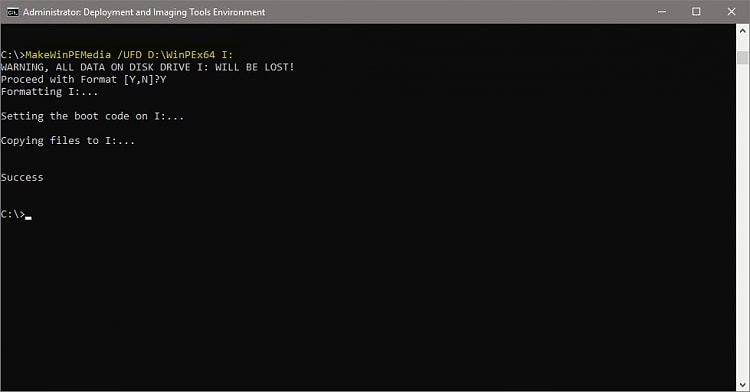
By following these steps, you easily learn how to create a bootable disk using Windows PE.
Step 4: Boot to Windows PE
Now when you know how to create bootable USB, you can make a bootable disk with Windows PE and keep it handy. Whenever your system would crash or malfunction, you can take the assistance of the Windows Preinstallation Environment to fix it. You can boot your system to a Windows PE disk after following these easy steps:
- Firstly, you need to connect the bootable USB drive to your system.
- If your system is already running, then you need to restart it. Else, you can just turn it on.
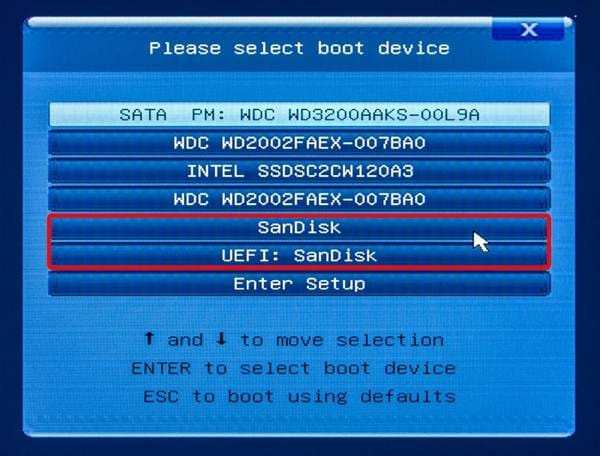
- As your Windows PC would turn on, press the relevant key (depends on the system you are using) that will launch the boot menu.
- From here, you can select the USB drive as a source.
- Once you will select the bootable USB drive with Windows PE, you can see the command "Wpeinit" on the screen as it will load the Windows Preinstallation Environment.
After when Windows PE interface is loaded, you can simply perform the desired operation.
Read More:
Creating a Windows 10 Bootable USB on Mac
How to Boot Win PE on Windows 7 & 8
Best Tools to Build Windows PE
How to Create WinPE to Recover Data from the Unbootable Computer?
In this way, you can create a bootable disk pretty easily and boot your system from it whenever needed. We recommend that you create a USB bootable soon and keep it handy. However, can we create WinPE to recover data from the Unbootable computer? Yes, we recommend Recoverit to help you with recovering data from the unbootable computer. Moreover, you can finish all the processes with simple clicks.
- Recover lost or deleted files, photos, audio, music, emails from any storage device effectively, safely, and completely.
- Supports data recovery from recycle bin, hard drive, memory card, flash drive, digital camera, and camcorders.
- Supports to recover data for sudden deletion, formatting, hard drive corruption, virus attack, system crash under different situations.
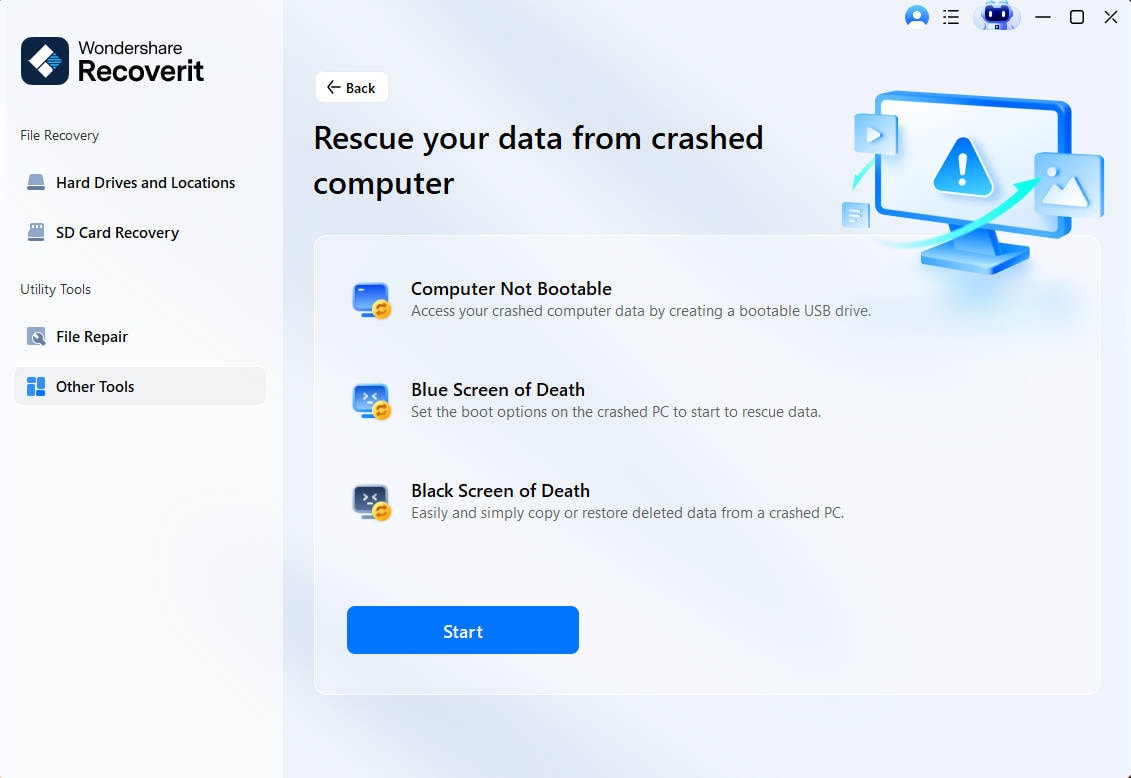
Step 1. Install and launch the Recoverit Data Recovery software and choose the "Recover from Crash Computer" option. Click the Start button to continue.
Step 2. Plugin a USB flash drive or insert a CD/DVD for creating the bootable media. Click the Create button to go on.

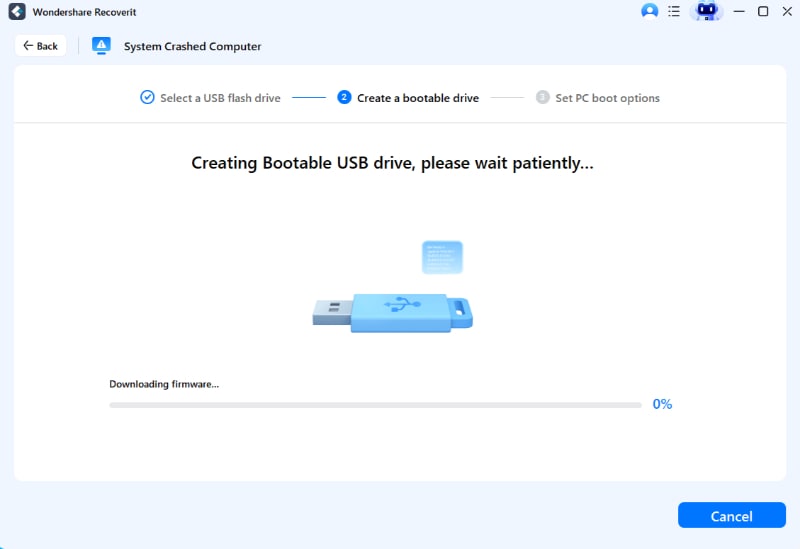
Step 3. The software will write WinPE files into the media. Wait for the process done.
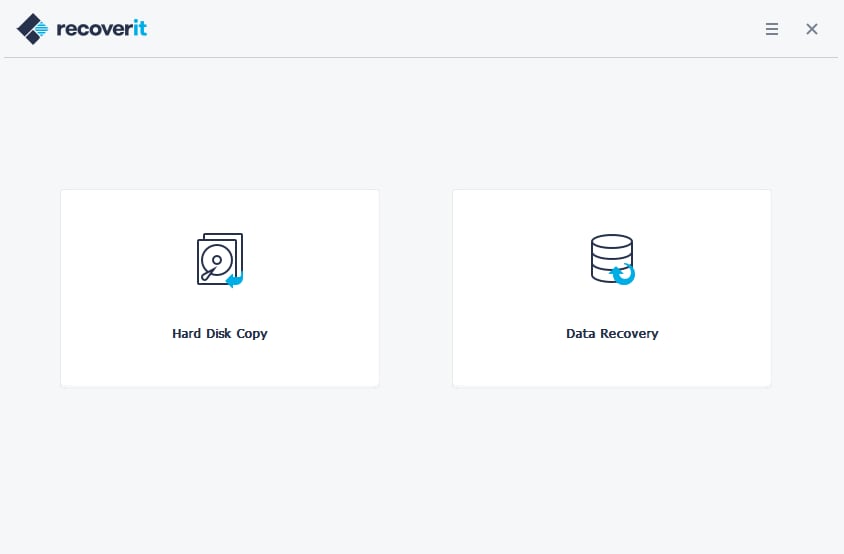
Step 4. When the above process is done, you can boot the unbootable computer with the WinPE media. And Recoverit will launch automatically. Just follow the instructions to recover the lost data.
People Also Ask
-
How to create Windows PE bootable USB drive?
You can create a Windows PE bootable USB drive within 4 steps:
Step 1. Prepare a USB Drive.
Step 2. Create Multiple Partitions on Your USB drive (Optional).
Step 3. Create a WinPE drive.
Step 4. Boot to Windows PE.
-
How to recover data from unbootable computer with bootable USB?
1. Download Recoverit on a bootable computer.
2. Create a bootable usb with Recoverit.
3. Connect the usb drive to the unbootable computer.
4. Adjust the BIOS to boot from USB drive.
5. Recover data from the unbootable computer.
Computer Troubleshooting
- Win System Crash
- Windows Tips
- Computer Problems
- Blue Screen Errors


 ChatGPT
 Perplexity
 Google AI Mode
 Grok
Grok


David Darlington
staff Editor