Windows System
Recovery
Recover critical files from system crashed Windows computer
What Is The Windows Operating System?

Microsoft Windows operating system is a family of operating systems designed for personal computers, laptops, tablets, and other devices. It is developed and maintained by Microsoft Corporation and is the most widely used operating system globally.
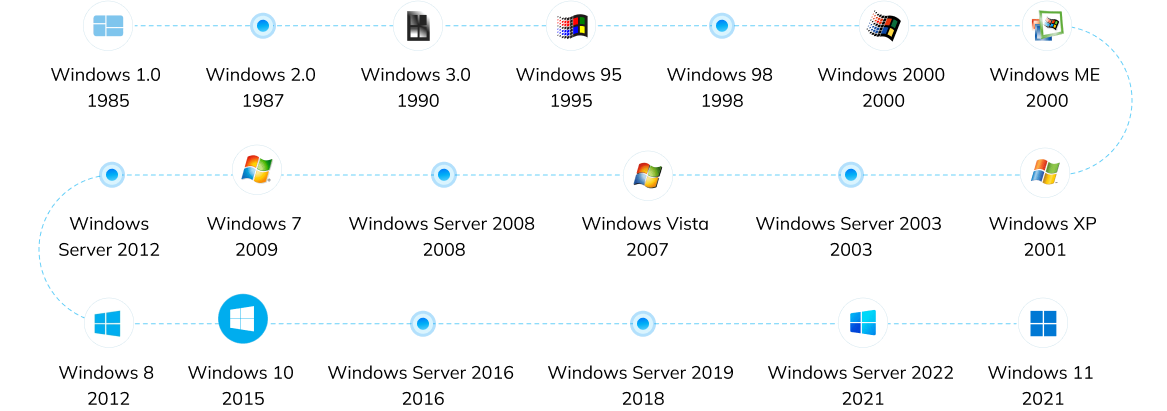
Windows System provides a graphical user interface (GUI), system utilities, and a platform for running various software applications. Some popular versions of Windows System include Windows XP, Windows 7, Windows 8, and Windows 10. And the latest version is Windows 11, released in 2021.
Check the version history of Microsoft Windows
Possible Triggers For Windows System Crashes
Windows Systems may crash for various reasons. Identifying symptoms of Windows
System crashes can help
pinpoint potential causes and facilitate the recovery of crucial files from the
crashed system.
Driver Conflicts
System crashes can occur when two or more drivers conflict with each other. This typically happens when incompatible or outdated drivers are installed.
Corrupted System Files
Crashes can be caused by important system files being damaged or missing. This could be due to virus attacks, hard drive damage, or accidental deletion.
Hardware Failures
Faulty hardware components, such as RAM, CPU, or hard drives, can lead to system crashes. This may be caused by hardware aging, overheating, or improper usage.
Software Conflicts
Crashes can occur when two or more software programs conflict with each other. This typically manifests as a particular program not running properly or causing system errors during operation.
Insufficient System Resources
System crashes can happen when system resources (such as memory, CPU usage, etc.) are depleted. This usually occurs when running large programs or multiple programs simultaneously.
Virus or Malware Attacks
Viruses or malware can wreak havoc by damaging system files, altering system settings, or exhausting system resources, ultimately resulting in crashes and necessitating appropriate measures to prevent data loss and restore functionality.
System Update Issues
Sometimes, Windows system updates can introduce new problems that cause crashes. This could be due to issues with the update package itself or problems that arise during the update process.
Operating System Errors
Although less common, there may be errors within the Windows operating system itself that lead to crashes. In such cases, users often have to wait for Microsoft to release a patch to fix the issue.
Top 8 Windows System Crash Symptoms And Solutions
Here outline the top 8 Windows system crash symptoms, such as
unexpected reboots and blue screen
of death, and offers effective solutions to prevent data loss and
improve system stability.

Note:
1. Restart your computer: In some cases, a simple restart can fix the issue. Press and
hold the power button to force a shutdown, wait for a few seconds, and then turn your computer back
on.
2. Perform System Restore: If none of the steps above have fixed the issue, try
performing a System Restore to revert your system to a previous state before the BSOD occurred.
3. Reinstall Windows: If all else fails, consider reinstalling Windows. This should be
a last resort, as it will erase all your files and settings. Backup your important data before
proceeding with this step.
4. Seek professional help: If you're unable to resolve the issue on your own, consider
consulting a professional technician or contacting your computer's manufacturer for assistance.
Patented Windows System Recovery Tool Defeats Data Loss
emails, etc., with a "no data, no charge" commitment. Moreover, you can preview the found files to facilitate precise recovery.
Recover All Critical Files From System Crashed Windows Computer

Video
MP4, MOV, AVI, FLV, M4V, WMV, MXF, AVI, MKV, MPEG, MPEG4, MPG, MTS, AVCHD, BRAW, R3D, etc

Photo
JPEG, JPG, PNG, PSD, RAW, RGB,3FR, ABM, AFX, ANI, ARW, BIZ, BLD, BLEND, BMP, CAD, etc.

Audio
MP3, AAC, FLAC, OGG, WAV, WMA, AA3, AAC, AC3, ACC, AFC, AIF, AIFC, AIFF, AM, AMR, APE, etc.

Document
DOC, DOCX, RTF, DOT, DOTX, DOTM, ODT, WordML, XLS, XLSX, XLTX, PPT, PPTX, PPSX, PDF, PDF/A, etc.

Archive
7Z, ACE, ALZ, ARC, ARJ, BZ, BZIP, CAB, DBS, DEB, GZ, JAR, KRYPTER, LZA, LZH, MSI, PF, PKG, PUP, RAR, etc.

BKL, BKS, BMS, DBX, DCI, EDB, EML, EMLX, MAIL, MBX, MSG, NSF, OEB, PAB, PST, WAB, etc.

Recoverit is a trusted crashed computer recovery tool that can retrieve all file types stored on your crashed computer. Check full tech specs >>
How Recoverit Rescues Crashed Windows System In 3 Steps?
a functional PC and a blank USB drive. Recoverit computer data recovery tool will effortlessly create
a bootable USB for the crashed computer and restore all files in just 3 easy steps.
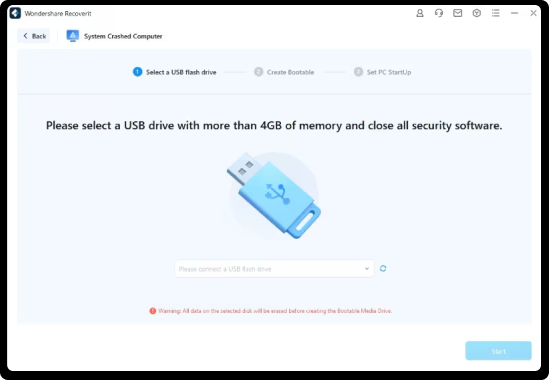
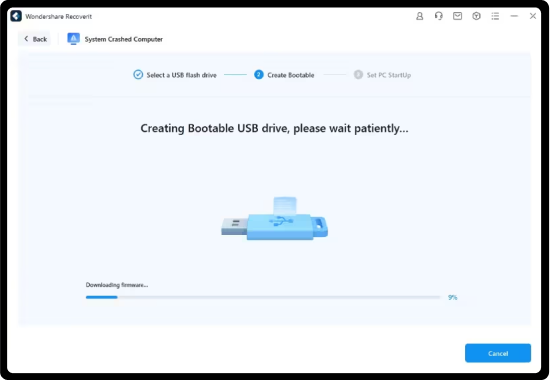
Step 1. Create A Bootable USB Flash Drive
Install the Recoverit Windows computer recovery tool on your functional computer. Launch Recoverit and choose the System Crashed Computer recovery function, then click Start. Follow the on-screen instructions to create a bootable USB drive.
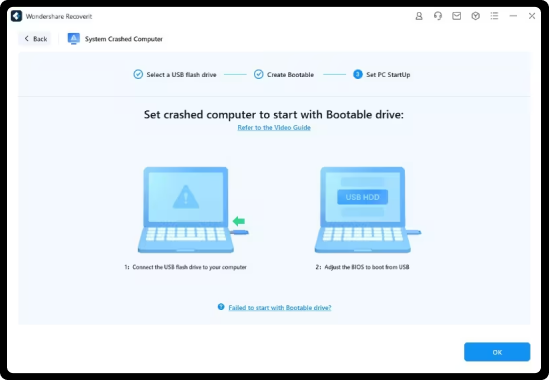
Step 2. Boot Your Crashed Computer Using The Bootable USB
Connect the bootable USB drive to your crashed computer. Restart the computer, press the BIOS entry key when the initial screen appears, and configure the BIOS to boot from the USB drive. Refer to the detailed guide on how to set the computer to boot from a USB.
Step 3. Recover Critical Files From Crashed Computer
After your crashed computer is bootable, you can choose the Hard Disk Copy or Data Recovery function to connect a new hard drive and copy target files from your crashed computer. You can preview the recovered file like videos, photos, documents, audio, etc.
See What Our Users Ask Frequently About Windows System Recovery
-
Are the Blue Screen Of Death errors the same? What are the main type of them?The codes of Blue Screen Of Death errors may vary depending on the Windows version used, and they can be categorized into several types, such as:
1. Blue Screen Bccode 50
2. Locale ID 16393 Blue Screen
3. Stop 0x000000F4 Error
4. Bluescreen 0x000000D1 Error
5. 1033 Error Blue Screen
6. 0x0000007B Error Blue Screen
7. 0x0000000A Error Blue Screen
8. Bluescreen Code 124
9. Stop 0x0000003B Blue Screen
10. Bccode 9F Blue Screen
11. 0x0000001E Blue Screen
12. Bad Pool Caller 0x00000C2 Blue Screen. -
What are the requirements for making a bootable USB?Please select a USB drive with more than 4GB of memory and close all security software. All data on the selected disk will be erased before creating the Bootable Media Drive with Recoverit computer data recovery tool.
-
What else can Recoverit recover besides recovering files from a system crashed computer?Recoverit is not just a system-crashed computer recovery tool but a comprehensive data recovery expert. Besides recovering data from crashed computers, Recoverit can rescue 1000+ deleted or lost file formats from 2000+ storage devices, including hard drives & locations, NAS servers, and Linux systems.
See What Tips & Tricks We Offer


