How to Set Computer to Boot from USB Drive
You can boot your computer from a FAT32-formatted USB drive by restarting the system and pressing the designated BIOS or Boot Menu key (such as F12, F2, or DEL) during startup to set the flash drive as the primary booting source.
● For UEFI-based systems running Windows 8 or 10, you can bypass the startup keys by holding the Shift key while clicking the Restart option to access the advanced boot menu directly.
● If configuring through the BIOS interface, you must use the keyboard arrow keys to navigate to the Boot tab, move Removable Devices to the top priority using the plus or minus keys, and press F10 to save the changes.
● Creating the bootable ISO will erase all existing files on the USB, and any subsequent boot failures are typically caused by a corrupted image, incorrect UEFI settings, or specific motherboard hardware incompatibilities.
Ask AI for a summary
Gone are the days when Windows systems can only be booted from a CD/DVD. Now, users can create a bootable partition on their USB flash drive and use it at the time of need. If your system has been crashed or is not able to boot in an ideal way, then you can change its booting source to a USB drive. In this way, you can easily boot your Windows PC from the attached USB flash drive. Read on and learn how to do the same in two different ways.
How to Get Access to the Computer’s Boot Menu?
If you are lucky, your computer will have a boot menu, and you need to find it. Follow these steps to get access to the computer’s boot menu.
- Step 1: You have to press the key F11 or F12; it can be either of the two to gain access to the boot menu. This allows you to boot from a specific hardware device without changing the boot order ever again.
- Step 2: Press the “Shift key” and at the same time click the “Restart” option on the Windows start menu. The desktop will restart with the boot menu option.
- Step 3: An option to choose the device you want to boot will pop on the screen. You can now choose a device like a USB, DVD, or network boot.
NOTE - Most of the desktops are either shipped with Windows 8 or 10 uses, also known as UEFI-based desktop. On such desktop’s you can always find an advanced boot menu option.
Method 1: Set the Computer to Boot from a USB Drive via BIOS
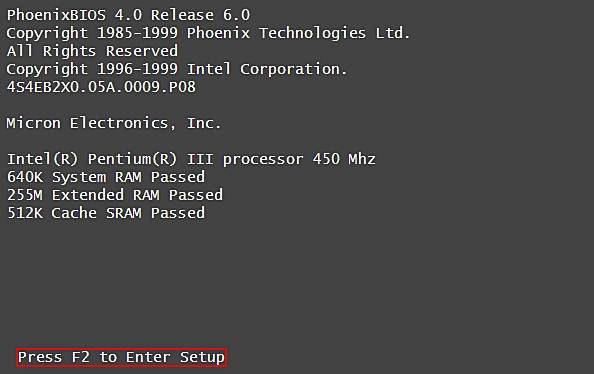
This is the most common way to boot a Windows system from a connected USB drive. Every system has a BIOS (Basic Input Output System) option that users can access. In this way, they can customize the BIOS settings and set the attached USB drive as a primary source for booting. You can access the BIOS options by pressing the BIOS Entry key when the system is turning on. The key can be different from one system to another. Here we can press F12 to enter PhoenixBIOS:
- Firstly, you need to turn on your computer. If it is already switched on, then you can restart it.
- As it would turn on, you need to press the designated BIOS entry key on the keyboard. You might have to press the key a few times to access the BIOS options. Additionally, you can view the key on the booting screen as well.
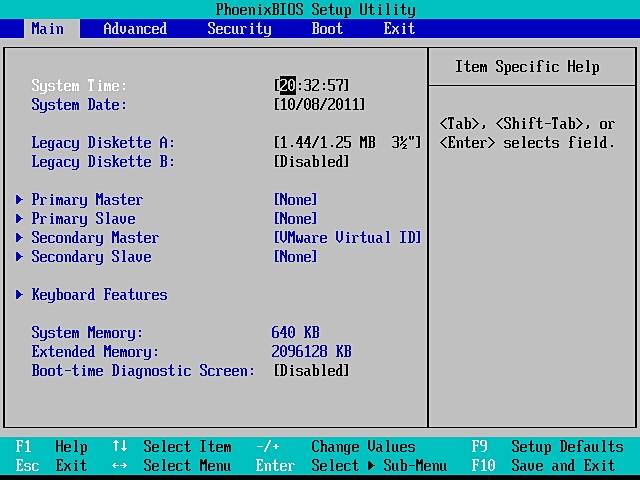
- Shortly, the BIOS options will appear on the screen. Since your mouse won’t work on the interface, you can have to navigate using the allocated keys. Usually, the arrow keys are used to navigate, ENTER to select, and ESC to exit. You can also view the shortcut keys and their allocated jobs at the bottom of the screen.
- As you can see, the interface has different tabs. Using the arrow keys (left and right), you need to navigate the "Boot" section.
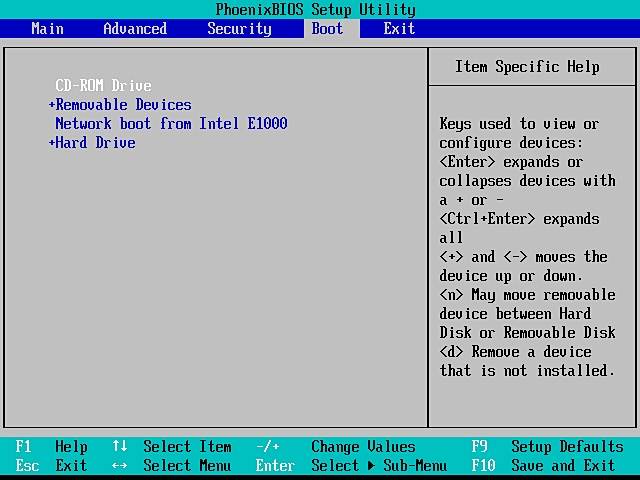
- As you can see, the interface has different tabs. Using the arrow keys (left and right), you need to navigate the "Boot" section.
Step 5: From here, you can see the priority of the sources used by the BIOS. Now, using the + (add) and the – (minus) key, you can prioritize the Removable Devices at the top.
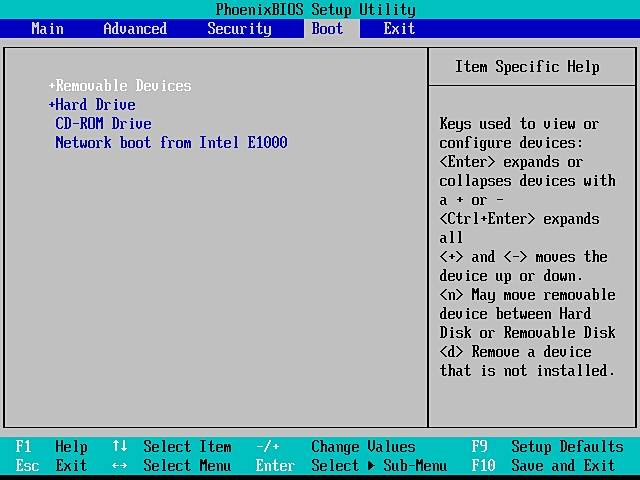
- After setting the USB device as the primary booting source, you can save your changes by pressing the F10 key.
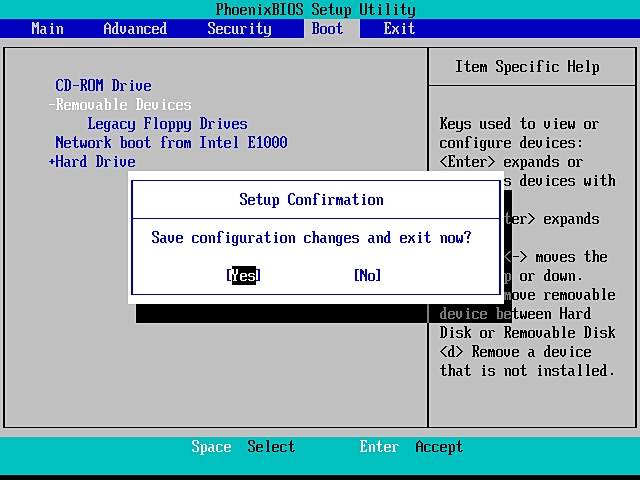
- Accept the changes and exit the interface by pressing the ESC key. Connect a bootable USB drive to the system and be used as a primary source by BIOS.
While the approach is the same, the overall interface and the keys can differ from one model to another. Nevertheless, by following these simple steps, you would be able to boot your computer from a USB drive without any trouble.
| Manufacturer |
Model |
BIOS Entry key |
| HP |
HP and Compaq Desktop PCs (Built-in 2006 or later (came with Vista or Windows 7)) |
F10 |
| HP |
HP and Compaq Desktop PCs (Built before 2006 (XP or earlier) ) |
F1 |
| HP |
HP Notebook PCs |
F10 |
| DELL |
Dell Inspiron, Dell Dimension, Dell Precision, Dell Optiplex, Dell Vostro Dell XPS |
F2 |
| DELL |
Dell Latitude |
Fn+F1 |
| Acer |
Aspire, Power, Veriton, Extensa, Ferrari, TravelMate, Altos |
DEL Or F2 |
| Gateway |
DX, FX, One, GM, GT, GX, Profile, Astro |
F1 |
| Gateway |
Older model |
F2 |
| Lenovo |
Lenovo |
F2 |
| Fujitsu, NEC, Sharp |
Fujitsu, NEC, Sharp |
F2 |
| Toshiba |
Portégé, Satellite, Tecra, Equium |
F1 or ESC |
| Toshiba |
Toshiba Equium |
F12 |
| Shuttle |
Glamor G-Series, Do, Prima P2-Series, Workstation, X Mini XPC, Surveillance |
F1 or DEL |
| Phoenix |
Phoenix BIOS |
F2 |
| AMD (Advanced Micro Devices, Inc.) |
AMD® (Advanced Micro Devices, Inc.) BIOS |
F1 |
| Award |
Award BIOS |
DEL |
| AMI (American Megatrends, Inc.) |
AMI (American Megatrends, Inc.) BIOS |
DEL |
Method 2: Set Computer to Boot from USB Drive via Boot Option Menu
Besides accessing the BIOS user interface, users can directly go to the Boot Options Menu as well. Just like a BIOS Entry Key, most of the systems also have a Boot menu key that can be used to select the primary booting device. Though, before you proceed, you need to ensure your system follows legacy support for booting.
Additionally, you should also be familiar with the Boot menu key on your computer. Here are some popular options:
- Insert the bootable USB drive into the computer and restart the computer.
- As soon as you see the company logo on the screen, start pressing the Boot menu key.
- This will open the Boot menu on the screen. It will display a list of all the devices your system can consider as a booting source. Just select your connected USB and let your computer boot from it.

- If you generated a bootable flash drive/USB, repeat all the steps that you did when you generated the flash drive in the first place. You may have skipped a step or two, which may be causing the trouble.
- Check out whether BIOS has been configured properly or not. It is one of the most common issues causing the booting error.
- Lastly, sometimes the BIOS motherboard is compatible with just certain USB drives, so try using another USB drive and restart your desktop to check whether it works.
By following these simple solutions, you can easily learn how to boot a computer from a USB drive. You can try either of these options and set the desired booting source for your computer. Go ahead and give it a try. If you face any problems, let us know about them in the comments below.
| Manufacturer |
Laptop |
Desktop computer |
| HP |
F9 or ESC |
F12 |
| DELL |
F12 |
ESC |
| Acer |
F12 |
ESC |
| Lenovo |
F12 |
F12 |
| Thinkpad |
F12 |
F12 |
| Asus |
Esc |
F8 |
| GIGABYTE |
F12 |
F12 |
| MSI |
F11 |
F11 |
| Samsung |
F12 |
F12 |
| Microsoft surface Pro |
Volume- |
Volume- |
| Sony |
Esc |
Esc |
| Toshiba |
F12 |
F12 |
| Fujitsu |
F12 |
F12 |
| Gateway |
F12 |
F12 |
Read More:
How to Fix Error 50 of Windows
Using DiskMaker to Create Bootable macOS USB
5 Best Alternatives to Create a Bootable USB
Video Tutorial on How to Install Windows 10 from USB?
What Should I Do if the Computer Doesn't Boot from the USB Drive?
If your computer doesn't boot from the USB drive, there may be several reasons why, such as a faulty USB drive, incorrect BIOS/UEFI settings, or a corrupted bootable image. Try the following troubleshooting steps:
- Ensure that the USB drive is properly inserted into the USB port.
- Try a different USB port or computer to rule out any hardware issues.
- Check the BIOS/UEFI settings and ensure that the USB drive is properly selected as the first boot device.
- Check if the bootable image on the USB drive is corrupt or incomplete and try creating a new bootable USB drive.
-
- If all else fails, check with the manufacturer's support website or forums for any known issues or solutions.
Conclusion:
With the right kind of information and devices, it will not be difficult to install an operating system through USB. USB is one of the most reliable and best options when it comes to installing software.
However, you must keep a backup of important files because when you burn the ISO file on it, all the files and data will disappear. In case you lost your data; Wondershare Recoverit software will revive all your data back. All you have to do is download and install the tool in your system and leave the rest to the recover it tool.
People Also Ask
-
Why should I boot my computer from a USB?
Booting from a USB drive can be useful in a variety of situations:
1. Install a new operating system or run utilities to diagnose and repair issues with the computer.
2. Booting from a USB is faster than booting from a CD/DVD.
3. Booting from a USB allows you to carry your operating system or diagnostic tools with you wherever you go.
-
Why my computer won’t boot from the USB drive?
If your computer doesn't boot from the USB drive, there may be several reasons why, such as a faulty USB drive, incorrect BIOS/UEFI settings, or a corrupted bootable image.
-
What should be the format of a bootable USB device?
It should be in Fat32 format.
-
Is it safe to boot from a USB?
Yes, it is safe to boot from the USB device; it is the most reliable source of installing any software.
Computer Troubleshooting
- Win System Crash
- Windows Tips
- Computer Problems
- Blue Screen Errors


 ChatGPT
 Perplexity
 Gemini
 Claude
 Grok
Grok


David Darlington
staff Editor