How to Fix Black Screen on Startup (Windows 7, XP & Vista)
1Screen keeps going black at startup?
When I start up my computer everything seems to be working fine, but after a while, the computer's screen turns black, and the power light remains green. If I switch it off and then switch it on again, the screen (again) starts up, and then (again) after a few seconds, shuts down. I can't use my computer now, even in safe mode. Any advice?
The first thing that you would do when you encounter this is to switch to the safe mode, checking whether you can fix this black screen. After all, you can get some computer checking and repairing utilities there, which would be helpful to you. For instance, some black screen on startup is caused by the drive, and you can easily fix it by updating it. What if this doesn't help or you even can't access the safe mode? Usually, it's about the problem in your system registry. You need a tool to boot your computer and deal with it.
23 steps to fix your computer's black screen at startup
Step 1. Create a bootable CD/USB drive
- Microsoft’s official tool for creating installation media and ISO images with Windows 10 is Media Creation Tool. You can download the latest version here – https://www.microsoft.com/en-us/software-download/windows10
- Select the Download tool now, and select Run. You need to be an administrator to run this tool.
- If you agree to the license terms, select Accept.
- On the What do you want to do? page, select Create installation media for another PC, and then select Next.
- Select the language, edition, and architecture (64-bit or 32-bit) for Windows 10.
- Select which media you want to use:
- USB flash drive. Attach a blank USB flash drive with at least 8GB of space. Any content on the flash drive will be deleted.
- ISO file. Save an ISO file to your PC, which you can use to create a DVD. After the file is downloaded, you can go to the location where the file is saved, or select Open DVD burner, and follow the instructions to burn the file to a DVD. For more info about using an ISO file, see the Additional methods for using the ISO file to install Windows 10 section below.
- After the installation media is created, follow the steps below to use it.
- After completing the steps to install Windows 10, please check that you have all the necessary device drivers installed. To check for updates now, select the Start button, then go to Settings > Update & Security > Windows Update, and select Check for updates. You may also wish to visit your device manufacturer’s support site for any additional drivers that may be needed.
Step 2. Fix the black screen on the startup
1. Insert your Windows Vista or Windows 7 disk into the DVD player and restart the computer.
2. You'll see the boxes of Language, Time and Currency, and Keyboard on the next screen.
3. There are two options on the lower left side. One is "Repair your computer", and the other one is "What to know before installing Windows".
4. Click on the first one: "Repair your computer".
5. Windows will then try to find the installation directory for Vista or Windows 7, depending on what you have.
6. Next up is a screen with a box called Recovery Options. Click the first option, Startup Repair.
You'll see a Startup Repair box with the message "Startup Repair is checking your system for problems…".
7. When it's done, it will prompt you to reboot. If there is more than one problem it may reboot again to continue repairing.
8. At this time, you can plug out the DVD, restart your computer and everything should be working normally.
3Recover Lost Data When the Computer Shows Black Screen
The black screen often causes the failure of booting the system. You have to fix it before accessing the data on the computer. However, it may fail to fix the issue with the above method. Under these circumstances, you will need hard drive data recovery software to retrieve your lost data back. Follow the below steps to recover your data from the computer with a black screen.
Start Recoverit on your computer and select your preferred data recovery option. You can choose the "Recover from Crash Computer" mode when experiencing challenges with your Windows 10 not booting up. Then proceed to click the "Start" button as soon as the next pop-up window emerges.
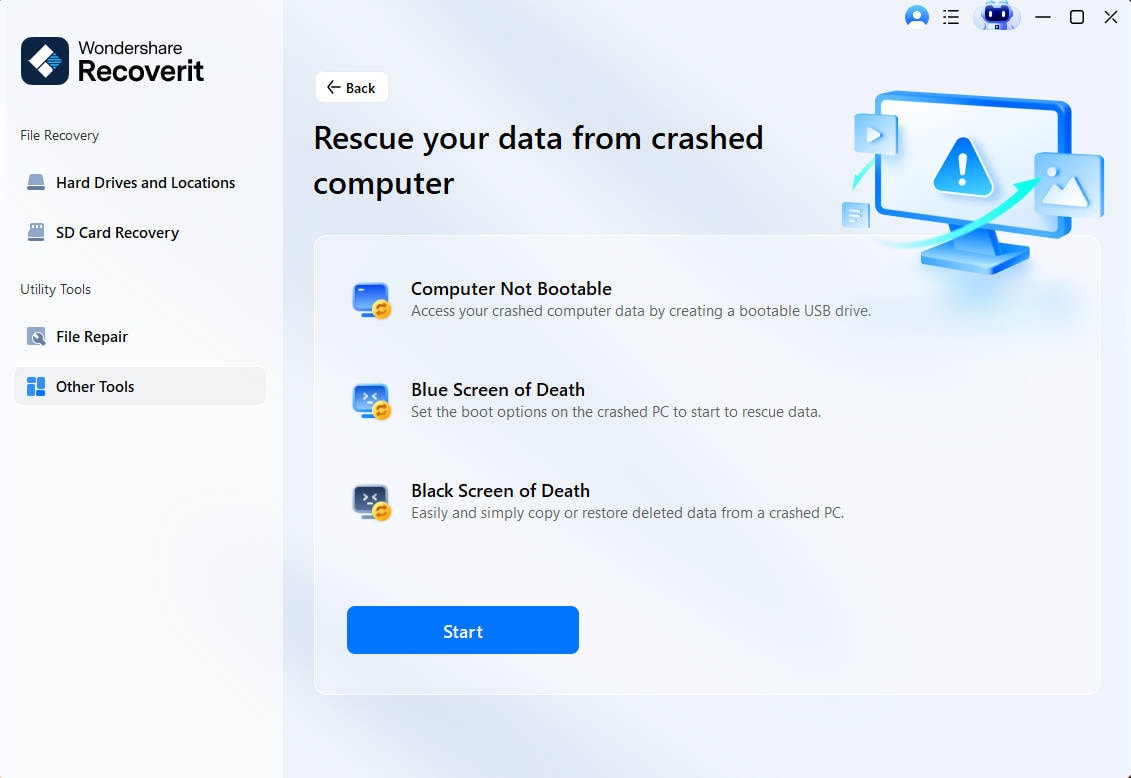
Choose between the USB bootable drive or CD/DVD to establish a bootable drive and begin by clicking the "Create" button.

A Window notification asking you to format your USB drive then pops up, ensure you backed up all your vital information before proceeding to click the "Format" button.
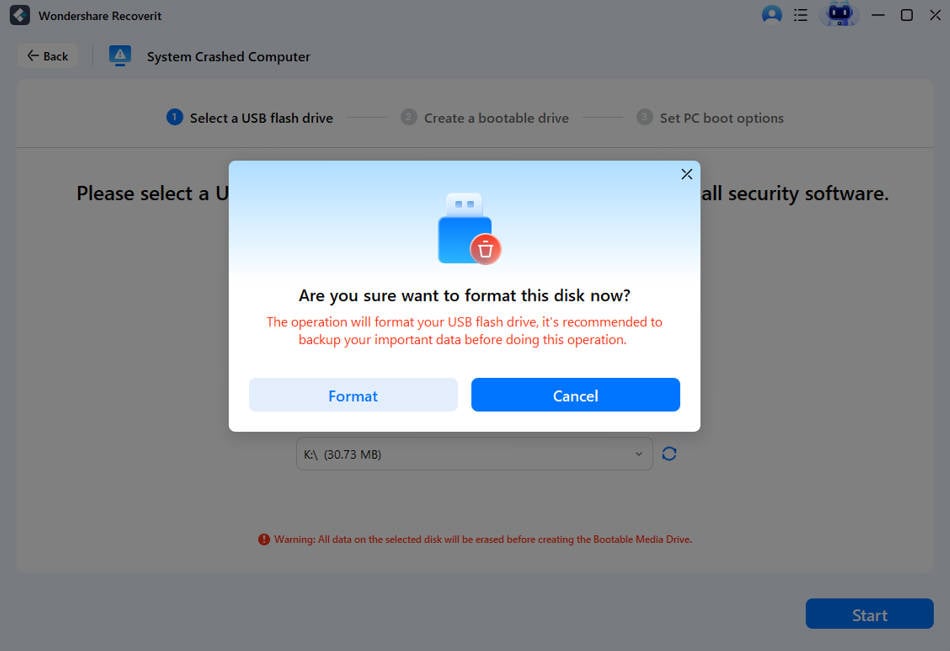
This will then start creating a bootable drive so try not to disrupt the process by ejecting the USB flash drive from your computer. You should follow the next steps on your screen or go with the option to view the full guide to initiate your data recovery process.
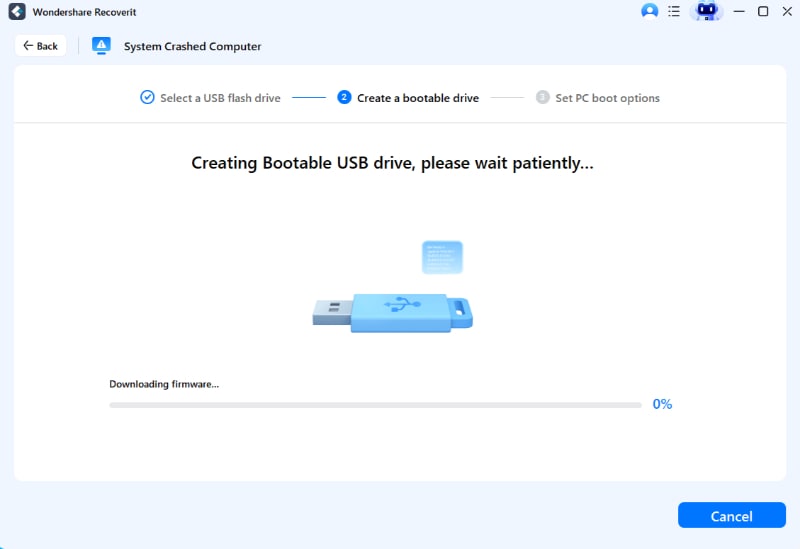
To create a bootable drive, you need to be patient as this could take some time, three easy steps concerning data recovery solution then pop up.
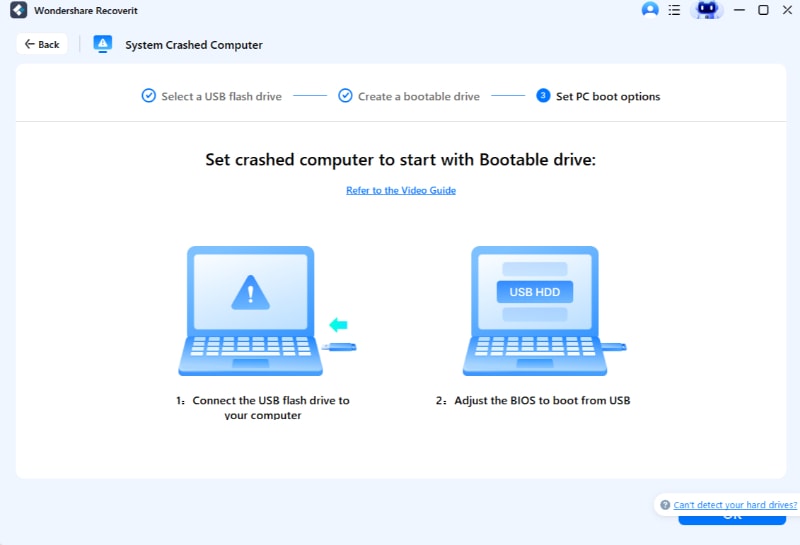
Try changing your computer boot sequence and let it boot from the bootable media that you have just created before initiating data recovery from unbootable Windows 10.
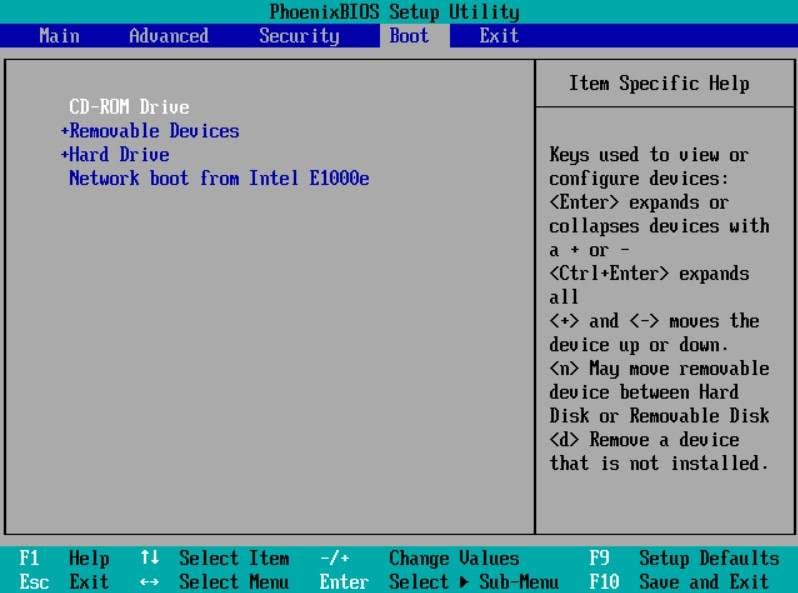
Initiate a quick computer restart and enter the BIOS with the F12 function key. It is important to note that this BIO entry key is different across computers. Get vital information about ways to set your computer to boot via a USB drive.
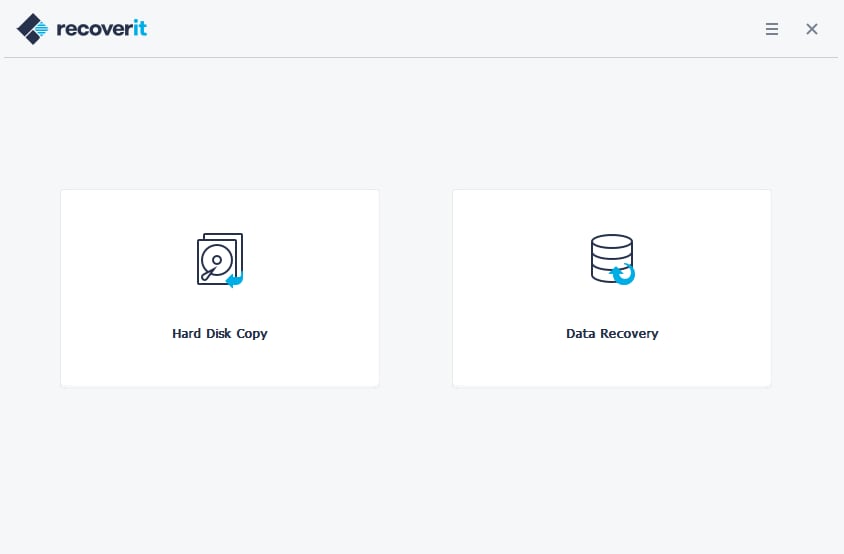
Recoverit software starts automatically after the booting process via the bootable drive. Then proceed to copy data from the hard disk or you may choose to recover lost data from Windows 10. We hope this has been useful information concerning data recovery from unbootable Windows 10 as well as remedy challenges arising from lost data on Windows 10 operating system.
Computer Data Recovery
- Windows PE
- System problems
- PC Errors


 ChatGPT
 Perplexity
 Google AI Mode
 Grok
Grok


David Darlington
staff Editor