6 Tips to Fix NTFS_FILE_SYSTEM Error in Windows 11/10/8/7
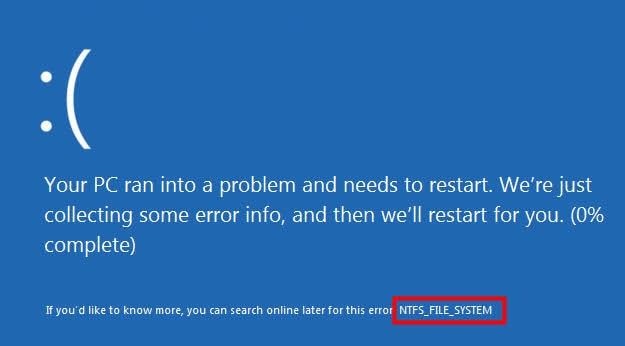
There are various types of errors associated with Windows 11, 10, 8, and 7. One such error is the NTFS_FILE_SYSTEM error which prevents Windows from starting. This error is called BSOD, an acronym representing its major symptom: Blue Screen of Death. To fix this error, you need to be guided on tricks and tips you can use. Here, you will learn all the major tricks that have proven effective over time. You also learn how to recover your data if they get lost from the NTFS disk.
Part 1: Causes of NTFS File System Error
You must know the causes of NTFS file system error so you can best understand how to resolve them. These causes include:
1. Virus or Malware Infection
Your system can malfunction if it gets corrupted due to malware or virus infection. Such infections can come from external sources during file transfers, unreliable downloads, and so on.
2. Issues with Drivers
If the drivers in your Windows are having issues like corruption or damage, it could lead to an error in the NTFS file system. More so, if your drivers are outdated, you can expect this error to occur.
3. Limited Space on System Memory
If your system memory space is limited due to so much accumulated data and files on it, it could slow down functions and prevent them from working properly. Thus, such errors as NTFS file system error may arise
4. Removed or Damaged System Files
Your system files are key in the operations of your system. Any damage to them will affect the operations of your system. Also, if any system file is missing, it will create such errors as NTFS BSOD
Part 2: 6 Methods to Fix NTFS_FILE_SYSTEM Error in Windows 11/10/8/7
This is the center of concentration: methods to fix NTFS_FILE_SYSTEM error in Windows 7, 8, and 10. The methods are practical and you can apply them till you get the one that works for you. Also, the cause of the error has a large role to play in determining which solution to use.
Method 1: Using Windows 10 Startup Repair to fix NTFS_FILE_SYSTEM Error
This method is the first to be explained and rightly so. This is because it addresses the issue of your PC not booting because of the NTFS_FILE_SYSTEM error. Here, you can use Windows 10 Startup Repair to fix this issue using the steps below:
Step 1. Insert a disc for Windows 10 installation then start your computer again
Step 2. Insert the bootable media you created before your computer restart. On your keyboard, keep pressing the "F2" key or Del, Esc, F12, F9, F8—depending on the type of motherboard
Step 3. Change the boot order to enable your computer boot from the bootable media. This action can be achieved in BIOS
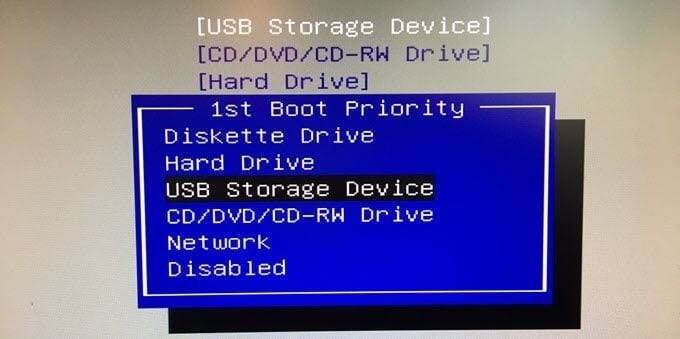
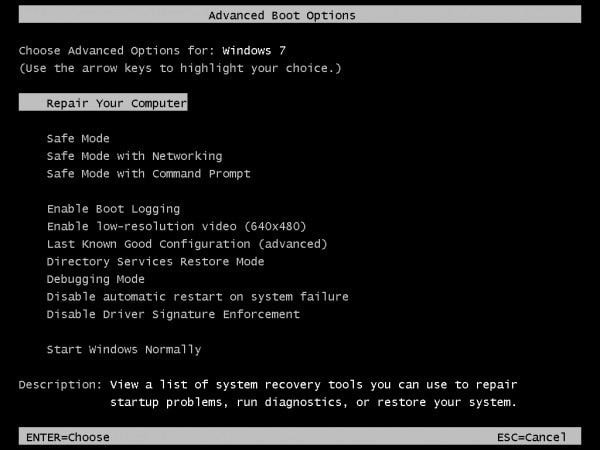
Step 4. Windows screen will appear. Here, you should select "Repair your computer"
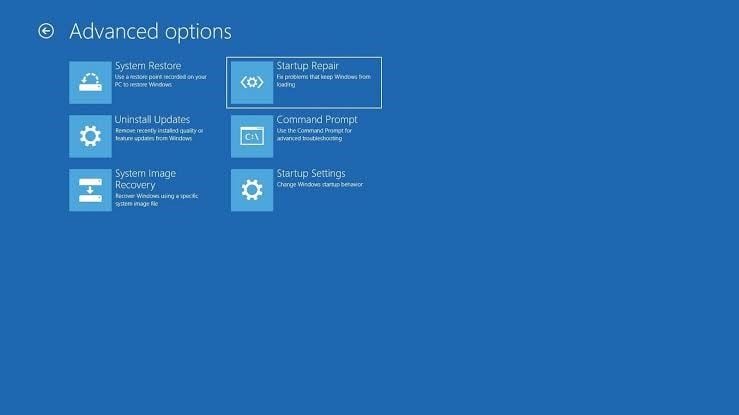
Step 5. Then follow the path: "Troubleshoot" > "Advanced Options"
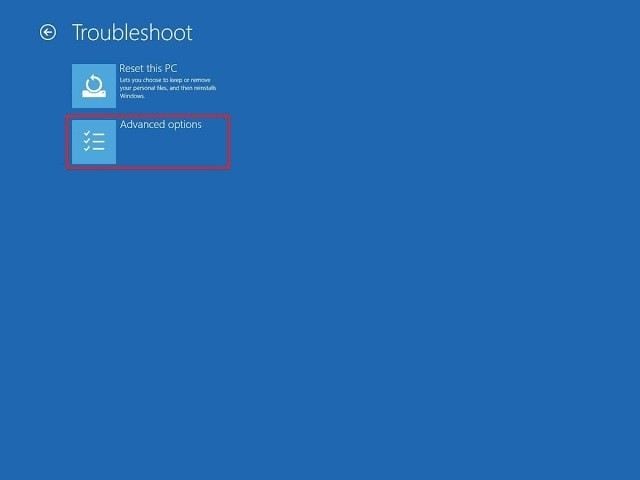
Step 6. Click "Startup Repair"
Method 2: Rebuild Boot Manager
You can rebuild the boot manager if using startup repair as explained in method 1 above doesn't work. How to do this? Follow carefully:
Step 1. Again, visit "Advanced options" > "Command prompt" instead.
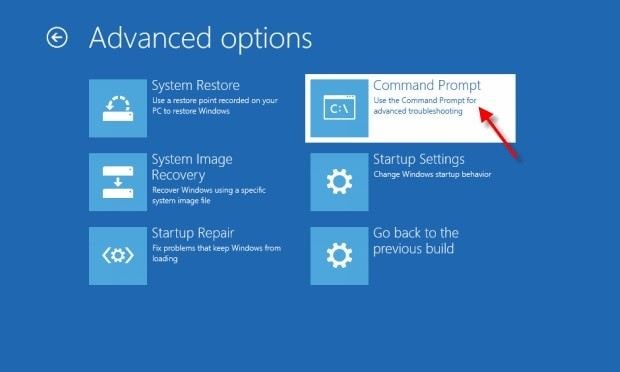
Step 2. Type these commands below to fix the error:
- bootrec.exe /fixmbr
- bootrec.exe /fixboot
- bootrec.exe /rebuildbcd
- bootrec /scano
Method 3: Boot into Safe Mode
When you boot your system into safe mode, it implies that your windows will be started using the most minimal system requirements. To boot into safe mode, follow these steps:
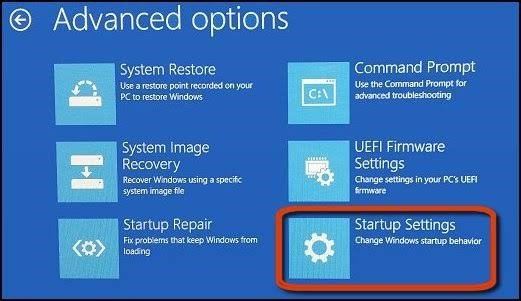
Step 1. Go to "Advanced Options"
Step 2. Choose "Startup Settings" and restart your system
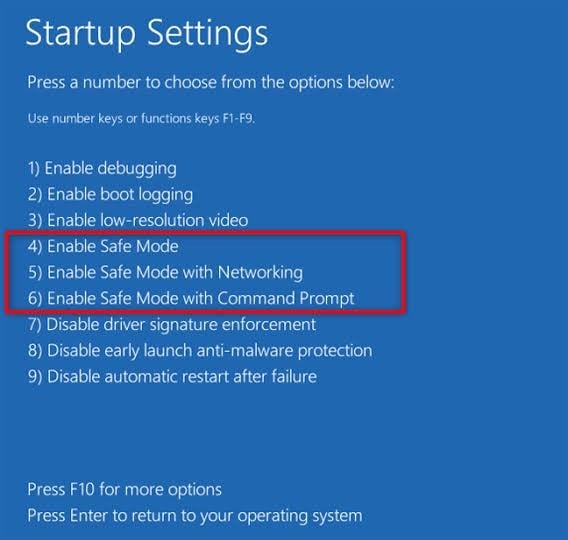
Step 3. Press "F4" on your keyboard to move into a safe mode. To move into safe mode with networking, press "F5". When you press "F6", it will enable the safe mode with a command prompt.
Method 4: Update Windows Drivers
This solution is meant to tackle the issue of outdated Windows drivers. You can update your drivers through the following:
Step 1. Right-click on the "Start" menu. From the list that appears, choose "Device Manager"
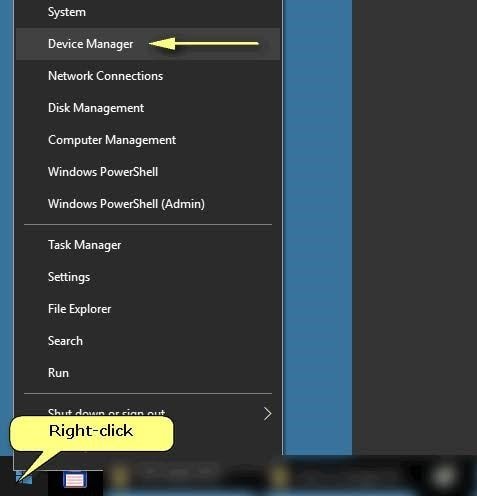
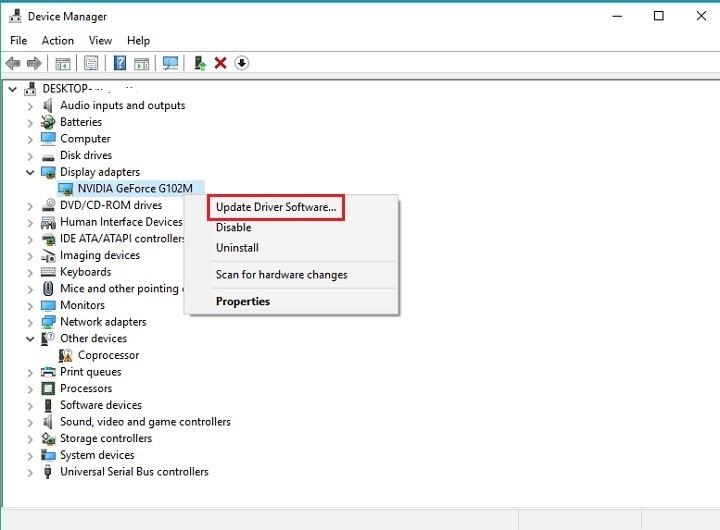
Step 2. In the window that opens, go to the right pane and expand the categories. Here, you will find the device whose drivers need updating
Step 3. Go the device name, right-click and choose "Update Driver Software" from the list that shows
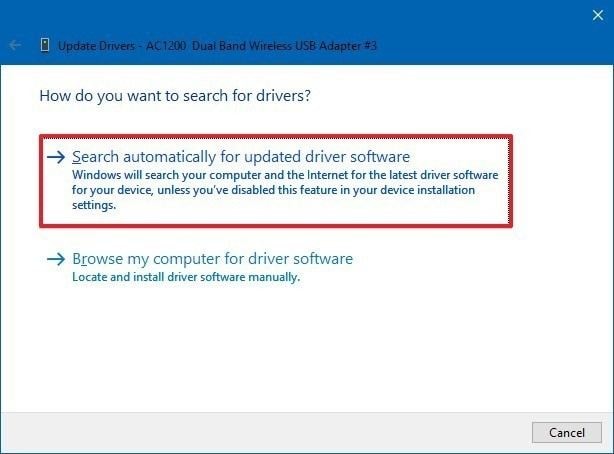
Step 4. Search for the new driver software by choosing the option to "Search automatically for updated driver software". You can also select "Browse my computer for driver software" if you have already downloaded the latest available driver
Step 5. Windows will search for the updated driver for you to download. However, if no driver can be found, you may have to go to the manufacturer's website and get a new one by following their on-site instructions.
Method 5: Check Disk Errors
You can check where the errors are located on your disk to be able to fix them. To run the disk check, follow the steps below:
Step 1. Press these keys together: "Windows" + "X" and choose "Command Prompt (Admin)"
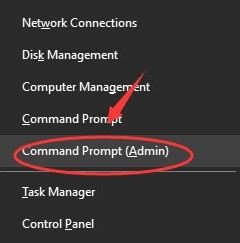
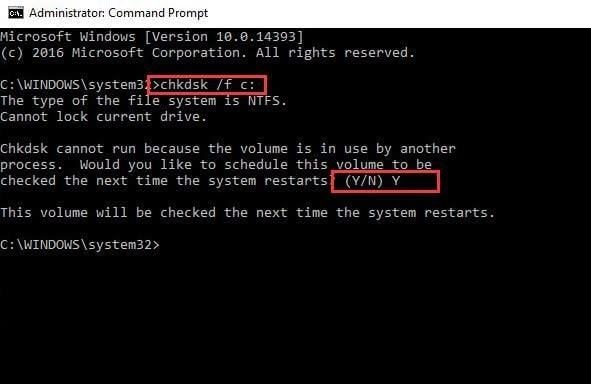
Step 2. Type "chkdsk /f c:", press "Enter" on your keyboard.
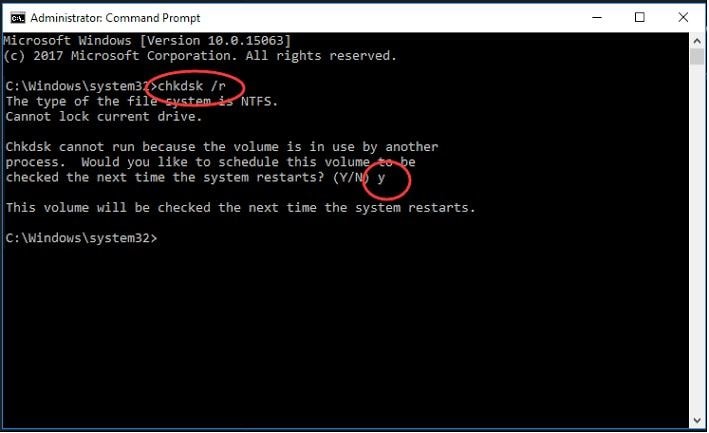
Step 3. Also, type in "chdsk C: /r".
After these, you can check to see if the issue has been fixed or not. If not, there are other solutions to try so don't be discouraged!
Method 6: Run SFC Scan
SFC stands for System File Checker. This tool has been built-in with Windows to let you scan your system for any file corruptions to have them restored. To run an SFC scan, do these:
Step 1. Press the "Windows" key and X" at an equivalent time, then choose "Search". In the search field, type "Command Prompt" and run the instructions as "Administrator"
Step 2. When the new Command Prompt window pops up, type in this command: sfc/scannow

Step 3. Restart your computer after the scan
Bonus Tip: How to Recover Lost Data from NTFS Disk
NTFS (New Technology File System) is quite useful as a file system in storing and recovering files on a hard disk. This shows that if any data is lost from an NTFS file disk, there is a need for recovery. Out of the many available recovery apps you can trust is Recoverit Data Recovery. This tool supports the recovery of lost files and data in various formats such as videos, audios, images, documents, ZIP files, etc. If your system has crashed or your external and internal storage drives are corrupted, Recoverit Data Recovery can restore all the files that have become inaccessible in these storage locations.
This tool is reliable and highly secure when it comes to full data recovery in both Windows and Mac OS. Therefore, download the software, install it, and follow the simple steps below to recover your NTFS file data:
Step 1: Select a Location
Choose the location where your file got missing and select "Start"

Step 2: Scan the Location
Start scanning the selected location and watch the progress bar of the process to know when it is completed.

Step 3: Preview and Save Recovered File
Use the amazing preview feature of the app to view all the files and data that have been recovered. Save them by choosing the button "Recover"

The Bottom Line
Let the Blue Screen of Death no longer scare you; you can do something about fixing it. The methods provided in this article are key in helping you achieve this. If you have lost any NTFS file due to this error or any other, get yourself a Recoverit Data Recovery app now and retrieve those lost files that are important to you.
Rescue & Fix Files
- Recover Document Files
- Repair Document Files
- Recover & Repair More
- Clear & Delete File



 ChatGPT
 Perplexity
 Google AI Mode
 Grok
Grok


Amy Dennis
staff Editor