How to Backup Computer to External Hard Drive
When you have stored your data on a computer, it is vulnerable to a number of risks and jeopardies that might take it away from you within no time. Your computer might come across some sort of physical damage due to a fall, power surge, or some other issues. There might be a cyberattack, a natural disaster, theft of physical devices, or any other incident that might free you of all your important data. Therefore, the best way to ensure the possession of everything you have been rooting for is to backup computer to external hard drive. There are numerous means to take a backup of your computer files. Some of them are discussed below.
On Windows: Backup Computer to External Hard Drive
- The first step when you are looking to backup computer to external hard drive is to get a drive for backup. You may get a USB device or some external hard drives for that purpose. It is recommended to get one that almost doubles the size of your original hard drive so that you might be able to get multiple backups easily.
- After you plug in the external hard drive, Windows would generate a prompt menu asking you if you are willing to use this device as a backup device or not. You can say yes or you can close the prompt and go to the Start menu and look for "backup and restore".
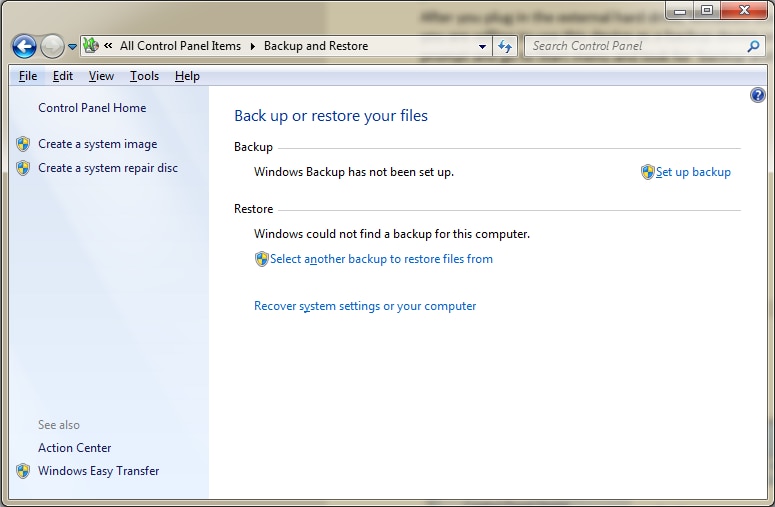
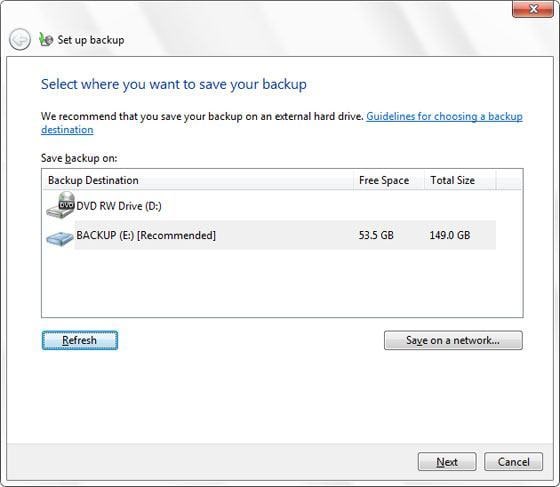
- When you have opened up the "backup and restore" menu, you need to hit the "Set up backup" button in order to initiate the process of backing up the computer. Select the external drive you want to back up on and keep on pressing "Next".
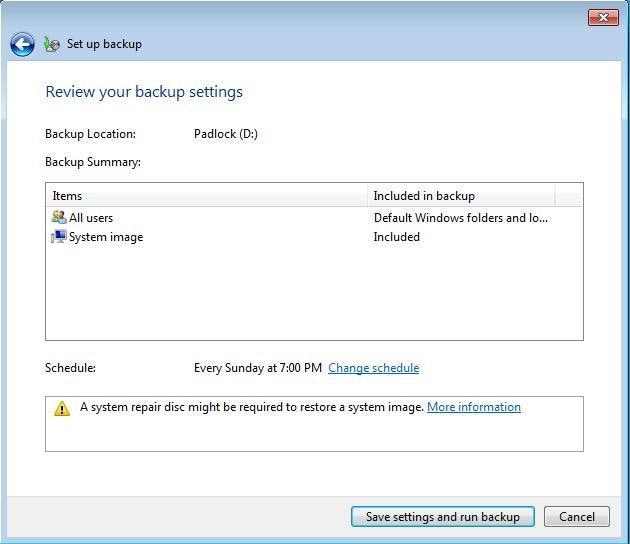
- When you come across the final screen, select the "Save settings and run backup" option and Windows will start taking all the required backups of your computer. Do not turn off the computer in the middle of this process so that it might be completed properly.
Part 2: On Mac: How to Backup Mac to External Hard Drive
- The first step required in the process of backing up your Mac device requires you to buy a new drive for backup purposes. You may get yourself a USB device or an external drive in this regard. Care to buy a drive with enough room to store more than one backup at the same time.
- Upon plugging in your device, you would be prompted by Mac saying if you want this drive to serve as a backup disk. You can say yes or you may do it manually by going to System Preferences > Time Machine.
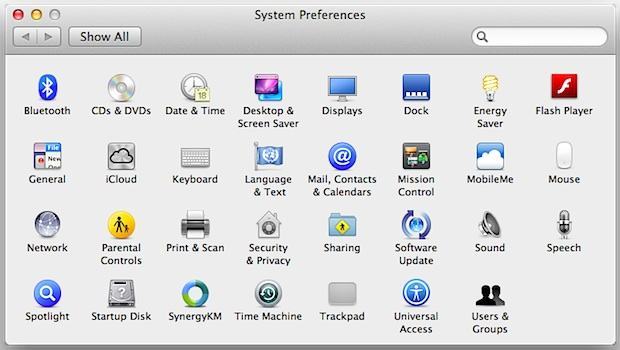
- After opening the Time Machine app, you need to hit the "Select backup disk" option in order to select the external hard drive you want to take your backup on.
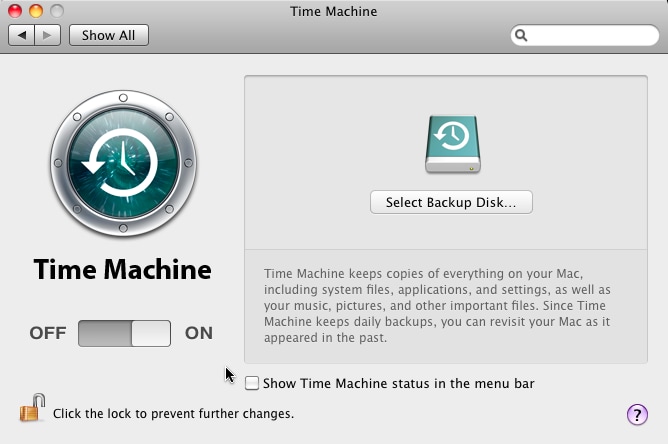
- When you have selected the backup disk, the Mac OS would start performing the backup operations. It is important to keep the computer on during this process. Otherwise, the backup might be interrupted and stay incomplete.
After the process is done, you can turn off the computer as per your requirement. When there is a need to restore the data, you can open up the Time Machine app and carry out a system restore by selecting the backup device.
Part 3: Backup Windows 11/10 to External Drive with UBackit Data Backup
Windows Backup function is a simple and understandable way to help you do data backups, but it might not satisfy your various needs including file sync and differential backup. Therefore, third-party backup software like UBackit Data Backup may be what you really want. Wondershare UBackit is a fully free backup and restore software with automatic, full, incremental, and differential backups available. It offers more options to configure a backup than Windows Backup does, and allows you to only backup new and changed files, which will save backup time and storage space. Moreover, its intuitive interface makes everything you do with it really simple.
- Allows you to take automatic, full, incremental, and differential backups of disk, partition, and files.
- Supports disk restore, dissimilar hardware restore, partition restore, and selective file restore.
- Can schedule file backup for real-time data backup to internal hard disks and external hard drives.
- Supports Microsoft Windows 11/10/8.1/8/7(64 bit)
How to Backup Computer to External Hard Drive?
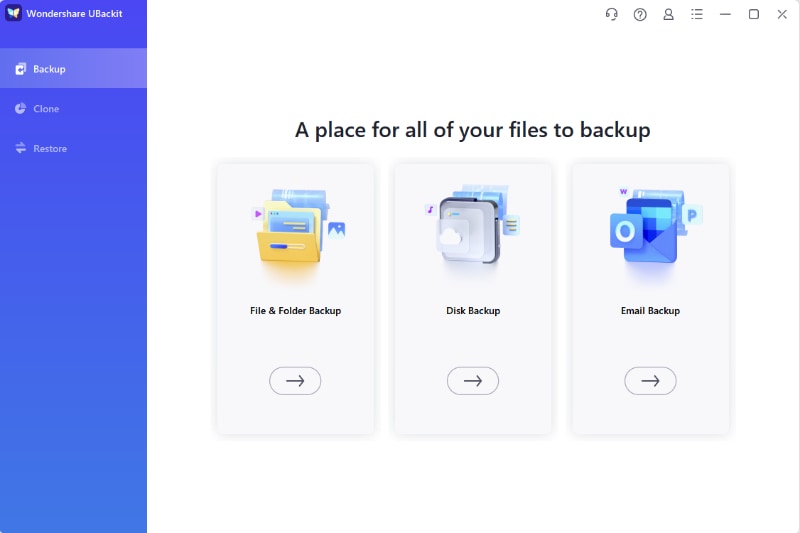
Step 1. Select Disk Backup
After downloading and installing Wondershare UBackit, launch the app and click Create New from the main screen. Then, click Disk Backup to backup computer to external hard drive.
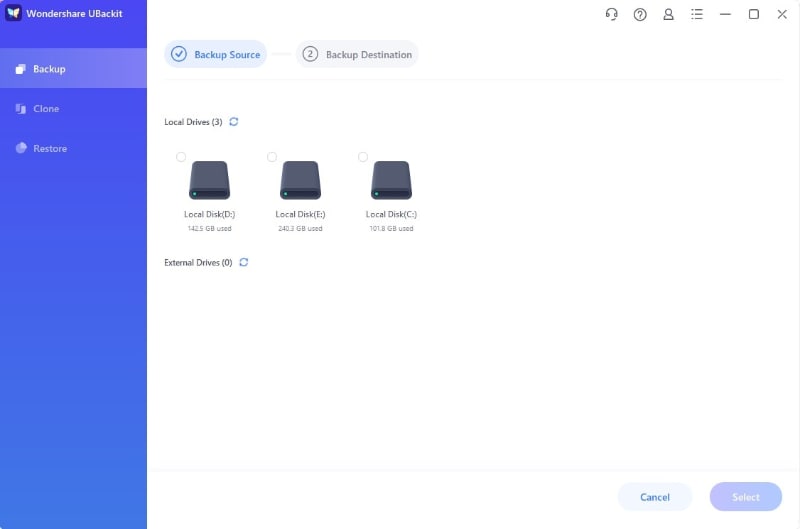
Step 2. Select Disk to Backup
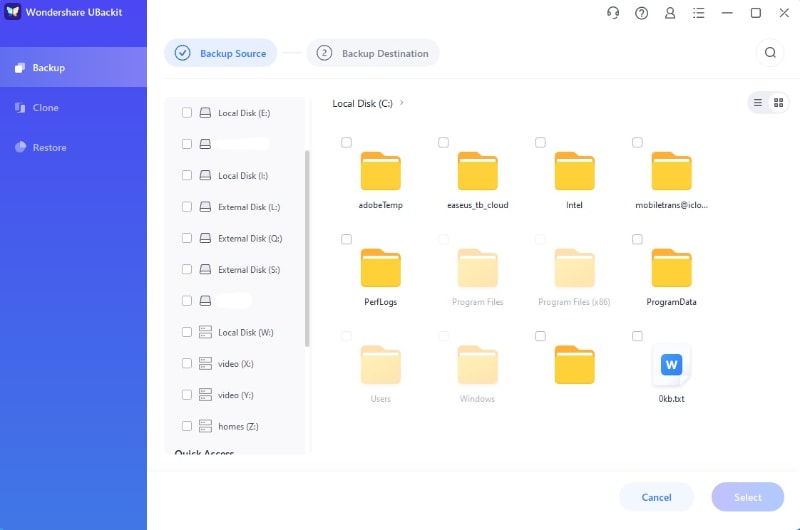
Now, you need to select the disk you want to backup. For the system disk, it could be C drive by default. Select the drive, then choose Select to continue.
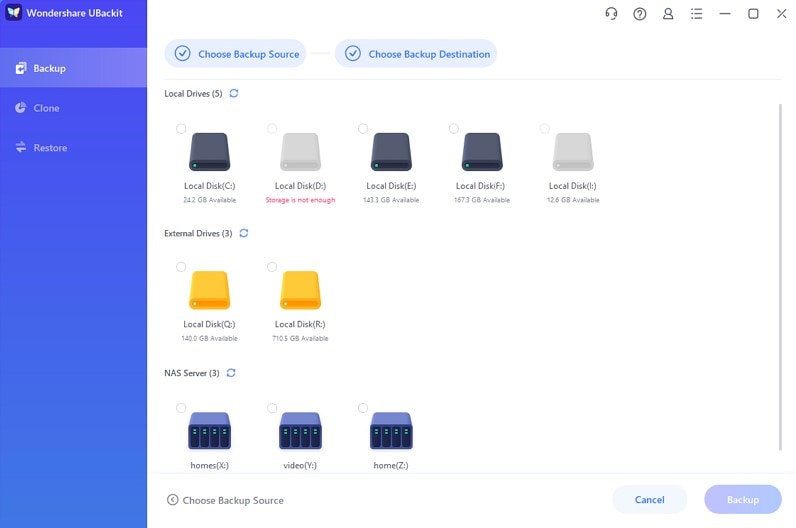
Step 3. Choose Backup Destination
To backup computer to external hard drive with UBackit data backup, you need to connect the external drive to your computer in advance so that UBackit can recognize it while you are selecting the backup destination. After that, click Select to get the computer backup process started.
Step 4. Complete the Backup
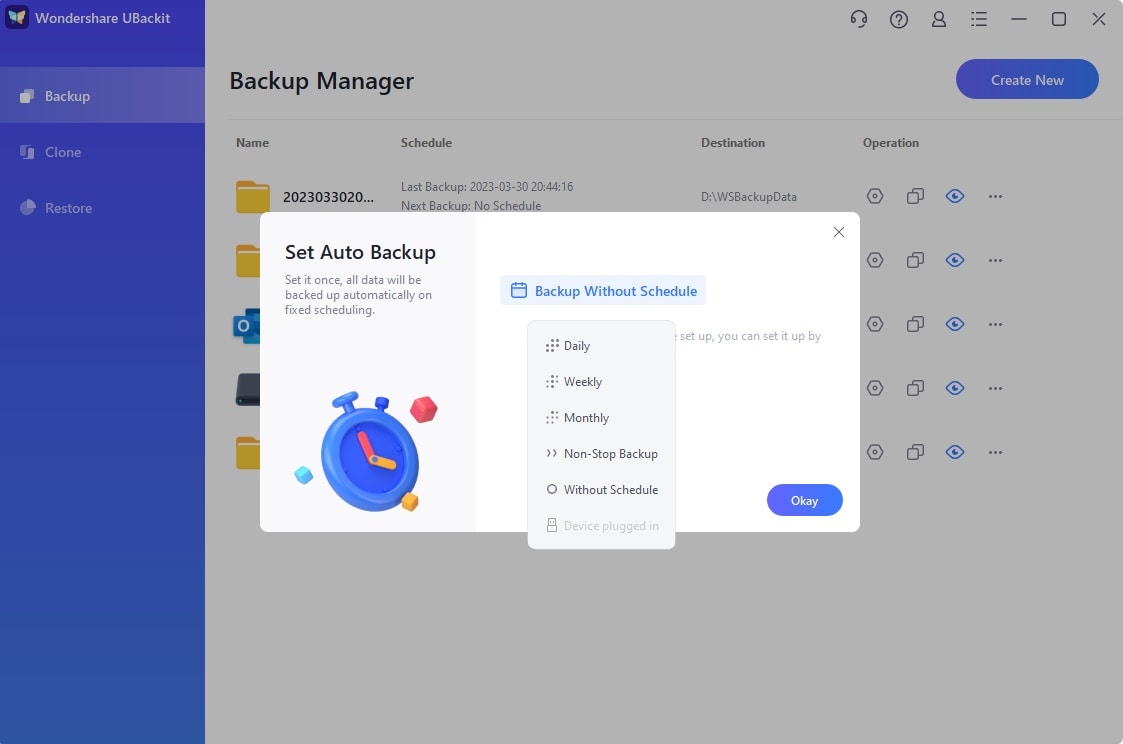
The process will complete after a few seconds or minutes. If you prefer automatic backup, you can click the Schedule option at the bottom of the backup folder. Then set it as daily, weekly, or monthly automatic backup as you like. UBackit will backup computer to the external hard drive on it own the next time it gets connected to the computer.
Part 4: Some Important Tips Regarding Backup of Important Data
When you are looking to back up the computer, a few tips that might come in very handy are listed below for your convenience and understanding.
- One of the most critically important things when it comes to taking a backup of your Mac or Windows computer is to let the backup process complete properly before you shut it down.
- If you want to keep your backup updated all the time, it is very important for you to set a proper updating schedule for your computer. The schedule may be created on the basis of how often your computer is used and how often the files are changed. You also need to ensure that the external drive is connected to the computer at the scheduled time of backup.
- After taking a backup of your important data, it is recommended to keep the external hard drive in some safe place that is away from your computer. This is important due to the fact that it might not get compromised in case something happens to your computer. Off-site storage is a highly recommended choice in this regard.
- Taking a backup computer might take up a lot of time. Therefore, it is highly recommended to schedule your backup for a time when you won't have to turn your computer off. It is also important that you might not be updating your computer files while the backup process is being carried out.
- It is recommended to take more than just one backup so that you might be able to get access to your important data in case one of the backups gets compromised somehow.




Amy Dennis
staff Editor