How to Backup Files in Safe Mode Windows 11/10?
“My Windows 10 computer is not booting properly and I’m afraid I might lose my important files. Can someone tell me how to backup files in safe mode on Windows 10?”
As I stumbled upon this query on Reddit, I realized that so many people find it hard to maintain a backup in safe mode. Well, if your system is not able to boot properly, then running it in safe mode might help you troubleshoot the issue. Though, the first thing that you should do is taking your system’s backup in safe mode to keep your files safe. In this post, I will let you know how to transfer files in safe mode Windows 11/10 easily.
Why you Should Backup Files in Safe Mode?
Most experts recommend taking a system’s backup in safe mode as it is just more secure and will let you complete the process without any interruption. These are some of the reasons for taking a backup of files in safe mode.
- If your computer is malfunctioning and you can’t seem to boot it normally, then consider booting it in the safe mode.
- In the safe mode, only the essential components of your system would be accessible, letting you back up your data without any interruption.
- Even if your computer is not starting properly, you can take a backup of your important files via safe mode.
- Since the backup process won’t be halted or interrupted in between, the safe mode would provide an overall better environment.
- The presence of a virus or malware can tamper with the backup process, but in the safe mode, you can easily access your files without security concerns.
2 Methods to Backup Files in Safe Mode on Windows 11/10
Now when you know the basics, let’s learn how to backup files in safe mode. To do this, you can manually launch safe mode via command prompt on your system or take the assistance of a dedicated backup tool.
Method 1: Backup Files in Safe Mode via Command Prompt in Windows 10
To learn how to backup files in safe mode Windows 11/10, you first need to boot your system in it. Later, you can enter the relevant command to maintain a dedicated backup to the desired location. You can easily backup files in safe mode by following these steps:
Step 1: Boot your Windows System in Safe Mode
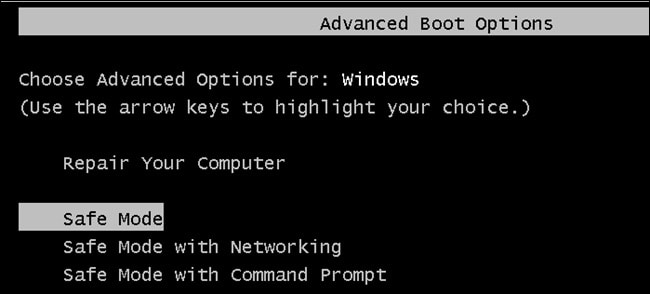
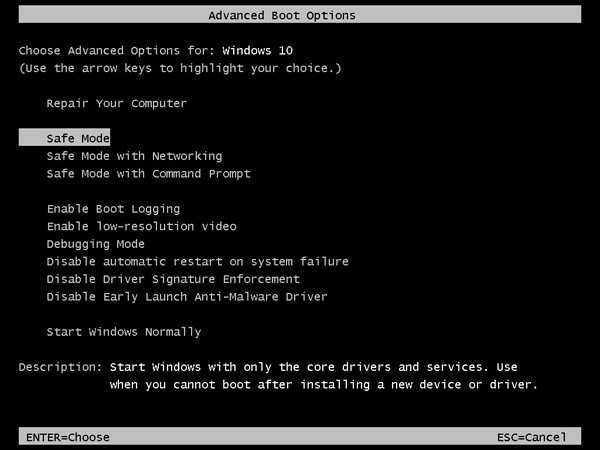
At first, just restart your computer and repeatedly press the advanced booting key on your system. Mostly, it is F8, but in some cases, it can also be F2, F6, F10, or the ESC key. As soon as you get the advanced booting options on the screen, choose to open the Safe Mode with Command Prompt.
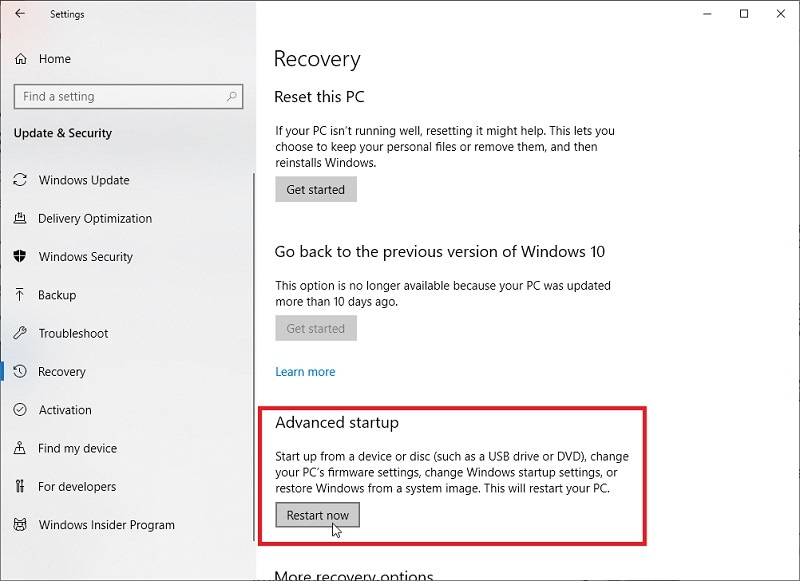
Besides that, if your system is running smoothly, then you can go to its Settings > Update & Security > Recovery and click on the “Restart” button under “Advanced Setup”.
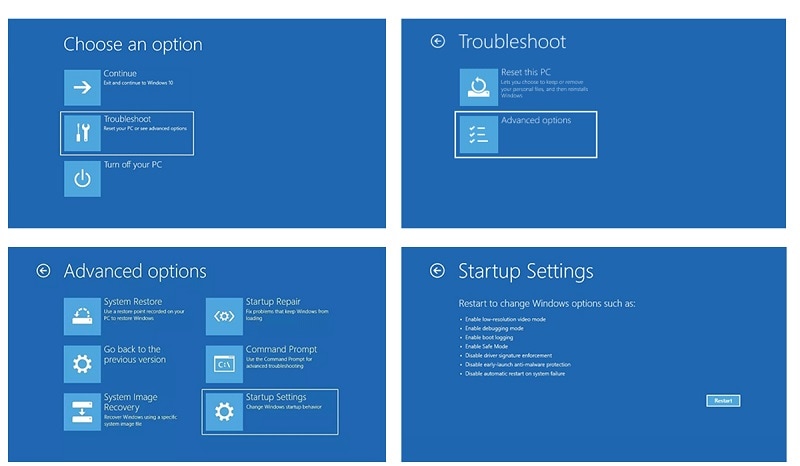
This will automatically restart your computer and provide the advanced booting options instead. Here, you can navigate to Troubleshoot > Advanced Options > Startup Settings and choose to start your system in safe mode.
Step 2: Manually Back up files in Safe Mode
Once your Windows computer has been restarted in safe mode, you can launch Command Prompt on it. Now, you can use the “Wbadmin” module and the “start backup” command to backup files in safe mode.
For instance, let’s say you have to back up the D drive data to the E drive. In this case, you can enter the following command to take a backup in safe mode:
Wbadmin start backup -backuptarget:E: -include:D:
If you want to include all the critical volume as well, then just add the “-allcritical” command after the above statement.
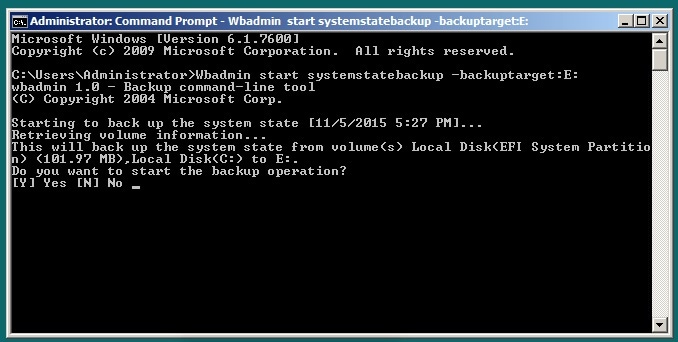
Afterward, you can just wait for a while and let your system back up your volume to the target location successfully.
Limitations
- Harder to implement
- Can’t take a selective backup of data
- No preview of files available
Method 2: Backup your Files Easily with Wondershare UBackit
As you can see, learning how to transfer files in safe mode Windows 11/10 can be such a tedious job. If you want to overcome this and back up your data to any location of your choice, then use Wondershare UBackit.
- Since UBackit has an inbuilt virus detection feature, it will make sure your backup would be safe without any malicious entity.
- Users can take an extensive backup of their entire system, any partition, or select the folders/files of their choice.
- UBackit by Wondershare supports an incremental backup which would save your system’s storage by up to 80 percent.
- The application can take a backup of all the data types (videos, audios, photos, documents, etc.) and will let you filter the data based on different parameters.
- Some other advanced features of Wondershare UBackit are automatic backup, storage monitoring, backup notifications, and more.
If you also want to backup your data from your system to any other location using Wondershare UBackit, then you can follow these instructions.
Step 1: Launch Wondershare UBackit on your system
At first, you can just install and launch Wondershare UBackit on your computer. From the sidebar, go to the “Backup & Restore” section and choose to create a new backup.

Step 2: Select the source and files to back up
Now, Wondershare UBackit will display a list of the available partitions and directories that you can browse to select what you wish to back up. You can find the drivers and folders on the sidebar and browse them on the right.

If you are looking for specific things to back up, then you can use the inbuilt search option of UBackit. Just enter keywords here and it will automatically display the relevant results.

Besides that, you can also use the inbuilt filter option of UBackit to look for specific file types to back up (like videos, photos, or documents).

In this way, you can easily select the partitions, folders, or files that you wish to include in the backup.
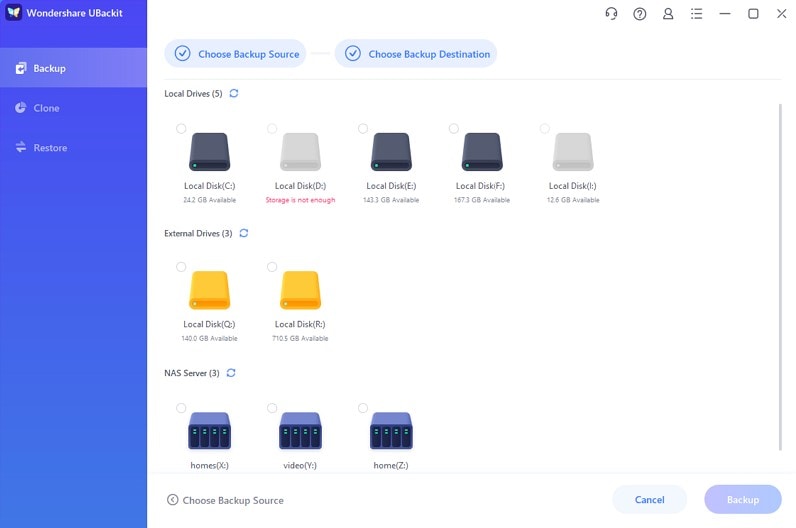
Step 3: Choose the Destination to Back up your Data
Once you have selected what to back up, you can choose a location to save it. Ideally, the backup destination can be any internal partition/folder of the system or any other external source (like an external hard drive).
Step 4: Enable Automatic Backup (Optional)
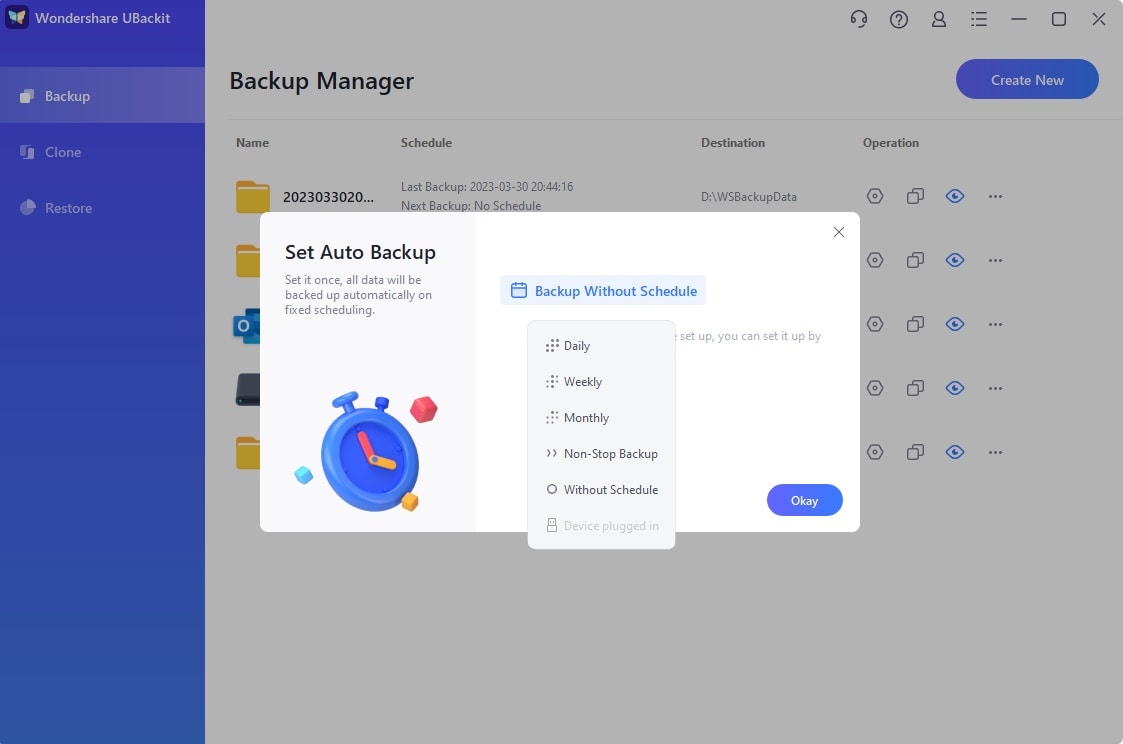
If you want, you can also enable the Automatic Backup option of UBackit from the top-right corner. This will let you select an appropriate frequency (like daily, monthly, weekly, non-stop) to automatically back up your data.
Step 5: Complete the Backup process
That’s it! Once you click on the “Backup” button, UBackit will start taking the backup of the selected data at the provided location. You can view its progress and make sure that the application is not closed till the process is completed. It has an inbuilt virus protection feature to ensure the backup is maintained without any malicious entity.
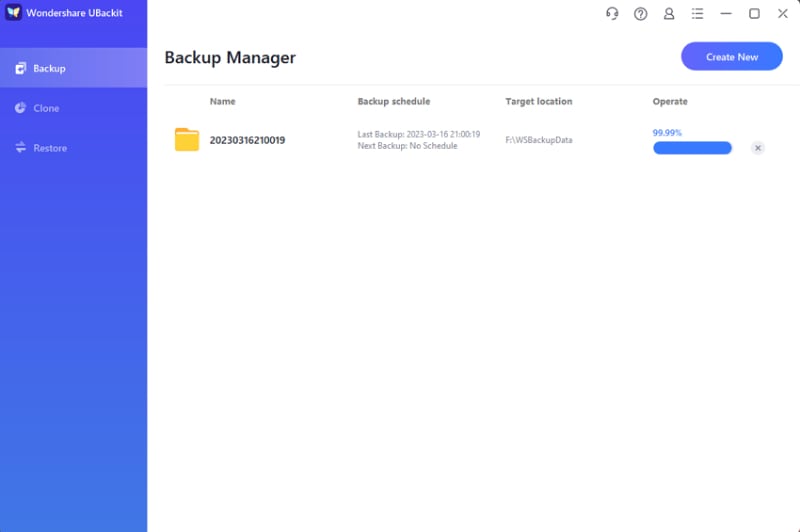
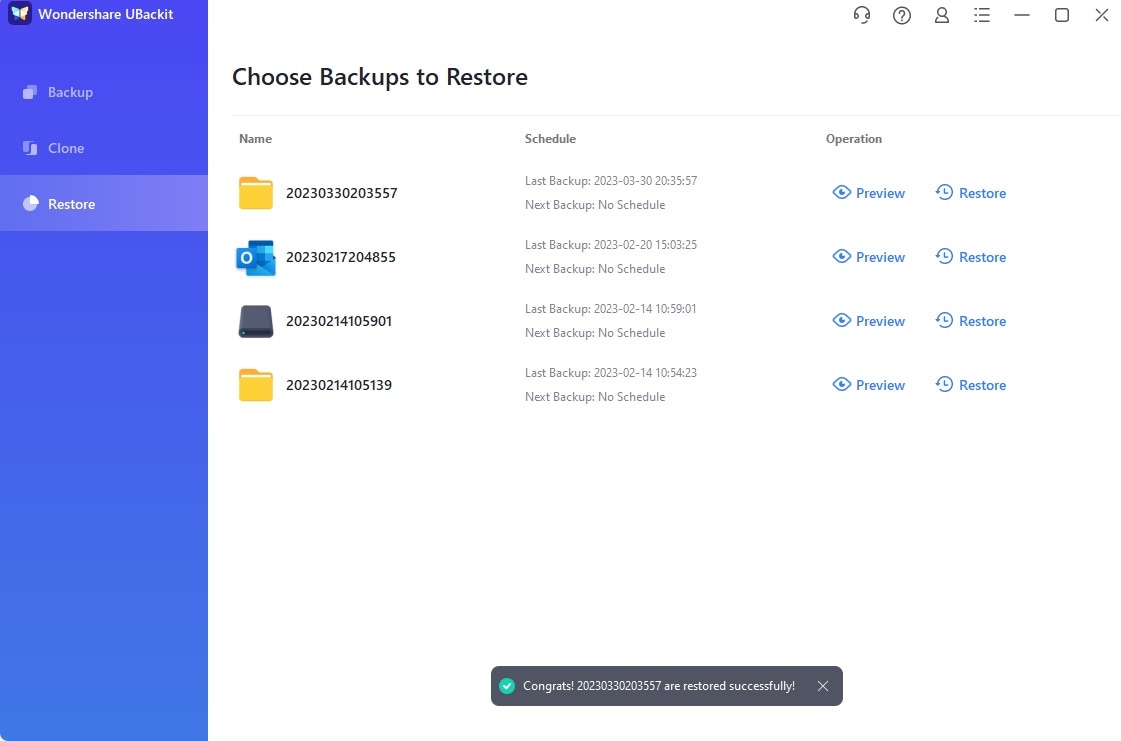
In the end, UBackit will let you know that the backup process can be completed. You can now check it on your UBackit dashboard and even restore it to any location whenever you want.
How to Improve Your Backup’s Success Rate?
By now, you would be able to maintain an extensive backup in safe mode of your important files. Though, if you want to improve the overall success rate of the backup process, then consider these tips:
- Take a complete backup: Firstly, make sure that you maintain the entire backup of your system and don’t close the backup app in between.
- No interruption: Most importantly, don’t shut down or restart your computer during the backup process or perform any other operation that can interrupt it.
- Use a trusted tool: Only go with a secure and trusted application (like Wondershare Ubackit) to back up and restore your data easily.
- Incremental backup: An incremental backup would save your time and the storage of the drive. Therefore, go with a tool like Ubackit that supports the incremental backup technique.
- Timely and secure backup: Lastly, make sure that you maintain a backup of your data regularly. Also, save it to any other location (like an external hard drive) to keep your files safe.
Now when you know how to backup files in safe mode Windows 10, you can certainly keep your data safe. Since there could be so many reasons for taking a backup in safe mode, you should be aware of the process. Though, if you want to make your job easier, then consider using Wondershare UBackit. It is an extremely secure and friendly application that can help you maintain a complete or selective backup of your data and would let you restore it however you want.
Data Backup Services
- Computer Backup
- Hard Drive Backup
- Mac Backup
- Cloud Backup


 ChatGPT
 Perplexity
 Google AI Mode
 Grok
Grok


Amy Dennis
staff Editor