How to Backup Chrome History and Bookmarks?
To back up your Google Chrome history, cookies, and bookmarks, you can manually copy the browser's data files from Windows AppData, export them using a format-converting extension, or schedule automatic backups using specialized software.
● To perform a manual backup in Windows, open the Run tool, navigate to %appdata% > Local > Google > Chrome > User Data > Default, copy the specific History and Cookies files, and restore them later by replacing the files in that same directory.
● When using the JSON-xls Chrome extension to extract your data, the initial export will be in JSON format, which must be converted to an HTML file via JSON-XLS.com before Chrome will allow you to import the bookmarks back into the browser.
● For ongoing data protection, you can utilize Wondershare UBackit to set up automatic daily, weekly, monthly, or non-stop backup schedules that continuously save your Chrome history folders directly to an external hard drive, SSD, or USB flash drive.
Ask AI for a summary
Google Chrome is the most common browser that exists today; millions of users use it daily to do searches of all kinds, many of them to find important information related to tasks or projects. Until a few years ago, the ways of backing up the internet history of visited pages were very limited, but thanks to the development of technology, today it turns out to be routine. In this post, you will know how easy it is to make a Chrome history backup, in addition to preserving your bookmarks even if you uninstall Google Chrome.
As you try to make a Chrome history backup, you must realize the importance of data backup. Join us to celebrate 2024 World Backup Day. Let's take the pledge, and make data backups a regular part of your day.
How to Backup Chrome History and Bookmarks?
Q: I want to format my hard drive. Is there any way to make a backup of my Google Chrome history and/or bookmarks?
In the past, it was common to have to save URLs and page names to a text file so that you could revisit them when necessary. This turned out to be impractical and to solve this problem, web browsers implemented various alternatives to create shortcuts to the web pages that users frequent. The bookmarks had an excellent reception by users and due to this, web browsers have added many improvements to this feature, using the user's history, cache, and cookies to make the user experience more intuitive and dynamic.
The history of Google Chrome is a feature that is of great advantage, since it stores the addresses of all the pages you have visited, thus personalizing the search criteria and making the user experience better.
If for some reason you delete Google Chrome and its temporary files, it is very likely that you will notice some changes regarding the search criteria and autocomplete. This can be a problem but it is easily avoidable by backing up your browser's temporary files.
Free Ways to Backup Chrome History or Export Chrome Cookies
If you are concerned about your history and bookmarks and therefore you don't uninstall Google Chrome or restrict yourself from formatting your hard drive, there are solutions for you to rescue this information; next, I will mention a couple of options that can be very useful:
Manually Backup and Export Chrome History/Cookies: Google Chrome has a feature that will allow you to backup Chrome history and cookies from the web pages you visited. Next, I will show you how to do it:
Step 1 Open "AppData" folder
Go to the Windows menu and type "Run" to open the application. Then type "%appdata%" and click on "OK".

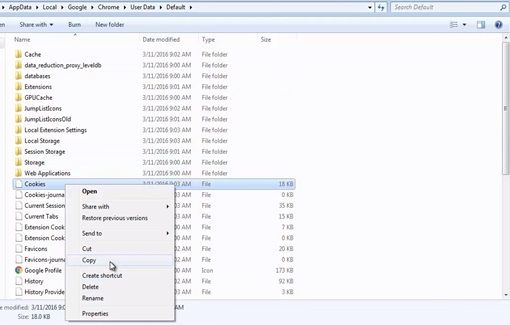
Step 2 Copy the file
Go to "Local", "Google", "Chrome", "User Data" and finally to "Default", search for the file you want to back up (among "Cookies" and "History), then copy it (right-click it and select "Copy" or press "CTRL + C" when selecting it) and paste it in the folder of your choice.
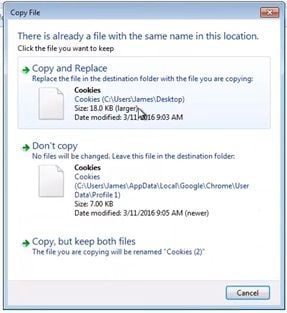
Step 3 Restore the History/Cookies/Cache
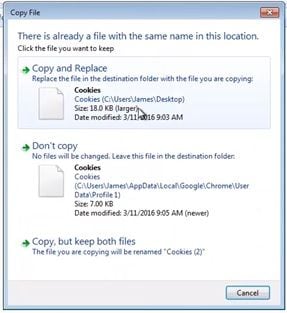
Once you have formatted your hard drive or you reinstalled Google Chrome, go to the "Default" folder again and paste the file you copied. A pop-up window will be shown, select "Copy and Replace" to send the file to the folder.
Step 4 Verify
Now you can check if the history or cookies of your backup are in Google Chrome.

If you want to save your Chrome history or bookmarks, you can easily do it with an extension which is "JSON-xls." Here I will show you how to use it:
Export Chrome History/Bookmarks/Cookies to JSON/CSV/XLS with Chrome Extension: Using a useful and practical extension, you will be able to export your history or bookmarks in a file, below I will show you how:
Step 1 Search for Chrome's "JSON-xls" extension
Go to your web search engine and write "Export History/Bookmarks to JSON/CSV", then click on the first option, you can also access through this link: https://chrome.google.com/webstore/detail/export-historybookmarks-t/dcoegfodcnjofhjfbhegcgjgapeichlf

After you opened the website, just click on "Add to Chrome" and the extension will be installed.
Step 2 Open "JSON-xls" extension
Click on the extension icon to open it.
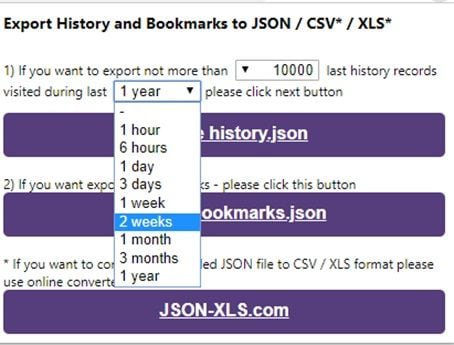
Step 3 Personalize
Choose the options you want to export. Click on the arrows to see the drop-down lists where you can select the limit of time and history records of your bookmarks and history you are going to export.
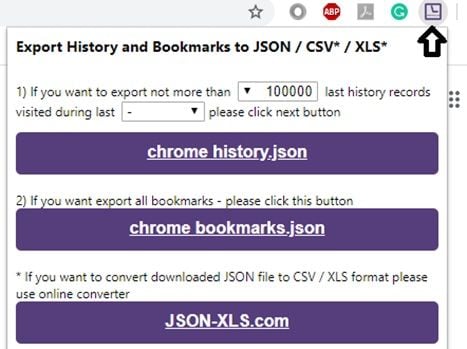
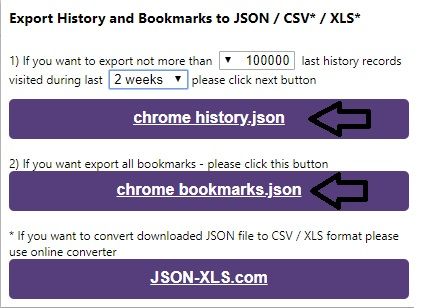
Step 4 Choose what you want to export
"JSON-xls" extension will allow you to export your history or bookmarks, just click on the option of your choice.
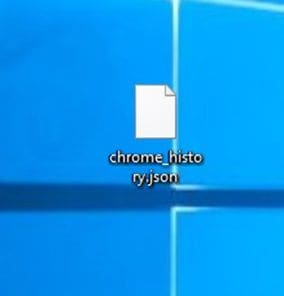
Step 5 Save the file
A pop-up window will emerge, it will allow you to save the Chrome history or bookmarks file on your computer. Select the place you want to save it and click on "Save". You can see the document in the place you saved it.
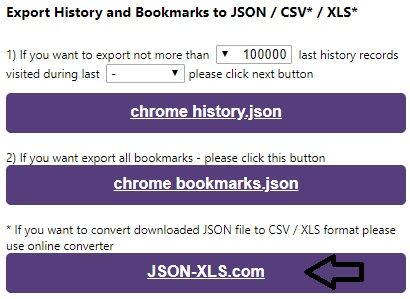
Step 6 Go to the conversion website
Click on the extension icon and then go to "JSON-XLS.com". You will be redirected to the JSON-xls website.
Step 7 Convert the file
The history/bookmarks file you downloaded is in the "JSON" format. You will need to convert it to "XlsX", "Xls", "CSV", "TSV" or "Html" as these are the most popular extensions that can be accepted by the browsers. In the case of Google Chrome, the "Html" file is the right one to import bookmarks. Click on "Select file", choose the JSON file you have already saved, select your destination format (remember to choose "Html" in case you want to import your bookmarks file in Google Chrome), click on the blank square of the CAPTCHA and finally choose the rendering view (Plain is the most common).

After that, you will have to wait some seconds and a pop-up window will be displayed. Click on "Save" in your favorite destination and you will have your "Html" file. If the file is zipped, just unzip it and you will be able to see it.
How to import your bookmarks to Google Chrome
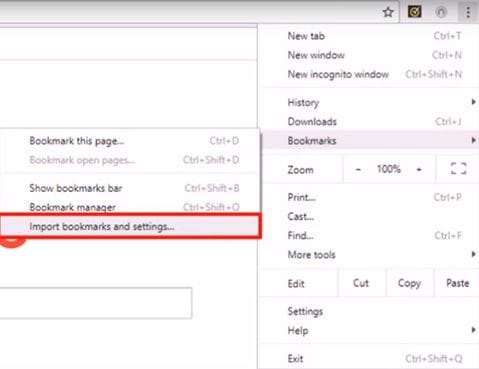
Step 1 Search for the import settings menu
Click on the three dots which are in the top right corner, then select "Bookmarks" and click on "Import bookmarks and settings" A dialog box will be displayed.
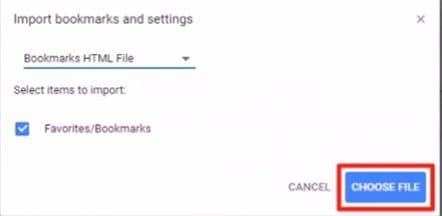
Step 2 Import "Html" file
Click on the arrow and a drop-down list will emerge, then select "Bookmarks HTML File," after that click on "CHOOSE FILE" and select the "HTML" file of your bookmarks or history.
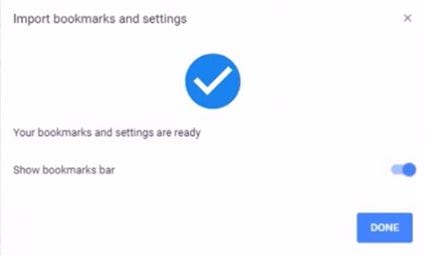
Step 3 Confirm you did it well
A pop-up window will emerge, and you have to search for the bookmarks file. Double click on it and your bookmarks should be imported. The dialog box will confirm that your imported bookmarks are ready.
How to Automatically Backup Chrome History/Cookies?
With Wondershare UBackit you can schedule automatic backup processes for the folders you want, minimizing the risk of information loss and data corruption, while keeping your information well organized. Below I will show you how to back up a folder using this software.
Video Tutorial on The BEST Storage And Backup Workflow For Content Creators
Step 1 Download Wondershare UBackit
Once the tool is open, go to the "Backup&Restore" option. Now click on the "Create New" button.

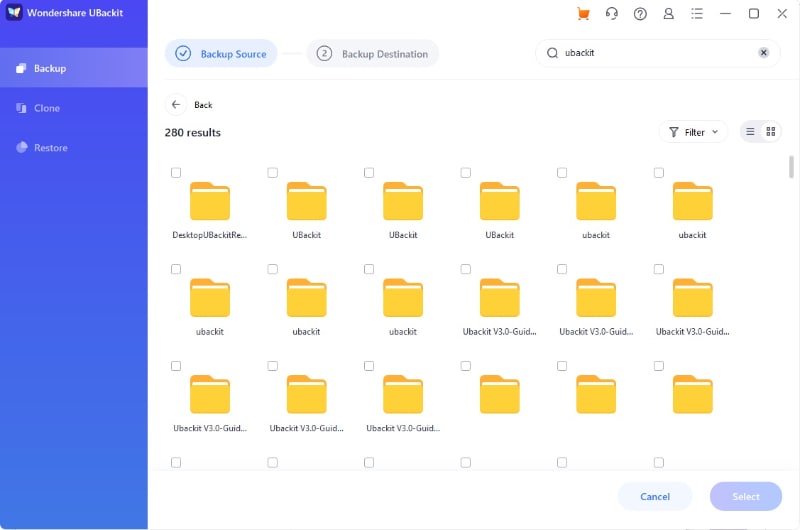
Step 2 Choose Google Chrome History Files
Click on the local disk to find out the history files. And right choose the files
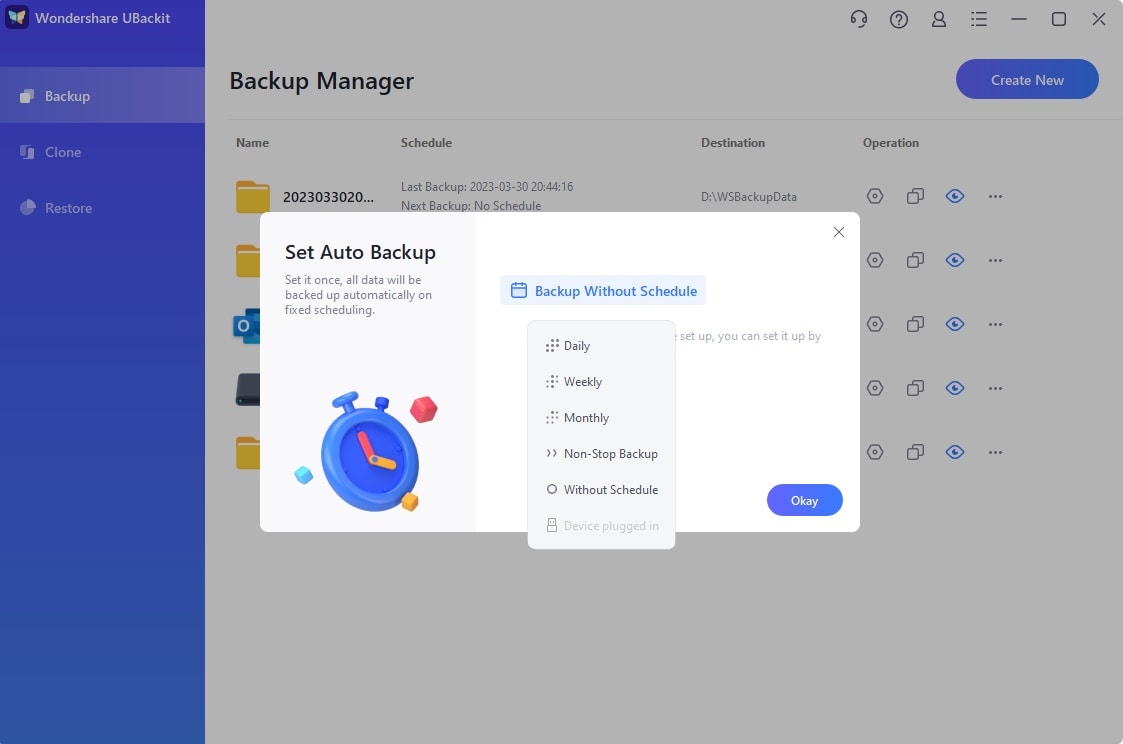
Step 3 Set Automatic Backup
Click to set automatic backup. In the drop-down menu, you can apt to backup daily, weekly, monthly and non-stop. Then press "Okay" button to proceed.
Step 4 Select Backup Storage
A connected USB flash drive, external hard drive, and SSD are all good choices for file storage and protection.

If all the preferences have been set up, you will have to click on the "Start Backup" button. As you have seen, the Wondershare UBackit backup tool is pretty simple to use and allows you to make any kind of backup process with great ease.
How to Restore History/Cookies Backup to Chrome Browser?
To restore the History/Cookies backup to the Chrome browser, you can type "%appdata% "in the "Run" tool (by pressing Win key + R) and open the Chrome folder. Paste the file you copied. A pop-up window will be shown, select "Copy and Replace" to send the file to the folder.
Conclusion
Your browser's history, cache, and cookies help to optimize your search criteria and they also help you to find fast what you're looking for. As you have noticed, backing up this information is simple, however, these files change constantly due to the constant interaction of the user with their browser, and therefore, it is highly recommended to use specialized software that performs constant backups automatically and thus save a lot of time and effort. So, if you need to restore your history, cache, cookies, or bookmarks, simply use the most recent backup copy that the software has automatically generated.
Data Backup Services
- Computer Backup
- Hard Drive Backup
- Mac Backup
- Cloud Backup


 ChatGPT
 Perplexity
 Gemini
 Claude
 Grok
Grok


Amy Dennis
staff Editor