How to Create a Portable Windows USB Drive
These days, lots of new-age laptops don't have a dedicated optical drive. In this case, it is important to create a portable Windows USB drive. This will let you keep Windows on the go and you would be able to use the drive to resolve various issues as well. While you might already know how to burn a Windows booting disc, the same can be done with a USB external hard disk or a flash drive. In this post, we will teach you how to create a portable Windows USB drive in a stepwise manner.
1. What will you need?
Before creating a Windows USB drive, it is important to be aware of all the prerequisites. Keep the following things handy before commencing the process.
A USB drive: Firstly, you would need an external USB drive or a USB flash drive. Even though a flash drive would work, we recommend choosing an external drive. A USB 2.0 would be an ideal choice.
A Windows installation disc: A Windows installation disc (or its ISO image) would also be needed. You can either go with Windows 10, Windows 8/8.1, or Windows 7. Comparatively, it is easier to work with Windows 8 and 10.
WinToUSB tool: This dedicated program will let you perform the installation process to create a portable Windows USB drive.
2. How to Create a Portable Windows USB Drive
- Step 1: Get WinToUSB on your system
- Step 2: Set up the installation
- Step 3: Start the installing
After making sure that you have all the essential things, you can easily create a portable Windows USB drive. Once the process is completed, you would be able to boot with your USB drive and repair your system. We have explained the entire process in different steps right here.
Step 1: Get WinToUSB on your system
This is the first step to have a portable Windows USB external drive or flash drive. You need to install the supported version of WinToUSB from here. It is available for Windows 10, 8.1, 8, and 7.
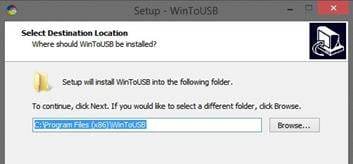
After downloading the installer, run it. Make sure that you are running it from the Administrator account. Simply follow the on-screen instructions to install the program on your system. Preferably, it should be installed on the C drive (where Windows is installed).
Step 2: Set up the installation
Get your Windows installation disc (or the ISO file) ready. Insert the disc in the optical drive of your system and launch the WinToUSB tool. It will launch a wizard that can be used to create a portable Windows USB drive.
Soon after starting the wizard, you will be asked to locate the ISO or the Windows installer disc. Simply click on the Browse button ("…") and locate the respective file or the disc. Additionally, you will be asked to choose the operating system you want to install.
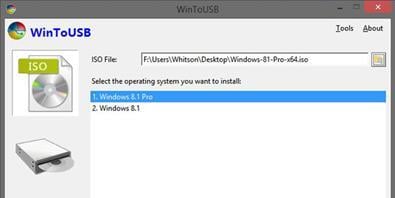
In this tutorial, we have taken the baseline of Windows 8. In your case, it could be any other version of Windows as well. After making your selection, click on the "Next" button to proceed.
On the next window, you will be asked to select your hard drive and pick the boot partitions. You might experience some limitations here. If you are using an external hard drive, you can select the first partition for the system and the second one for boot. We have shown the same on the following screen. Furthermore, you should ensure that your drive has an NTFS format.
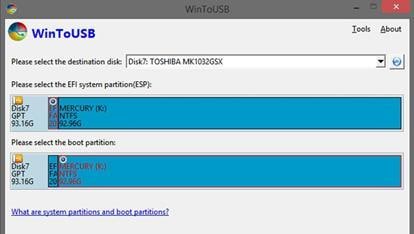
If you are using a USB flash drive, then you might face a few setbacks here. Chances are that you won't be able to create distinguished partitions. Therefore, it is recommended to go with an external USB drive instead of a flash drive.
Step 3: Start the installing
After making the above-mentioned selections, simply click on the "Next" button. Agree to the terms and conditions to initiate the installation.
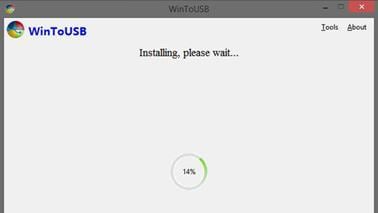
Sit back and relax as it might take a while for the process to be completed. The speed would depend on your Windows version and the type of the external hard disk that you are using. Make sure that you don't disconnect the hard drive during the process. Ideally, it would take around 20-30 minutes for the entire process to be completed successfully.
After creating a Windows USB drive, keep it safe, and use it whenever you face any setback related to your system. The external drive can be used to perform a recovery or repairing process. You can also boot your system from the USB drive as well.
3. How to run Windows 10 from a portable USB drive
Now when you have the Windows USB drive ready, you can use it whenever you want. Booting your system from the USB drive is pretty easy. Ideally, it can be done in the same way as you boot Windows from a CD or DVD. After following the above-stated solutions, you would be having a Windows 10/8/7 USB drive. Now, to run the portable USB drive, follow these steps:
Step 1: Start by connecting your USB drive to the system and restart it.
Step 2: As your system would be restarted, you need to boot from the USB drive. This can be done by entering its BIOS settings.
Step 3: To do this, you need to keep pressing the F2 key as your system would reboot. This will let you enter its BIOS settings.
Step 4: From here, you need to select the USB drive as a booting source. Save your settings and set your computer to boot from the USB drive.
Step 5: Exit the settings and let your system reboot from the USB drive.
This will make you run the Windows installation or fix any issue by taking the assistance of your portable Windows USB drive.
Wrap up
After creating a portable Windows USB drive, you can take your operating system anywhere. Additionally, it will help you to prevent system failure or an unexpected crash. You can simply reboot your system from the USB drive and resolve any problem or conflict associated with Windows. Now when you know how important it is, you can simply go ahead and create a portable Windows USB drive of your own and be ready to resolve any unforeseen situation.
Bonus, if you want to get more information about backup, you can click here to check:
Data Backup Services
- Computer Backup
- Hard Drive Backup
- Mac Backup
- Cloud Backup


Amy Dennis
staff Editor