How to Restore from Backup in Windows 10 PC & iCloud?
In today's digital world, computers, or laptops where you store your files or documents are highly susceptible to various data loss situations such as virus attack, hardware failure, system crash, etc. Luckily, if you have a backup of your system, then you can easily restore your data from the backup. That's why backup plays an essential role in data loss situations. Here, in this article, you will get to know how to restore from backup. We have also mentioned a solution that iPhone users can try out to restore their data from iCloud backup.
How to Restore from Backup on Windows PC?
Fortunately, the latest Windows 10 comes with the great built-in utility of backup and restore. Because of this utility, it has made it very easier for Windows 10 PC users to restore their lost files or data from the backup. If you don't want to rely on a third-party tool for backup and restore, then this utility is the ideal one for you to protect your important data from data loss.
Follow the step-by-step guide to restore from backup in Windows 10.
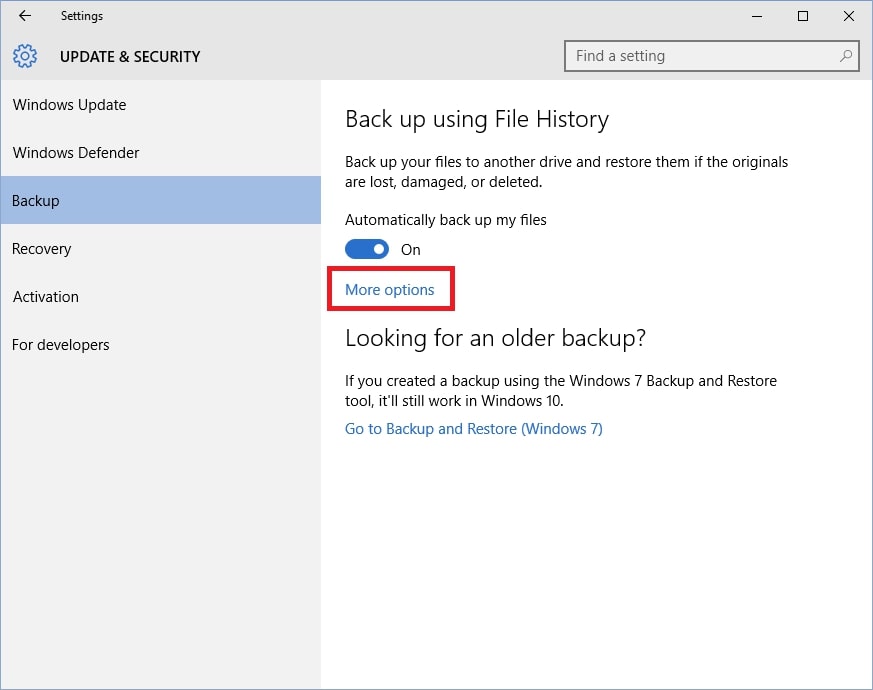
Step 1. Choose Windows Recovery
On your Windows 10 PC, click on the Windows "Start" button and then tap on the "Settings" button. After that, select the "Update & Security" option.
Step 2. Select backup
Thereafter, select the "Backup" option from the left bar and then choose "Back up using File History". Now, tap on the "More Options".
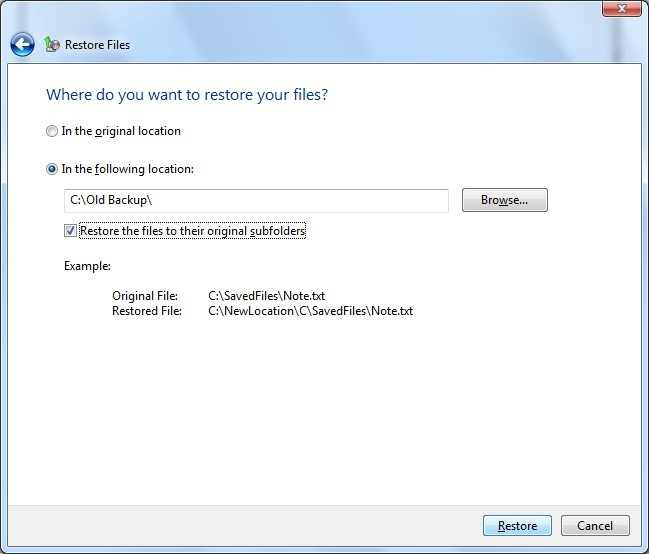
Step 3. Select current backup
Now, scroll down your Windows screen and select the "Restore files from a current backup" option.
Step 4. Select desired files
In the search bar, type the name of the desired file that you want to restore from the backup or you can also find the desired files from the left and right arrows.
Step 5. Restore
Once you can find your desired files, select and restore them to their original location. Finally, tap on the "Restore" button.
Wondershare UBackit | Backup and Restore Files on Windows 10?
No doubt, there is an inbuilt utility for restore and backup on Windows 10 PC. However, Wondershare UBackit is a free software that can backup and restore files from Windows 10 effectively and efficiently.
Main features of Wondershare UBackit
- Backup and restore files on Windows 10 in simple steps.
- Intelligently monitor backup schedule, backup environment.
- Set sutomatic backup to free you from heavy backup worries.
Here is the step-by-step guide on how to backup and restore on Windows PC/Laptops with the help of Wondershare UBackit.
Backup Files on Windows 10
Step 1 Launch Wondershare UBackit

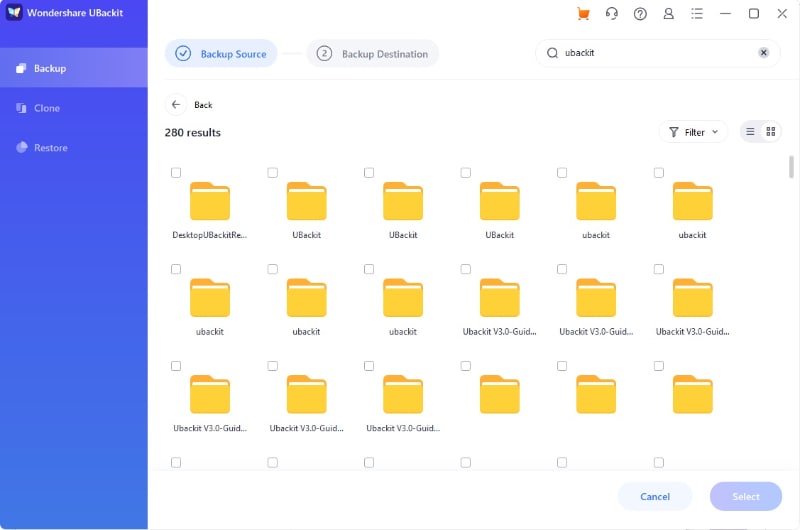
Step 2 Select Files/Folders from Hard Drive
Step 3 Choose Backup Destination

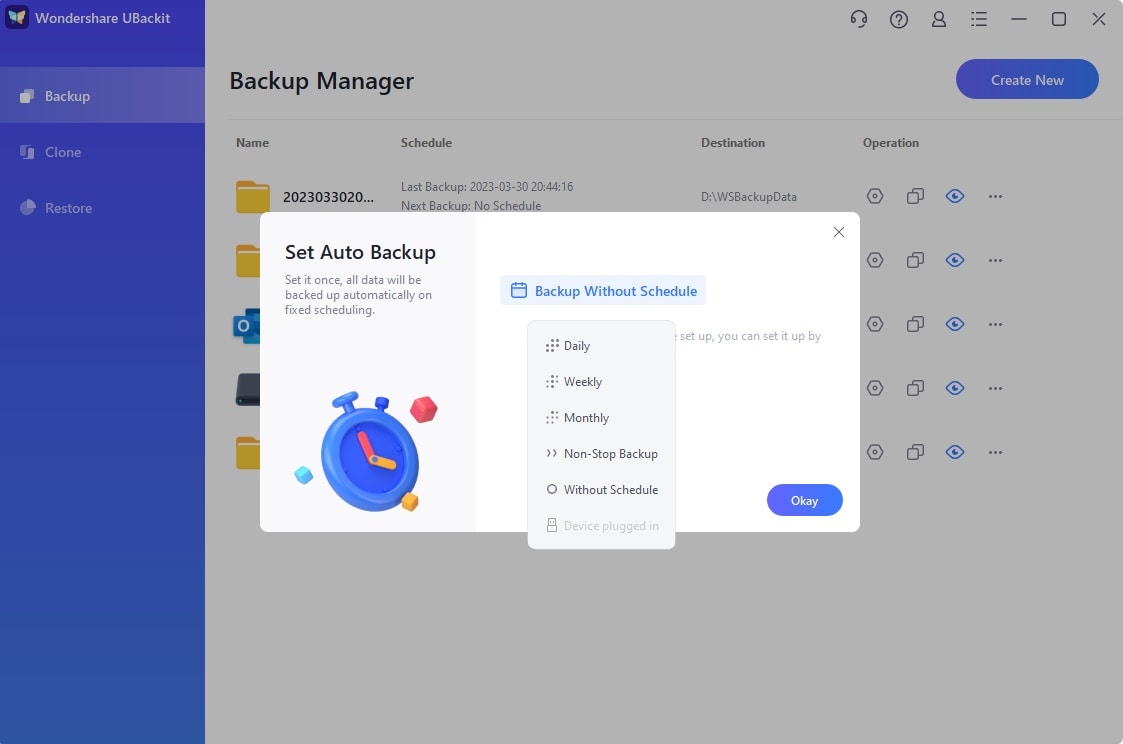
Step 4 Set Automatic Backup
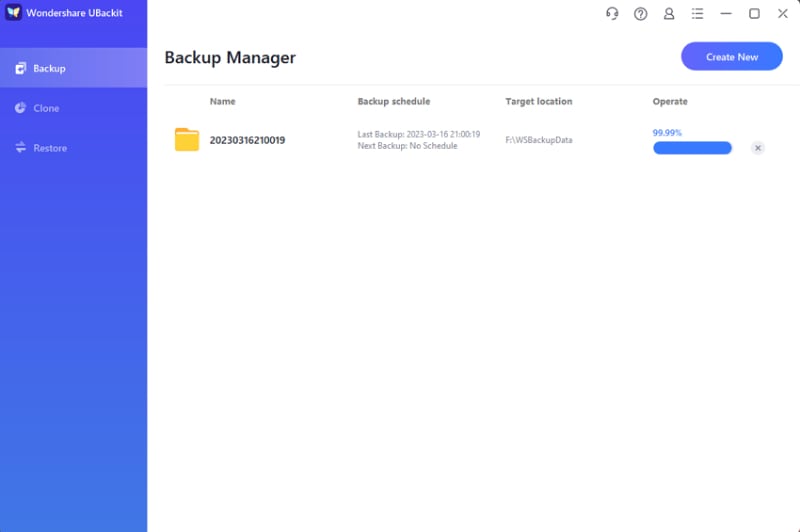
Step 5 Evoke The Backup Process
Restore Files on Windows 10
Step 1 Choose the Restore Option
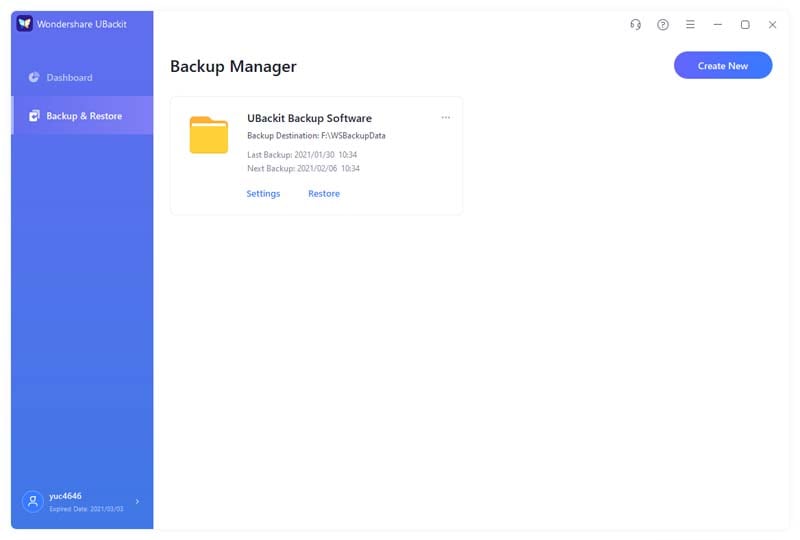
Firstly, go to the “Backup & Restore” feature to view the saved backups. Select the files that need to be restored.
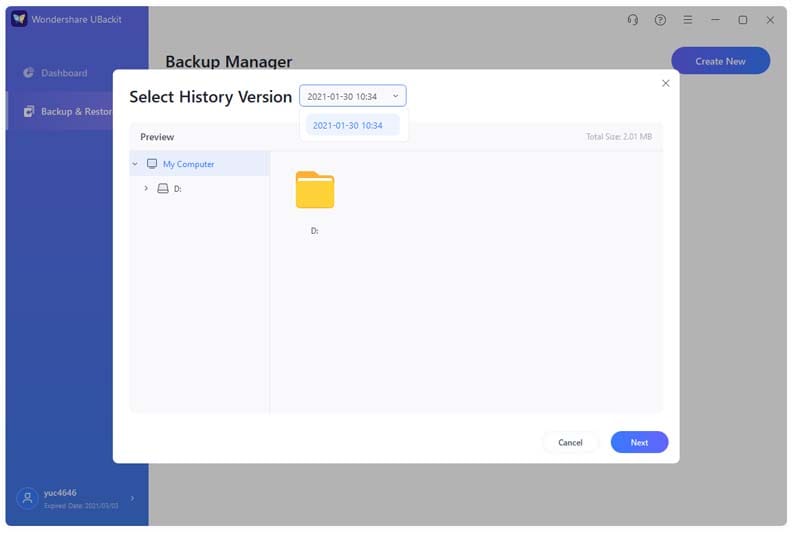
Step 2 Select The History Version
Now, UBackit would automatically load the content of the selected backup on its interface. You can go to the History Version option from the top and select any version from the saved sticky notes from Windows 10.
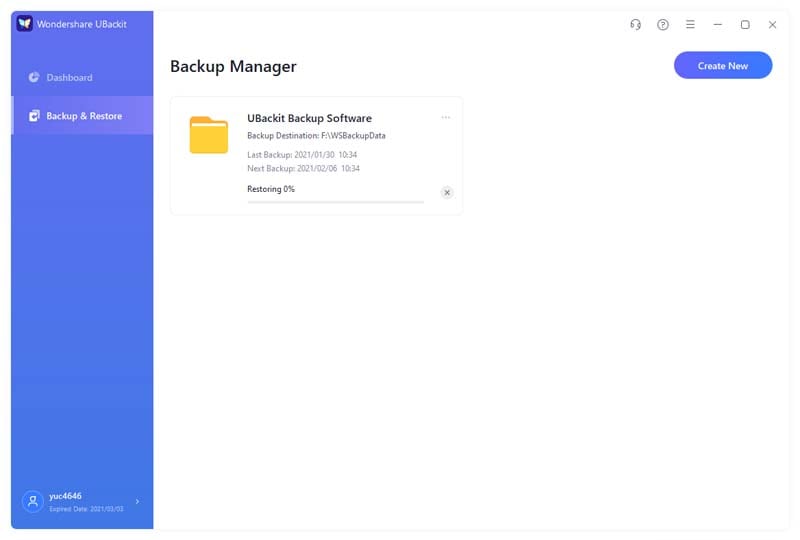
Step 3 Initiate the Restoring Process
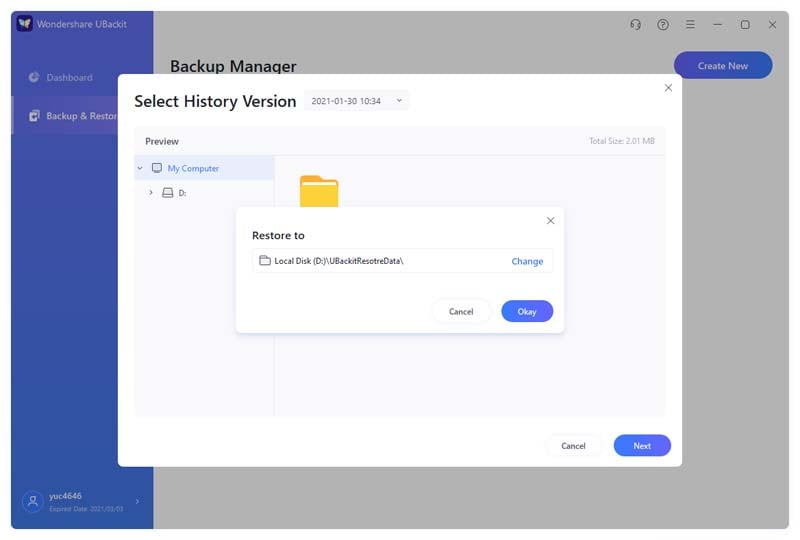
Wait for a while as the application would start extracting the saved data from the backup. If you want, you can check the restoring process on UBackit as well.
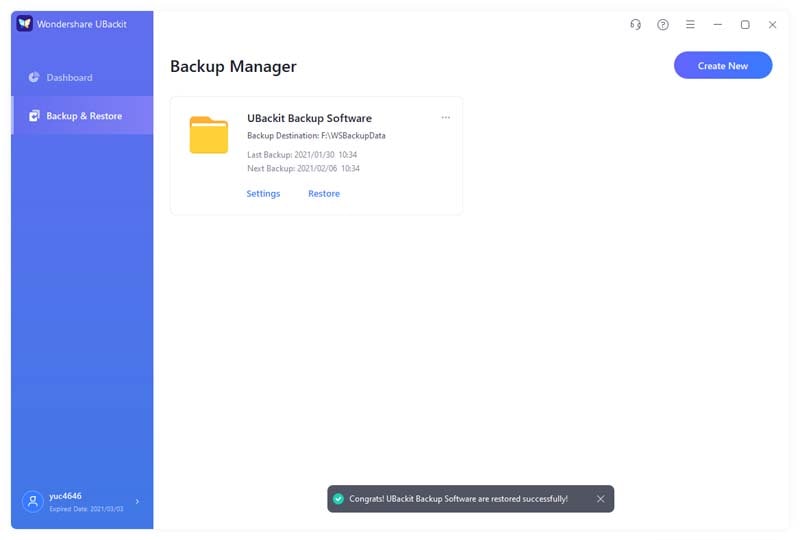
Step 4 Restoring Process Finishes
That’s it! Once the restoring process is completed, UBackit would let you know. You can now access your data by visiting the destination location easily.
How to Restore iPhone from Backup via iCloud
Are you an iPhone user? Lost all your iPhone data? Then, you don't need to panic if you have created a backup of your iPhone data with iCloud backup, then you can easily restore all your data from iCloud. To restore data from iCloud, you need to erase all your current iPhone data and then, you have to re-activate your iPhone. So, iCloud backup is the ultimate way of protecting data from numerous data loss situation for iPhone users. You can save entire your iPhone data on iCloud such as contacts, music, apps, documents, and many more. Even the settings can be saved on iCloud.
Step 1. Erase all data
To commence the process, navigate to the "Settings" app on your iPhone and then, open the "General" settings. After that, tap on the "Reset" option and then, click on the "Erase All Content and Settings".
Step 2. Set up iPhone
Now, turn on your iPhone by pressing your iPhone "Home" button and then, follow all the instructions until the "App & Data screen" does not appear on your iPhone screen.
Note: Make sure that you have connected your iPhone to a good Wi-Fi connection. Otherwise, you will not be able to restore data from iCloud backup.
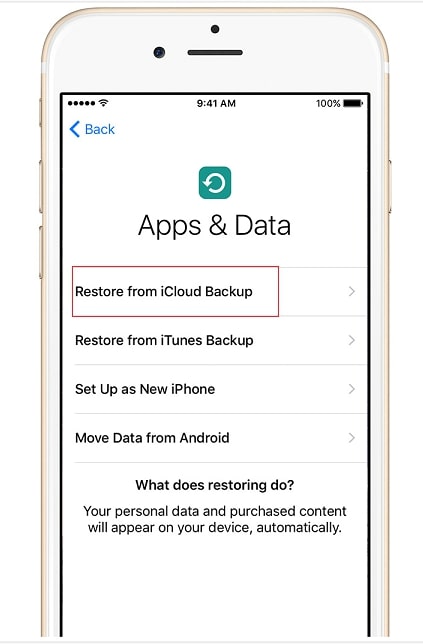
Step 3. Select Restore from iCloud
After that, when you see the "App & Data" screen, select the "Restore from iCloud Backup" option from the listed options.
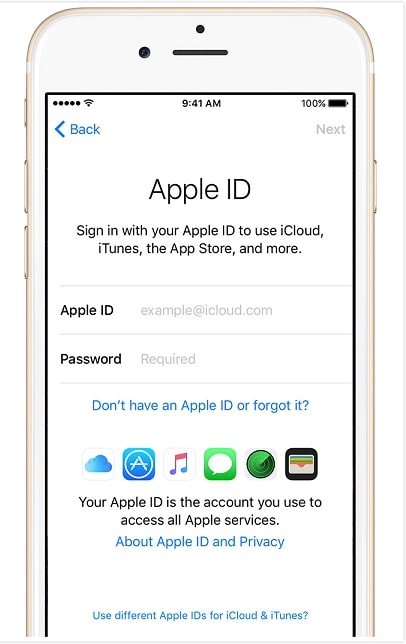
Step 4. Sign-in process
Now, you need to enter your Apple ID and password for restoring data from iCloud backup. This will restore all the data including music, apps, and many more.
Thus, now you know how beneficial the data backup is and how to restore it from backup. No doubt, there are plenty of tools available for data restoration from the backup, but AOMEI Backupper is the most powerful and reliable one which will protect your data from any kind of data loss situation. It offers the simplest way to restore data from backup for every Windows operating system. It is also considered a professional tool for both data backup and data restoration. AOMEI Backupper is designed for professional and personal use also. So, users who lost their important data can refer to this guide to find a solution.
Data Backup Services
- Computer Backup
- Hard Drive Backup
- Mac Backup
- Cloud Backup


Amy Dennis
staff Editor