Further Read:
How to do Windows 10 Incremental Backup
How to Make a Full System Backup in Windows

Jul 17, 2024 • Filed to: Take Data Backup • Proven solutions
What would you do if the Operating System (Windows here) gets corrupted, or become so messed up that you can't even reboot? What about your precious data? Is it lost? Will you be able to recover it, anyhow? Well, the chances are slim or absolutely nil, if you haven't taken a backup solution. Depending on your version of Windows, whether 7 or 10, it becomes immensely important to take an image backup solution. Though you can re-install Windows right from the beginning, this doesn't ensure all your programs to get restored. This calls for re-installing all the programs and eventually re-configuring them.
However, if you have the latest image backup ready, you can recover Windows, all the programs and configurations within a few minutes. In this article, you will get to know something about Windows image backupand some Windows image backup solutions, including the native Windows tool - Windows Image Backup, and the best one - AOMEI Backupper Professional.
But to begin with, what does an image backup do? It copies all the data on the drive. This includes partitions and the boot sector. It is the best way to backup Windows accurately including all the programs and settings.
Part 1. Introduction on Windows Image Backup
The Windows Image Backup program captures a picture of the hard drive and then creates a copy image (compressed) of it. It is saved in an ISO format which is further saved on a DVD that can thumb drive with integrated restore software or self boots. The image backup solution is of two types: full back up and incremental backup.
- Full backup: It is just like the system image but the file is in a compressed format. The backup software stores this on a thumb or a network drive. This needs an entirely different media for the boot to restore the entire or portions on the backup.
- Incremental backup: The servers usually do this at a fixed time or personal desktop. It copies modified files of some specific folders in a compressed file form. It can be restored in portions or entirely back into the system which had lost the files or got corrupted.
Difference between Image Backup in Windows 7 and Windows 10
The one big difference is previous versions of files are now called File History. The second main difference is that the image backup is buried deep in Windows 10. Windows 7 users have to tap on Start > Settings > Update and Security. On the left tap Backup. On the right, click the link "Go to Backup and Restore (Windows 7)". On the left, create a system image and move from here. Also, it is easy to boot into safe mode but it is not easy to reach there.
Why Should You Go for Windows Image Backup?
- Image backups are necessary as it helps in getting an operating system into a specific state (for instance a new install).
- You need data backup to bring you out from disaster.
- Bigger companies that do not back up their data are at a huge loss. Though in the case of a server crash, it can be rebuilt and the OS too can be reinstalled including the applications; but if the data is lost, it is lost forever.
- Lastly, an image backup is helpful in case of upgrading an operating system when the latter fails or shows some problems developed by the hard disk. The system image contains everything: operating system, data, hardware drivers, settings, applications installed, preferences, etc. if you have an image backup, the system can be restored easily without having to work from scratch.

Part 2. Windows 7 Image Backup Solution
Windows 7 has an in-built image backup tool. A system image backup is just like a snapshot of the entire hard drive. In case of a hard drive crash, you can restore everything and take it back to where it was. Yes, it has some disadvantages too. It takes a long time and one cannot restore the backup of one PC into another PC. An image backup makes of the full windows installation and hence would not work on any other PC. Nevertheless, it is overall a convenient tool for every Windows user to take a system image backup. Here is how to go about the Windows 7 Image Backup Process.
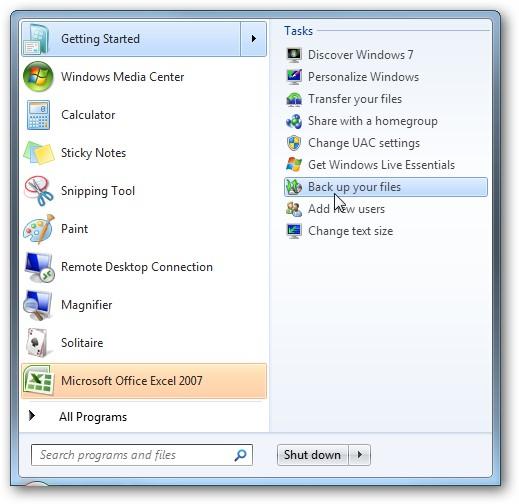
- 1. Click "Start". Hover on the arrow against "Getting Started". Click "Back up your files".
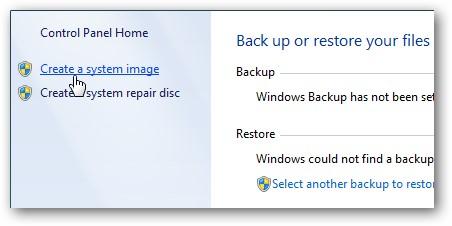
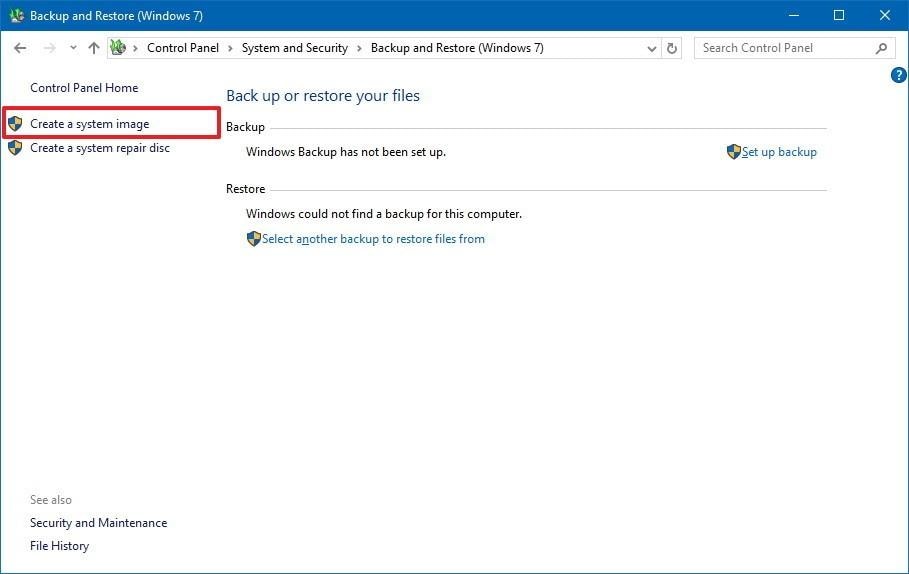
- 2. A window appears "Backup and Restore". Tap "Create a system image" link.
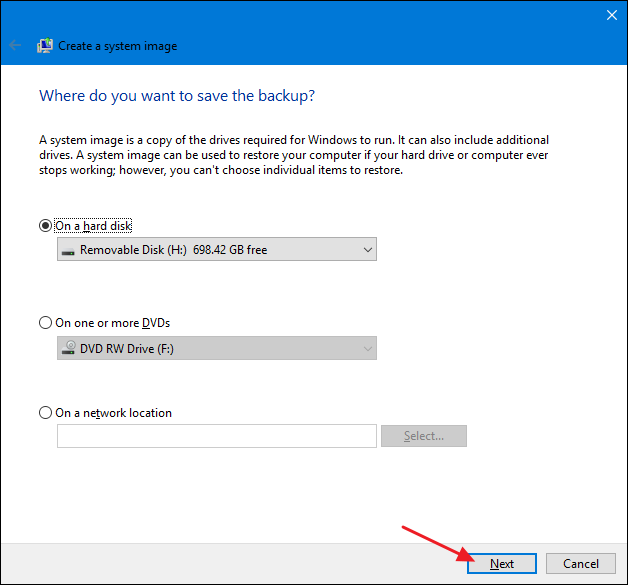
- 3. Create a system image backup. Select the place where you want to save the image. It can be any external drive, network location, or multiple DVD's. Select the location and click "Next".
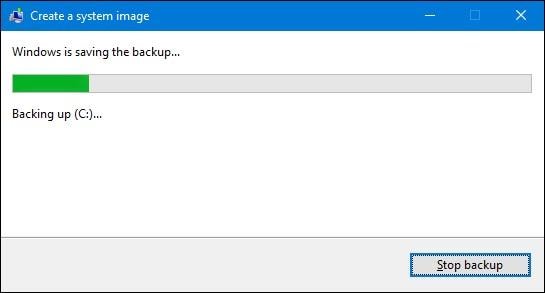
- 4. Windows is creating the image. A dialog box appears showing how much backup is done.
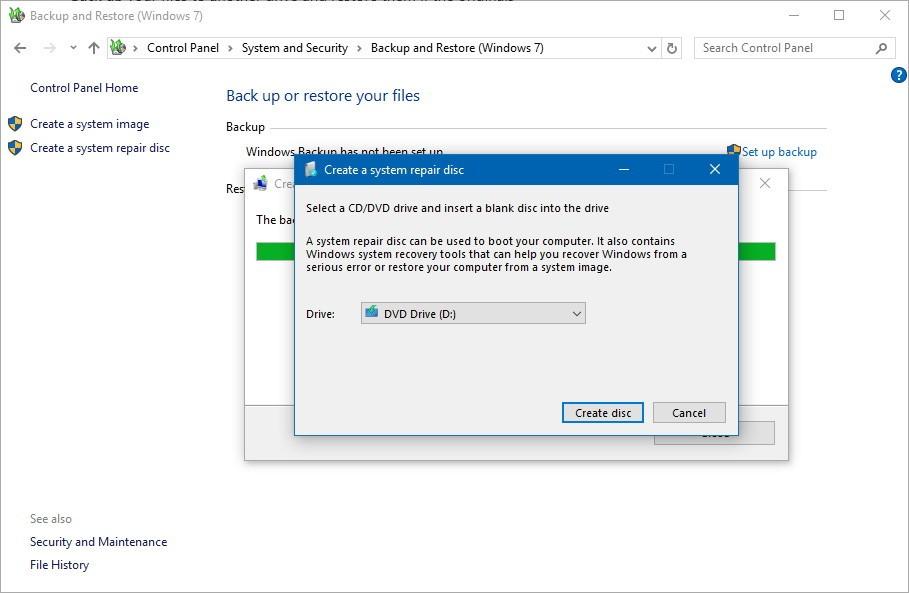
- 5. Create System Repair Disc. Windows offers you an option to create a system repair disc. This disc can be used in the future to start your PC and restore your image backup in case you are not able to start the Windows and there is a need to replace the hard drive. Label it and save it in a secure location.
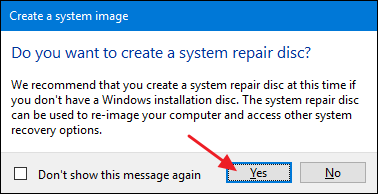
- 6. Select the drive in which you wish to create the disc and click the "Create Disc" button.
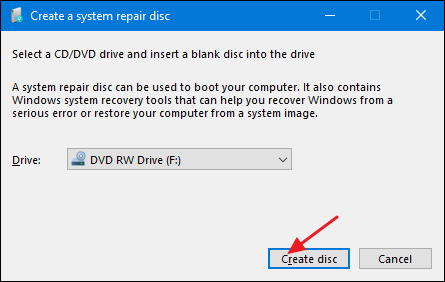
Image backup is a lengthy process. You should accomplish this in your spare time when you don't need your system. Restoring is easy and can be done easily.
Part 3. Windows 10 Image Backup Solution
Before starting to create a system image backup in Windows 10, make sure there is enough space to store the backup. For this, you can connect the drive, and then the wizard will let you know the available space. Connect to external storage space, if the available space is not enough. Now follow the step-by-step strategy to take animage backup in Windows 10.
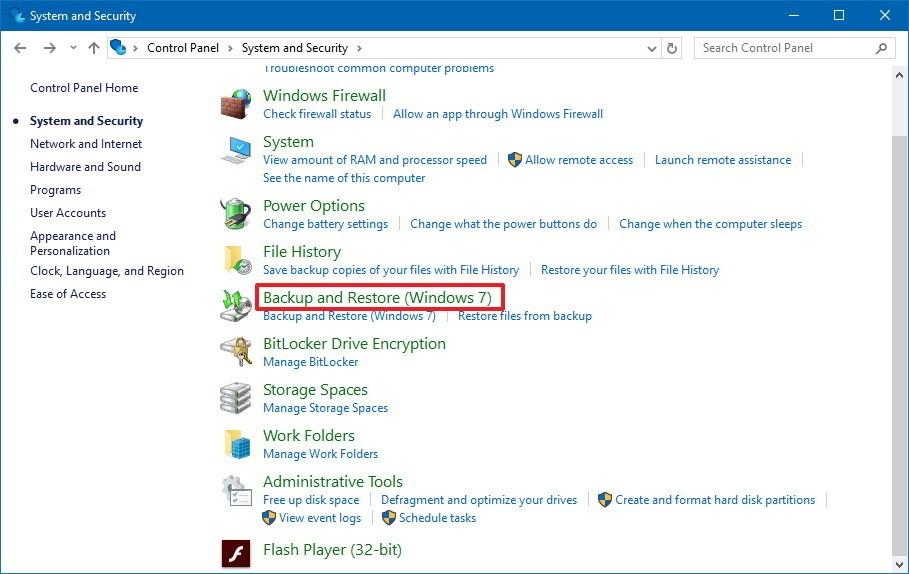
1. Open Control Panel, tap "System and Security" and then click "Backup and Restore (Windows 7)" to run Windows 10 image backup.
2. On the left side, hit on "Create a system image".
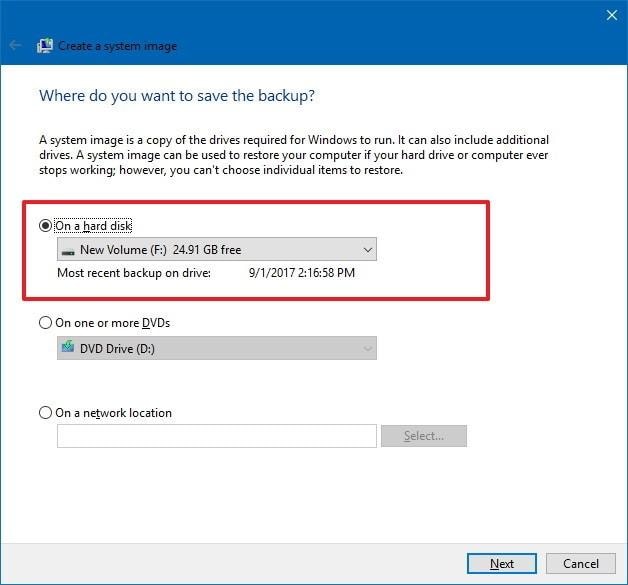
3. In "Where do you want to save the backup", select your option of the storage location of the backup image.
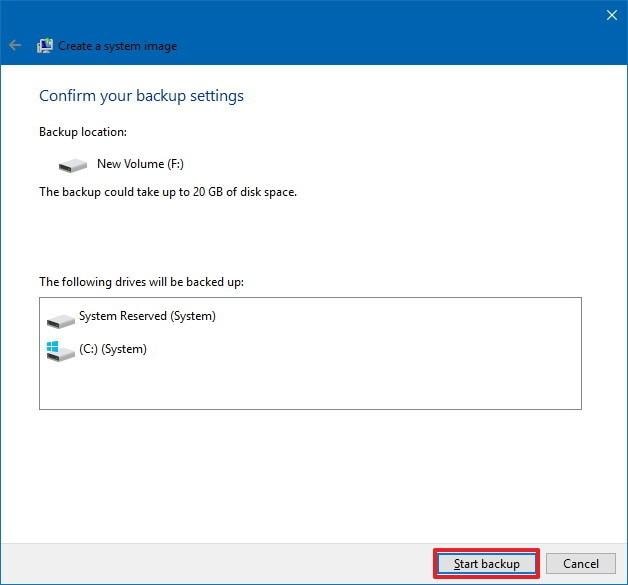
4. Click the "Start Backup" button, and then the wizard creates a full image backup of your system. This includes all that is stored in the main drive and the system reserved partition.
5. Disconnect the external hard disk drive in case you have connected it. Then keep it in a safe place.
An added advantage of image backup in Windows 10 is the usage of the Shadow Copy. This technology helps in creating backup even when they are in use. So, you can work and let the wizard do its job simultaneously.
Once the backup completes, it prompts another action – System repair disk. This is useful in case the computer fails to boot. Though this is useful, access the recovery options while making use of a bootable USB drive with the installation files.
Windows built-in image backup tool has its downsides too. First, it consumes a lot of time. Secondly, it can't backup Windows image to another computer, and might cause some error codes. Also, it may or may not have enough space. In some cases, you may be required to save the data in an external disk drive. One has to ensure this with the wizard before proceeding with the backup plan. With these kinds of issues erupting, you should start looking for a concrete solution.
The Best System Image Backup Solution
One of the best that we have come across is the AOMEI Backupper Tool. This tool is specially designed to provide backup to Windows. It is capable of backing up, syncing, restoring, and also cloning Windows system, data, and all the necessary applications.
Part 4. Windows 10/7 Image Backup Solution - AOMEI Backupper Pro
Windows has immense storage issues. When you are securing the system images in a network location, only the most recent system images can be kept. Windows Backup will require username and password to learn about the network location while saving the backup. Backing up to tape is just not possible.
Additionally, there are a few more drawbacks. For instance, Windows backup consumes a lot of time. Would you still have Windows as your priority? How about a software program that overcomes all the shortcomings?
One such program is AOMEI Backupper. AOMEI Backupper Professional is one of the best Windows backup software and can be called as an alternative to Windows 10 Backup and Restore. With it, one can restore backups, image systems, individual partition, and hard disk in case the system crashes.
Main backup features of AOMEI Backupper Professional
- Flexibility
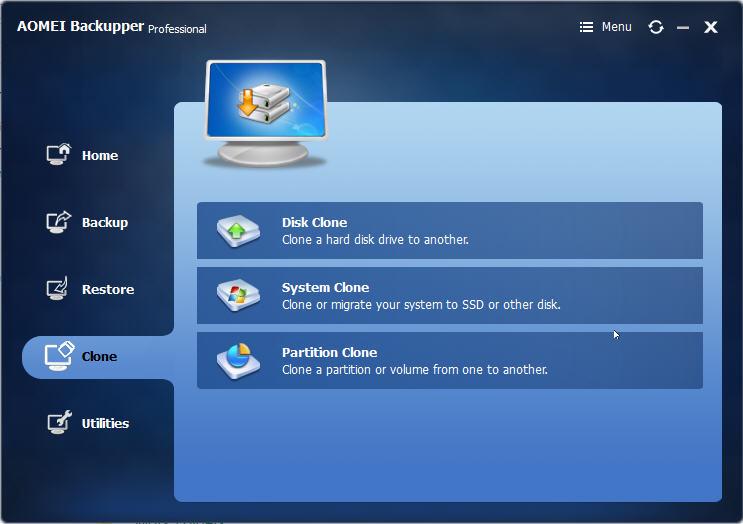
AOMEI clones software. With it, you can clone system, partition to other locations, and hard disk.
- Extra DestinationsAOMEI allows you to clone or backup to external hard disk, local disk, USB flash drive, network share, NAS device, cloud drives, etc.
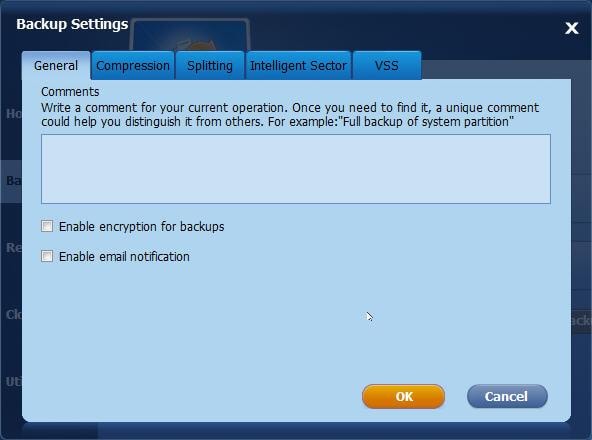
- More OperationsYou can compress, explore, encrypt images, split, and merge backup images.
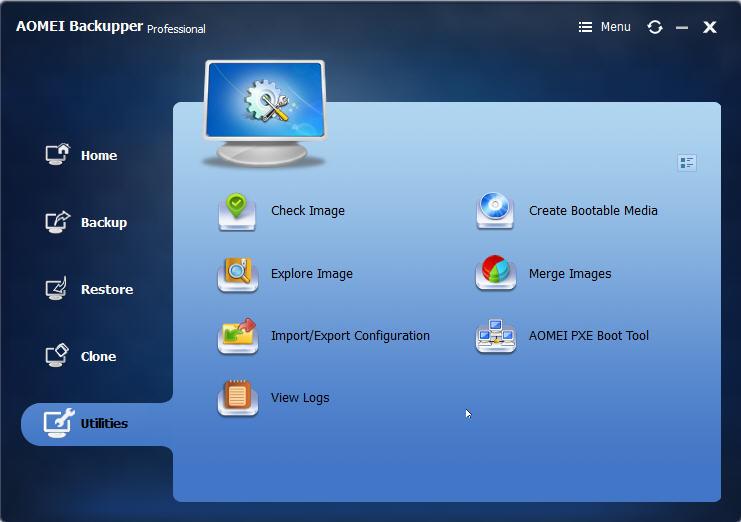
- New Built-in abilities
It has some of the best features such as Creating Bootable Media and the AOMEI PXE Boot Tool.
- Some Additional features:
1) Full, differential, incremental backups
2) Moving the OS to SSD or HDD without re-installing
3) Different restoration of hardware
4) Synchronization of files/folders
5) Command-line backup
Other features of AOMEI Backupper Professional
Resize Features
- It changes partition size without losing data
- It extends the NTFS partition. Doesn't require restarting the computer
- It moves free space between two partitions
Create Features
- To stores more data, and creates a new partition
- It deletes any useless partition
- Changes file system. Empties all data
Migrate Features
- Migrates system to a solid-state drive
- Clones one disc to another
- Clones partition to a different location
Bootable media Feature
- Creates Windows Bootable media without the need to install AIK/WAIK
- Installs Windows 1/8 to a USB flash drive or a removable disk
How to Do Image Backup with AOMEI Backupper
Step 1. Download AOMEI Backupper
Free download, install, and run the program. Hover on "Backup" and click. Now choose "System Backup" from the list on the right pane.

Step 2. Choose the partition
You can edit the default "Task Name". Besides, the program chooses the partition needed automatically and makes it shown on the "Step 1". Hover the cursor on the displayed drive and double click it. You can see the specific files stored on it.

Step 3. Choose the storage location
The program selects the location to save the system image automatically. You can choose a location of your choice too from a local disk, a USB flash drive, or CD/DVD or external hard drive. Tap "This PC" and choose the destination. A system image can be saved to NAS devices or network by tapping "Share/NAS".

Step 4. Schedule image backup task
To keep an up-to-date system image, schedule your system image backup. This can be done by clicking on "Schedule". It can be made on a daily, weekly, or monthly basis. Also, click on "Advanced" to choose how to schedule system images from full, incremental, or differential backup.

So, when you find issues with backup and restore with Windows 7 or Windows 10 backup and restore or are stuck, then try AOMEI Backupper Professional. AOMEI Backupper Professional is a free tool lasting 30 days for the computer both for home and work.
Part 5. Conclusion on Windows 10/7 Image Backup
Image backups can be rightfully said to be the foundation of any backup strategy. Have at least two backups because as it is said if there is only one copy, you don't have a copy. There is a risk of getting corrupted or damaged. Henceforth, it is recommended to have at least two.
Windows image backup solutions are utterly important. Whatever be your OS, do ensure that you save all the data via system image backup. You can use USB drives or an external disk if the wizard shows that there isn't much space available.
Or if you are not happy with the shortcomings while accomplishing the image backup process, try AOMEI Backupper Professional software. Whatever be your Windows Operating System - 7 or 10, do employ AOMEI Backupper as well. It is as discussed one of the best Windows image backup solutions which will make your life much easier. Both backup and restore are extremely simple with this. Now, go ahead with it and remain at peace, your data will remain safe!

- Allows you to take automatic, full, incremental, and differential backups of system, disk, partition, and files.
- Supports system restore, disk restore, dissimilar hardware restore, partition restore, and selective file restore.
- Supports disk clone, partition/volume clone, flexible clone, system clone, and command line clone.
- Supports Windows 10, Windows 8.1/8, Windows 7, Vista, and XP (all editions, 32/64-bit)
Data Backup Services
- Computer Backup
- Windows 10 Backup
- Windows 8 Backup
- Best File Sync Software
- Driver Backup
- SD Card Backup
- Best Incremental Backup
- Onedrive Automatic Backup
- Hard Drive Backup
- CMD Backup
- External Hard Drive Backup
- Hard Drive Backup Software
- Move Files from C Drive to D Drive
- Best Backup Hard Drive
- Mac Backup
- Cloud Backup


Amy Dennis
staff Editor