
Jun 03, 2026 • Filed to: Recover Emails • Proven solutions
Are you finding mismatches in the messages received in Microsoft Outlook in comparison to its web app? Or you receive an error message while synchronizing your offline folder? All these scenarios indicate problems with the synchronization folder or corrupted .ost file.
The in-built Synchronization process happens when your OST or PST files get updated. Sometimes this process gets corrupted, and this leads to sync errors. If you are also into such problems, then read this post.
In this article, we will discuss the synchronization issues folders, the method to solve it manually and automatically with the excellent Stellar Outlook Repair software.
| Sync Folder Name | Typical Content | When to Check This |
| Sync Issues | Technical synchronization logs | When Outlook is slow or won't update. |
| Conflicts | Multiple versions of the same item | If changes on mobile don't match desktop. |
| Local Failures | Items not uploaded to the server | If you see emails on your PC but not on Web Mail. |
| Server Failures | Items failed to sync from mailbox | When your server connection is unstable. |
Part 1: What you need to know about the issues with synchronization folders in Outlook?
Items and logs not synced to your email by Microsoft Outlook are present in the synchronization issues folders. It is a normal Outlook function, and these messages act as error checking mechanisms for programs that use it for syncing email services.
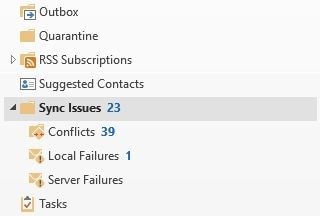
The four outlook synchronization error folders are:
- Sync Issues: All the synchronization logs are stored here and prove helpful when Outlook faces any trouble during synchronization.
- Conflicts: Conflicting item's multiple copies are present in this folder. To view the list of conflicting items, you can click on Infobar that is present on the original item's top. If any conflict arises, you can resolve it with the copies present in the Conflicts folder.
- Local Failures: While making some changes to the items of your Outlook, if you find it missing in other Outlook clients, then you can check in the local failures folder. It contains all items that are not sent to the server.
- Server Failures: Items failing synchronization with mailbox are present here. When any item fails to synchronize, it moves to the Server failures folder from the original folder, but are available only when the connection with the server is active.
Access these folders by following the steps mentioned below:
Step 1: Type CTRL+6 or click on three dots present in the bottom left of the Outlook email program
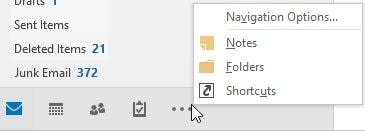
Step 2: Click on folders to see the list of folders available in the account
Step 3: Reach Sync folders and expand it to view other folders.
Part 2: Solve Error Synchronizing Folder Outlook 2003/2007/2010 manually
While synchronizing your Outlook with Exchange server, sometimes you receive error messages. It leads to the occurrence of the issues of Outlook OST synchronization. In such scenarios, you need to check the proper working of the synchronization process.
You check the proper synchronization with the following steps:
Step 1: Click on the folder that needs verification and then on "Properties"
Step 2: Click on the "Synchronization" tab to verify settings of:
Date: Last Synchronized on, # Items: Server folder, # Items: Offline folder
Check whether the numbers of items in the Offline and Server folder are the same. If it's the same, then synchronization is proper, but in case of variation, check profile settings.
You can check it with these steps:
Outlook 2003:
Step 1: Click on the "Tools" menu and then click "E-mail Accounts."
Step 2: Click "Next" if the option – change existing email account, or view is selected in the email account dialogue box. Check your "Mailbox – account name" is selected.
Step 3: Select the option "Microsoft Exchange Server object," and then go to "Change."
Step 4: Check "Use Cached Exchange Mode" is selected, and click on "Next."
Step 5: Click on "Finish", and then "OK" to exit Outlook and relaunch it.
Outlook 2007:
Step 1: Click on "Account Settings." You can find it in the Tools menu.
Step 2: Select the "Data Files" tab, to check the Mailbox – account name is the default.
Step 3: Click on the "E-mail" tab and then Mailbox – account name.
Step 4: Select "Settings" and then "Advanced" tab, to check "Use Cached Exchange Mode" is selected.
Step 5: Now tap on "OK" and click on "Close" in Account Settings. Exit from Outlook and open it again.
Outlook 2010:
Step 1: Reach the File menu and select "Account Settings."
Step 2: Ensure Mailbox – account name is a default by clicking on the "Data Files" tab.
Step 3: Click on the "E-mail" tab and then Mailbox – account name.
Step 4: Tap on "Change" and check "Use Cached Exchange Mode" is selected.
Step 5: Now click on "OK" and "Close" in Account Settings. Exit from Outlook and open it again.
Part 3: Create a New.ost File and Synchronize Offline Folders Again
If you are unable to synchronize folders, then probably your .ost file is damaged. You need to create a new file for it:
| File Extension | Account Type | Function |
| .OST | Exchange / Office 365 / IMAP | Offline copy of server mailbox data. |
| .PST | POP3 / Personal Archives | Local storage for folders and archives. |
Step 1: Exit all the running programs and click on Start
Step 2: Reach "Search" and click on Files or Folders.
Step 3: In the search box, click on All files and folders.
Step 4: Type *.ost in tab- All or part of the file name.
Step 5: Click on the hard disk in your "Look in" list.
Step 6: In "More advanced options" select the checkbox of "Include subfolders" and then click on "Search."
Step 7: Look for .ost file in the "Name" column.
Step 8: Click on "Rename" after you right-click on .ost file.
Remember to name it with a different extension, like you can add .old in place of .ost.
Step 9: Click on "Close" in the File menu and start Outlook.
Step 10: In the "Tools" menu, reach Send/Receive option and then click on "Send/Receive All"
Look at the lower-right section of the screen. You can see the synchronization status here and your new .ost file now. As it is the replication of the existing information of Exchange Server mailbox, so the complete process does not cause any damage to the information.
Part 4: Solve Synchronization Errors Automatically with Wondershare Repairit
When manual fixes like renaming the .ost file fail, the issue is likely deep-seated corruption within the mailbox database. Wondershare Repairit for Email is a professional-grade tool designed to handle massive files and complex corruption that standard Outlook repair tools (like ScanPST) miss.
Step 1: Upload the Corrupt Mailbox File

Launch Wondershare Repairit and navigate to the Email Repair section. Click the "+Select File" button. You can use the "Find" feature to automatically scan your local drive for the .ost or .pst files associated with your synchronization errors.
Step 2: Start the Advanced Repair
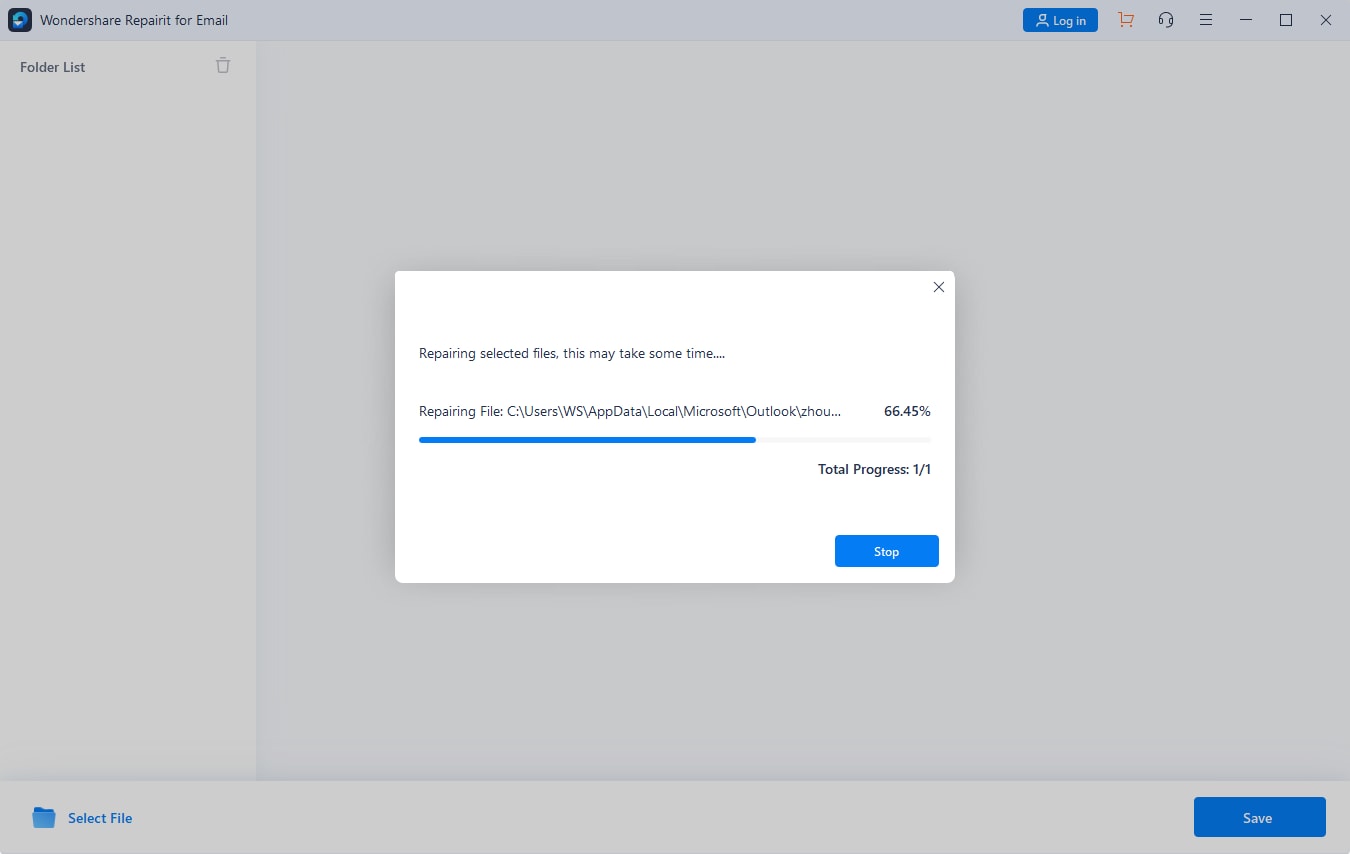
Once the file is loaded, click the "Repair" button. The software will perform a comprehensive scan to re-align the synchronization headers and fix broken item links that cause folder mismatches.
Step 3: Preview and Save Restored Emails

After the process is complete, Repairit provides a categorized preview of all folders (Inbox, Sent, Contacts, etc.). You can double-click items to verify their content. Finally, click "Save" and choose your preferred format (PST is recommended for easy import back into Outlook) to restore your data.
Your file is repaired, now you can access your Outlook.
The Bottom Line
Sometimes because of a corrupted OST file synchronization process stops functioning properly and thus leads to error. If you see any mismatch in the data, then the methods discussed in this guide will surely help you resolve the issue.
We have given you complete information about the synchronization issues folders in Outlook, and the ways to solve it manually and automatically.
We recommend using the automatic process and fix the issue with the Wondershare Repairit Email repair. This excellent software is easy to use and fixes the issue quickly. Whether it's a bigger file size or smaller, the software can repair all file types with any level of corruption.
People Also Ask
-
Why does Outlook show "This folder has not yet been updated" at the bottom?
This usually indicates that Outlook is in "Cached Exchange Mode" and is currently busy downloading headers or is disconnected. Ensure your status bar says "Connected to Microsoft Exchange." If it persists, try Method 3 to rebuild your .ost file. -
Will repairing my OST file delete my emails?
No. Since .ost files are just local mirrors of what is on the server, deleting or repairing them will not result in data loss. Outlook will simply re-download the data from the server once a new file is created. -
Does a slow internet connection cause synchronization folder errors?
Yes. If the connection drops during a "handshake" between Outlook and the Exchange server, the sync process can hang, leading to entries in the "Local Failures" folder. Always verify your connection before performing a manual sync.
Recover and Repair Email
- Repair and Recover Emails
- Get Email Password Back


Amy Dennis
staff Editor