


 TL;DR:
When deleting files from an SD card in Windows 10 or 11, standard Delete and Shift+Delete bypass the Recycle Bin entirely, instantly marking directory entries as free while leaving the physical bytes intact and recoverable until new data overwrites those sectors.
● For bulk file removal, use the command prompt del command with wildcards, or utilize PowerShell Remove-Item with the -WhatIf switch to safely preview irreversible mass deletions before committing.
● If deletions are blocked because the card is stuck in read-only mode, first ensure the physical adapter switch is unlocked, then execute attributes disk clear readonly in Diskpart to clear the volume-level flag.
● To recover mistakenly deleted files, immediately halt all SD card write operations and scan the drive with software like Wondershare Recoverit before any new file saves permanently overwrite the vulnerable flash chips.
Ask AI for a summary
 ChatGPT
 Perplexity
 Gemini
 Claude
 Grok
Grok
Most Windows users assume files deleted from an SD card go to the Recycle Bin the same way files deleted from C:\ do. They do not. Microsoft's Q&A on permanent delete confirms: Windows does not host a Recycle Bin on removable drives, so the standard delete and the Shift+Delete do exactly the same thing — they mark the directory entry as free and let the file's sectors be overwritten later. Reddit r/LifeProTips' 2024 Shift+Delete PSA spread the same insight after a wave of users lost files they thought were recoverable from the Recycle Bin.
This guide separates the five deletion paths, names the file-system traps Thumbs.db / .DS_Store / desktop.ini / OneDrive sync introduce, and walks through the recovery path when the delete was on the wrong file.
In This Article
Part 1. How Windows Delete Behaves on SD Cards
The Windows Recycle Bin is a hidden folder on the drive the file lives on: C:\$RECYCLE.BIN. On a removable drive, Windows refuses to create that folder; the Bin simply does not exist on the SD card. So the standard delete gesture behaves the same as Shift+Delete on every SD card reader — the file's directory entry is freed and the bytes are recoverable until something else writes over them.
Why Recycle Bin Does Not Catch SD Card Deletes
USB and SD card volumes mount as Removable, not Fixed, in Windows. The Recycle Bin housekeeping service skips removable volumes because the removable drive may be unplugged at any moment — files parked in a removable drive's Recycle Bin could not be safely emulated. Microsoft Tech Community's 2026 thread on empty Recycle Bin confirms this — emptying the Recycle Bin only empties the system drive's Bin; SD card deletes never reached it.
What Actually Happens to the File Bytes
The file's bytes stay on the SD card's flash chips in exactly the same condition they were before delete. Three things change in the file system metadata:
- The directory entry that pointed to the file is marked as free in the File Allocation Table.
- If the file's sectors are reachable, they are marked as free in the cluster bitmap.
- Nothing is physically rewritten to the SD card's flash.
Until one of the SD card's sectors hosting that file is reused for a new write, the bytes remain intact. Recovery tools, including Wondershare Recoverit, can read the sectors and reconstruct the file from its header signatures (JPEG, MP4, CR3, PNG, DOCX).
Part 2. Pick the Right Method by Cleanup Goal
Five tools cover every Windows deletion scenario. Pick the one that matches your goal.
Method 1. File Explorer Delete (Single File or Selected Group)
The case: you can see the file in File Explorer, you want to delete it, and you have time to select each file. This is the case most readers come in with.
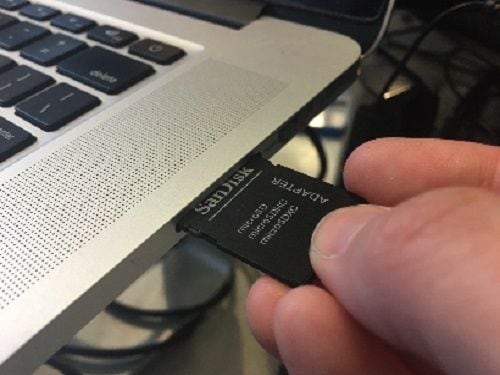
Step 1. Insert the SD card via a USB reader or built-in slot. The card appears as a removable drive in File Explorer's This PC.

Step 2. Double-click the SD card drive letter. Browse to the file or folder you want to delete.
Step 3. Click the file once to select it, hold Ctrl for a non-contiguous multi-select, or Shift+Click for a range. Right-click and choose Delete from the context menu.

Step 4. Windows shows a confirmation dialog asking "Are you sure you want to permanently delete this file?" Note the word "permanently". Press Yes.

The file is now marked deleted and the storage space is returned to the card. The bytes remain on the card until something else writes over them.
Method 2. Shift+Delete (Skip the Already-Skipped Recycle Bin)
The case: many Windows guides recommend Shift+Delete on the SD card "to skip the Recycle Bin." That advice is wrong on remountable drives — the Recycle Bin was never in the path. Shift+Delete produces the exact same result, but it is faster if you have to delete a long list because Windows skips the confirmation dialog.

Step 1. Browse to the file in File Explorer. Select it.
Step 2. Press Shift + Delete on the keyboard. Windows confirms with a single dialog instead of two.
Step 3. Press Yes. Job done.
Method 3. Cmd DEL (Command Prompt Bulk Delete)
The case: hundreds of files need to go, all matching a pattern, and doing it one click at a time would take an hour. The del command in cmd runs in sub-seconds and accepts wildcards.
Step 1. Press Win + R, type cmd, press Enter. (For the SD card paths use elevated cmd if Windows cannot see the drive.)
Step 2. Switch to the SD card letter. If the SD card is F:
F:
cd \DCIM\100CANON
del *.CR3
This deletes every .CR3 Canon RAW file in the 100CANON folder in one go. del does not prompt — it skips the Bin just like File Explorer because of the removable drive rule.
Method 4. PowerShell Remove-Item (Filtered Bulk)
The case: you want more control than del. PowerShell's Remove-Item takes the same wildcards as del plus a -Recurse switch for folder trees and a -WhatIf preview.
Remove-Item F:\DCIM\100CANON\*.CR3 -WhatIf
Remove-Item F:\DCIM\100CANON\*.CR3
Run with -WhatIf first to see which files would be deleted. Then run without -WhatIf. Use -Force to bypass hidden / read-only attributes; use -Recurse to descend into subfolders.
Watch out: PowerShell'sRemove-Item -Recurseon an SD card with hundreds of files is fast but irreversible. Verify the path and the wildcard with-WhatIffirst.
Method 5. Diskpart Attributes Clear Readonly (Stuck-on-Read-Only Cards)
The case: Windows reports the SD card as read-only — Delete is greyed out in File Explorer. The cause is a stuck Read-Only attribute on the volume, fixable through Diskpart.

Step 1. Press Win + R, type diskpart, press Enter. Confirm the User Account Control prompt.

Step 2. In Diskpart, type the following commands one at a time:
list disk
select disk X (replace X with the SD card number — usually the smallest)
attributes disk clear readonly
exit

Step 3. Remove and reinsert the SD card. Windows now sees it as writable, and Delete is no longer greyed out.
Side effect: attributes disk clear readonly also disables any write-protect flag set at the controller level on counterfeit cards. If the card re-mounts as read-only after a fresh write, the card itself is failing — back up its readable files and replace it.
Part 3. Decision Matrix: Pick the Right Method
| Goal | Best method | Why | Recovery if wrong |
| Delete one or a few files you can see in the card | Method 1 File Explorer Delete | Visible feedback, confirms each file | Recoverit still works |
| Bulk-delete a folder of files matching a pattern | Method 3 cmd DEL | Wildcards are fast | Recoverit |
| Bulk delete with a preview before commit | Method 4 PowerShell Remove-Item -WhatIf | Shows proposed deletes | Recoverit |
| Delete a long list without confirmation dialogs | Method 2 Shift+Delete | Skips confirmation | Recoverit |
| Card looks fine but Delete is greyed out | Method 5 Diskpart Clear Readonly | Clears the volume-level flag | Recoverit |
| Card itself is failing — sectors keep reallocating | Backup now, replace | No software fix for bad flash | Recoverit may salvage pre-failure photos |
| Need to free space to write new photos | Method 1 or 3 + eject safely | Quickest + lowest risk | Recoverit |
Part 4. Common Snags After Deleting
Four snags turn a routine delete into a support ticket. Each has a specific cause.
Files Keep Reappearing (OneDrive / Google Drive Sync)
When the SD card is in a folder that OneDrive or Google Drive is set to back up to, deleting a file locally does not delete the synced cloud copy. The next time you sync the card, the cloud pushes the file back. The fix is one of:
- Disable sync on the SD card folder in OneDrive / Google Drive settings.
- Delete from the cloud first, then from the local copy.
- Move the SD card out of the sync root folders.
Thumbs.db / .DS_Store Cache Grows Back
Windows creates Thumbs.db in any folder that has been viewed as thumbnails in File Explorer. Mac writes .DS_Store to every folder it browses. Both files reappear the moment Windows or Mac reads the folder again.

For removing the Lock-switch caveat (the cause of false read-only on full-size cards) — verify the SD card jacket's small switch is set to Unlock before any delete attempt.
Note:Thumbs.dband.DS_Storeare not the cause of any read-only behavior. They're a side effect of the file-system thumbnail cache. Disable thumbnail viewing in File Explorer if you do not wantThumbs.dbregenerated.
Hidden Files Will Not Delete (Read-Only Flag)
If a file shows the Hidden attribute in File Explorer's properties, the standard Delete may silently skip it. Enable Show hidden files in Folder Options, then right-click → Properties → uncheck Read-only, then Delete. PowerShell's Remove-Item -Force handles both attributes in one step.
Card Still Shows "Used Space" After Delete
Two reasons:
- The deleted file's sectors are still occupied by the original bytes. As soon as another file writes to those sectors, the space is reused.

- Recycle Bin icons: Windows still has the deleted file's entry in the file-system cache. Right-click the SD card's drive letter and choose Properties → Disk Cleanup for a clean slate.


Always eject the SD card safely after the cleanup. Windows caches writes; pulling the card mid-write is the most common cause of the "blank or has unsupported file system" error.
Part 5. If You Deleted the Wrong File: Recover Before Overwrite
If you just realised the wrong file was deleted — stop using the SD card immediately. The card's free space now points at sectors the deleted file used to occupy; every new write to those sectors makes the deleted file harder to reconstruct. The window for high-quality recovery is minutes to hours, not days. Wondershare Recoverit is built for this case.
Recommended Tool: Wondershare Recoverit
- Reads below the file-system layer. Recoverit ignores the directory table and scans the card's sectors for known file signatures (JPEG / HEIC / MP4 / MOV / CR3 / DOCX / PDF).
- Previews before recovery. You see the file before committing to a save — files are not silently dropped.
- Recovers from a wide range of file systems. SD cards with FAT32, exFAT, NTFS, or even RAW volumes are all supported.
- Recovers to a different drive. The card itself is never written to during recovery.
3-Step Recovery Workflow
Step 1. Add the SD card as a source. Insert the SD card via a USB reader. Launch Recoverit and choose the SD card letter under Hard Drives and Locations.

Step 2. Scan. Click Scan. The standard scan finishes in seconds; the deep scan reads every sector for file signatures.

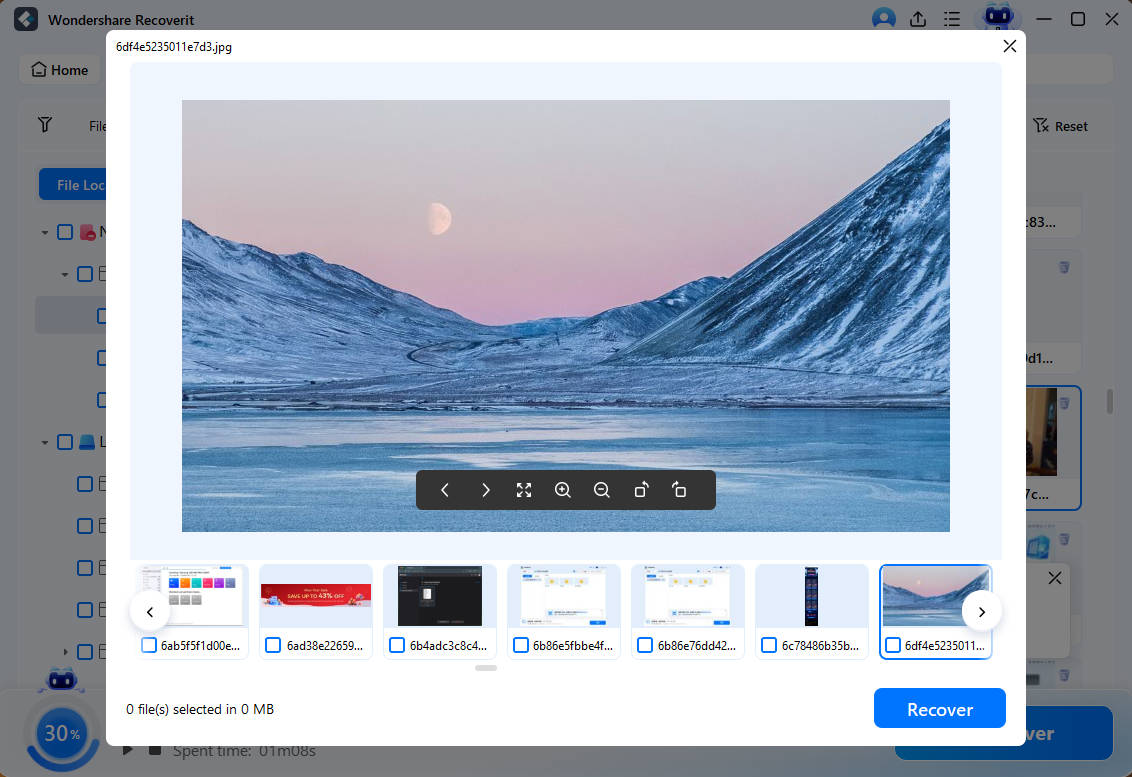
Step 3. Preview and save. Preview the recovered files in Recoverit's viewer, select the ones you want, click Recover, and save them to a separate drive. Open each recovered file in its native viewer before deleting the original copy from the camera's CFexpress / SD card or another backup.
For full file-system package recovery, see Recoverit's SD card workflow and the memory card pillar. For "I just formatted the wrong card" instead of "I just deleted the wrong file," see the TF card format recovery flow.

Conclusion
To delete files on an SD card in Windows, pick the method that matches your cleanup goal: File Explorer for visible single deletes, Shift+Delete to skip the confirmation dialog, cmd del for bulk deletes, PowerShell for filtered bulk deletes, and Diskpart for stuck-on-read-only volumes. Windows does not host a Recycle Bin on removable drives, so the standard delete is already permanent from the directory's perspective. If you deleted the wrong file, run Wondershare Recoverit before any new file overwrites the deleted sectors — the recovery window is minutes to hours, not days.
FAQ
-
Do deleted files from an SD card go to the Recycle Bin in Windows?
No. Windows does not host a Recycle Bin on removable drives. Files deleted from SD cards are immediately marked as free in the file system. The standard delete and Shift+Delete behave identically on SD cards — both are "permanent" from the user's perspective. Recovery is still possible because the sectors still hold the file's bytes until they're reused. -
How do I permanently delete files on an SD card in Windows 11?
Use File Explorer's Delete gesture. Windows will confirm with the “Permanently delete this file?” dialog because the card has no Recycle Bin. Press Shift+Delete to skip the dialog. The bytes stay on the card until another file writes over them. -
Can I undelete files on an SD card after Delete?
Yes, as long as the card's flash sectors have not been reused. Stop using the card immediately, insert it via a USB reader to the host PC, and run Wondershare Recoverit. The deep scan reads below the file-system layer and reconstructs files from the sectors still occupying the file's old region. -
Why does Windows delete keep asking for confirmation on an SD card?
Because the SD card has no Recycle Bin, Windows shows the confirmation dialog. Pressing Yes completes the delete. If you want to skip the dialog, use Shift+Delete. -
What is diskpart attributes disk clear readonly used for?
It clears the volume-level read-only attribute that Windows sets when a removable drive has its WriteProtect bit flagged. After running it, the card can be written to again. It does not erase the data — just removes the flag. -
Why does my SD card still show used space after delete?
The deleted file's bytes are still on the SD card's flash. The file may have been moved to a hidden Recycle Bin (for fixed drives) but on a removable card there is no Recycle Bin. Eject and reinsert the SD card to refresh Windows' view of the available space. To reclaim the sectors, write new files to them. -
Can I delete files on a read-only SD card?
Only after the read-only attribute is cleared. Use diskpart attributes disk clear readonly, file-level uncheck Read-only in Properties, or set the physical lock switch on a full-size SD jacket adapter to unlock. If the card reports read-only after every reinsert, it's failing — back up and replace. -
What's the fastest way to delete all .CR3 photos from a Canon shoot on the SD card?
Open cmd as administrator, cd to F:\DCIM\100CANON, and run del *.CR3. This deletes every .CR3 file in seconds. Use Remove-Item F:\DCIM\100CANON\*.CR3 -WhatIf in PowerShell first if you want to preview the proposed deletions.


