

 TL;DR:
To remove write protection from an SD card, first ensure the physical lock switch on the card or adapter is flipped up, and if the issue persists, clear the software-level read-only attributes using Windows CMD or the Registry Editor.
● For software-locked cards, run `diskpart` in CMD and execute the `attributes disk clear readonly` command, or navigate to `StorageDevicePolicies` in the Registry Editor to manually set the `WriteProtect` value to 0.
● When using a MicroSD card inside a standard SD adapter, slot friction can accidentally push a loose adapter switch into the locked position; use a dedicated MicroSD-to-USB reader to bypass this hardware issue.
● If the SD card is recognized as RAW or completely corrupted, extract your files using recovery software like Wondershare Recoverit before utilizing a removal tool like AOMEI Partition Assistant to force format the partition.
Ask AI for a summary
 ChatGPT
 Perplexity
 Gemini
 Claude
 Grok
Grok
If you wanted to delete some data from an SD card, but it didn't let you do that, you're probably wondering why. If your SD card says "write protected", it won't let you delete your files. Luckily, we have several ways to fix write-protected SD cards.
| If you see this... | Likely Cause | Recommended Fix |
| Physical switch is set to "Lock" | Manual hardware lock | Way 1: Toggle Physical Switch |
| "The disk is write-protected" popup | Software attribute or Registry lock | Way 5: CMD Diskpart |
| Files can be seen but not deleted | Read-Only file attribute | Way 3: Properties Settings |
| SD card is recognized as "RAW" | File system corruption | Way 6: Reformat Tool |
First, we'll cover what write protection is and why you should remove it. Then, we'll explore six ways to remove write protection from SD card. Lastly, we'll show you how to recover data from corrupted SD cards after turning off write protection.
Try Wondershare Recoverit to Perform Data Recovery
 Security Verified. Over 7,302,189 people have downloaded it.
"The Disk Is Write Protected" - What Does It Mean?
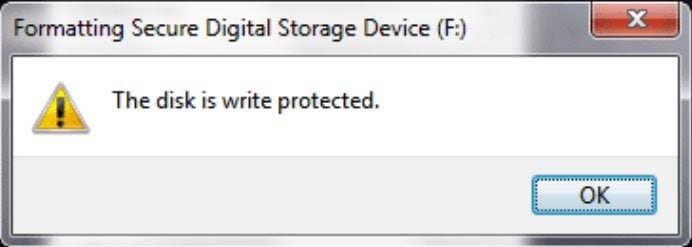
Have you tried deleting your SD card data, but it says, "The disk is write-protected"? If so, your SD card data is locked, and the SD card won't let you delete your files. If you can delete them, you've allowed the card to overwrite them with new data.
Write protection means you can't overwrite your SD card data. It essentially puts your SD card into read-only mode. This way, you can't modify the data on it; you can just view it.
How can you write-protect your SD card? You can do it physically or with software. Physically enabling SD card write-protection is much easier, as you only flip the switch on the side of your memory card. If you want to do it with an app, numerous SD card write protection software allowing you to lock your SD card data are available.
Why Is My SD Card Saying Write-Protected?
Your SD card may be saying it is write-protected due to one of the following reasons:
| Reasons | Explanations | Fixes |
|---|---|---|
| Physical lock switch | Many SD cards come with a small lock switch on the side. If this switch is set to the "locked" position, the SD card will be write-protected, preventing any changes to its contents. | Toggle the Physical Write Protection Switch |
| Malware or virus | A malware or virus infection can cause SD cards to show as write-protected. | Scan Your SD Card With an Antivirus |
| Read-only attribute | The SD card might have been set to read-only mode in its Properties. | Fix 1. Remove Read-only in Properties Fix 2. Remove Read-only Using CMD |
| Registry settings | In Windows, the registry settings may enforce write protection on removable storage devices, including SD cards. | Remove Write Protection From an SD Card Using the Registry Editor |
| Operating system restrictions | Some operating systems, like macOS and Linux, may have trouble writing to SD cards formatted with the NTFS file system. | Reformatting the SD Card to a Compatible File System (e.g., FAT32 or exFAT) |
| Corrupted or damaged SD card | A damaged or corrupted SD card may sometimes display a write-protected error. | Fix 1. Try using a different SD card reader or connect the card to another device to see if the issue persists. Fix 2. Recover Data From Corrupted SD Card Using Recovery Software |
Simple Steps you can try to quickly remove write protection from SD card:
- Reconnect the SD Card
- Use another USB port, and change a different USB adaptor.
- Connect the SD card to another computer.
Check if the SD card becomes accessible after trying the above solutions. If no, keep reading to find the 6 effective ways to remove write protection from SD cards.
More related:
How to Remove Write Protection on External Hard drive?
How to Fix “The Media Is Write Protected” in Windows 10/11 Easily
6 Ways to Remove Write Protection From an SD Card
Removing write protection isn't as complicated as you'd think. We've prepared six easy ways to unlock write-protected SD cards in a few minutes. Go through the list of fixes and choose the one that works best for you.
Way 1. Toggle the Physical Write Protection Switch
The first tip to remove write protection from a memory card is to do some trick with the physical switch of the SD card. Nearly every SD card contains a lock switch – a slider on the left side. This switch is working as a locking technique. Check your SD card and see if the switch is at the bottom position. If yes, that means the card is locked and write-protected. This will restrain you from making any modifications to the SD card.
To physically turn off write protection from your SD card, follow these steps:
- Find a little switch on your SD card. It's usually on the upper left side.

- If it's next to the word LOCK, it's locked to read-only mode.

- Flip it back up to unlock your SD card.

If you are using a MicroSD card inside a standard SD adapter, the physical lock switch can sometimes become "loose." As you slide the adapter into your PC or camera, the slot's friction may accidentally push the switch to the LOCK position. If your card remains protected despite flipping the switch, try using a different adapter or a dedicated MicroSD-to-USB reader to rule out hardware fatigue.
Way 2. Scan Your SD Card With an Antivirus
If your SD card is write-protected, and you didn't do that yourself, you might have a virus or malware messing with your SD card. Viruses can make unauthorized changes to your SD card and even delete your files. Thus, you should scan your SD card with an antivirus program first:
- Connect your corrupted SD card to your PC with an SD card reader.
- Your antivirus software will detect your SD card automatically, or you'll need to open the program and find it there.
- Click the Scan button to scan your SD card for viruses.

- If the card virus-free, the software will display a green message informing you it found no viruses or malware on your SD card.

Way 3. Remove Write Protection From an SD Card in Properties
If the SD card is not infected by virus or malware, you can fix a write-protected SD card in Properties. It's a quick and easy solution, as it takes just a few clicks to unlock the read-only mode. However, not all SD cards have this option available in Properties, so you'll need to try a different method if yours doesn't. To disable the SD card write protection in Properties, follow these steps:
- Open This PC and find your SD card.
- Right-click your SD card and click Properties.
- Find Write Protection or Read Only and unselect it.

Way 4. Remove Write Protection From an SD Card Using the Registry Editor
Another way to disable the write protection on SD card is to use the Registry Editor. It's a Windows tool that allows users to view and make changes on the Windows operating system. Like others, the Registry Editor provides an easy way to remove the write protection from an SD card. The steps go as follows:
- Press CTRL + S and type Registry Editor to find it. Click it to open.

- In the Registry Editor, navigate to HKEY_LOCAL_MACHINE\SYSTEM\CurrentControlSet\Control\StorageDevicePolicies.

- Double-click WriteProtect to open a dialog box. Set the value to 0 and click OK.

- If WriteProtect doesn't exist, create it manually.
- Once you're done, remove your SD card and connect it again.
Way 5. Remove SD Card Write Protection Using CMD
CMD is a command prompt most widely used for SD card write protection removal. It's a quick and easy way to unlock your read-only SD card. Here's how to unlock your write-protected SD card using a command prompt:
- Connect your SD card to your computer.
- Press Windows and R keys to open the Windows dialog box.
- Type "diskpart" and press Enter.
- Input the following commands as shown in the picture below:
list diskselect disk #(replace the "#" character with your SD card's number)attributes disk clear readonly
Way 6. Use an SD Card Write Protection Removal Tool
The last way to remove the write protection from your SD card is to use write-protection removal software to format your SD card. Numerous such tools are available online, so it's up to you to pick one that suits you best. To fix a write-protected SD card with write-protection removal tool like AOMEI Partition Assistant, follow these steps:
- Download the write protection removal software of your choice.
- Connect your SD card to your computer.
- Open the software, right-click your SD card partition, and select Format Partition.

- Set the name of your SD card under Partition Label and select the file system you need. Click OK.

- Click Apply and confirm the formatting process by clicking Proceed.

Your SD Card Could Be Corrupted Even if You've Successfully Removed Write Protection
Now that you've successfully removed write protection from your SD card, you want to enjoy the ability to modify your data. However, what happens if your SD card gets corrupted along the way? SD card corruption is not uncommon.
It can happen for various reasons, such as physical damage, viruses, malware, and disk or file errors. Your SD card is corrupted if devices can't detect it, it keeps freezing, or it's suddenly empty. However, there's a perfect and simple way to recover lost and corrupted SD card files.
How To Recover Corrupted or Deleted Files From an SD Card
To ensure your SD card data recovery is successful, we recommend using Wondershare Recoverit. Wondershare Recoverit is a data recovery tool that offers many advanced features, including quick recovery of videos, photos, audio, and other files, support for more than 1,000 file formats, a user-friendly interface, and advanced technology for the best possible results.
Additionally, it offers a free version that allows the recovery of up to 100 MB, while the paid version has no limitations.
Thus, if you encounter SD card corruption or accidentally delete your files, follow these steps to recover them quickly:
- Connect your corrupted SD card to your computer via an SD card reader.
- Download, install, and open Wondershare Recoverit on your PC or Mac.
- Click Hard Drives and Locations and select your SD card. Click Start.

- The program will start scanning your SD card for lost files automatically, so wait for it to finish. You can monitor the process at the bottom of the screen.

- Once the scanning process completes, you can preview the recovered files to check if they are your desired ones.

- Once you've previewed your SD card files, click Recover. Be sure to save them to a different location.
Why Does SD Card Need Write Protection?
From the above introduction and not being able to use the SD card properly because of write protection, you must be having a slight idea now that a write protection SD card rejects any operation and doesn't let you use it.
On the other hand, you should know that there is a little need to write protection as well. If your SD card is write-protected, your files will be protected and anyone will not be able to do any erroneous operation. Also, having such protection will avoid any virus attack on your SD card. And what can be a better thing than not being able to get attacked by a virus? That is why an SD card at times, needs to write protection.
🏁 SD Card Unlock Checklist:
- Hardware Check: Ensure the side slider is pushed UP (towards the metal contacts).
- Attribute Clear: Use attributes disk clear readonly in CMD to wipe software flags.
- Registry Reset: Set WriteProtect to 0 in the Windows Registry if the lock persists across multiple cards.
- Bitdefender/Antivirus: Ensure a security suite isn't blocking write-access to "Removable Drives" as a safety feature.
- Recovery First: If the card is failing, use Wondershare Recoverit to extract files before attempting a "Force Format" with AOMEI.
Conclusion
If your SD card says, "The disk is write-protected," it won't allow you to modify its data. While write protection is perfect for preserving valuable data, it can be frustrating if you need your SD card for data transfer.
That's where our thorough guide to the six most straightforward ways to unlock write-protected SD cards, physically or with software, comes into play. However, if you encounter SD card corruption, use Wondershare Recoverit to recover your files quickly.
FAQ
-
Can I remove write protection from my SD card using a computer?
Yes, you can remove write protection from your SD card using a computer. You can do this by inserting the SD card into a card reader and then using the computer's file explorer to change the write protection settings. Find more solutions on removing write protection from SD card through this guide. -
What should I do if I can't remove write protection from my SD card?
If you are unable to remove write protection from your SD card using the methods mentioned above, it is possible that the card is damaged or malfunctioning. In this case, you may need to consider replacing the SD card.


