

 TL;DR:
Windows Update error 0x8024402c indicates a failure to connect to Microsoft servers in Windows 10 and 11, which is typically resolved by manually reconfiguring network DNS to 8.8.8.8, clearing the local update cache, or resetting system connection protocols.
● To clear corrupt data causing the connection block, stop the Windows Update service via `services.msc` and delete all files inside the `C:\Windows\SoftwareDistribution\` and `C:\Windows\System32\catroot2` directories.
● If disabling VPNs or proxies does not restore server access, perform a deep network reset by running an elevated Command Prompt and executing the `ipconfig /flushdns`, `netsh winsock reset`, and `netsh winhttp reset proxy` commands.
● In situations where the 0x8024402c update crash results in missing documents or system instability, Wondershare Recoverit can be utilized to scan the affected hard drive and restore up to 500MB of lost files for free.
Ask AI for a summary
 ChatGPT
 Perplexity
 Gemini
 Claude
 Grok
Grok
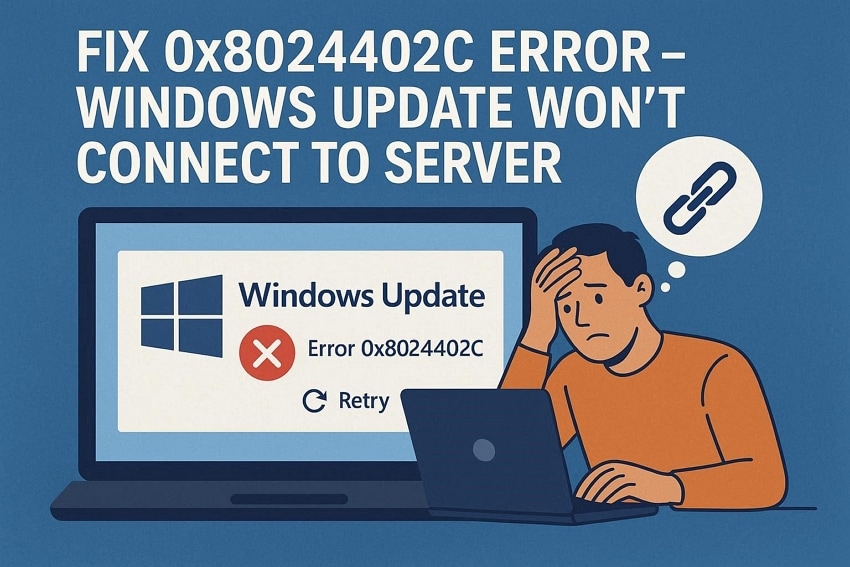
When Windows Update fails, routine fixes and security patches become much harder. One common cause is a connection issue between your PC and Microsoft. This problem often appears with the error code 0x8024402c during updates. It can stop downloads and leave your system outdated or exposed online.
The good news is that this issue is usually quite easy to fix these days. Since simple network settings, wrong proxy details, or DNS problems may trigger it. Thus, a few careful changes can restore access and restart updates. This guide explains the causes and shows practical steps to fix this issue.
Try Recoverit to Perform Data Recovery
 Security Verified. 3,591,664 people have downloaded it.
In this article
-
- Fix 1: Check and Reset Your Internet Connection
- Fix 2: Run Windows Update Troubleshooter
- Fix 3: Clear Windows Update Cache
- Fix 4: Configure Correct DNS Server Settings
- Fix 5: Temporarily Disable Firewall and Antivirus
- Fix 6: Reset Windows Update Components
- Fix 7: Remove Proxy or VPN Settings
- Fix 8: Restart the PC and Try Updating Again
- Fix 9: Use Command Prompt to Reset Network Settings

Part 1. Why Windows Update Won’t Connect to the Server
It becomes easier to fix the problem once the cause is clear. So, let’s look at why Windows Update won’t connect to the server:
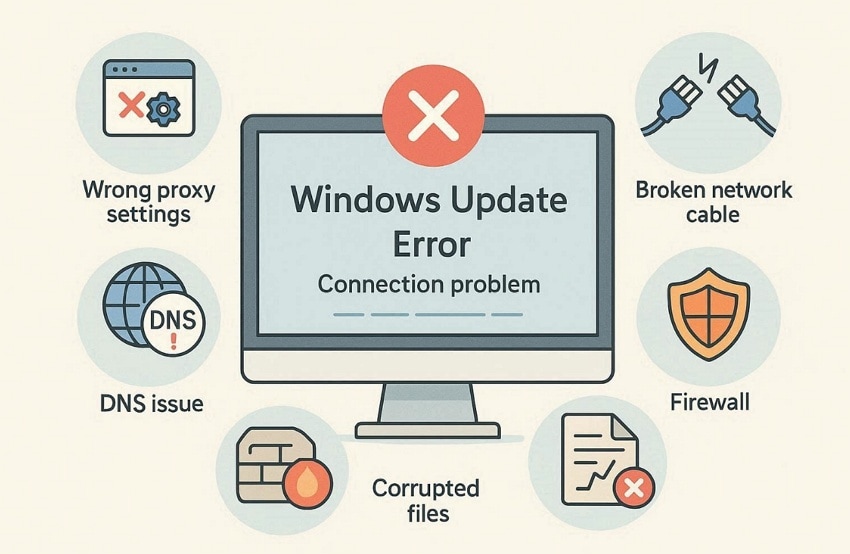
- Wrong Proxy Settings: A wrong proxy setting can stop Windows from reaching update servers. That is why the update process may fail before it starts.
- DNS Issues: DNS problems can stop your system from finding Microsoft server addresses. When that happens, Windows Update cannot connect and download files properly.
- Broken Network Settings: Damaged network settings can interrupt the link between your PC and Microsoft. This may cause repeated update errors and failed connection attempts online.
- Firewall Blocking: Some firewall tools may block update traffic even when it is safe. That can prevent Windows Update from keeping a stable server connection.
- Corrupt System Files: Broken system files can affect services needed for Windows Update tasks. As a result, the server connection may fail during update checks.
Part 2. How to Fix 0x8024402c Windows 11/10 Update Error
Now that the common causes are clear, the next step is fixing them. Let’s go through the most useful ways to resolve this update error.
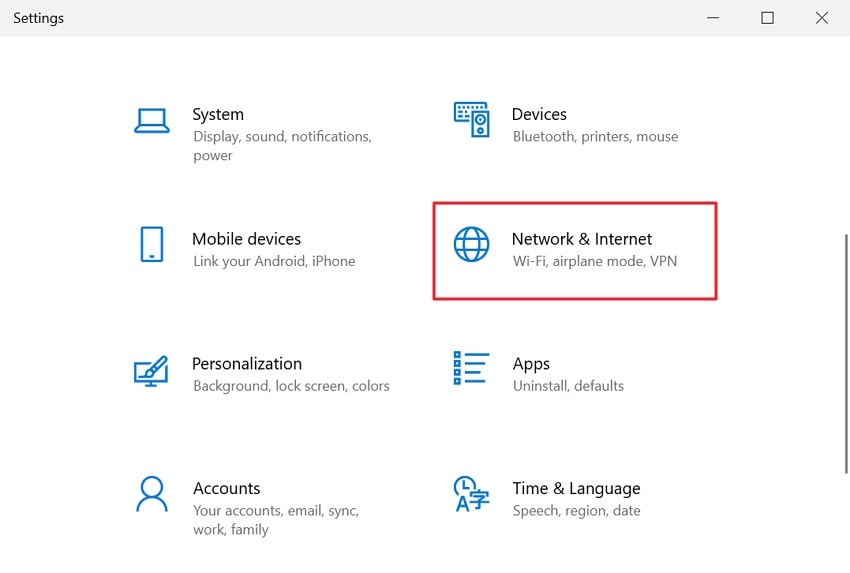
Fix 1: Check and Reset Your Internet Connection
Checking and resetting your internet can fix the Windows 11 update error 0x8024402c. This error happens when your PC cannot reach Microsoft’s update servers. However, slow or unstable connections often cause this problem. A bad proxy or DNS settings can block the update connection. Therefore, resetting the network clears old settings and temporarily turns off any proxy or VPN. Thus, review the steps below to reset your internet connection:
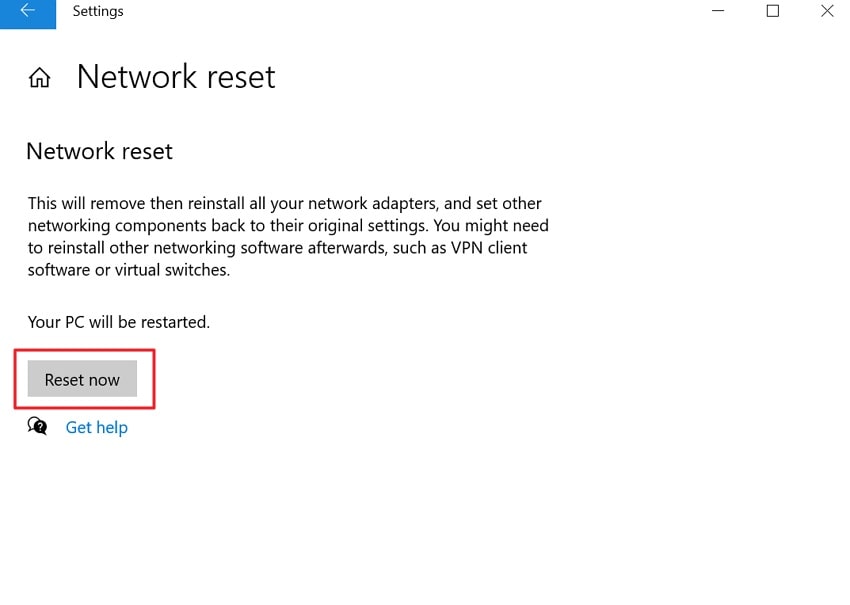
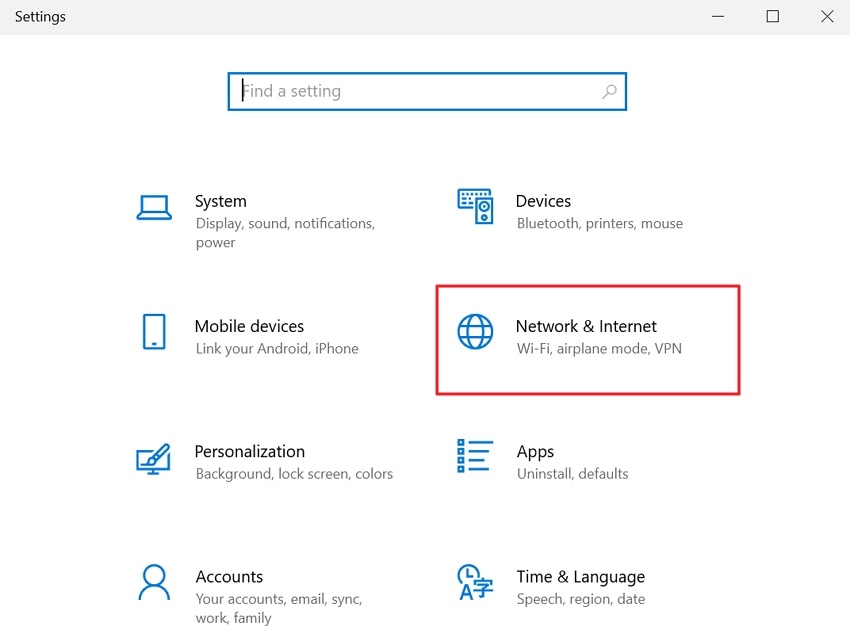
- To initiate, open “Settings” from the “Start” menu and choose “Network & Internet.”
- Now, go to the “Status” section and opt for the “Network Reset” option.
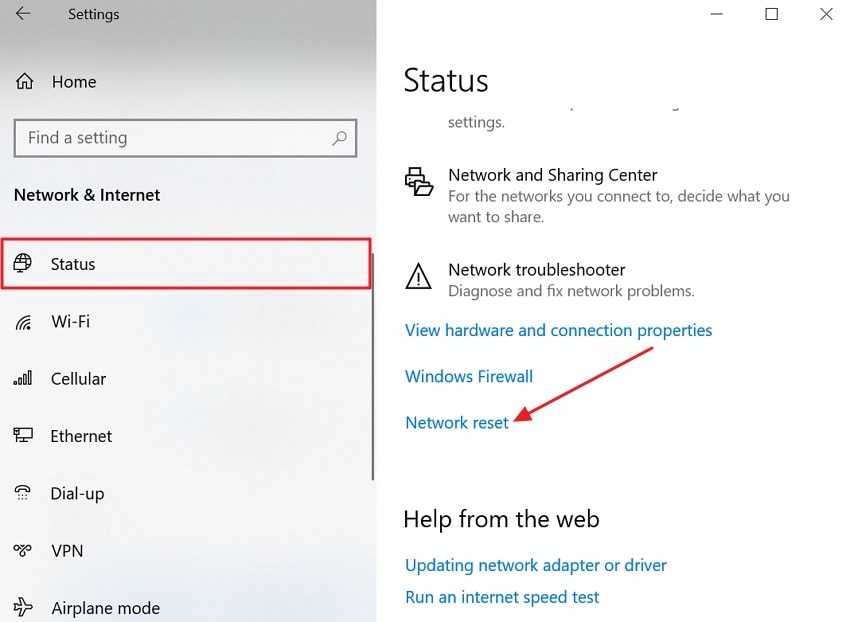
- Upon assessing it, click the “Reset Now” button to reset the internet connection.
Fix 2: Run Windows Update Troubleshooter
You should run the Windows Update Troubleshooter to fix the Windows update error DNS server fix. It can detect issues with update services, background transfers, and cache files. Plus, the tool resets stuck components and repairs corrupted files automatically. It also fixes network and proxy settings and corrects misconfigurations. This helps your PC connect correctly to Microsoft update servers. Adhere to the steps below to run the Windows update troubleshooter:
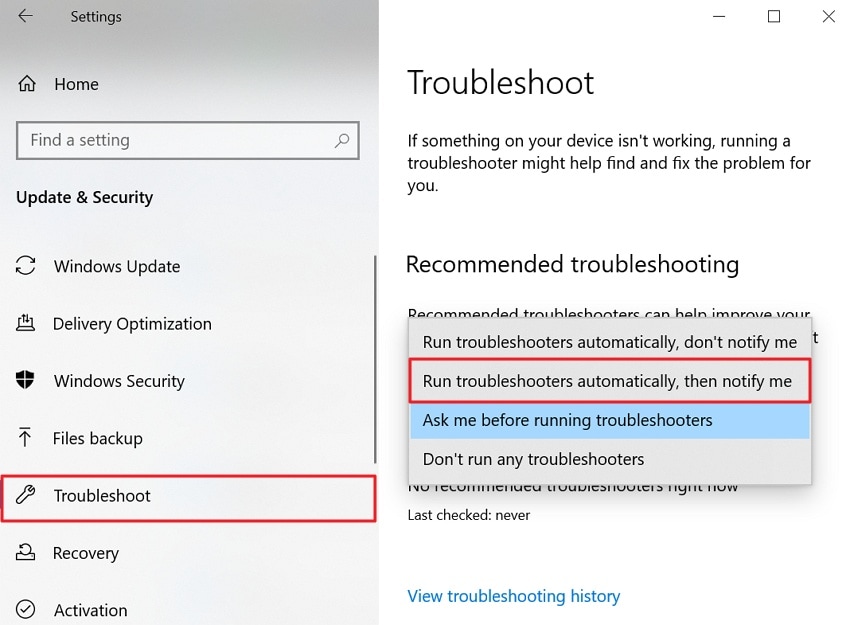
- Open “Settings” and go to the “Update & Security” section.

- Now go to the “Troubleshoot” section and choose “Run the troubleshooter” from the dropdown menu.
Fix 3: Clear Windows Update Cache
While exploring the Windows update error DNS server fix, you should clear the update cache. Corrupted or incomplete files in the SoftwareDistribution and Catroot2 folders can block updates. Removing these files forces Windows to rebuild them fresh, letting the PC download the correct update data and metadata. Hence, follow the guide below to clear the cache of the system:
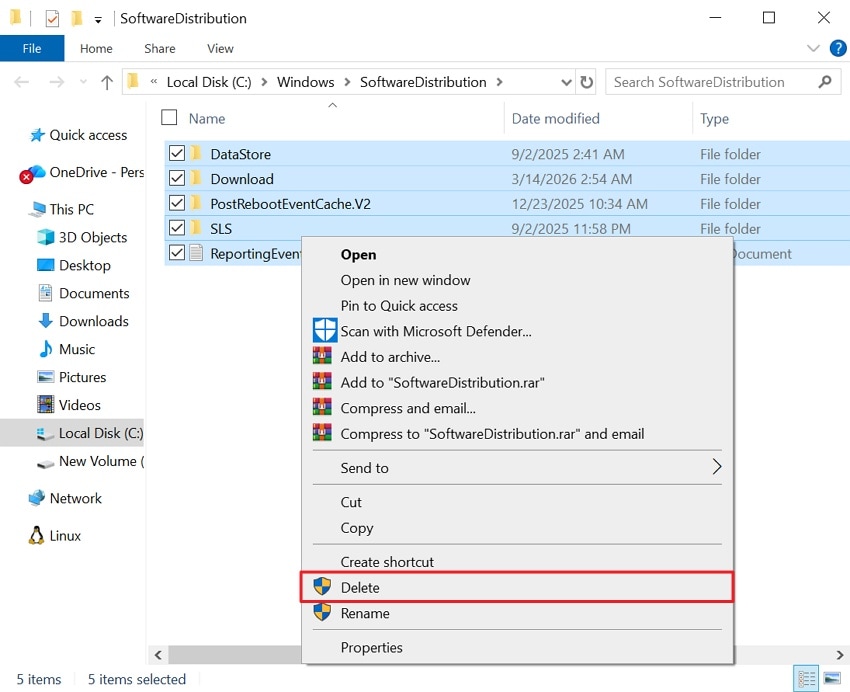
- To start, press “Windows + R” together and type “services.msc”, then click the “OK” button.
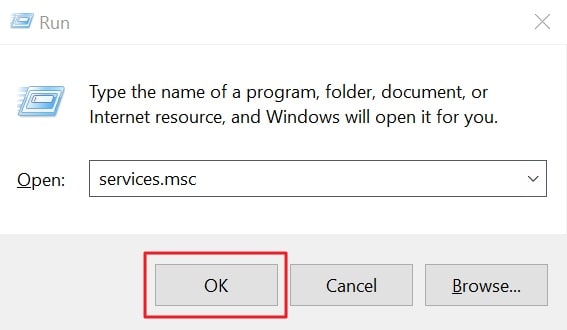
- In “Services,” find “Windows Update” and right‑click it, then choose the “Stop” option.

- Now, press “Windows + R” again and type “C:\Windows\SoftwareDistribution\” then press “OK.”
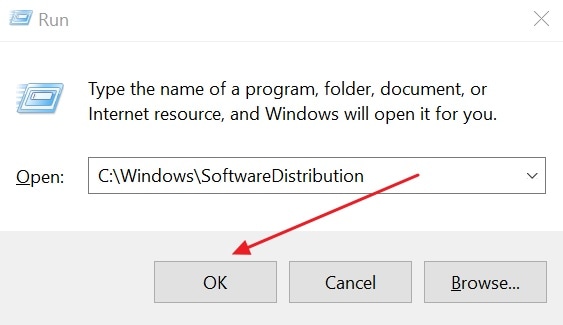
- Select everything in that folder and press “Delete” to confirm.
Fix 4: Configure Correct DNS Server Settings
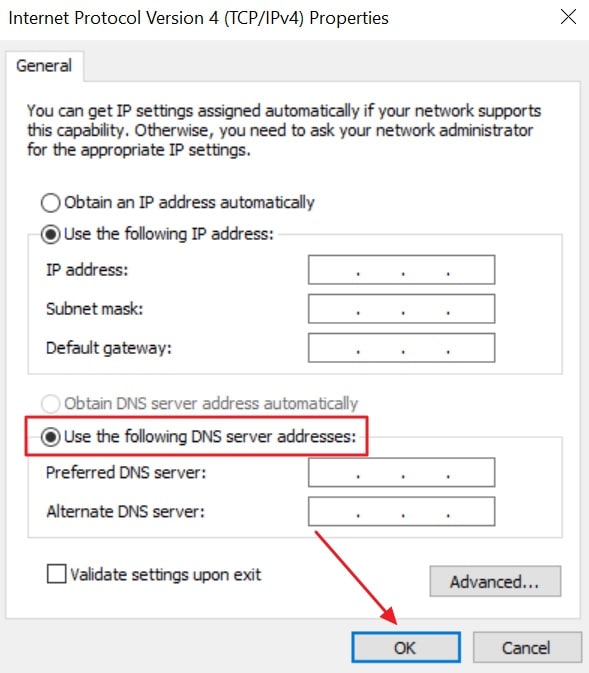
This method changes the digital address book your computer uses for finding websites. Reliable DNS settings solve the problem when Windows update won't connect to server anymore. A DNS helps your computer find Microsoft update servers on the Internet. Using new provider bypasses slow or broken paths from your local provider. So, let's explore the given steps below to correct the DNS server settings:
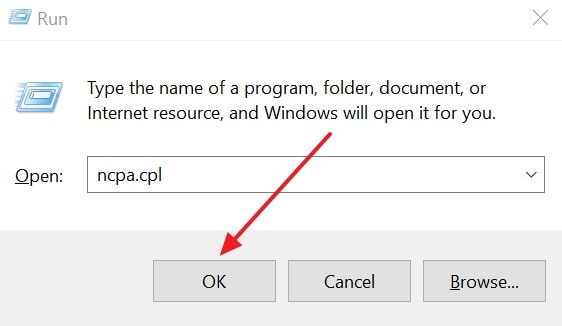
- To initiate, press “Windows + R” at the same time and type “ncpa.cpl”, then press “OK.”
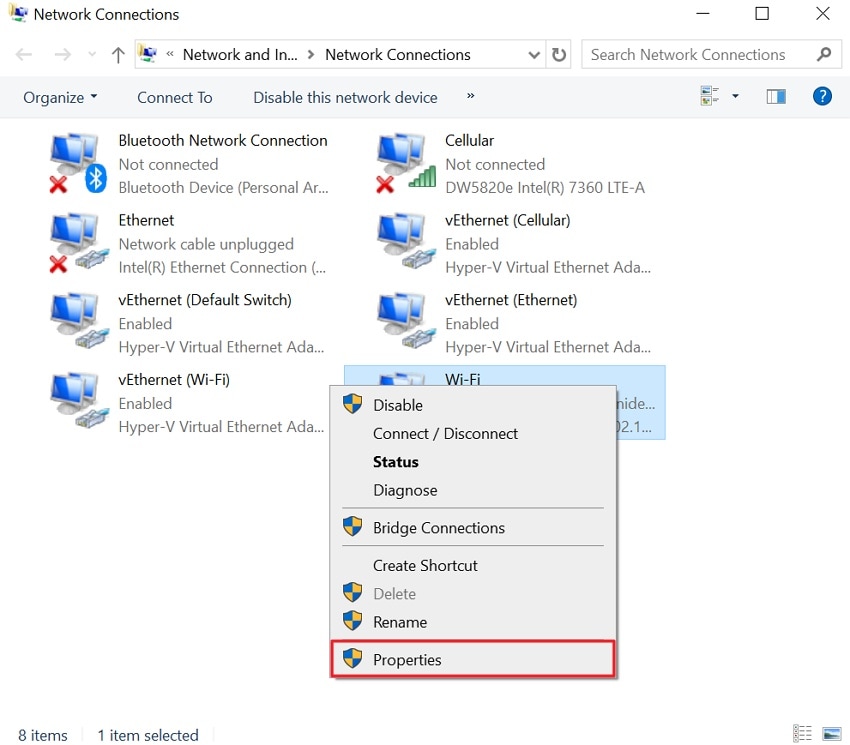
- Now, right-click your Wi-Fi and opt for “Properties” from the menu.
- In the properties window, select “Internet Protocol Version 4 (TCP/IPv4)” and click “Properties.”
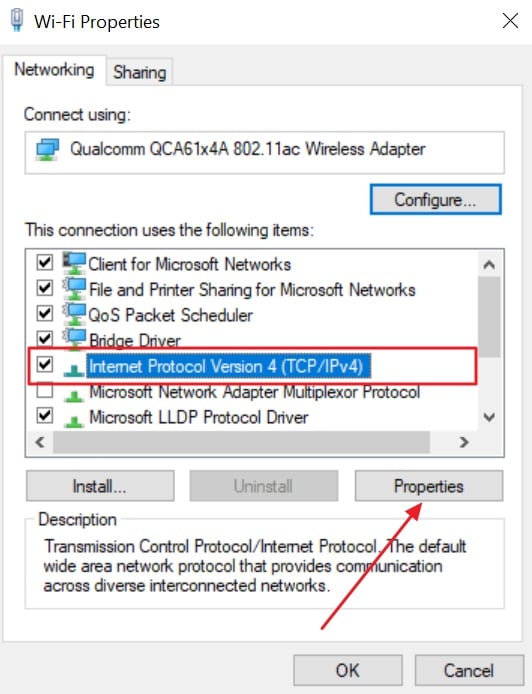
- At last, opt for “Use the following DNS server addresses” and set “Preferred DNS: 8.8.8.8”, “Alternate DNS: 8.8.4.4”, then hit “OK.” After that, restart your PC to apply the changes and resolve the error.
Fix 5: Temporarily Disable Firewall and Antivirus
Sometimes security programs block update traffic, causing problems like “Windows update error DNS server fix.” Firewalls or antivirus apps may stop system processes from reaching Microsoft update services. Some antivirus tools wrongly treat update connections as risky and silently block them. Temporarily disabling protection helps confirm whether security rules interrupt Windows Update communication. Thus, review the instructions below to disable antivirus:
Turn off Windows Defender Firewall
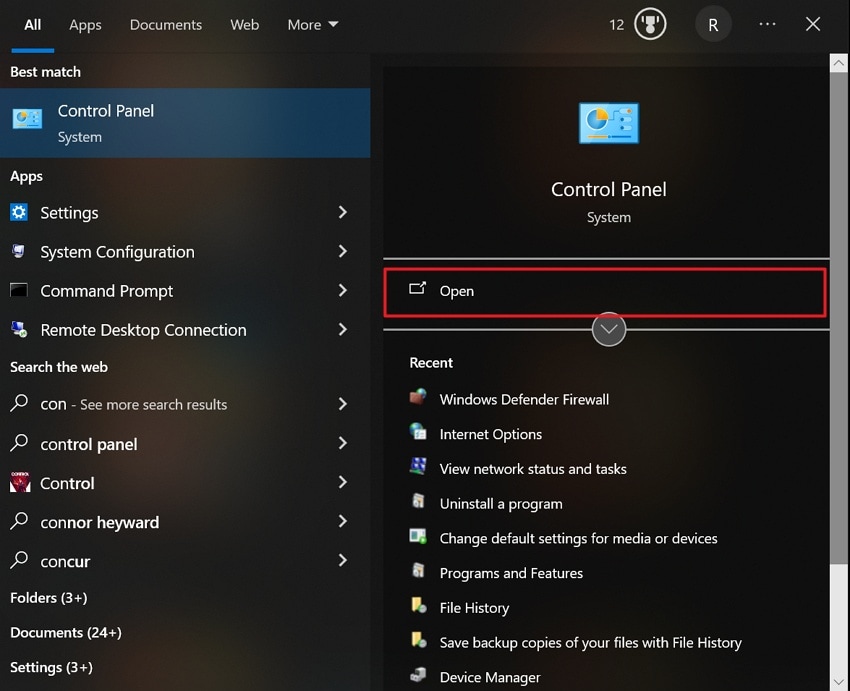
- From the “Start” menu, search for “Control Panel” and opt for “Open.”
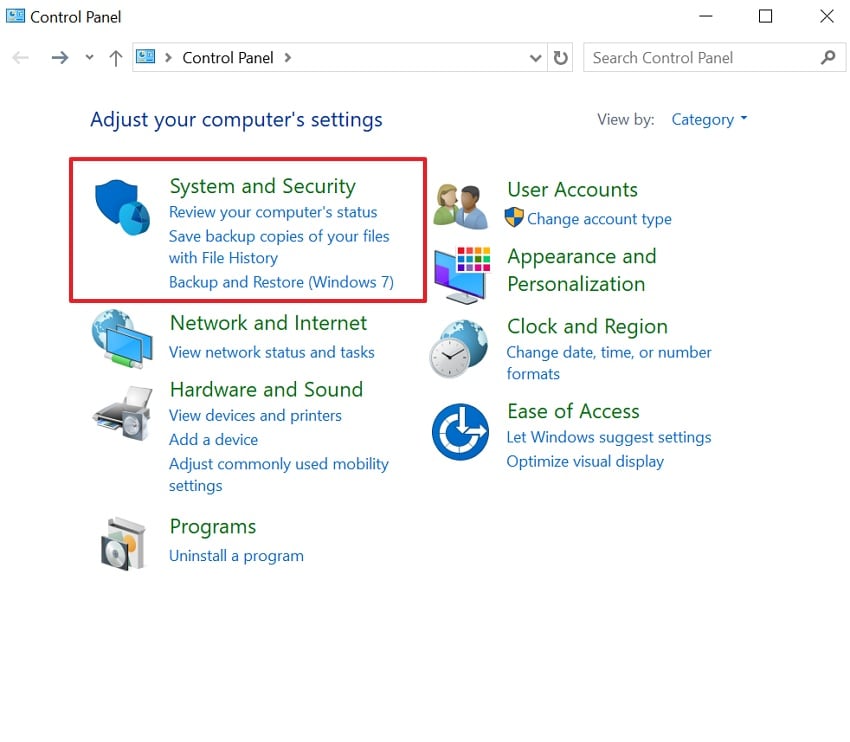
- After assessing it, select the “System and Security” option.
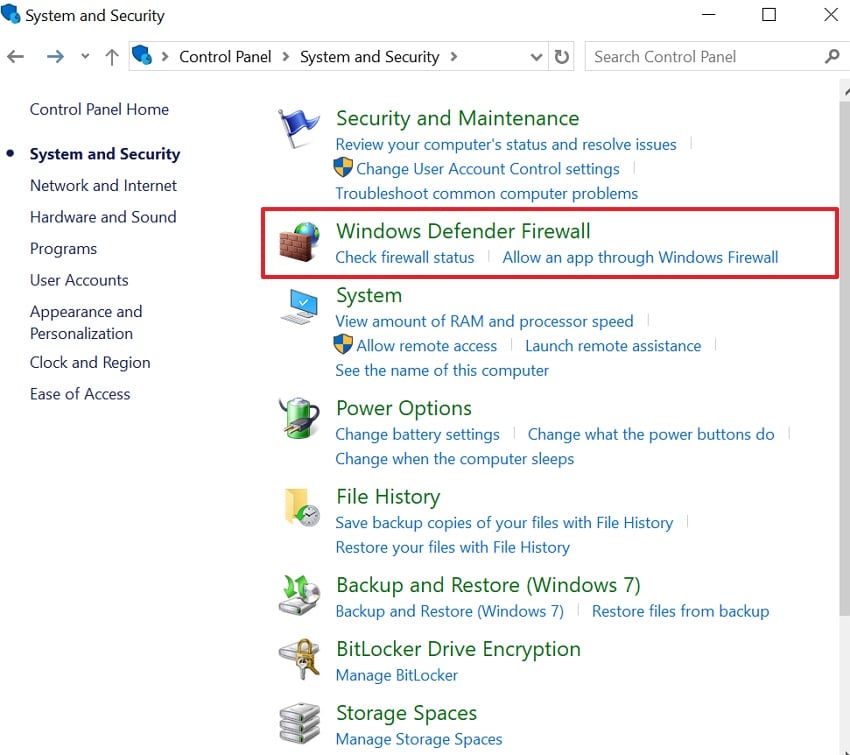
- When a new interface appears, click the “Windows Defender Firewall” option to move forward.
- In the left pane, click “Turn Windows Defender Firewall On or Off.”
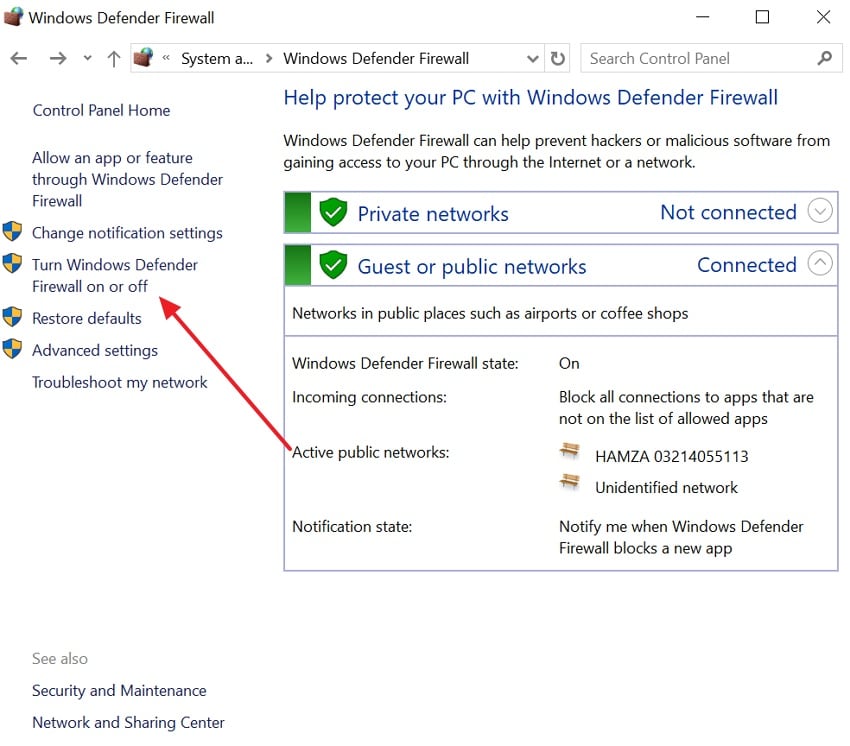
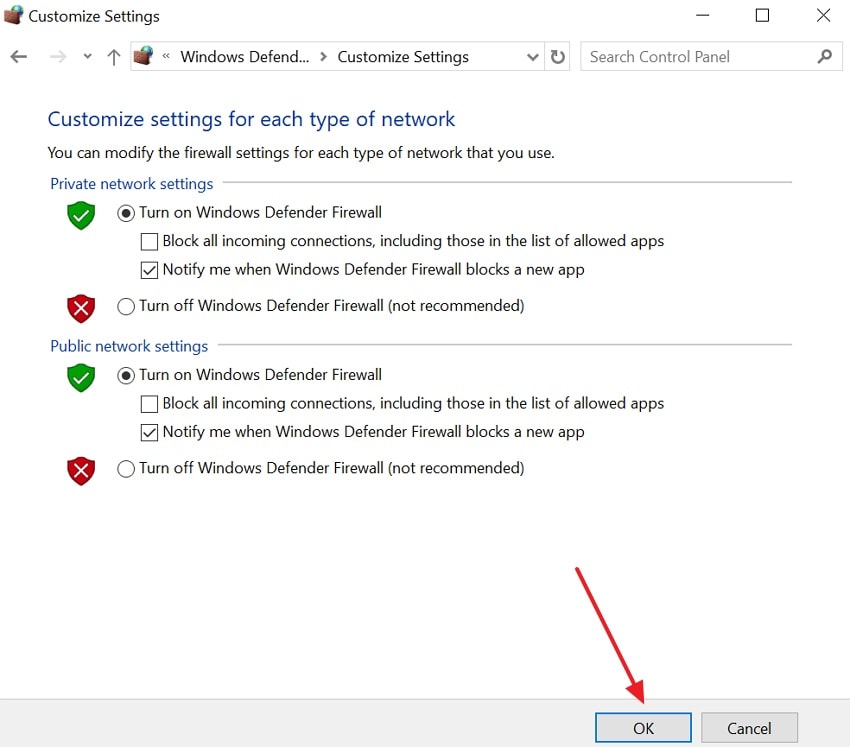
- At last, opt for the “OK” button to turn off the Windows Defender firewall.
Temporarily Disable Antivirus
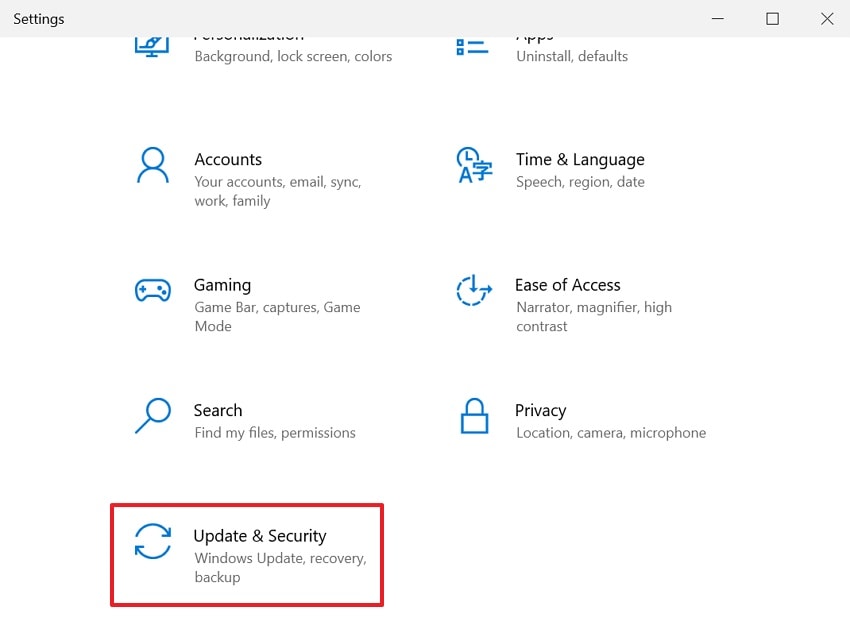
- Open “Settings” from the “Start” menu and choose “Update & Security.”
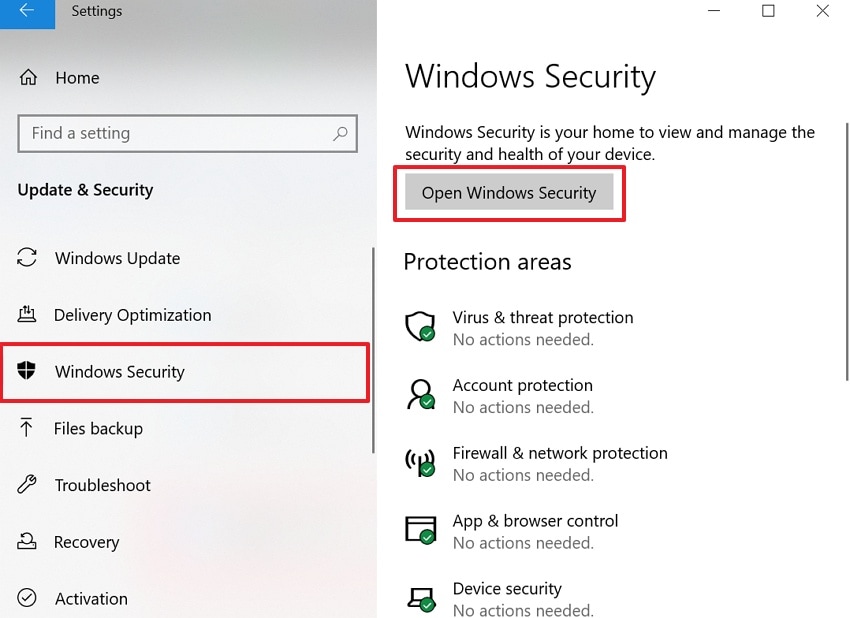
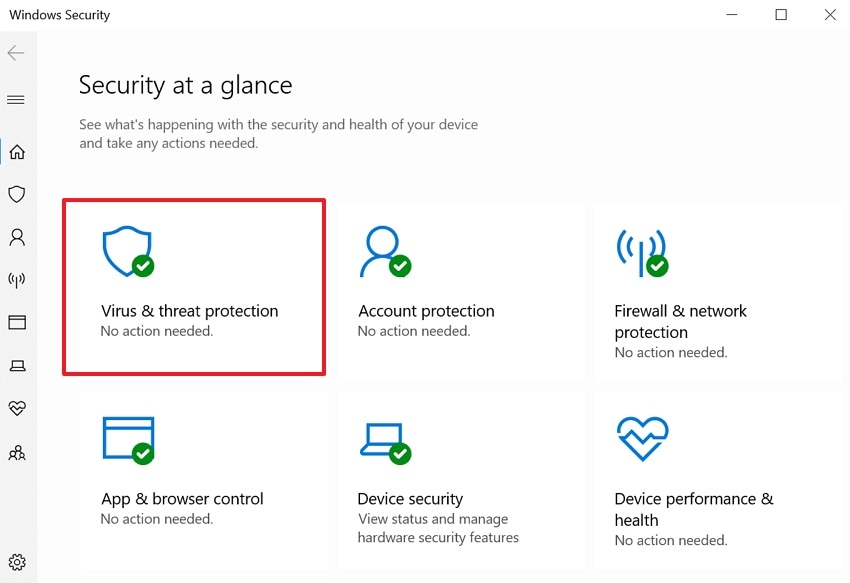
- Upon accessing it, go to the “Windows Security” section and click “Open Windows Security.”
- Now, opt for the “Virus & Threat Protection” option.
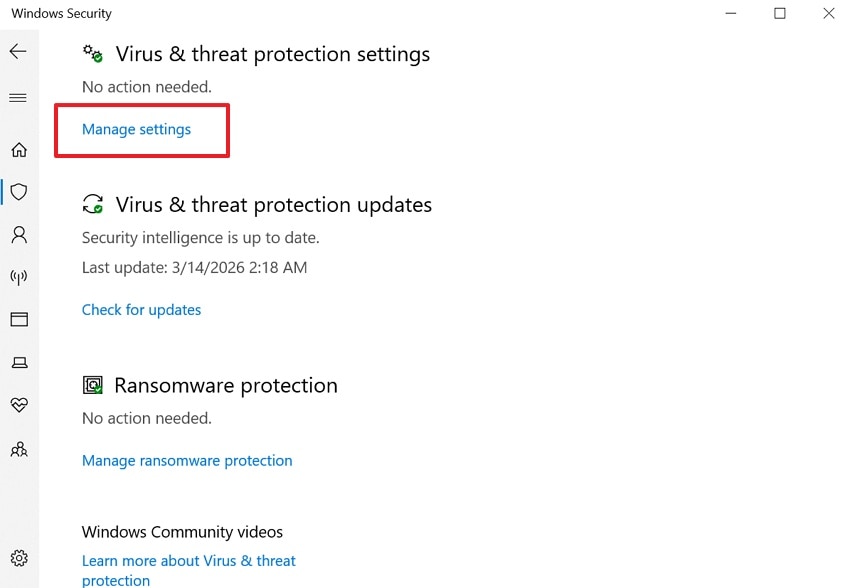
- Under the “Virus & Threat Protection,” press the “Manage Settings” option.
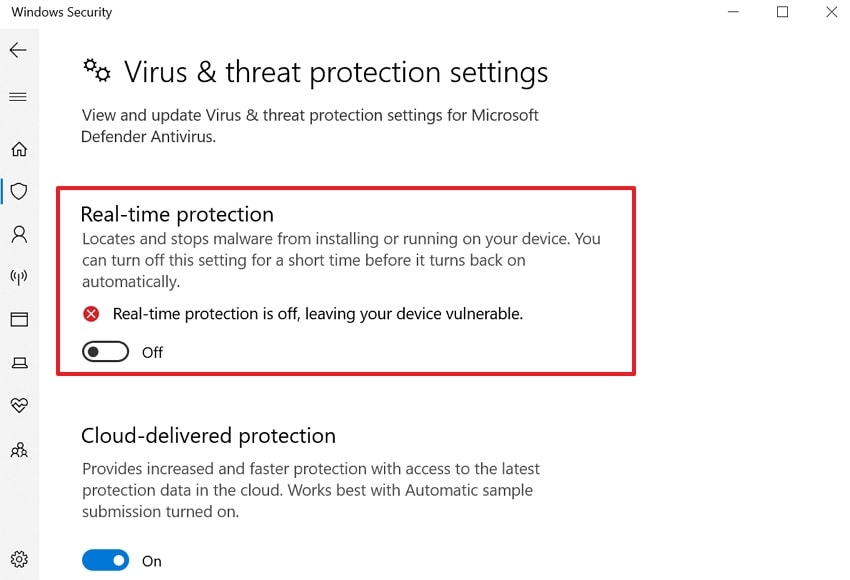
- At last, turn off the “Real-time Protection” toggle.
Fix 6: Reset Windows Update Components
Resetting Windows Update components can fix Windows 11 update error 0x8024402c effectively. Sometimes the main parts of your update tool become broken or corrupted. This process refreshes update services, folders, and system files used for updates. It removes damaged data, stuck download tasks, and broken settings. After resetting, Windows creates clean update files and reconnects to Microsoft servers. Hence, follow the steps below to reset Windows update components:
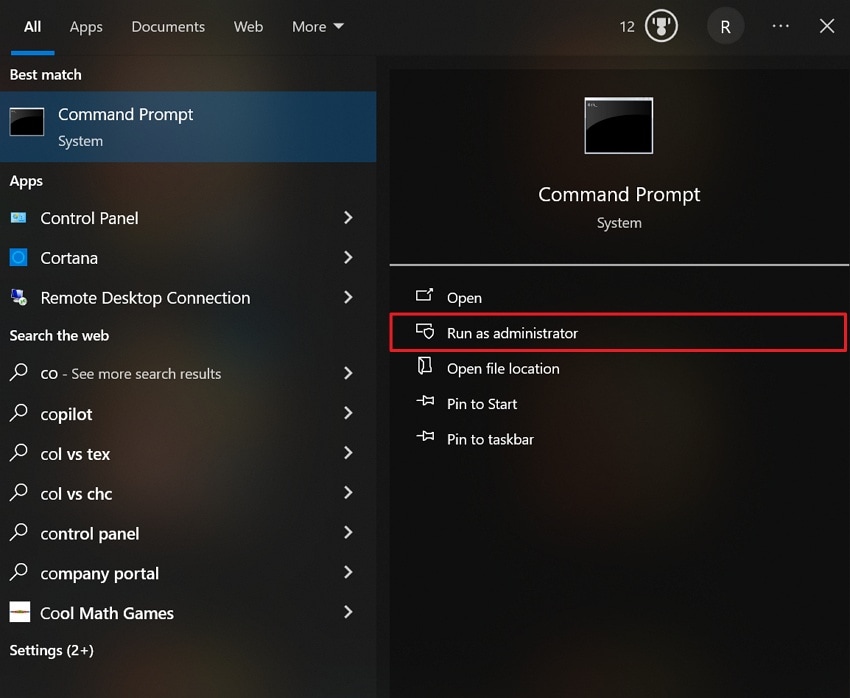
- Search “Command Prompt” from the “Start” menu and opt for “Run as Administrator.”
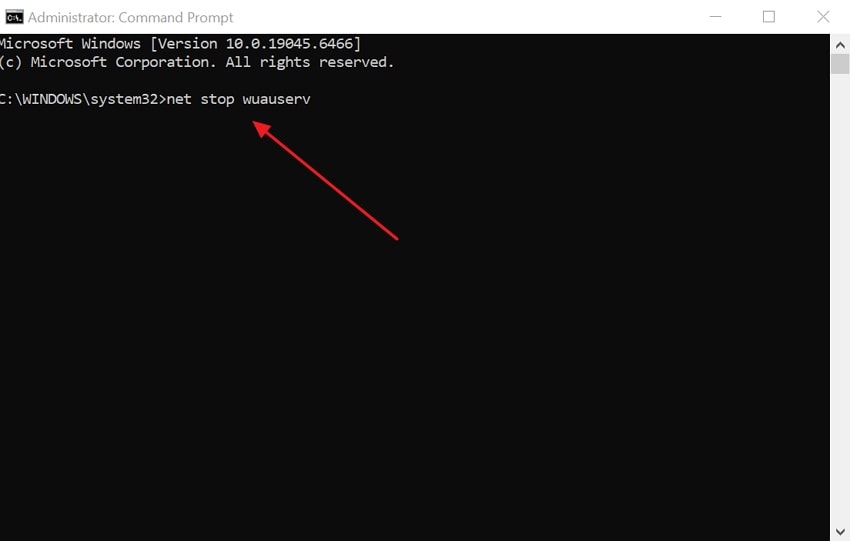
- Type “net stop wuauserv” in the “Command Prompt” and press the “Enter” key.
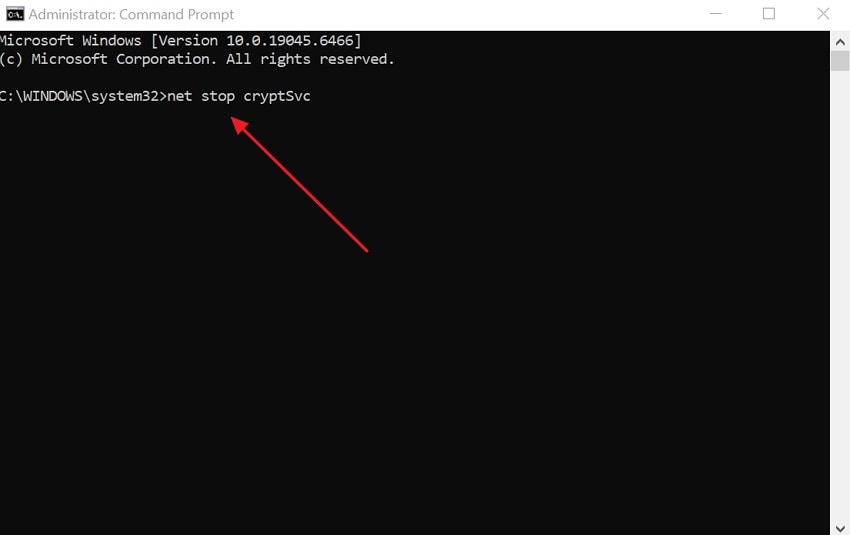
- After that, run the “net stop cryptSvc” command.
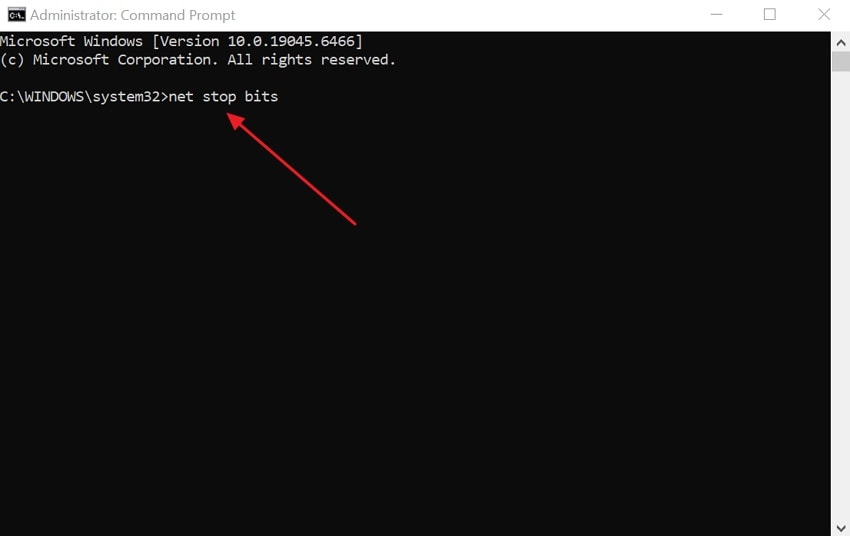
- When you enter the above command, type “net stop bits” and press “Enter.”
- At last, run “net stop msiserver” and restart your PC to complete the task.

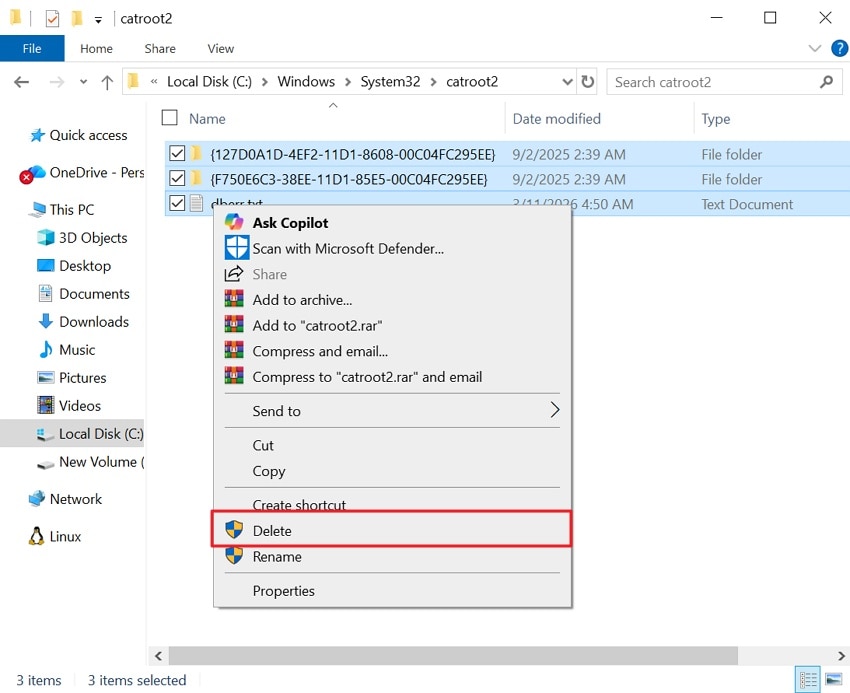
- Upon restarting, go to the “C:\Windows\SoftwareDistribution” and delete all files. Next, navigate to the “C:\Windows\System32\catroot2” folder and delete the files inside this folder.
- Return to “Command Prompt” and type “net start wuauserv,” then press “Enter.” Now type “net start cryptSvc,” “net start bits,” and “net start msiserver,” pressing “Enter” after each command.

Fix 7: Remove Proxy or VPN Settings
Proxy or VPN settings can sometimes cause “Windows update won't connect to server” problems. These tools route internet traffic through other networks before reaching websites. However, if the proxy or VPN path is wrong or blocked, update requests fail. Thus, removing these settings restores a direct connection between Windows Update and Microsoft servers. Go through the guide below to remove proxy or VPN settings from the system:
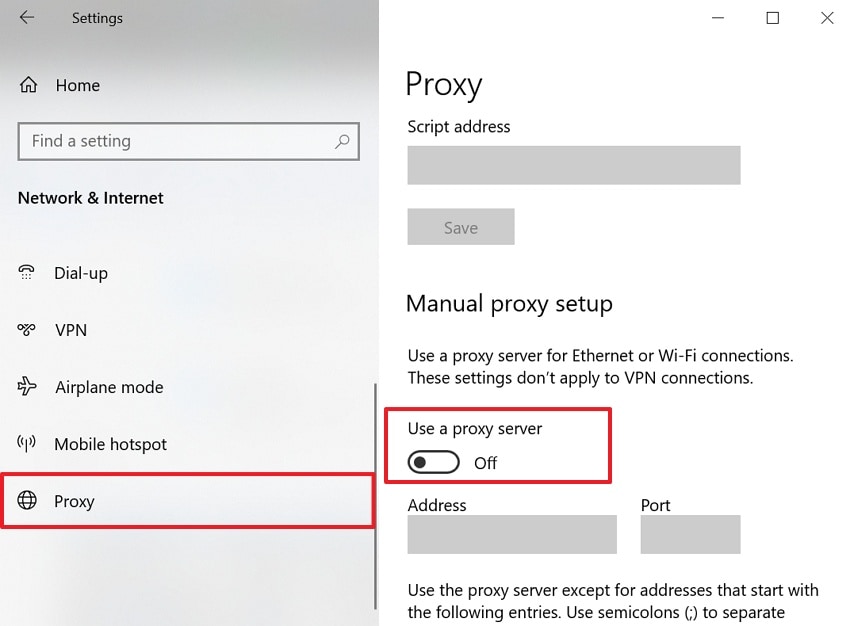
- Press “Windows + I” at once to open “Settings” and then pick the “Network & Internet” option.
- After accessing it, opt for the “Proxy” section and turn off the “Use a Proxy Server” toggle.
Fix 8: Restart the PC and Try Updating Again
You should restart the computer to refresh services and network parts used during Windows updates. Temporary glitches or stuck update services sometimes block server communication. A reboot reloads system files and clears short-term connection problems. This simple action can support a “Windows update error DNS server” fix by letting updates start with clean settings. Take guidance below to learn how to restart the computer:
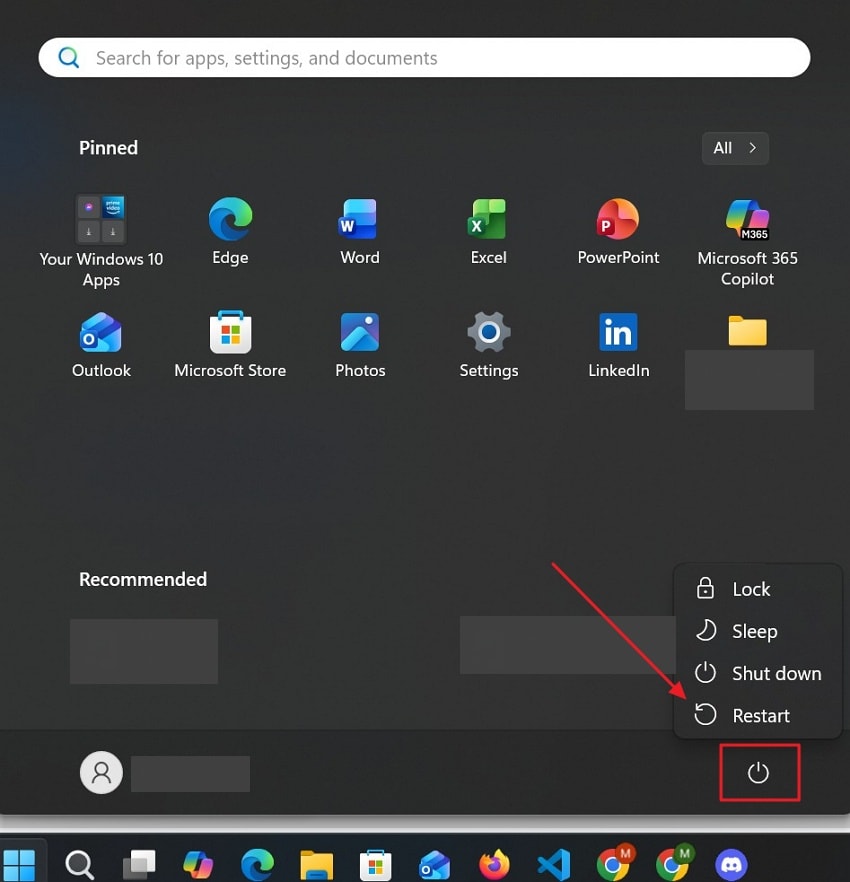
Instructions. Click the “Start” button and press the “Power” button, then choose “Restart” from the options.
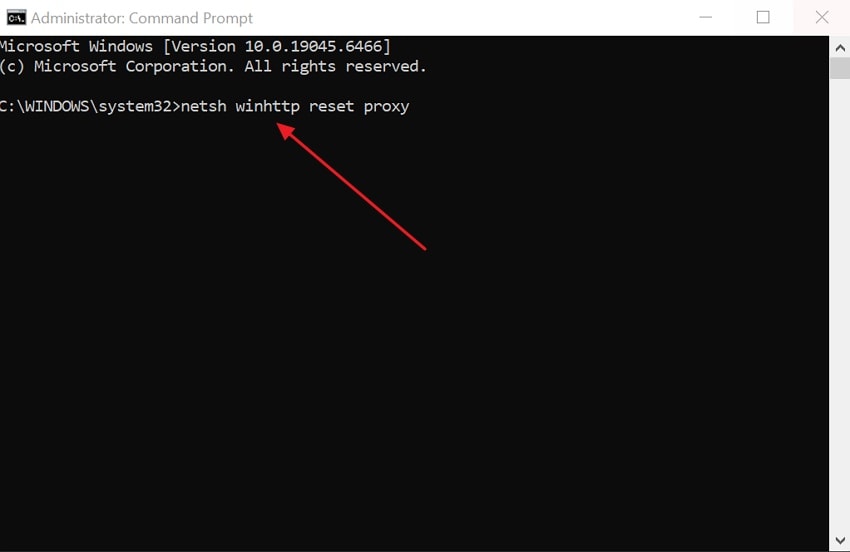
Fix 9: Use Command Prompt to Reset Network Settings
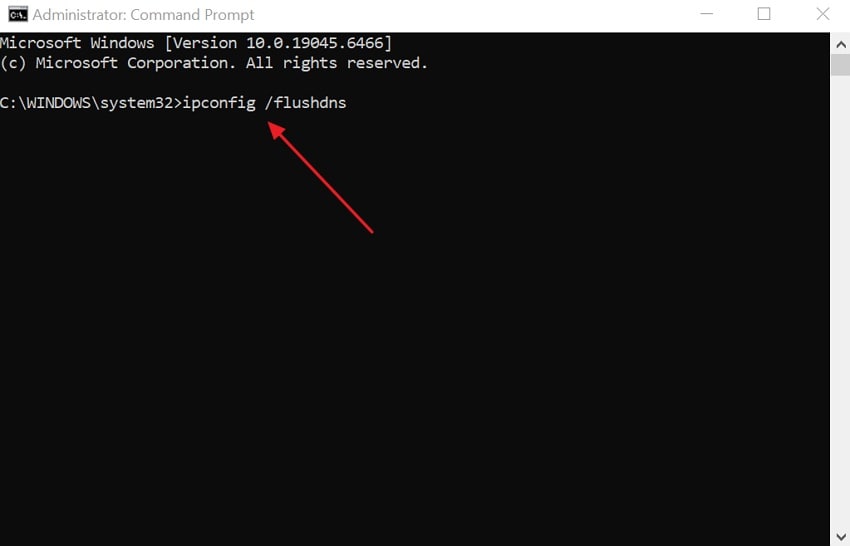
When the above fixes fail, you must clean the deep network layers on your PC. Resetting DNS cache, Winsock, and proxy settings removes corrupted or wrong network data. This powerful command clears old address lists that often block your important downloads. It also helps you solve the Windows 11 update error 0x8024402c by fixing hidden paths. So, adhere to the guide below to reset network settings using Command Prompt:
- Open “Command Prompt” and opt for “Run as Administrator”. After that, type “ipconfig /flushdns” or press “Enter.”
- Now enter “netsh winsock reset” and press the “Enter” key. This rebuilds network components that may be corrupted.

- At last, type “netsh winhttp reset proxy” and press “Enter”. After that, restart your PC to apply the changes.
Pro Tip. Recover Files from PCs Affected by Windows Update 0x8024402c Error
When a Windows update fails, file access problems can appear without warning. In some cases, users lose documents, photos, or work after 0x8024402c issues. That is why it helps to have a recovery tool ready early. Thus, Recoverit offers a practical way to safely restore lost files. For building confidence, it offers 500MB of free data recovery for its users.
Moreover, it can recover deleted data from crashed, stuck, or unstable systems. This makes it useful when update problems affect normal file access. Instead of guessing where files went, users can scan carefully. That way, Recoverit adds support before the problem gets worse.
Key Features
- Formatted Drive Recovery: Recovers lost files after accidental formatting removes access to stored data on drives.
- BitLocker Data Recovery: Helps restore files from encrypted drives when access becomes limited after system issues.
- Scan Pause and Resume: Allows people to be able to stop long scans and to be able to resume them later, without losing any progress.
Guide to Recover Files from PCs Affected by Windows Update 0x8024402c Error
Adhere to the steps below to recover files from PC’s affected by Windows update error with Recoverit:
- Pick a Location to Start the Recovery
To start, navigate to “Hard Drives and Locations” to select the location to initiate the recovery process.
- Start the Scanning Process
Afterwards, Recoverit will organize the discovered files into folders and categories for review of the scanned results.
- Preview and Recover Files
Lastly, choose the file, click on it to preview it, then press the “Recover” button to complete the recovery.
Conclusion
To conclude, fixing update connection issues becomes easier when the cause is clearly understood. With the right steps, most users can solve the problem and restore updates normally. In many cases, a proper Windows update error DNS server fix can bring everything back on track. If files go missing during the process, Recoverit is a smart tool to use.
FAQ
-
1. What does the 0x8024402c error usually mean on Windows?
It usually means Windows Update cannot connect to Microsoft servers properly online. This often happens because network, proxy, DNS, or firewall settings are incorrect. -
2. Can DNS problems really stop Windows Update from working properly?
Yes, DNS problems can block your system from finding update servers correctly. Once server addresses fail to load, update downloads may stop completely there. -
3. Is it safe to disable antivirus during update troubleshooting?
It is safe only when done briefly during careful troubleshooting steps. After testing the update process, always turn antivirus protection back on. -
4. Can Recoverit help after update issues cause file loss?
Yes, it can recover files lost after crashes or failed updates. It also helps when damaged systems make accessing normal files harder.


