Fixed: Windows Hello isn’t available on this device
With so many hackers today that can steal your identity, your financial information, and such, it is important to increase security measures in your computer; and, this is one of the reasons why more people are choosing Windows 10. With this new operating system, you would be able to use Windows Hello.
Windows Hello is a feature that will allow you to log in to your computer fast through facial recognition, fingerprint, and even iris scan. It requires the use of necessary hardware like a fingerprint sensor and camera to do its thing. To make use of this neat feature, all you have to do is to configure your system for it. However, a lot of users have been encountering the error "Windows Hello isn't available on this device", even when all the necessary hardware is already present.
With that, here are 6 methods to fix Windows Hello isn't available on this device on Windows 10.
Method 1: Update your Windows
Checking for Windows update is an option to do whenever you encounter an error on your computer. To do this, just follow the steps below.
Step 1: Choose Update & Security after hitting on Windows Key and I on your keyboard.
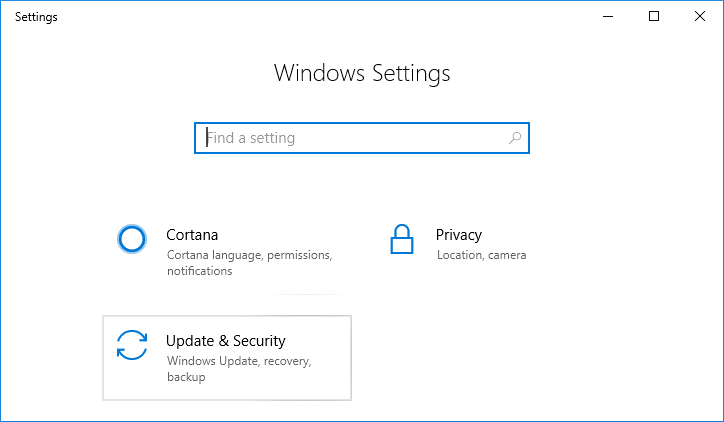
Step 2: Choose Check for Updates.

Step 3: After checking updates and your computer has found them, install the updates, and restart your computer.
Method 2: Run Hardware and Devices Troubleshooter
Step 1: The same with the first method, open windows setting, and choose the Update & Security option.
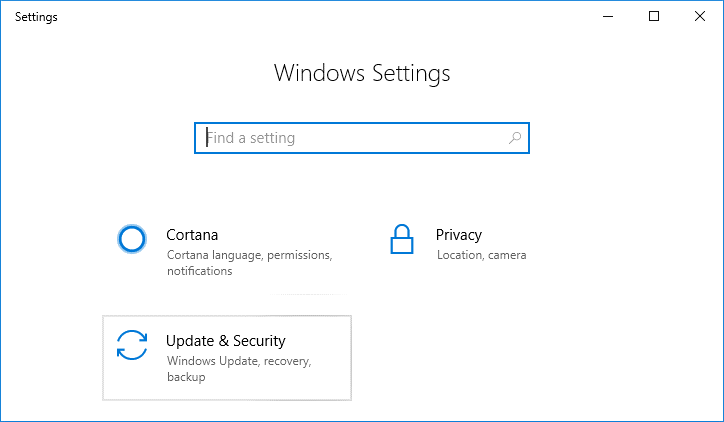
Step 2: Select Troubleshoot on the left-hand menu.
Step 3: Choose Hardware and Devices, which you can find on the section Find and Fix other problems.
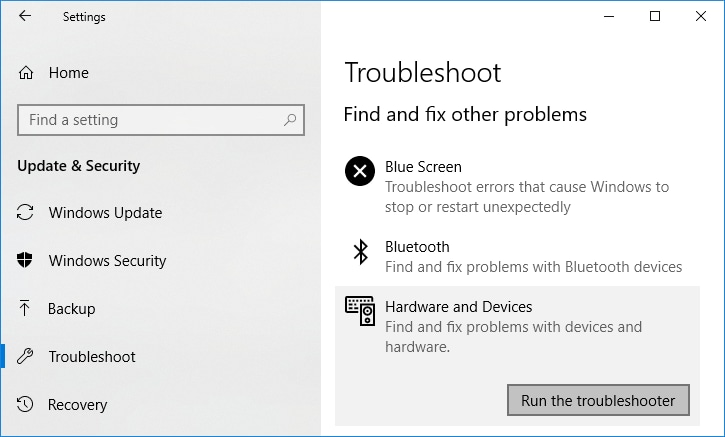
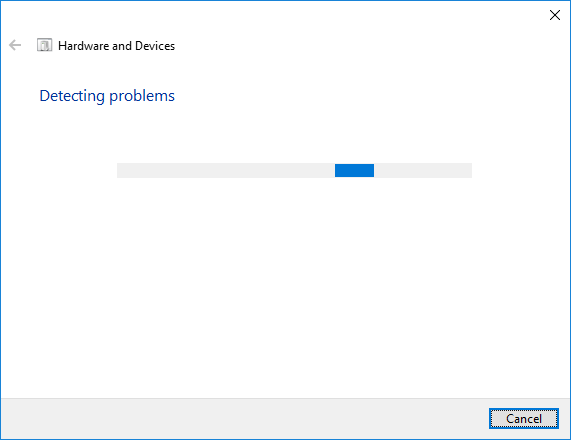
Step 4: This time, just press Run the troubleshooter. This will detect the problems and fix them. Just follow the instructions it would provide you on the screen.
Method 3: Enable Use of Biometrics from Group Policy Editor
Take note that this method will only work on Windows 10 Education, Pro, and the Enterprise Edition. If you have a Windows 10 Home Edition Users OS, then you need to skip this and try other methods.
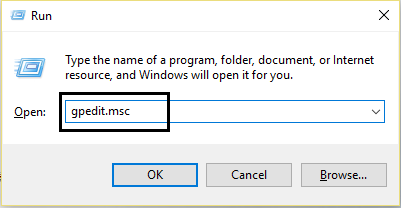
Step 1: Pull up Group Policy Editor by typing gpedit.msc on the space provided after you hit the Windows Key and R on your keyboard and click Ok.
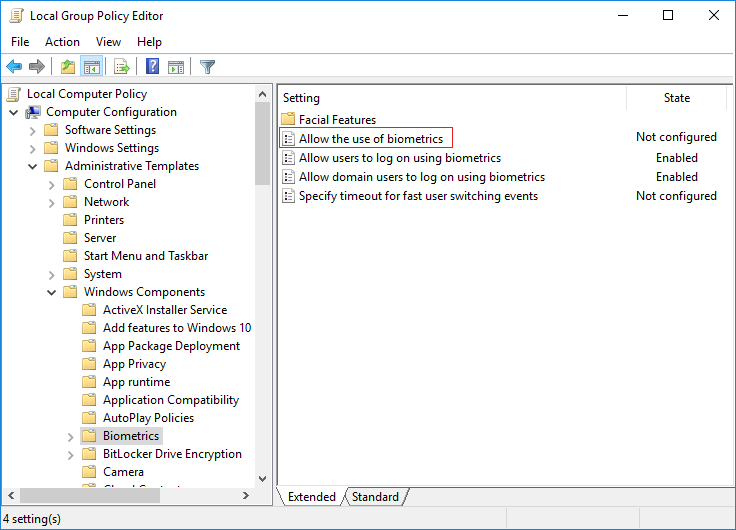
Step 2: Follow this path to locate the right registry key. Computer Configuration > Administrative Templates > Windows Components > Biometrics
Step 3: Click on Biometrics and go to "Allow the use of biometrics" and double-click on it.
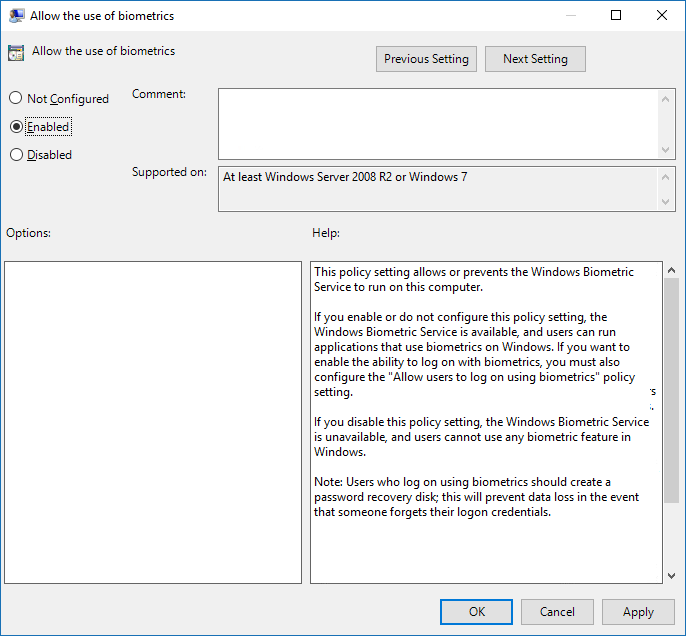
Step 4: When you are at the policy properties box, make sure to tick on "Enabled". After doing that, just hit Apply and then Ok to save the changes you made.
Step 5: To make sure that changes would be applied to your computer, restart the computer.
Method 4: Update the Biometric Drivers from Device Manager
Step 1: On your keyboard, hit on the Windows Key and R simultaneously. On the box, type in devmgmt.msc and then Enter. This will open the computer's Device Manager.

Step 2: With the Device Manager page up, check for Action on the upper left-hand side of it and click it. It will open a drop-down menu where you can see and choose Scan for Hardware Changes.
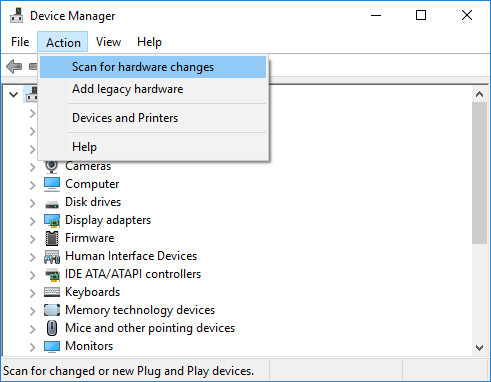
Step 3: After which, you need to expand the Biometrics icon. Doing this will show you the Validity Sensor or the Fingerprint Sensor Device icon. Right-click on it and choose to uninstall it.
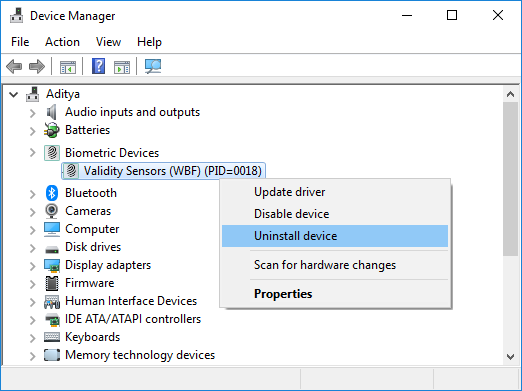
Step 4: Whenever you uninstall something, it is imperative to restart your computer to save the changes that you have made. Once your computer is done with the reboot, it will automatically detect the newest drivers for your Biometric Devices and install them. Once they are installed, it is then you can see whether the error "Windows Hello isn't available on this device" has already been fixed or you need to try a different workaround.
Method 5: Disable Fast Startup
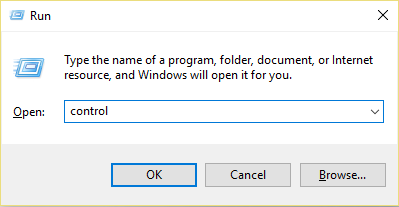
Step 1: To disable the Fast Startup, you need to access your computer's control panel. You can do this by simply clicking on the Start menu and go to the control panel. You can also do it by pressing the Windows Key on your keyboard together with the letter R, and typing and entering the words Control Panel on the box.
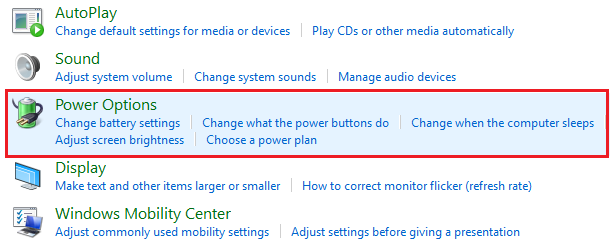
Step 2: In the Control Panel screen, you will see a lot of different icons, depending on your view. Locate and choose Hardware and Sound. On the selections available, click on Power Options.
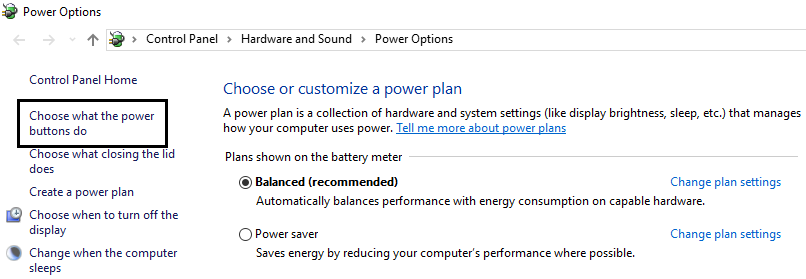
Step 3: On the left-hand corner of the screen, look for the option "Choose what the power buttons do".
Step 4: The previous step will bring you to a box where you can customize the power settings. At the higher part of the box, look for "Change settings that are currently unavailable and click on it.
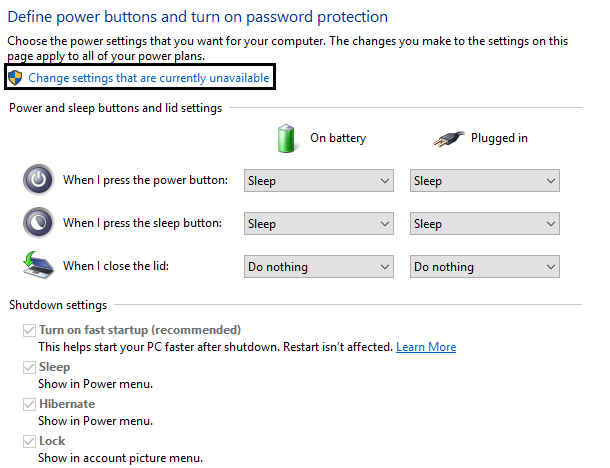
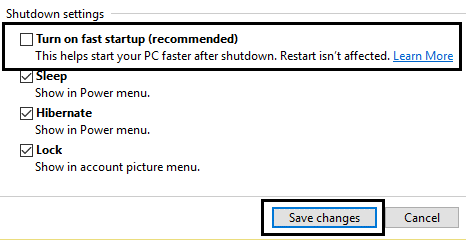
Step 5: This will bring another page where you can see small boxes with checkmarks. Make sure to uncheck the box corresponding to "Turn on fast startup". Once it is done, just click on Save changes.
Method 6: Reset Facial/Fingerprint Recognition
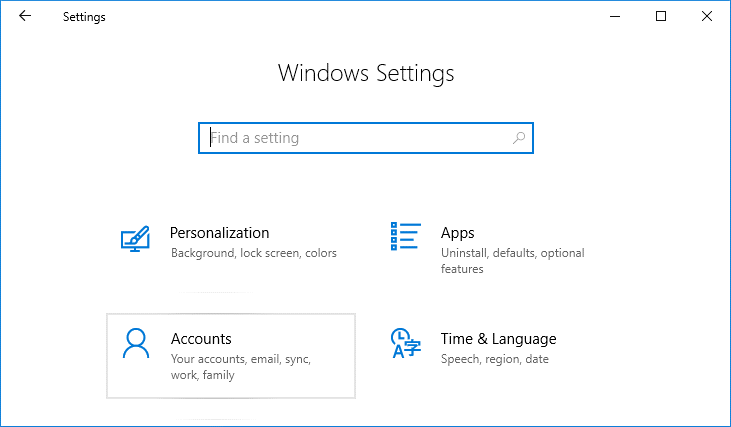
Step 1: Open Windows settings by pressing the Windows Key on your keyboard plus the letter I together. Choose Accounts.
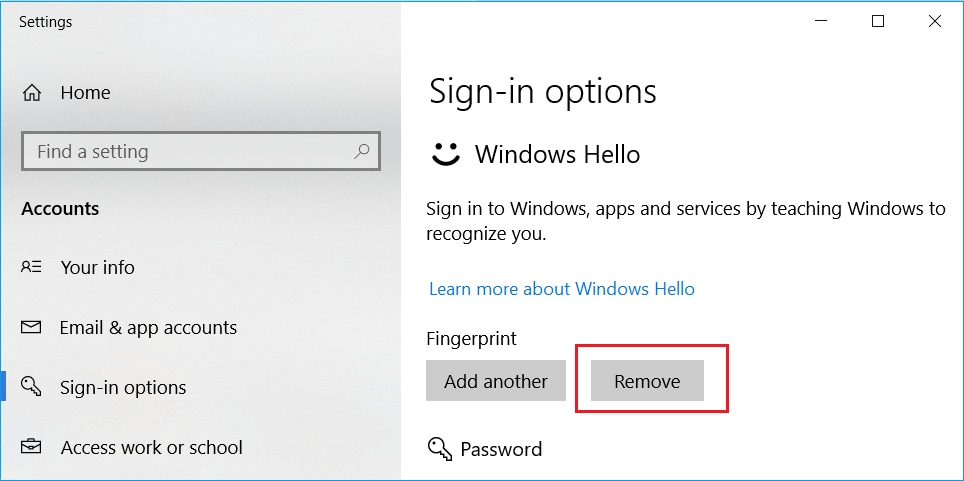
Step 2: Under Accounts, choose Sign-in options. This will bring you to the Windows Hello box.
Step 3: Under the Windows Hello box, you need to look for either Fingerprint or Facial Recognition and choose to remove it by clicking the Remove button.
Step 4: Another box will pop-up after going through Step 3, which would say Welcome to Windows Hello. At the bottom of the box, you will see the Get Started button. Hit it and just follow the onscreen instructions your computer will provide for you to reset the Facial/Fingerprint Recognition.
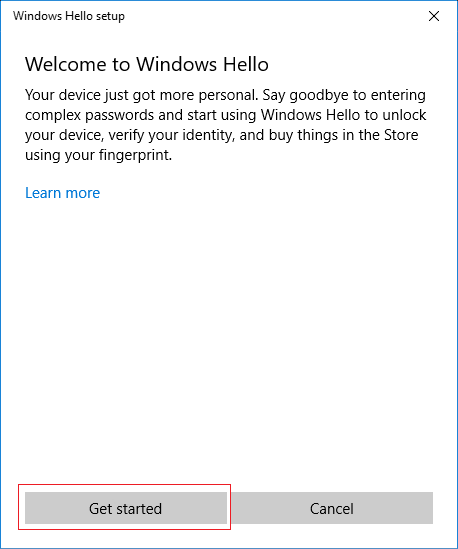
Step 5: When that is done, just close the window and restart your computer.
There you go. Once you can make use of one or more of the methods above, you should now be able to fix the "Windows Hello isn't available on this device" error. With that, you would be able to log in faster to your computer with added security.
Partition Recovery
- Partition Management
- Solve Partition Problems
- Partition Tips



 ChatGPT
 Perplexity
 Google AI Mode
 Grok
Grok


David Darlington
staff Editor