How to Sync My Documents with OneDrive Windows 10
Data sync is an essential process for PC users, who want to have stored in a safe place exact copies of their information so that this form can be accessed when it is required. To sync your information and back it up, some many methods and forms have become increasingly sophisticated; however, Microsoft OneDrive is one of the most popular, since it is a file hosting service that provides many complimentary features that represent advantages for those who use this service. Here you will learn how to sync My Documents folder with OneDrive in Windows 10.
Part 1: Ways to Sync My Documents with OneDrive in Windows 10
Q: I want to sync My Documents files with OneDrive. Could you please help me to perform it?
In earlier times, users had to rely exclusively on their computers to keep their information safe, since there were no other alternatives for backups or synchronizations. To perform a "backup" the only way was to transfer manually all the files to another computer, so this was an expensive and inefficient task. Of course, data sync was inexistent at that time.
Later came portable storage devices (PSD), which have progressively increased their capacity and become more sophisticated for the convenience of users and to simplify information management. Currently, there are devices with thousands of Gigabytes of capacity, something that at the beginning of the century was unimaginable.
Because it has always been very common to work with extremely important information, computer and technology developers were concerned with designing software to synchronize and backup files; file hosting services (also known as "clouds") have become a very recurring option in these times, thanks to the practicality of having the information stored on an online storage service, without the need of any additional storage device.
As of today, there are many file hosting services, however, Microsoft OneDrive is one of the most used for several factors. One of the most useful features is that being a platform developed by Microsoft, Office documents (such as Word, Excel, and PowerPoint) can be edited online, without the need to have the applications installed because the platform has these applications included in a "lite" version.
Part 2: Benefits of Syncing Documents with OneDrive in Windows 10
In addition to the aforementioned, Microsoft OneDrive has other benefits that its users will be able to enjoy, some of them are the following:
- To protect documents from ransomware attacks: Technology today has evolved, but unfortunately, some people make use of malicious software that can hack into your computer and access your data. Microsoft OneDrive has highly updated and developed security measures so that its users have the confidence that their files will be safe. To make things better, Microsoft recently presented "Personal Vault," a tool that allows the user to access an area of important documents only by fingerprint, PIN, facial recognition, or a code that is sent by email or SMS, was implemented.
- To release storage space: If you need to free up space on your disk, having your information in Microsoft OneDrive will represent a huge advantage. Remember that, being an online platform, your files will not be stored on your computer but in the cloud, so you can choose to use this platform to save many Gigabytes of space.
- To make data access easy: Sometimes it is likely that it has happened to you that your files are "lost" in various folders and sections within your computer, which may become a headache. If your information is in Microsoft OneDrive, it will be very easy to access it, since all the folders and files will be on your account page, so accessing any document, photo, folder or file will be a matter of making a few clicks.
- To share the documents: Microsoft OneDrive has a function to directly share your files and folders. You can copy the link of the information you want to share and send it to any contact; you can even send it directly to an email.
Part 3: How to Sync My Documents with OneDrive in Windows 10
Syncing My Documents folder with OneDrive is an extremely simple process, below I will show you how to do it using these simple steps:
Step 1: Open the OneDrive app
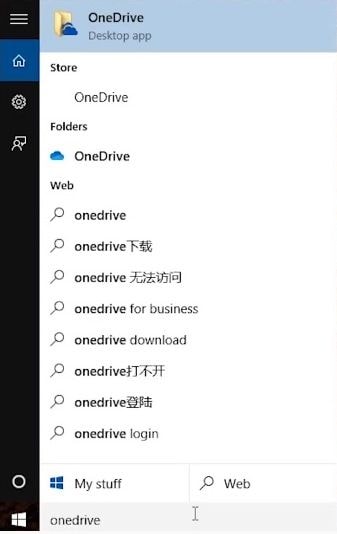
Make sure you installed correctly Microsoft OneDrive. Then type "one drive" on the search box and click on "OneDrive" to open the app.
Step 2: Sign in
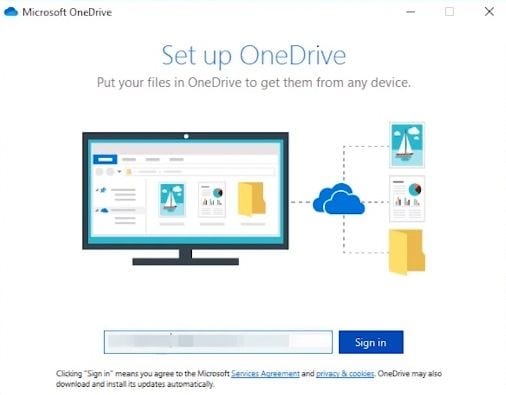
Remember you must have a Microsoft account to sign in OneDrive. Just type your email and your password to login to your account.
Step 3: Select your OneDrive folder
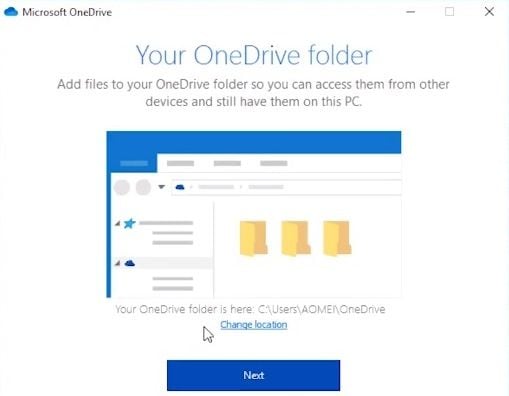
A new folder will be created for synchronization. You can change the location by clicking on the blue underlined characters, then you just have to click on the blue rectangle.
Step 4: Select files and folders to sync
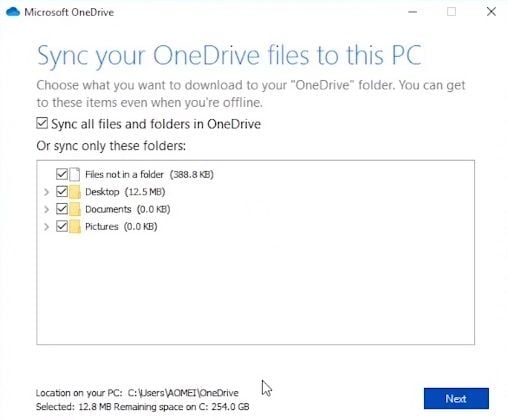
A list will be displayed with files and folders. Click on the blank squares to select which files and folders you want to sync. In this case, you must tick "Documents" to sync My Documents folder. Finally, click on "Next" and synchronization will start.
Step 5: Open sync folder
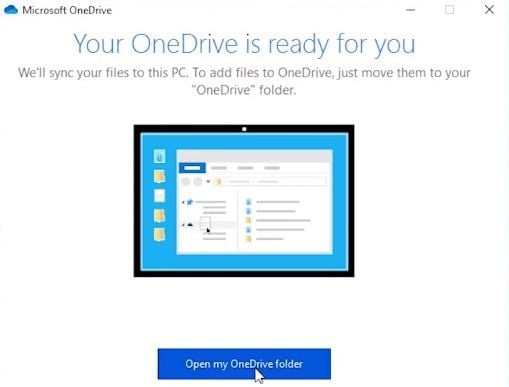
While your documents are syncing, you may check your OneDrive folder. Just click on the blue rectangle.
Step 6: Check sync folder
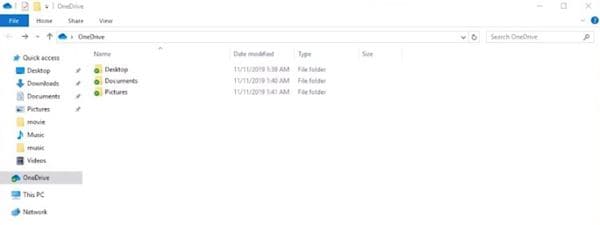
Once you have opened your OneDrive folder, you can check the folders and files that are being synced. You can add or delete new files and folders here and the information will be automatically updated.
Part 4: How to Sync My Documents with AOMEI Backupper?
There is an alternative that is very useful to manage file synchronization processes. AOMEI Backupper is a professional data backup and synchronization software that was designed to allow you to designate specific folders or files to be synchronized with OneDrive and many other storage media, in this way you can automatically synchronize any file or folder.
You can download this software and if you want to sync My Documents folder with AOMEI Backupper you only have to follow some simple steps that I will show you below:
Step 1: Go to "File Sync"
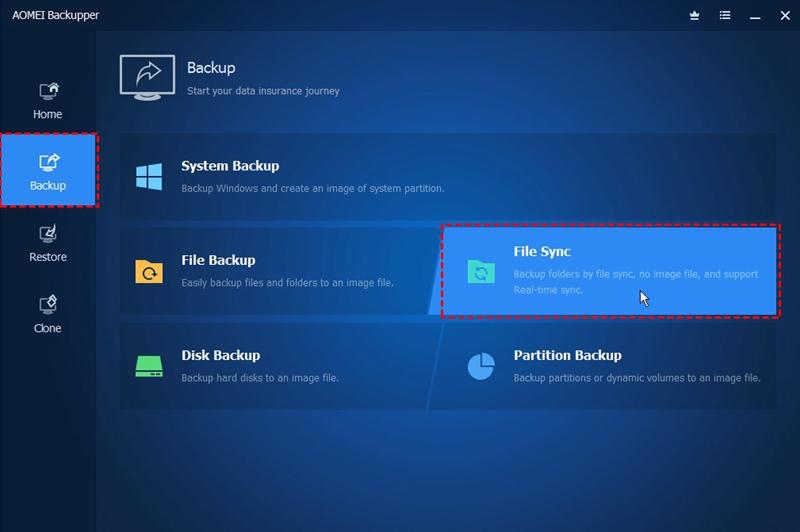
Once the tool is open, go to the "Backup" section (located on the left panel of the window). Now click on the "File Sync" option.
Step 2: Assign a name to your task
Before going further, it's advisable to name each backup task to help you to distinguish each backup process from other ones. You can do this by clicking on the "Task name" edit icon.
Step 3: Select the folder to backup

Click on "Add Folder" and select the one or those which contain the files you want to backup to OneDrive. In this case, you can choose the "My Documents" folder.
Step 4: Customize the filter settings
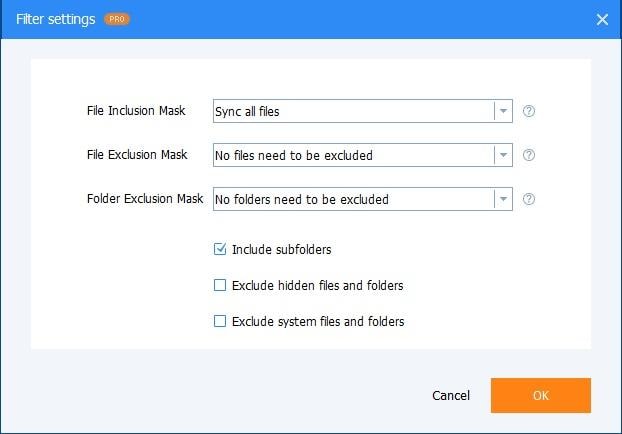
If you have a Pro license, you will be able to set filter preferences to make your experience much more efficient.
Step 5: Select "cloud drive" option
Once you've edited the filter preferences, you must select the cloud drive option. To do this, you have to click on the drop-down list button.
Step 6: Select "OneDrive"
Once you've selected the "Cloud Drive" option, a Window like this will be displayed. Please select "OneDrive" and click on "Ok."
Step 7: Set up Schedule
You can find this option by clicking on the "Schedule" label with a clock icon. Here you can set the schedule preferences. You can schedule automatic backups by day, week, month, real-time, or set event triggers.
Step 8: Start the backup process
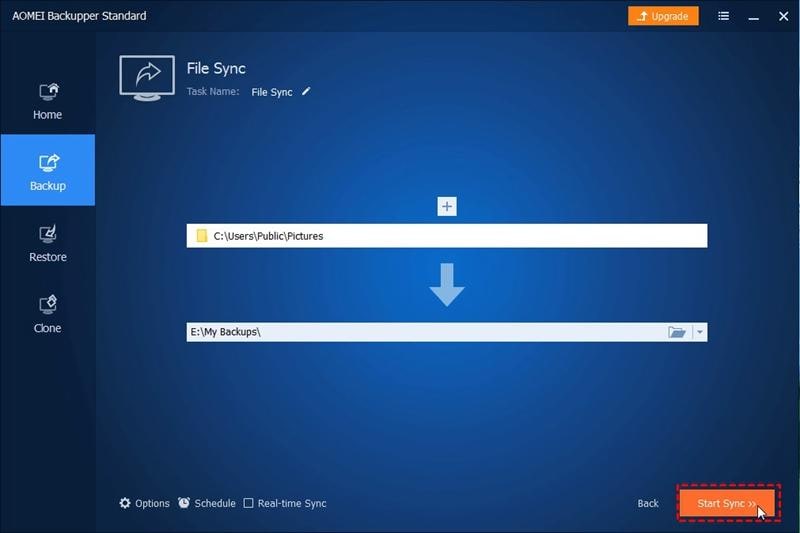
If all the preferences have been set up, you will have to click on the "Start Sync" button. As you have seen, the AOMEI Backupper tool is pretty simple to use and allows you to make any kind of backup process with great ease.
Conclusion
Syncing data is a common task for many users; however, reliable and secure software is required to accomplish this process. Microsoft OneDrive is an excellent alternative which has been becoming more sophisticated adding progressively very useful features, so it is not surprising that this is one of the most used file hosting services. Also, with the help of AOMEI Backupper you can customize and automate all kinds of synchronization and backup processes, thus achieving a considerable improvement in the management of your synchronization processes at all times.
Data Backup Services
- Computer Backup
- Hard Drive Backup
- Mac Backup
- Cloud Backup


Amy Dennis
staff Editor