How to Delete Old Backup Files in Windows 10
Backing up data is one of the safest and most common tasks for millions of Windows users around the world. This task is very convenient and offers many advantages; however, with time, if many backups have been made, you will have to deal with disk space problems. There are several alternative solutions to delete old backups Windows 10, which you can learn about in this post; Also, you will know a powerful software that will help you a lot to avoid having to delete old backups periodically.
Part 1: Delete Old Backups Windows 10
Yesterday, I noticed that I have to free up disk space urgently. There are a lot of old backup files stored in the disk that I want to delete. Is there a way to do it quickly?
Making backups is one of the most mandatory activities for users, who thank this task they will be able to have a copy of their files, which means security. This task prevents the definitive deletion of their files if an unexpected event occurs like a problem with the disk, a virus, or malware appears and accidentally deletes determinant information.
The benefits that making backups can provide are too many, but, like any task of this caliber, it can bring some problems. One of them is that if you are used to backing up your information day in day out, you may start to deal with disk space problems.
You should take into account that, after making a backup (unless you back up just part of your information), all your files, documents, and folders will be copied to an image or folder, which makes you have a duplicate of your data. If you have a disk with a large amount of storage space, you should not worry, but if you have one of the average capacities, you will probably have to delete old backup files after some time.
Then, possibly you may be concerned because, if your disk does not have enough space, you will no longer be able to make any backup and, therefore, all your information stored on your PC may be vulnerable. There are several solutions to this problem; in the next, you can learn some of them.
Part 2: How to Delete Old Backup Files Windows 10?
If you want to delete previous backups, there are currently several ways to do it. Next, I will share with you two effective methods that will help you do this task.
Method 1: Delete Old Backup Files Using File History Cleanup
File History is a Windows built-in tool that makes backups of the files that are in the predefined folders of the operating system (Documents, Music, Pictures, Videos, and Desktop) as well as OneDrive files if you have activated the service.
This tool is practical for making backups if you have stored your information in the aforementioned folders, so you can make use of it if you don't need more than the basics.
Through File History, you can also delete previous versions of folders and files; To do so, you merely have to follow the following steps:
Step 1: Open Control Panel
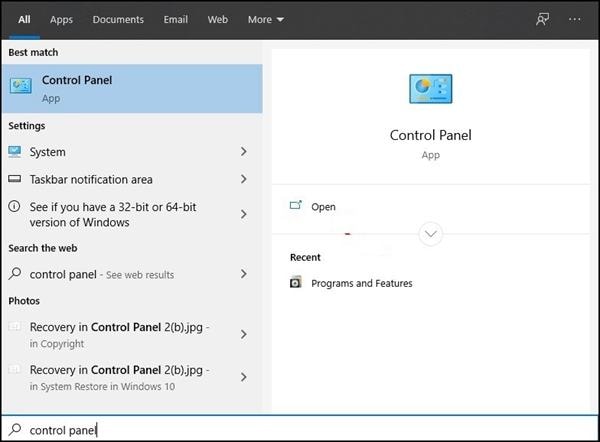
Click on the Windows icon and write control panel, then click on the best match option.
Step 2: Go to System and Security
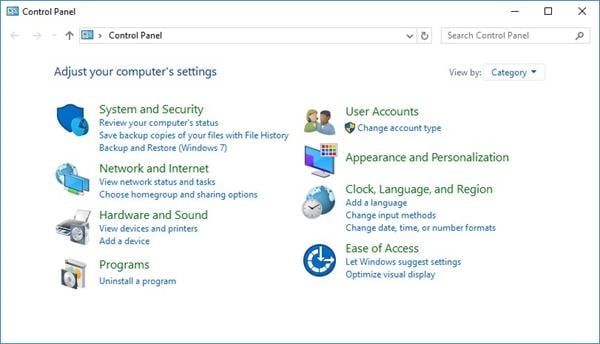
Once you open Control Panel, click on System and Security.
Step 3: Open File History
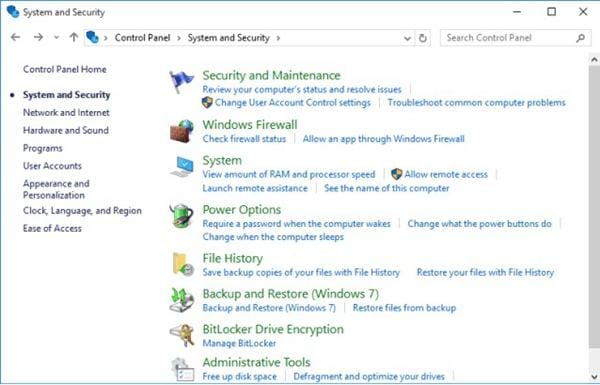
In this section, click on File History.
Step 4: Open Advanced Settings
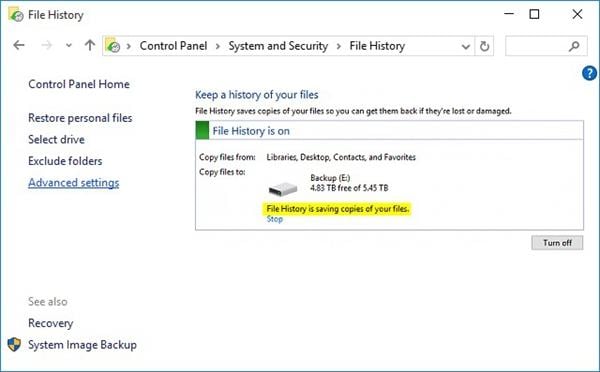
Click on Advanced Settings from the list on the left part of the screen.
Step 5: Open Clean up versions
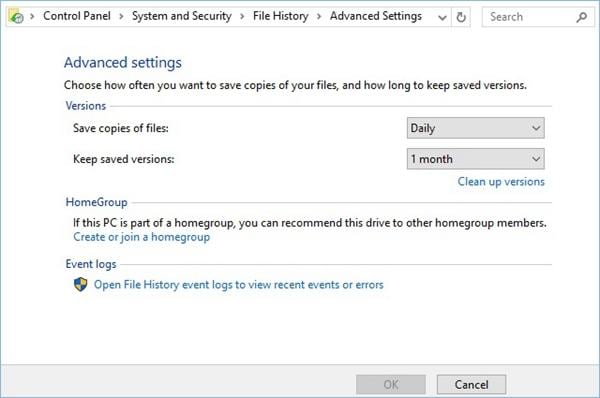
Click on Clean up versions, which are in the Versions part of the window. Windows will immediately display a dialog box.
Step 6: Delete older versions of files and folders
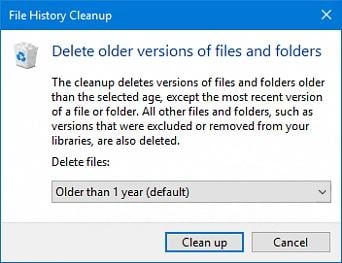
On this dialog box, click the arrow in the grey box, and you will see a drop-down list. Choose to delete older versions of files and folders from 1 month to 2 years. Next, click on Clean up and File History will start to delete old backup files and folders. Be patient; this task may take several minutes to complete, specifically if you selected a long period.
Method 2: Delete Old Backup Files Using Command Prompt
There is a second method that I recommend you. It is about activating the cleanup process through fhmanagew.exe, which is a program that can delete older file versions based on File History record. To run this program, you must use Command Prompt; below, I will show you how to do it through a few steps:
Step 1: Open Command Prompt tool

Click on the Windows icon and then type cmd, right-click on Command Prompt, and select Run as administrator from the drop-down list.
Step 2: Type the corresponding command
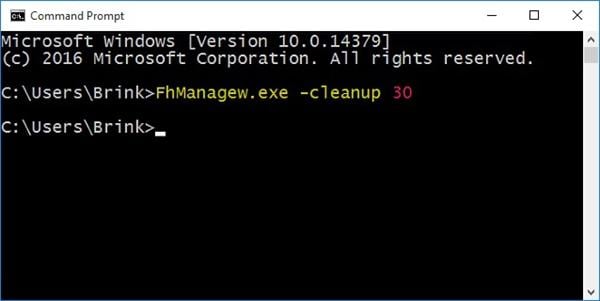
Once you opened Command Prompt tool, type the next command to delete backup files older than 30 days: fhmanagew.exe -cleanup 30 and then press Enter. The process will start immediately, and the old backup files should be deleted. You must have in mind that this task may take several minutes.
Hint: The typed command was on a 30-day basis. If you want to delete old backup files from another time, only change the number, for example:
fhmanagew.exe -cleanup 60 deletes files older than two months.
fhmanagew.exe -cleanup 365 deletes files older than one year.
If you want to delete all the older versions of backup files but the latest one, type number 0, for example, fhmanagew.exe -cleanup 0
Step 3: Finish the process
If fhmanagew.exe deleted the older version files correctly, a pop-up window will appear with the message The cleanup completed successfully. Now, the only thing you have to do is to click on OK to finish this task.
Step 4 (optional): Confirm
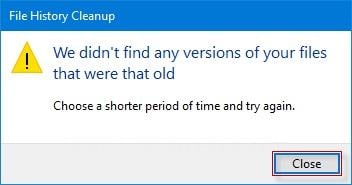
If you want to confirm that you successfully deleted the old backup files, you can write the same command again, and a window like this should appear.
How to Backup Files and Don't Need to Delete Old Backups?
Making backups through Windows is very practical, but you must bear in mind that you will have to delete previous backup versions with some frequency. If you do not like doing this task that can be cumbersome and uncomfortable, I recommend using Wondershare UBackit. This professional software will not only prevent storing countless versions of old files and folders, but you will also be able to make backups in a comfortable method adjusted to your needs.
To make a backup of your files and folders, you will only have to do the following:
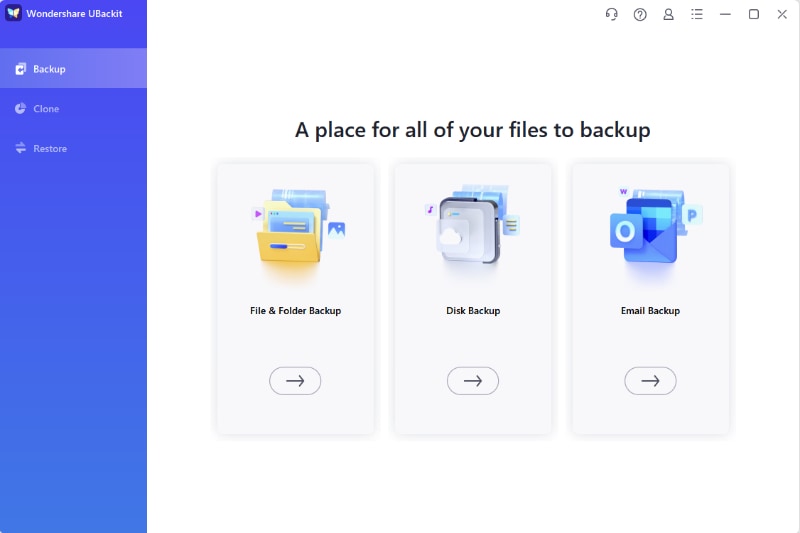
Step 1: Go to File Backup
Launch UBackit data backup on your computer, and click Create New, then, File Backup.
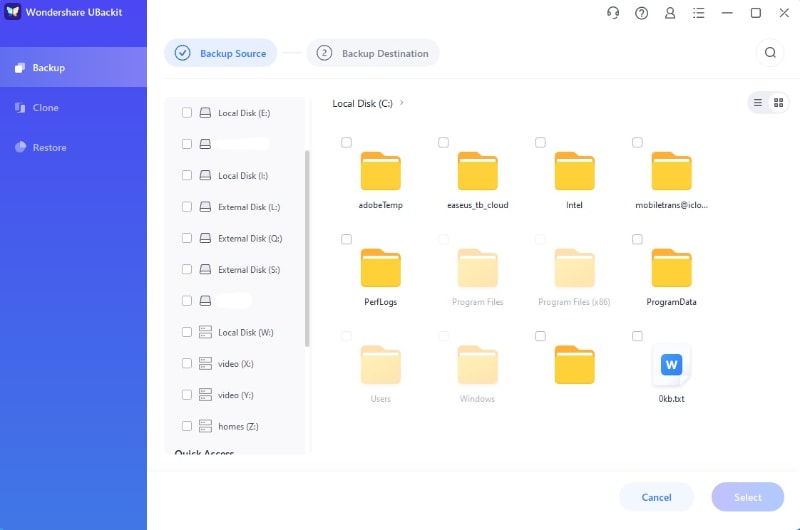
Step 2 : Select files to backup
Select the files you want to backup, then click the Select button to continue.
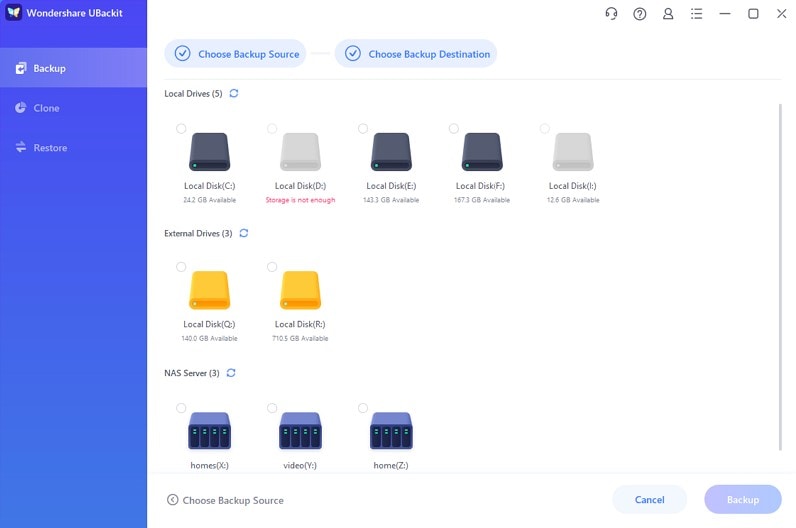
Step 3: Select Backup Destination
After that, select the destination where you want to save the backup. Then click Select to start the backup process.
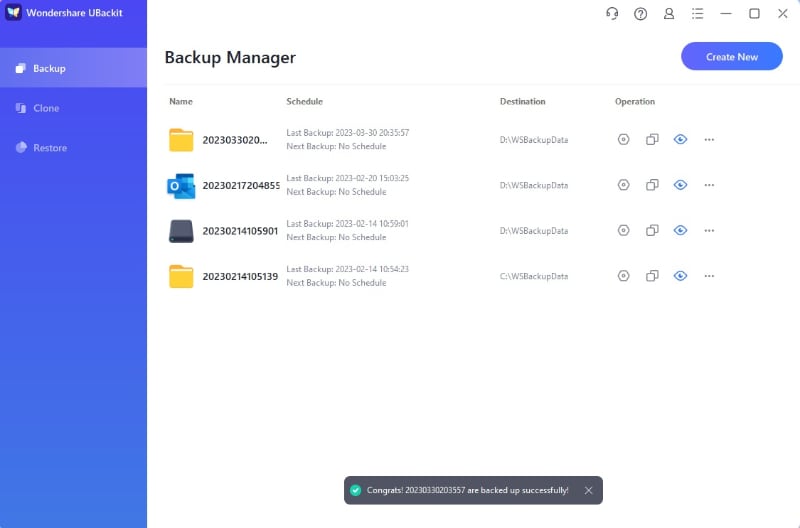
Step 4: Complete the Backup
Now you need to wait a few seconds or minutes to let the backup process completes. Once it finishes, you will receive a notification from the tool. And you can preview the backup files.
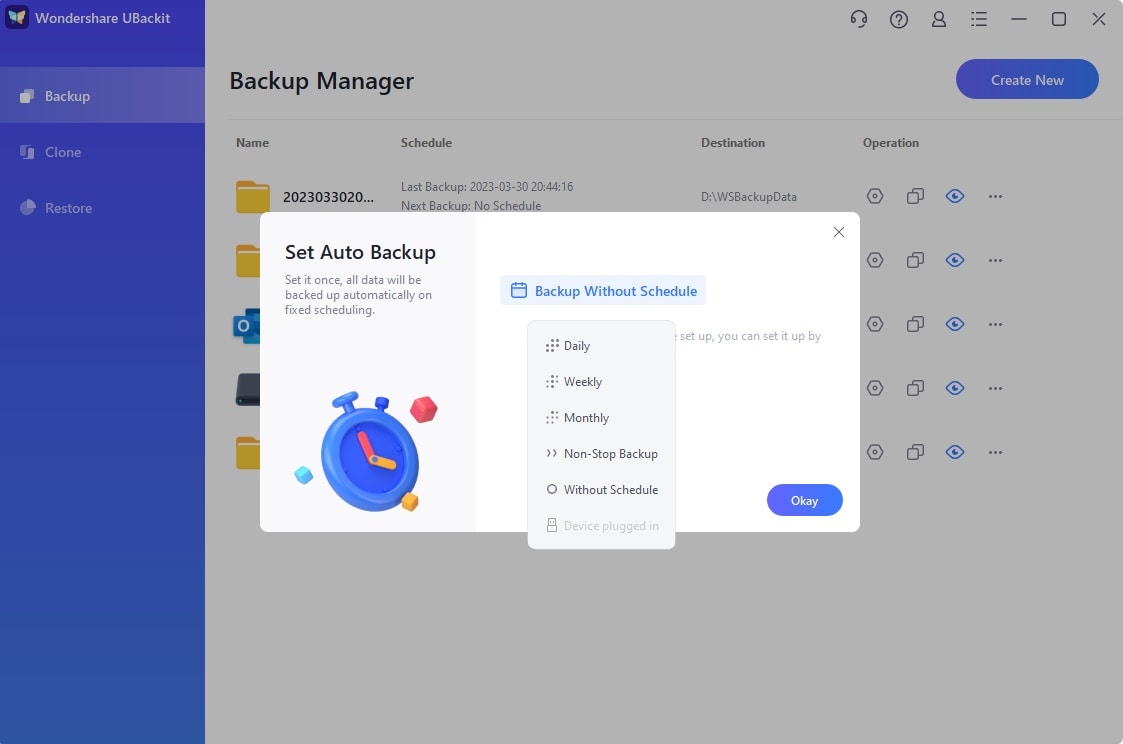
Step 5 (optional): Schedule backups
If you want to set an automatic backup, you can click Schedule at the bottom of the backup folder. It offers daily, weekly, monthly and non-stop backup schedule. Set the backup schedule as you need.
Conclusion
Making backups is a very convenient task, and it prevents user information from being deleted without having the possibility of recovering it. One of the few disadvantages of this task is that, if a person does it periodically, it will produce many versions of copies of files and folders, which will take up a lot of disk space. Although you can delete previous backup versions, it is much more practical to use UBackit data backup, since you can configure it so that old backup files are not stored and the backups are more secure and compatible with your preferences.
Data Backup Services
- Computer Backup
- Hard Drive Backup
- Mac Backup
- Cloud Backup


 ChatGPT
 Perplexity
 Google AI Mode
 Grok
Grok


Amy Dennis
staff Editor