How to Format SD Card on Android Phone?
Why would we want to format an SD card? Well, with daily use on your Android phone, there are several situations — malware, storage errors, and other issues that can only be cured by formatting. In this article, we show you how to format an SD card on Android and recover from any errors that you encounter in the process.
What Are the Common Situations of Formatting an SD Card?
Formatting in computing refers to the deletion of all data in a storage medium and setting up a file system. Before you begin, you may want to back up your SD card (memory stick) if it contains files you don't want to lose.
Before we begin, let us examine some common situations where you need to format a memory stick on an Android phone.
1. SD card is damaged or simply isn't working and you have some kind of error message on your phone e.g. "SD card is corrupted".
2. Compatibility issues. Some older Android phones don't have support for the exFAT file system. In such a scenario, you would need to reformat to FAT32.
3. You may experience performance degradation. If that's the case and the memory stick's performance can improve, then formatting becomes an option.
4. Data security. If you don't know where the memory stick has been and you're not sure what kind of files could be there, or you suspect it could be infected by a virus, the easiest thing to do is to format it.
5. File size restrictions. For large files over 4GB, you can't use the FAT32 file system which has a maximum file size of 4GB. In such a situation, you would have to format the SD card to exFAT.
Steps to Format SD Card on Android
There are several ways to format a memory stick. As already mentioned most devices with SD cards including phones, computers, and cameras have a formatting option.
1. Format SD Card on Android Phone
Different Android versions have slightly different steps on how you go about formatting. But the main idea is to navigate to the Storage area in your phone Settings, tap on the SD card, and look for the Format option. Below, we show you an example of how to format an SD card in Samsung on Android OS version 10.
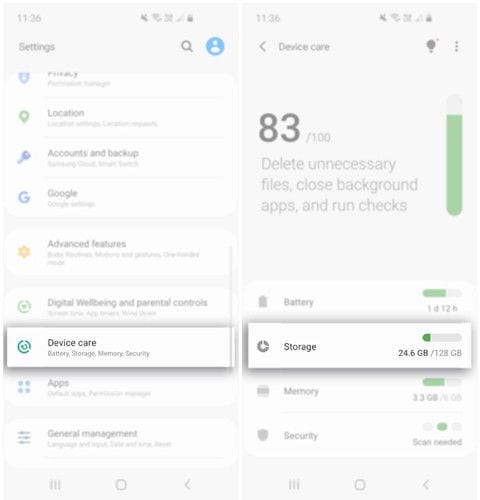
On your phone, navigate to Settings > Device Care. Next, select Storage.
Tap on Advanced. Here, you will see Portable storage. Proceed and select SD Card.
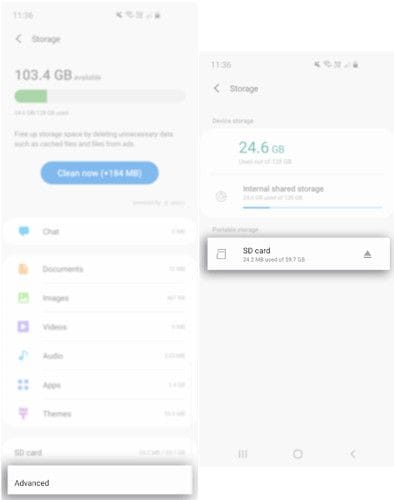
Next, tap Format. Finally, in the pop-up message, select Format SD Card.

Wait a few minutes for the process to terminate then begin using the card.
2. Format Android Memory Card on Computer
There are two options to format an SD memory card on a computer.
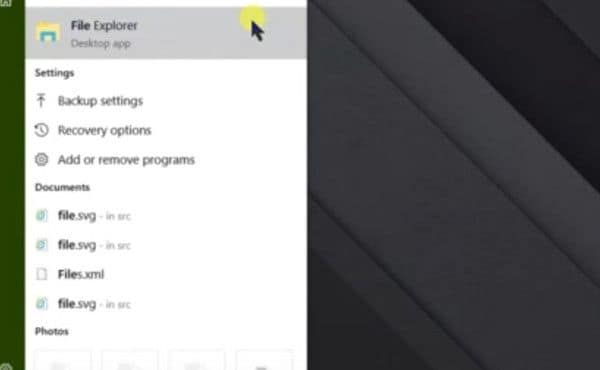
For the first option, connect the memory stick to the computer. Depending on the PC model, you can use a built-in reader or an adapter. Next, open Windows Explorer and locate the SD card on your drive list or wait for a few seconds for the drive to load.
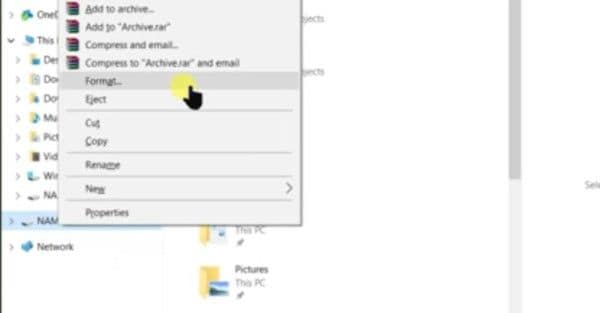
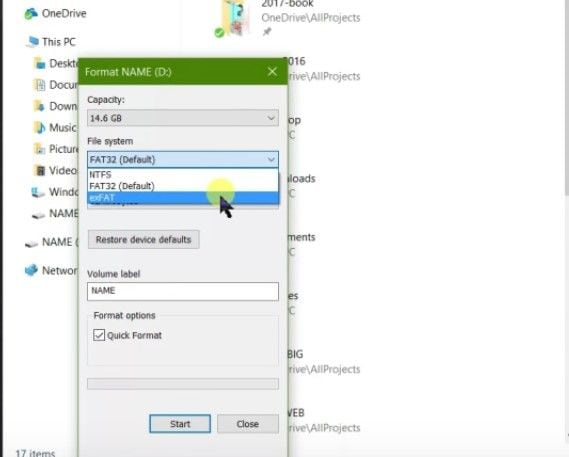
Right-click on the drive and select Format. You should then see a format window that defaults to FAT32. You may want to change this to exFAT if you anticipate having files larger than 4GB on the memory stick.
Next, enter the desired name in the Volume Label field. Check the Quick Format box or else the process can take a long time especially for large SD cards. To finish the process, click the Start button.
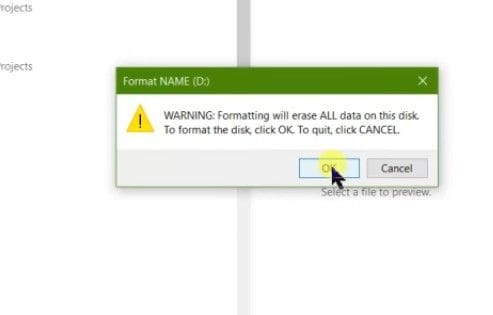
A warning message will appear. Click OK to proceed.
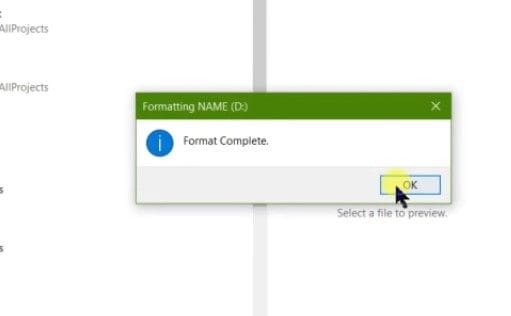
After a few seconds, the SD card is formatted.
3. Format SD Card as Internal Storage
If your Android phone runs out of internal memory for your apps, the only solution is to use the SD card as internal storage. To do so, you need to format it as Internal Storage.
Begin by inserting it on your Android phone and wait a few seconds for it to be detected.
Next, go to Settings. Scroll down to Storage and Tap the SD card. Next, tap the three dots located in the top right corner of the screen. Tap Storage Settings. Next, select the Format as an Internal option.
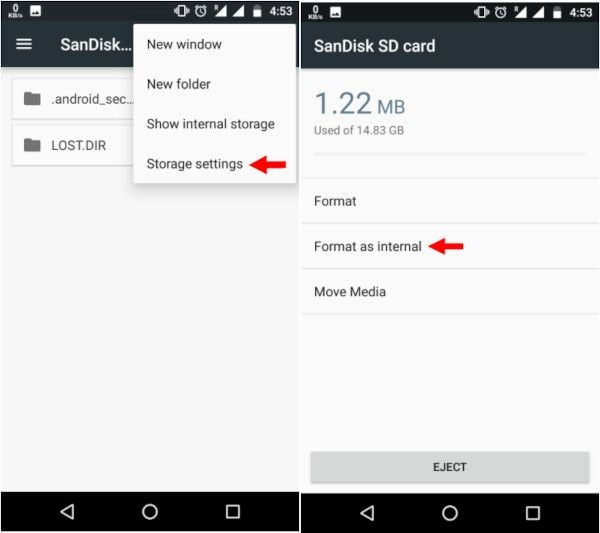
Tap Erase & Format. If it is too slow, you will get a notification. Android may reject formatting a slow SD as Internal Storage.

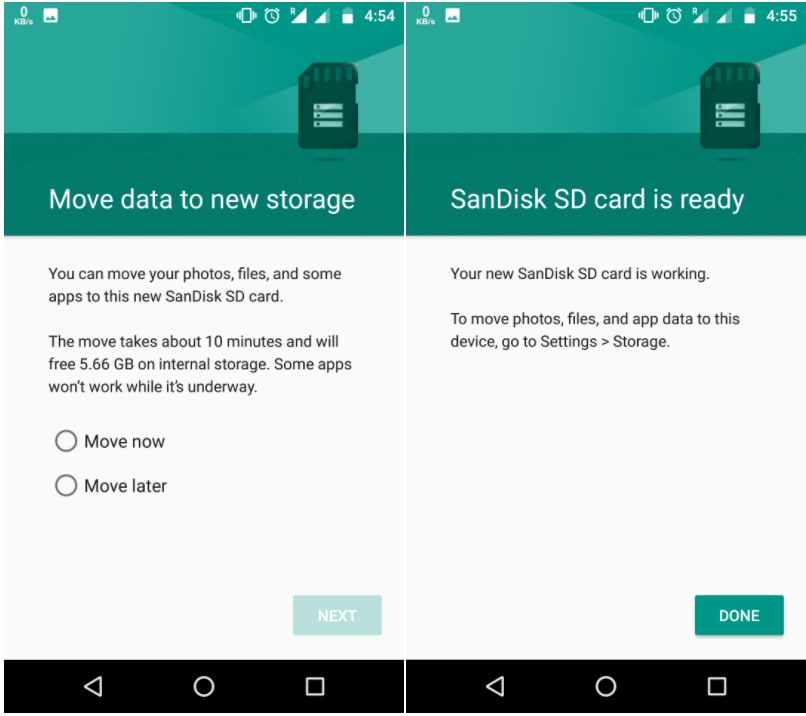
Tap OK to continue then begin the data migration process by checking the Move Now radio button or Move Later to do it later.
Tap Done to complete the process.
Workable Solutions to SD Card Not Formatted Error
In the process of formatting an SD card using any of the methods described above, you may come across some errors. If you come across an error message stating, "Micro SD card not formatted", then the following are possible causes and solutions.
1. Damaged or Corrupt SD Card
An SD card may be damaged or corrupted due to bad sectors or a virus in the files. To fix this error, connect the memory stick to your PC and navigate to File Explorer and take note of the drive letter.
Next, launch the command line utility by typing "CMD" in the Windows search and running the app as an administrator.
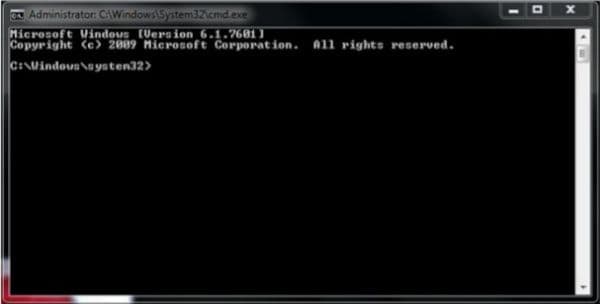
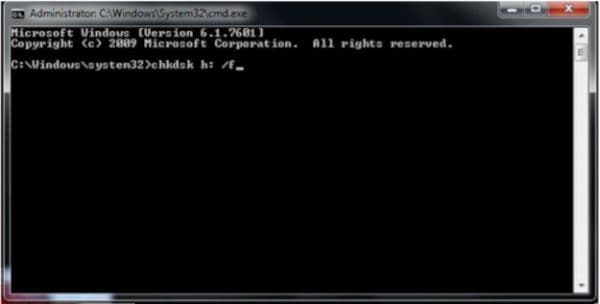
In the command line window, type "chkdsk h: /f", where "h" represents your drive letter. This commands the PC to check and fix (f) any disk errors.
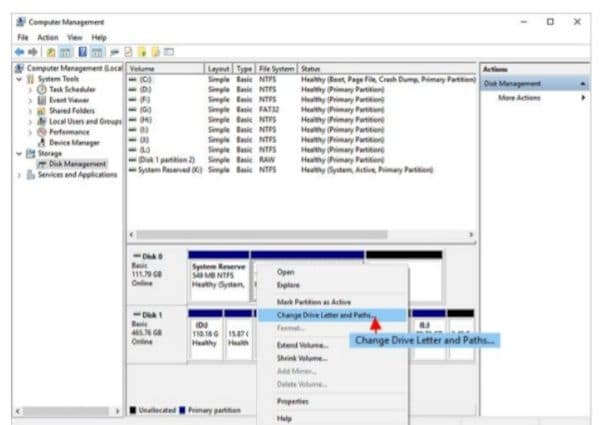
If this does not work, you can try and change the letter assigned to the drive.
To do this, go to This PC, right-click then click Manage. Click on Disk Management under the Storage menu and then right-click on the volume of the drive letter you wish to change. In the drop-down menu, select Change Drive Letter and Paths. Click Change and choose a different drive letter. Select OK, then Yes to the warning then wait a few seconds for the new drive letter to be assigned. You can view this change in Disk Management or File Explorer.
Retry the process.
The Memory Stick is Write-protected
You may have write-protected the memory stick without realizing it. The fix for this is quite easy. If it uses physical protection, identify the switch, and slide it to the appropriate position.
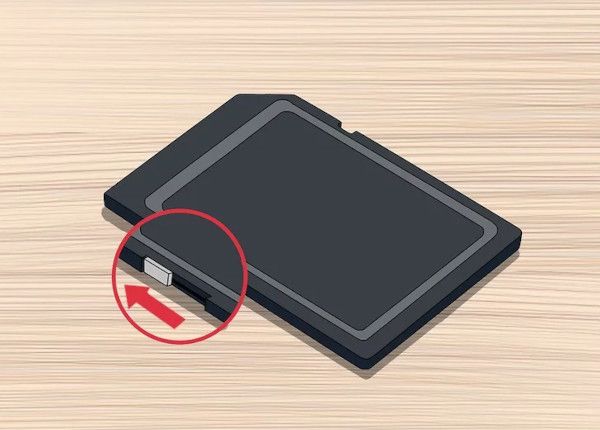
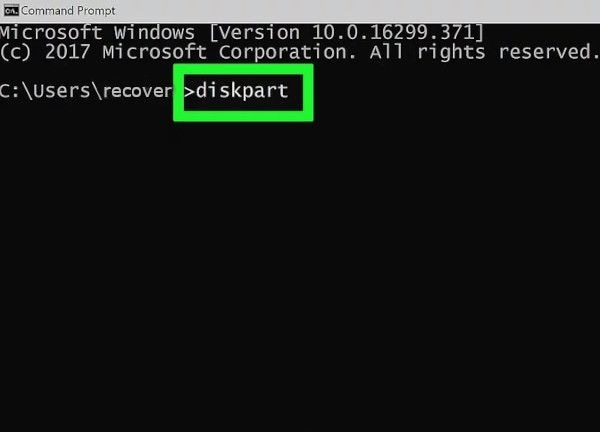
If it isn't using a physical switch, connect it to your PC. Take note of the drive letter in File Explorer and then type "CMD" in the Windows search bar at the bottom left of your screen. This will launch the Command Line utility. Type "diskpart" and press Enter.
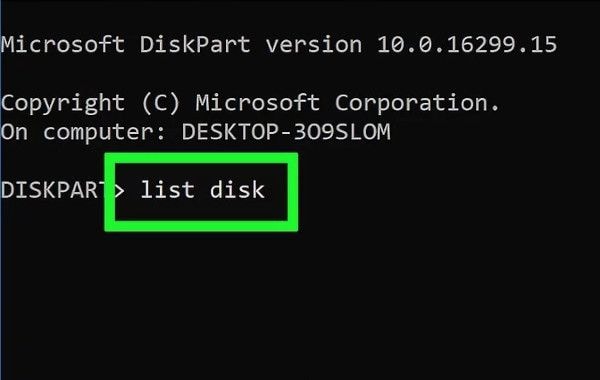
Next, type "list disk" to see a list of all the drives.
Identify it and note the disk number allocated to it.
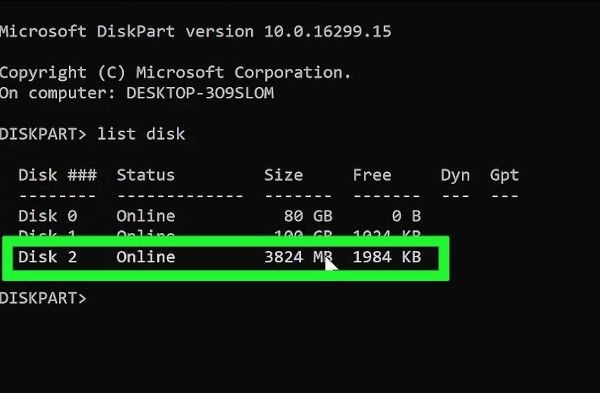
Next, type "Select Disk x" where "x" represents the actual disk number on your system e.g. "Select Disk 2".
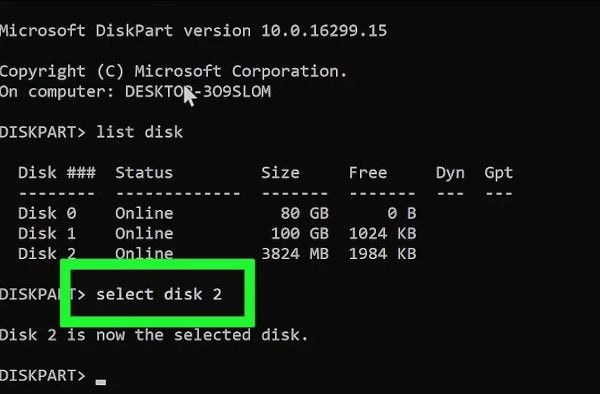
Next, type "attributes disk clear readonly". This will clear the read-only attribute.
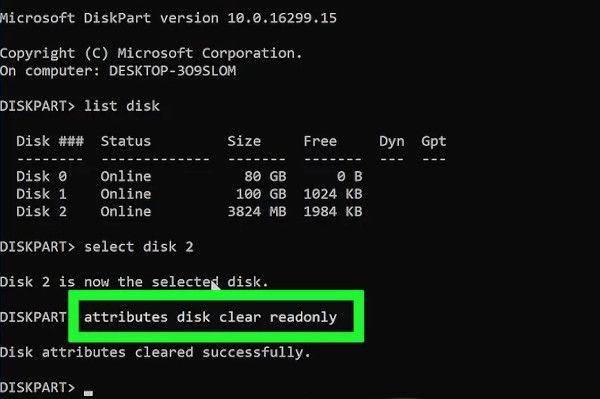
Close the Command Line utility and retry formatting the memory stick.
2. Sudden Power Failure
In the event of a sudden power loss, as the Phone or computer is formatting the memory stick, the process terminates prematurely. This is a simple fix, just retry the process once again and you should succeed.
All-Around Tips to Format SD Card Without Losing Data
One of the problems that can arise when formatting an SD card is data loss. Below are a few tips to format an SD card without losing data.
Tips You Should Know When Formatting an SD Card
Formatting refers to the complete erasure of data on the SD card and the creation of a file system.
1. How to Do an SD Card Data Backup
The best way to prevent data loss is to first perform a data backup. There are two ways to do this. Using your Android phone or backing up to a PC.
1. To back up using an Android phone, you will need a Google account and the Google Drive app. Install the Google Drive app from the Play Store and launch it.
2. Next, tap the + icon and select Upload.
3. Navigate to your SD card then select the files you want to upload or choose to upload everything.
4. Click Done and Google will begin uploading the files to Google Drive.
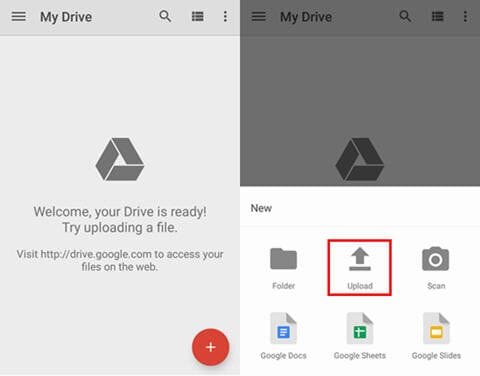
The second backup method involves using a PC. Connect the SD card to a PC and use File Explorer to navigate the drive. Right-click on the drive, click Copy and then paste in a different location on your computer. This action makes a copy of your SD card contents on your PC.
2. Recover Accidentally Formatted Android Files
In the unfortunate event that you fail to make a backup, do not worry. Wondershare Recoverit software can recover accidentally formatted Android files using Windows or Mac. This useful software can save you the trouble of having to hire a data recovery expert to get back your files. With Wondershare Recoverit Software, you can recover accidentally formatted Android files in three minutes.
To recover your files, follow these steps.
Step 1: Launch Wondershare Recoverit on Windows
Download Wondershare Recoverit and install it on your PC. Next, open the application. You can do so by typing "Recoverit" in the Windows search bar. Click it to launch it.
Step 2: Connect the SD Card
Next, connect the SD card to the computer and make sure it is recognized or detected.
Step 3: Select the SD Card
From within Wondershare Recoverit software, select the SD card from the list of locations.

Step 4: Scan the SD Card
Click Start and a scan will be launched on the SD card. You can pause or stop this process at any time.

Step 5: Preview and Recover the Files
At the end of the scan, preview the files from the list of results. To get your files back, simply click Recover, and save them in a location on your computer.

Wondershare Recoverit software is guaranteed to recover files accidentally deleted from an SD card. It can recover data in numerous types and formats, and even includes a video repair tool to repair corrupted videos.
Closing Words
We hope these tips have taught you how to format an SD card on Android without losing data. If you encounter a problem, go through the solutions again to solve the problem. And, most importantly, if you accidentally delete your data, you can always recover files from your Android SD card using Wondershare Recoverit Software.
Related Questions Searched for Frequently
-
1. How do I format my SD card on my Samsung?
The process differs slightly with each Android version. But the main idea is to navigate to Storage in your phone's Settings. Identify the SD card and tap it. Then, tap Format.
-
2. Why can't I format my micro SD card?
There are several reasons that you may encounter an error. Your micro SD card may be damaged or corrupted. It may also be write-protected. Also, the formatting process may have terminated prematurely due to sudden power loss/shutdown.
-
3. Do you need to format a new SD card?
No, new SD cards are not formatted because most are pre-formatted by the manufacturer.
-
4. What does it mean to format an SD card?
In computing, formatting refers to the process of deleting all data on a memory stick and creating a file system.
SD Card Recovery
- Recover Card Data
- Repair Card Errors


 ChatGPT
 Perplexity
 Google AI Mode
 Grok
Grok


Eleanor Reed
staff Editor