Time Machine Won't Backup? Get Time Machine Backup Troubleshooting
What do you do when you have important documents on your computer that you want to back up and time machine stalls during the backup process? Don't panic; there are various solutions that you can use to back up your documents using inbuilt Mac tools and third-party tools such as Recoverit Mac Data Recovery.
Part 1 - Overview of "Time Machine Won't Backup"
1. What does "Time machine won't Backup" Mean?
There are times when Time Machine refuses to backup data on your Mac, leaving you at a loss as to what to do next. This s not a critical error since it can easily be resolved and you can continue with your backup procedure.
2. Common Causes of Time Machine Backup Problems
- Bad Backup Drive – Time Machine uses an external disk to back up your documents. Your backup drive may have been compromised leading to the error
- Outdated Software – Time Machine Backup issues may arise if you have not updated your MacOS. Update the OS and restart your Mac and see if this clears the problem.
- Poor Network Connection – Always make sure that the Mac and the Time Machine Backup destination are on the same network. Network issues arise when you use an AirPort Time Capsule, AirPort Extreme connected drive, or server that is on a different Wi-Fi network. Make sure they are all on the same network.
- Time Machine Backup Destination Not Mounted – this may be due to poor connection if you are using a cable to connect the external disk to your Mac. The disk may also have been corrupted or probably turned off.
- Incomplete or Interrupted Backup – if you interrupt the backup process, Time Machine may not be able to proceed when you try to continue with the backup later. You may get a "Time Machine Waiting to Complete First Backup" error message.
Part 2 - Errors and Fixes of "Time Machine Won't Backup"
It can be very upsetting when your Time Machine won't backup especially when you think your backup files may have been corrupted or lost. Time Machine is quite sensitive and these error messages may not indicate a critical error to your backup files. This guide will help you in troubleshooting Time Machine problems.
A) Common "Time Machine Won't Backup" errors
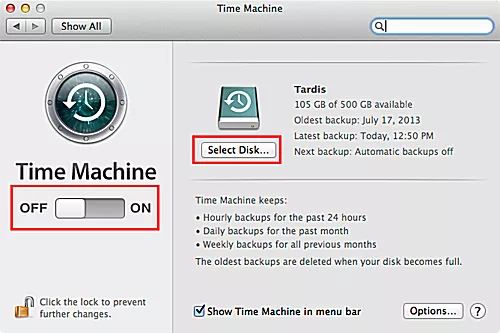
Error 1 - Time Machine Backup Volume Could Not Be Mounted
This error may occur when Time Machine is using a Time Capsule, a remote Mac, or a Network Attached Storage device (NAS). The error message can also occur when you have a backup device directly attached to the Mac but this is uncommon. Time Machine must access the backup drive from your Mac so it must be mounted on the Mac first.
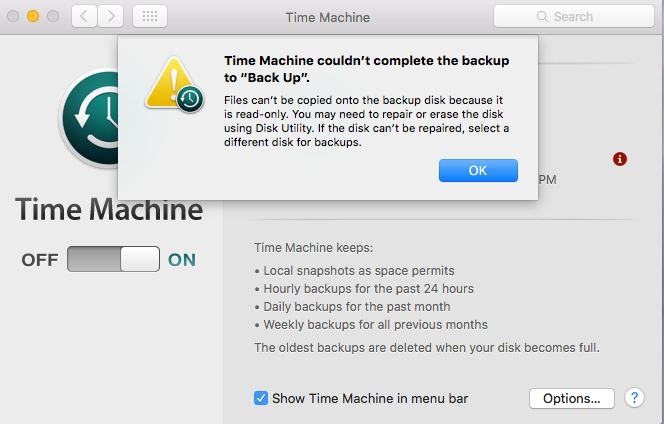
Error 2 - Time Machine Backup Volume is Read Only
The Time Machine "Backup Volume Is Read Only" error comes when it can't write or backup up on the external drive; it can only read the information already stored on the drive. You may have accidentally set the drive to "Read Only" but this is quite uncommon. This error can have critical implications or it could just be a minor error.
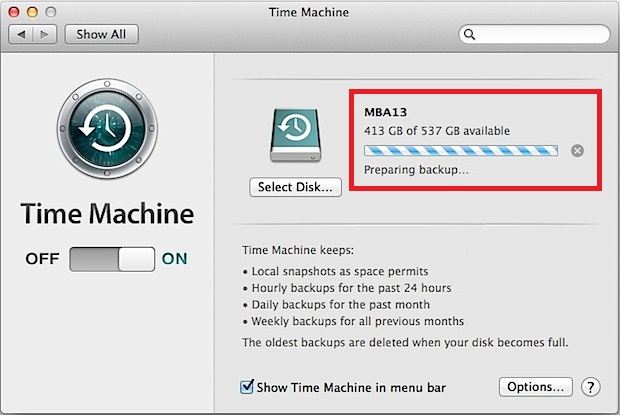
Error 3 - Time Machine Jammed on "Preparing Backup"
Time Machine will usually tell you that it is preparing backup, which is quite normal. However, when you come back after a while and it is still in the "Preparing Backup" phase, it indicates a problem with your backup process.
This could be due to a number of issues including a bad backup drive, poorly ejected drives, system hang, third party apps that interfere with Time Machine, corrupt files, and much more. Simple Time Machine troubleshooting should fix the problem.
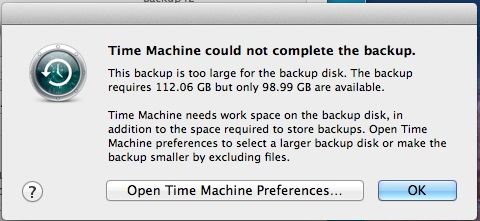
Error 4 - Time Machine Cannot Complete Backup
This is an error that you may get when the destination drive does not have enough space to store the backup files. The error may also occur due to problems with the destination disk. Disk errors can occur if you unplug the disk before unmounting it fist from the Mac. There are various issues that can cause this Time Machine backup problem and troubleshooting should indicate what the real problem is, and you can accurately address it. Continue reading the guide to get the solution.
Error 5 - Time Machine AirPort Base Station
At times, your Time Machine won't back-up because of issues with an Airport Base Station. This is common for people who use this device for storing their Time Machine Backup files.
Troubleshooting will solve the issue and may simply require a restart.

B) Fixes for "Time Machine Won't Backup" errors
Backup issues connected with Time Machine backup simply indicate that the facility is unable to create backup files on the preferred device for one reason or the other. The original Mac drive could be fine, but your Time Machine drive could be faulty. Another problem could be due to a poor connection between the Mac and the Time Machine backup destination device.
The solutions listed below should repair time machine backup in most cases.
Solution 1 - Ejecting the Time Machine drive
Time machine issues may be due to bad disconnection practices such as disconnecting without ejecting the drive from the Mac.
- Go to "System Preferences"
- Access the "Time Machine" preferences window
- You will be presented with the Time Machine home window. Simply move the slider to the "Off" position in order to exit Time Machine.
- Now go back to the Desktop and look for the Time Machine Drive. Right Click on it and then select "Eject" from the resultant menu.
- Once it is ejected, power off the drive and disconnect it from the Mac.
- Wait for a few minutes and then reconnect the drive to your Mac once again.
- Wait for the drive to be shown on the Desktop of the Mac before restarting Time Machine.
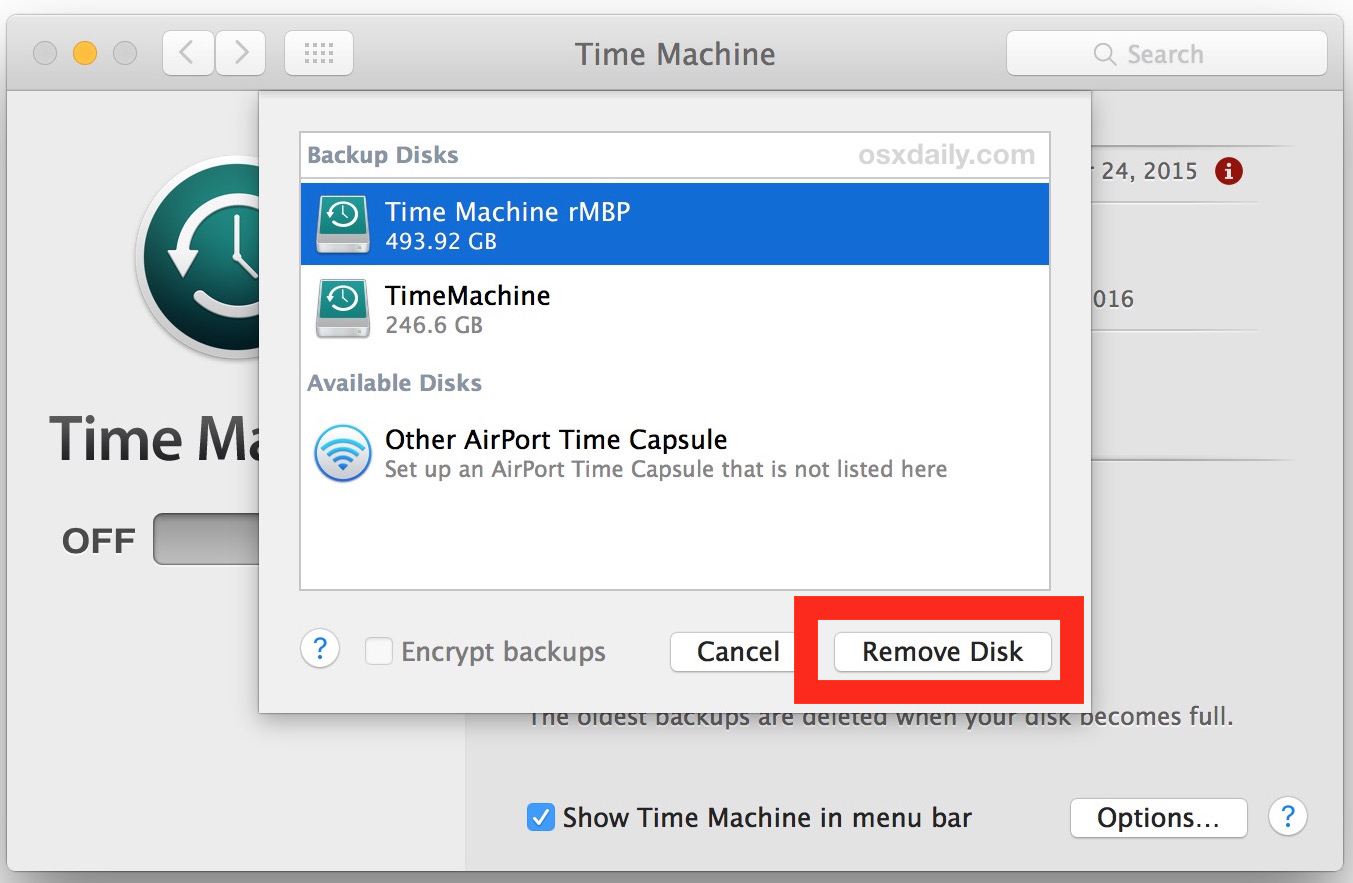
Now create a Time Machine backup and see if the "Time Machine Won't Backup" error has been resolved.
Solution 2 - Unmounting the Time Machine drive using Disk Utility
At times, the issue may not be due to bad ejecting practices, but simply because the drive was not initially mounted on the Mac. In this case, you should unmount the drive using Disk Utility.
- Start by following steps 1 to 3 in solution 1 above.
- From the Finder application, browse to "Applications > Utilities" to locate the Disk Utility.
- Launch the Disk Utility and go the sidebar. Select the drive and then click on the "Unmount" button located in the toolbar.
- Now proceed to eject the drive, wait for a few minutes before reconnecting it once more.
- Once it is mounted, Proceed as usual and create a Time Machine backup.
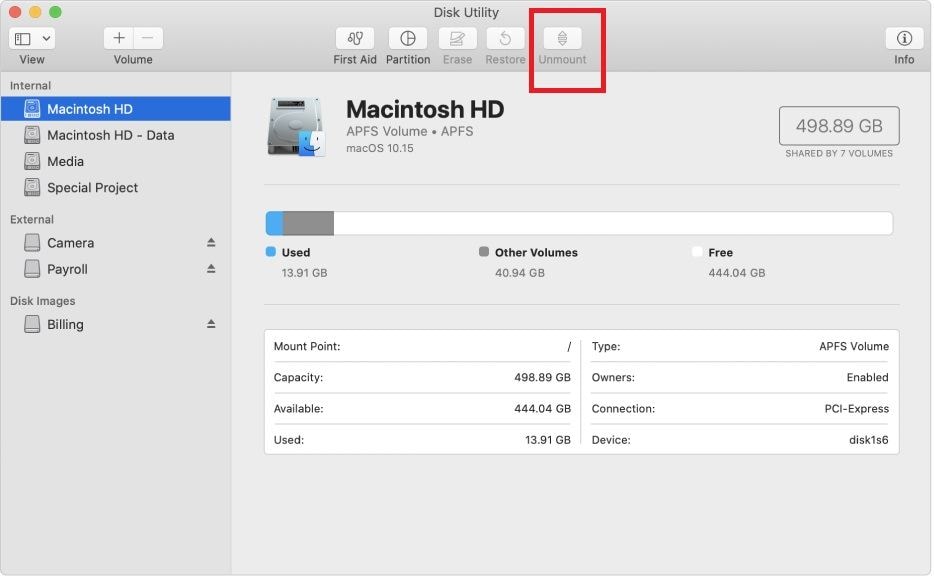
Solution 3 - Repairing the Time Machine drive
The "Time Machine Won't Backup" error may be caused by a faulty or malfunctioning Time Machine drive. In this case, you should use Disk Utility to try and repair the drive. This is a built-in feature that allows you to perform "Repair Disk" and "First Aid" functions to fix the faulty drive.
It is best to go through "First aid" followed by "repair disk" in order to rectify all errors on the drive.
Once you are finished, you may create a Time Machine backup once more.
Solution 4 - Run a File System Check using (FSCK) command
The "Time Machine Won't Backup Error" may be due to a bad file system structure. Mac has an inbuilt FSCK command that allows you to repair the file system and remove errors.
- Go to the Terminal tool in your Mac
- Now type in "/sbin/fsck –fy".
- Wait for a while as the file system is repaired.
- Once complete, reboot your Mac and then try to create the Time Machine Backup.
![Run a File System Check using [FSCK] command](https://images.wondershare.com/recoverit/article/2020/03/time-machine-wont-backup-11.jpg)
The solutions mentioned above will fix all non-critical "Time Machine Won't Backup" errors and you can proceed with your backups as you normally do.
Part 3 - Extra Error – Mac Files Lost After Backup
Sometimes, when you create backup files, you find that there are files that are lost or cannot be opened. This happens due to several reasons and can be a cause for concern.
1) Causes
- Formatting – you may accidentally format a disk or partition and lose your files.
- Accidental deletion – you may accidentally delete a file by pressing the wrong keys
- Improper use of Mac and backup features – removal of the backup disk without ejecting may result in data loss
- Computer Viruses – these may change the structure and formats of files making them unreadable.
- Sudden Power outage – this affects files that are in use and have not been saved at the time the power goes off.
- Improper OS upgrades – making wrong upgrades may affect your files.
- Bad Partitions – this is quite common and can easily be fixed.
2) Recovery Solution
Recoverit Mac Data Recovery is a powerful solution that enables you to recover more than 1,000 file types that could be lost on your Mac. It can also recover files from all types of file systems, such as FAT, NTFS, HFS+, and APFS.
Recoverit Mac Data Recovery similarly recovers data from all forms of external storage devices like Cameras, SSD Cards, Flash Disks, and more.
The backup process may bring about errors that may render the files unusable or lost, but this tool can help you get them back. It has been found to have one of the highest data recovery rates in the industry.
A Step-by-step guide to recover lost files and data using Recoverit Mac Data Recovery
Step 1 – Select the device
Launch Recoverit to access the home screen and then choose "Devices" or "Desktop" from the "Select Location" tab. Click "Start" to proceed.

Step 2 - Scan the location
Give Recoverit Mac Data recovery a few minutes to scan the desired location. You can stop/pause the scanning process once you have found your missing file(s).

Step 3 - Preview the files
This tool allows you to preview the recoverable files, so you can easily access the specific files that you need. The preview is in the form of thumbnails.
Go to the panel on the right and click on the "Preview" button. You can only preview files that are smaller than 15MB in size.

Step 4 – Complete the recovery and save your files
After reviewing the files, click on the "recover" button and your files will be opened. Make sure that you save the files to a different location to avoid data overwriting.
NOTE: With this method, you can recover files that were lost or deleted from your hard drive during the Time Machine or another backup process, such as iCloud.
Part 4 - Prevent Time Machine Backup Problems
You can easily avoid losing files after a Time Machine backup by following the few simple tips outlined below:
1. Right Steps on Using Time Machine Backup
- Connect your Time Machine storage device; wait for it to be properly mounted.
- Make sure the selected device is your storage destination
- After connecting the backup device, wait to be asked whether you want to use it with Time Machine. Click on "Encrypt Backup Disk" followed by "Use as Backup Disk".
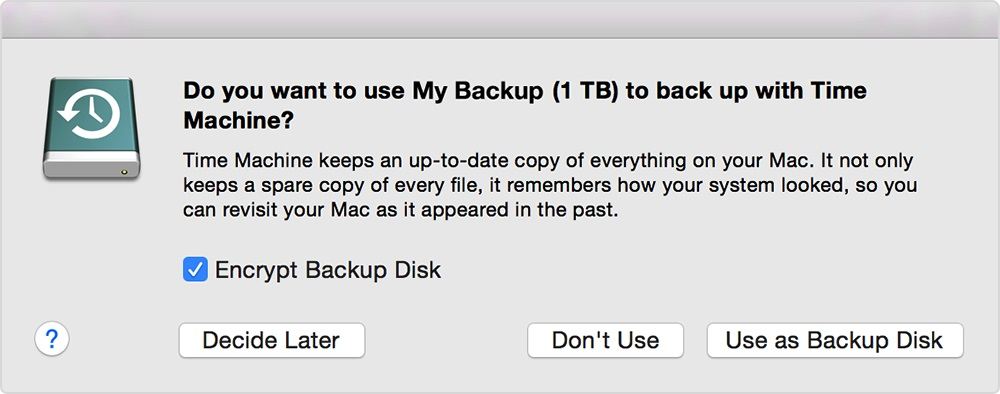
Sometimes, Time Machine will not automatically prompt you and you have to add the storage device to Time Machine manually. Follow these steps.
- Go to "Time Machine Preferences" and click on the Time Machine icon. You may also use "Apple Menu > System Preferences" then click on "Time Machine".
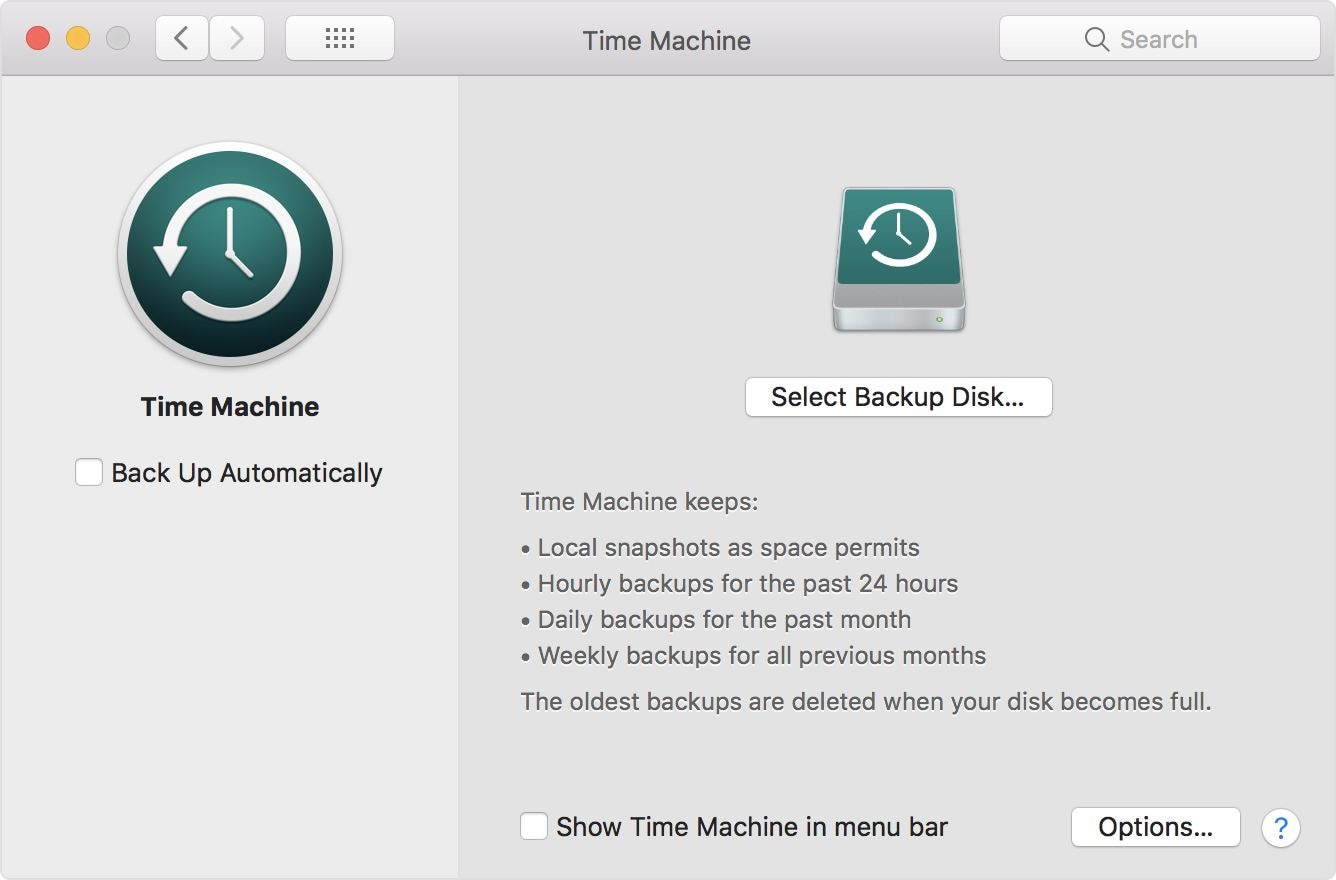
- Click on "Select Backup Disk" and then choose your external disk from the resultant list. It is recommended that you choose "Encrypt Backups" for the security of your files. Finally, click on "Use Disk".
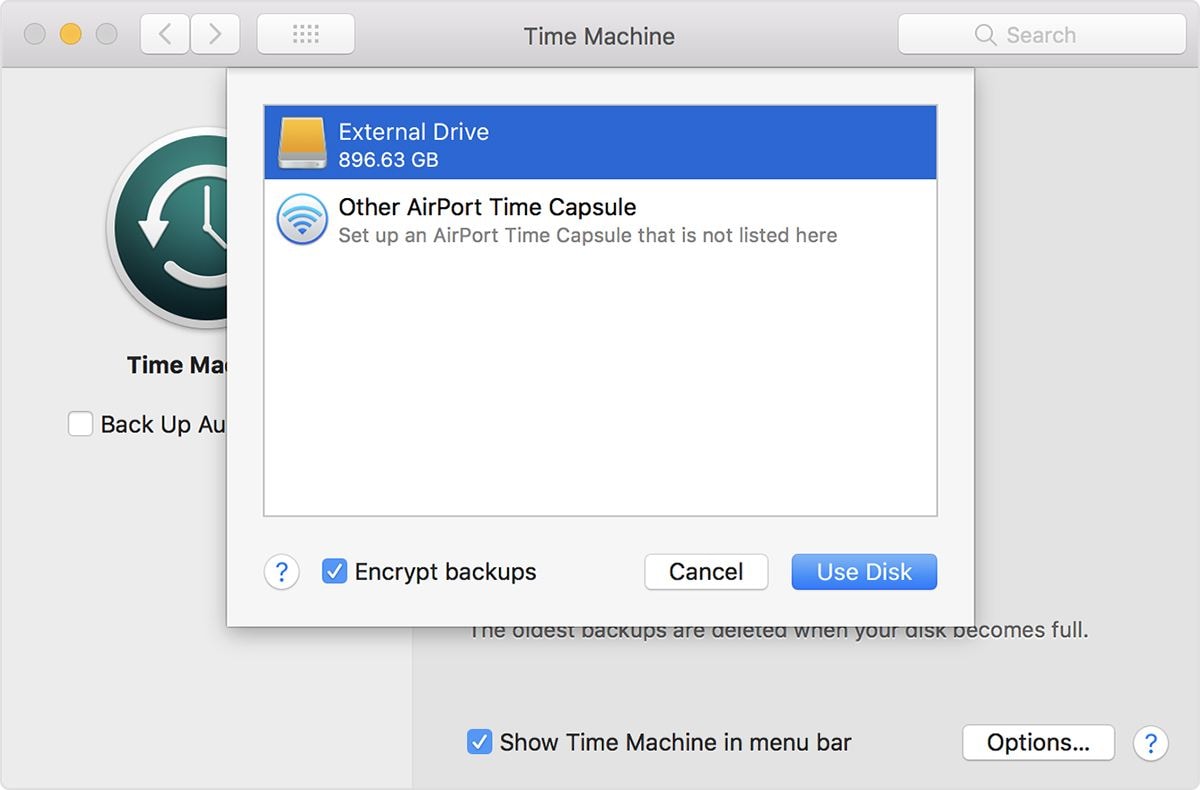
Time Machine may ask you to erase the disk if it is not in a format that can be used by Time Machine. Click on "Erase" to continue.
2. Right Tips to Prevent Time Machine Problems
- Set up your Time Machine properly right from the start
- Connect and disconnect the time machine drive properly every time you use it
- Make sure that you fix errors on time
- Get a good data recovery program such as Recoverit Mac Data Recovery in case you do end up losing data when creating a Time Machine backup.
In conclusion
Time Machine is a great tool for backing up files from your Mac to an external drive. If you get a Time Machine Won't backup error, follow the steps outlined in the guide above and fix the problem. Should you lose any files, use Recoverit Mac Data Recovery to get your files back.
What's Wrong with Mac
- Recover Your Mac
- Fix Your Mac
- Delete Your Mac
- Learn Mac Hacks



![Run a File System Check using [FSCK] command](https://images.wondershare.com/recoverit/article/2020/03/time-machine-wont-backup-11.jpg)


Sue Wayne
staff Editor