Tips for DSLR Camera Repair and Troubleshooting
"How to perform DSLR Camera repair? I can't access my photos and videos on the camera. Is there any way to recover data from my DSLR camera? What should I do?"
The creation of the "digital single-lens reflex" or DSLR camera has made our lives convenient by allowing us to store precious memories for a lifetime. However, it can cause quite a bit of stir in our everyday routine if it suddenly stops working, which can happen due to several factors.
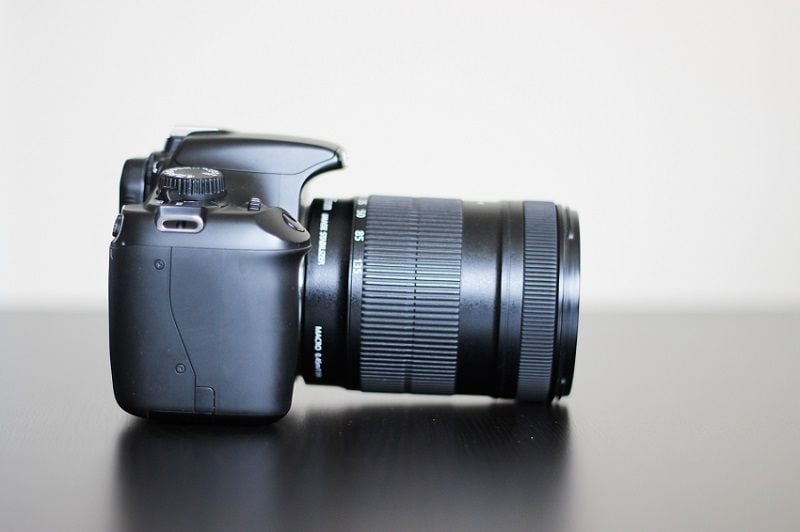
Stay and read our guide to quickly learn tips for DSLR camera repair and troubleshooting. And if you accidentally lose your camera files, then we will show you the most straightforward way to recover photos and videos using the Recoverit file recovery application and the method to repair broken video files.
Part 1: An introduction to the latest DSLR Camera.
Announced on August 28, 2019, by Canon, the EOS 90D is the latest DSLR camera to brace the market for photography enthusiasts. Its 32.5-megapixel sensor is the highest resolution for any DSLR you can buy, which does its work in 10 frames per second. The advantage of such a high-resolution is that you will be able to capture more details while getting the flexibility to edit the picture quickly during post-processing, without compromising on image quality.
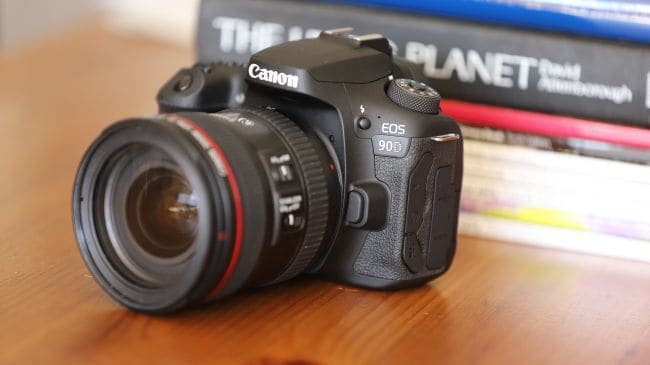
EOS 90D is the successor of one of the highly popular cameras in the world, the EOS 80D, but it follows all those attributes, which made 80D a standout. The features of Canon EOS 90D are as follows:
- It offers Uncropped 4K/30p video.
- The camera has an Ergonomic grip and Joystick control for the convenience of the photographer.
- Canon's latest DSLR has a new 32.5MP APS-C High-resolution image sensor.
- Moreover, it features a 220K RGB+IR metering sensor.
- You can use the option of Wi-Fi and Bluetooth connectivity to ensure smooth file transfer with the new camera.
- EOS 90D features a USB Type-C connector.
- Much like the older models of Canon cameras, EOS 90D has a similar LP-E6N battery.
- It is water and dust resistant but not entirely waterproof, so you are required to be extra careful.
- Furthermore, it covers almost 100% of the frame by offering a magnification of around 0.95x.
- The latest DSLR model provides a Dual Pixel CMOS AF system with precise face tracking.
Canon's EOS 90D is a welcome addition to the DSLR family and a must-buy for photography enthusiasts.
Part 2: Tips for DSLR Camera Repair and Troubleshooting.
Any electronic device, nevertheless a DSLR camera, can become faulty at any moment if you do not handle it with care, which can get extremely frustrating. DSLR camera-related issues can manifest in several ways, which could hinder the process of photo making by disturbing things like image quality.
If the issue to your DSLR camera is related to physical damage, then it could get confusing for you to resolve, and you should immediately send your camera to a repair center. However, some other issues are straightforward to fix and only require a small bit of troubleshooting. In this section of the editorial, you will learn different easy-to-follow tips for DSLR camera repair and troubleshooting.
1. Camera Won't Power On:
Probably the most fundamental problem photographers might endure from their DSLR camera is that they can't get it to "Power on." Such an issue can arise due to many factors, which are as follows:
- The camera's battery is empty, or you had improperly inserted it into the DSLR
- The battery has dirty metal contacts.
- Your battery might be permanently broken.
- The latch of the battery compartment might be loose due to external trauma.
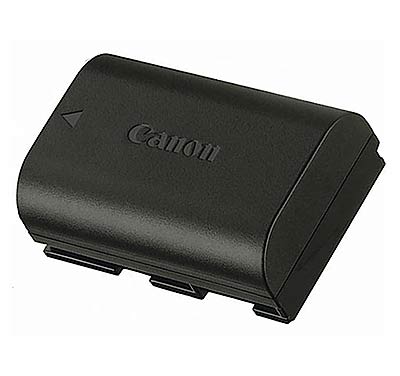
You can fix the "Power on" issue by merely recharging the drained battery and make sure it is fully charged or purchase a new one from the market if it is not working entirely. Furthermore, it would help if you make the battery compartment free of carbon, grime, and other particles that could interrupt the metal contacts and the function of the battery.
2. LCD of the DSLR Camera is Blank:
Some older cameras typically have the "monitor" button, which allows you to power on and off the LCD anytime you like, make sure to check whether you had accidentally pushed the button.
Other such instances of LCD not turning on happens when your camera is locked. You can fix it by removing the battery and the SD card from the device for 10 minutes before starting the DSLR camera again.
Additionally, the display screen of the DSLR camera goes blank after a specific period of idleness, which occurs when you have the power-saving mode enabled in the camera. You can fix such a problem by increasing the time limit of sleep mode.
3. Camera Won't take Photos:
There could be many factors behind the problem when you are unable to take snaps from the DSLR camera, which one can quickly fix. One of those instances could occur if you have set the camera on a wrong mode like the video or playback mode, which you can adjust by turning the DSLR back to photography mode.
Other than that, make sure you have ample space in your SD card for additional photographs; you should keep a backup memory card to tackle such kind of emergency. Some newer versions of the SD card tend to resist working with an older camera, make sure to check how much does an internal software of the camera allows you to take pictures in a single memory card. Furthermore, you should always check the health of the SD card, as it tends to stop working, if neglected or not handled with care. While transferring photos from the SD card to the computer, please make sure your PC does not have any malware/virus in it. The system should have an excellent antivirus to resist any attack.
4. Photo Quality of the DSLR Camera is Poor:
Poor photo quality is directly associated with the improper functioning of the DSLR camera, and you can repair such a concern by adjusting the zoom function, framing, and the sharp focus of the camera. If you are using taking photographs as a beginner, then it is best to keep the DSLR camera in automatic mode, which will allow you to shoot photos with complete certainty.
Other than adjusting the built-in camera setting, make sure you're the lens of the camera is clear and doesn't have any smudge on it. If you still having trouble with blurry images, then you should use a tripod or the DSLR's stabilization feature for a high-quality picture.
Part 3: How to Recover and Repair DSLR Camera Videos?
If you have lost videos and photos from your DSLR camera and think that they are gone for good, then you are in luck as not only you can recover all the erased video files, but you can repair the video files if they are corrupted or broken with Wondershare's Recoverit video recovery software. Here are some of Recoverit application's limitless features:
- The app offers support in more than 1000 file-formats for videos, audios, photos, animation, documents, and much more with near-perfect accuracy.
- It allows video recovery from an extensive gallery of external devices such as DSLR camera, external hard drive, SSD, USB, among others.
- It doesn't matter whether your external drive is in FAT, NTFS, or HFS+ format, Recoverit video recovery program is compatible with all of them.
- You can easily save the retrieved files to any other location of your choice.
- Other than supporting external devices, Recoverit recovers video files and others from lost partitions, crashed computers, and recycle bin.
- It is available for free(Basic Version) on all the latest and older versions of Windows and macOS X.
Here's how you can take the assistance of the Recoverit Data Recovery app and learn how to recover the lost video files from a DSLR camera.
Step 1: Select a location:
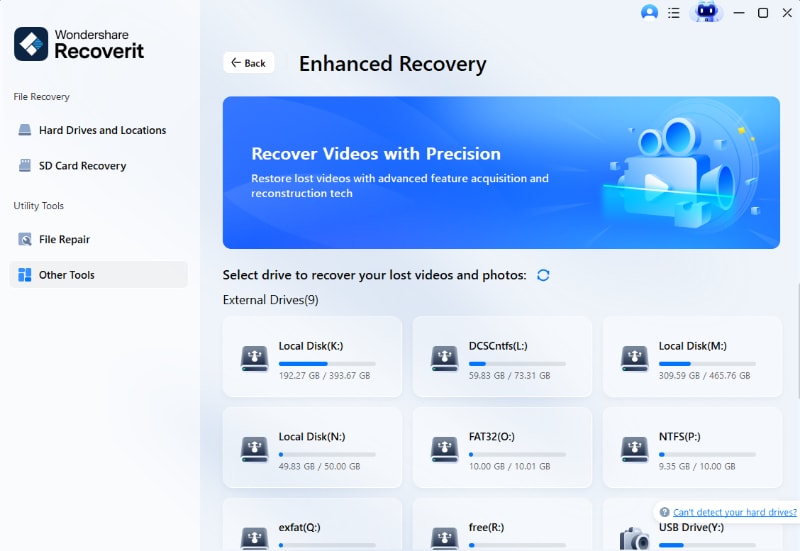
Connect your DSLR directly to the PC or insert its SD card with the help of a card reader. After connecting the memory card, launch Recoverit on your PC and select the location of your DSLR camera under the "External Devices" section. Click on start after performing all the mandatory procedures to initiate the scanning process.

Step 2: Scan the Location:
After selecting the location, click on start to begin the scanning process. You will have to wait for a few minutes as the Recoverit Video Recovery app will scan the location of your DSLR camera and recover every video and photo file from it. You can pause/stop the scan at any time if you find the required video early. Once the program completes the scan on the DSLR camera, it will notify you with a pop-up dialogue box.

Step 3: Preview the File
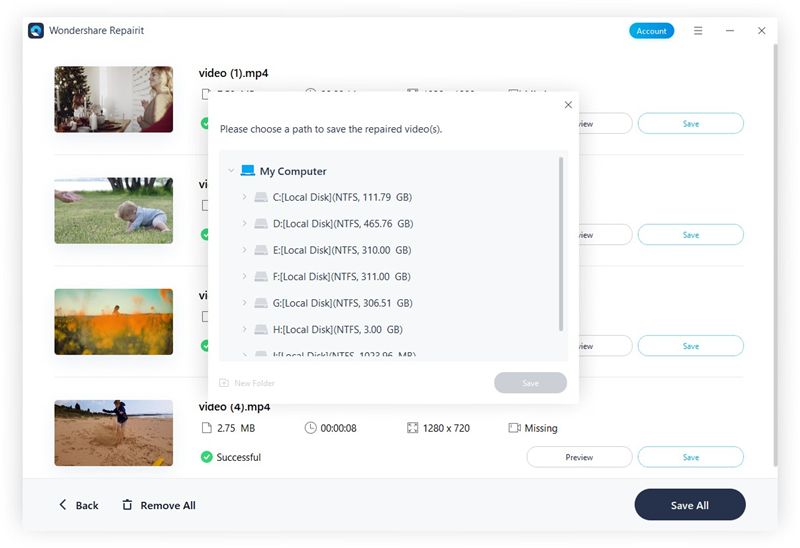
You can double-click the file to preview the recovered video. And then click the "Recover" button to save the file.

Advance Video Recovery function of Recoverit:
The method of recovering videos from a device is different from the rest of the file formats, somewhere down the process, you might find a broken/corrupted video file. But it would help if you didn't worry as Recoverit Data Recovery Ultimate supports the Advance Video Recovery feature, which not only scans the fragments of the corrupt videos but gathers and matches to make them watchable. Recoverit allows you to recover videos from external devices, including DSLR, Digital cameras, Drones, Action Cameras, Dashcams, camcorders, SD card, PC, and HDD. Here are some of the characteristics of Recoverit's Advance Video Recovery function.
- It scans and matches your video fragments.
- After matching the fragments, it merges them from the same video.
- The advance video recovery function keeps 95% of the recovered videos intact without corruption
You can check your videos through the advanced video recovery section, which you can access while using Recoverit's preview feature. Advance video recovery retrieves the video file in the DSLR or the memory card with excellent efficiency.
Video Repair by Recoverit:
Video files are delicate, and they are prone to get corrupted or broken if you inadvertently erase them from your DSLR camera. However, with the assistance of Video Repair, you can repair your precious videos in no time. Below are some of the unique characteristics of the video repair feature:
- It supports two video repair modes which are as follows:
- Quick Repair: This mode fast tracks the repairing process by checking and fixing various video errors from the device at hand.
- Advance Repair: This mode carefully analyzes the data of the video and fixes it.
- It supports multiple video file formats and allows you to repair more than one file simultaneously.
Here is the step-by-step guide to repairing corrupt video files with Recoverit:
Step 1: Add your corrupted videos
Launch the application on your computer. To repair your corrupted video files, you can add it through clicking the Add button or "Add video and start repairing" area.

Step 2: Repair your videos
As soon as you have added all the corrupted videos, click on the Repair option to start the video repair process.

Step 3: Preview the videos
It will take some time to repair and once it has finished the repair process, a reminder showing info of successful fix will pop up on the screen. Press OK to close the operation.

Step 4: Advance mode for severely corrupted video (optional)
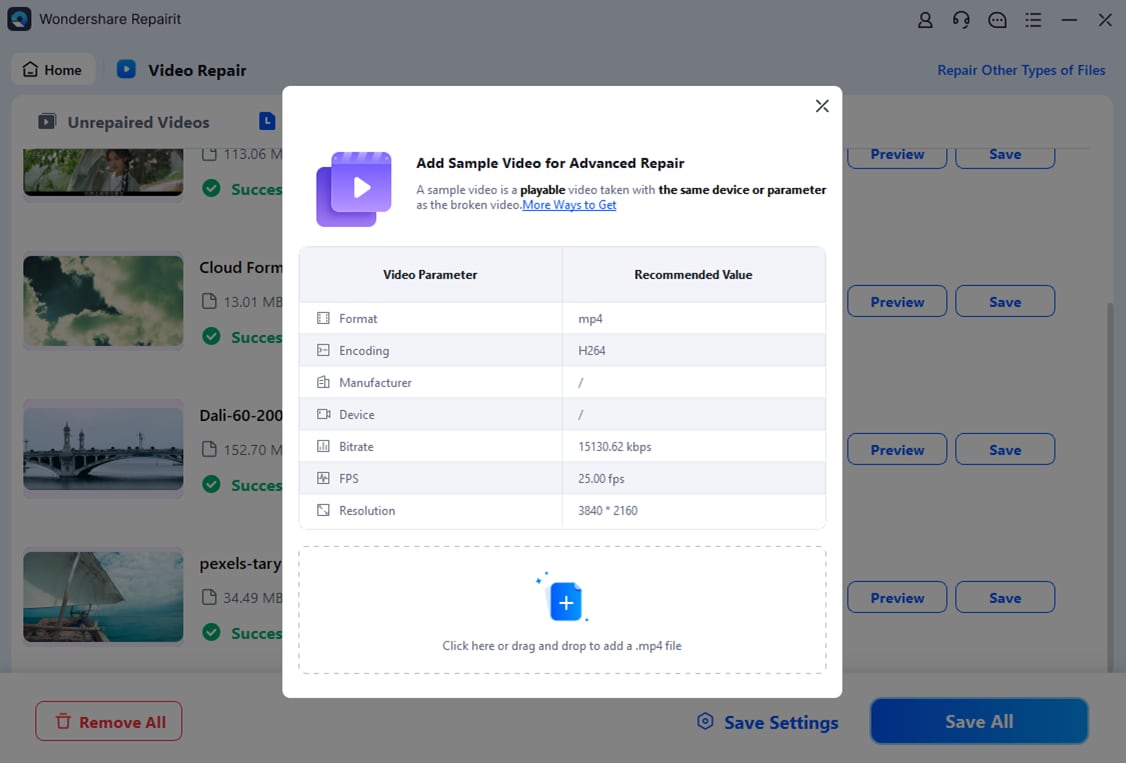
If the videos are severely corrupted and not repaired successfully, please go to the advanced repair mode. Just click the Advanced Repair button.
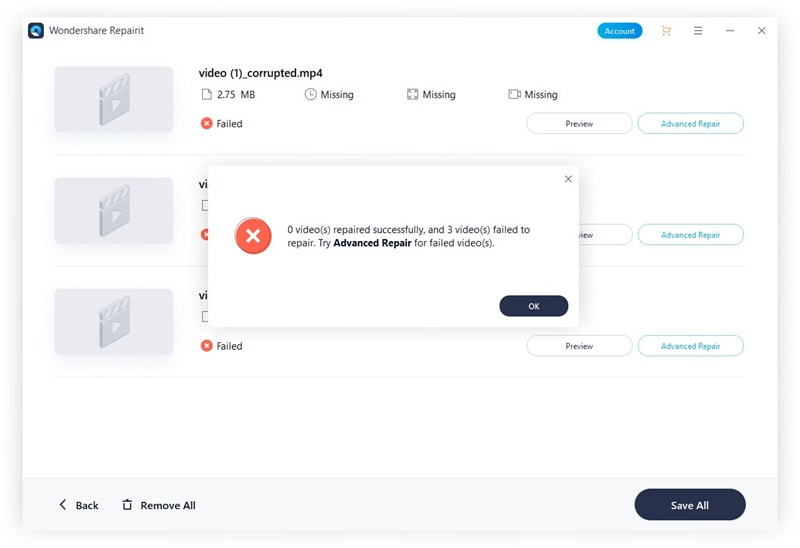
Then add a sample video and repair it now.
Step 5: Save repaired video
The advance repair will perform the repairing process and prompt a success message when the process is completely done. Now, you can play these videos and you will not see any error on the screen.
Bottom Line:
Other than being a handy gadget to keep the blueprint of important memories, a DSLR camera is a delicate electronic device, which needs proper care. One single mishap could erase every last bit of videos and images.
With the guidance of our article, you now know the fundamental tips and tricks to perform a DSLR camera repair. However, f you fail in repairing your DSLR camera and lose your data in the process, you can easily retrieve all of them with Recoverit's Video Recovery Software.
Solve Media File Problems
- Recover & Repair Photos
- Recover & Repair Videos
- Recover & Repair Audio
- Recover & Repair Cameras


 ChatGPT
 Perplexity
 Google AI Mode
 Grok
Grok


Eleanor Reed
staff Editor