How to Take Windows 10 Backup to a USB Flash Drive: 3 Smart Solutions
“Can I backup Windows 10 to a flash drive – and if yes, then how to back up a computer’s folder to flash drive in Windows 10?”
This is a recent message that a friend of mine texted me as he was finding it hard to take a USB flash drive backup. Ideally, a USB drive is the best way to back up your Windows 10 data. It is a handy solution and can accommodate plenty of data easily that you can later restore to your computer. The best part is that it is easy to maintain a Windows 10 backup to a USB flash drive. In this post, I will discuss 3 smart solutions on how to save Windows 10 data to a USB drive.

Why Taking a Copy of Windows OS Backup is Important?
Ideally, there are all kinds of reasons to take a Windows 10 backup to a USB flash drive. Here are some of the possible scenarios in which taking a backup would come in handy.
- If your Windows PC is not able to boot properly, then a bootable media (USB recovery drive) can troubleshoot the issue.
- A system backup would include all the essential Windows files, letting you fix issues like corrupt firmware.
- If your computer’s hard drive has been formatted or suffered from missing fragments, then you can get your data back from its backup.
- Since you have a second copy of your important files, you won’t lose them unexpectedly.
- Taking a backup of Windows 10 to a USB drive is the safest and the cheapest option (compared to cloud backup).
Method 1 | Backup Windows 10 to USB Through AOMEI Backupper
A system backup is one of the best ways to save your Windows files as it would create an image of your system to the USB drive. For instance, if your Windows is installed on the C drive, then a system backup would create an image of the drive (including system and boot files) to a USB drive.
To back up the Windows 10 image file to a USB drive, you can use a professional tool like AOMEI Backupper. The application is known to take different types of backups and would provide a stepwise solution for taking a USB flash drive backup. To learn how to use a flash drive to back up your computer, simply connect a USB drive and follow these instructions.
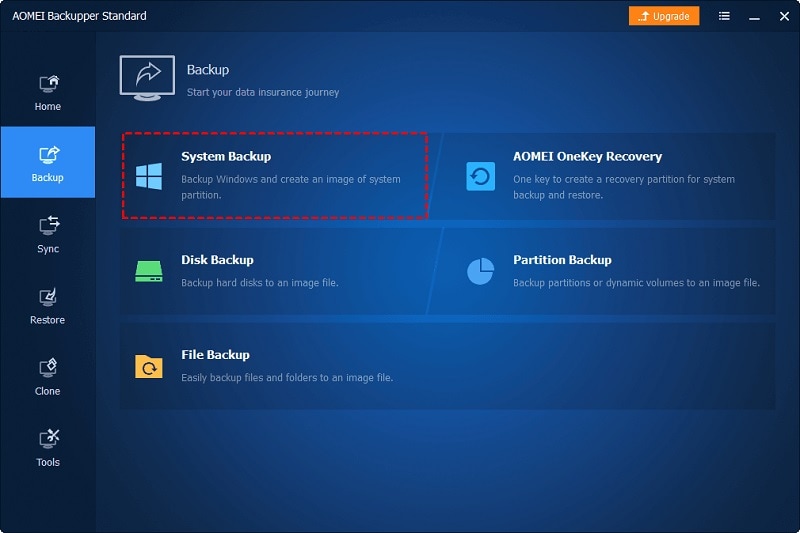
Step 1: Select the System Backup feature in AOMEI Backupper
Simply install and launch the AOMEI Backupper application on your computer and go to its “Backup” module from the sidebar. From the provided options for the backup, just select “System Backup” and continue.
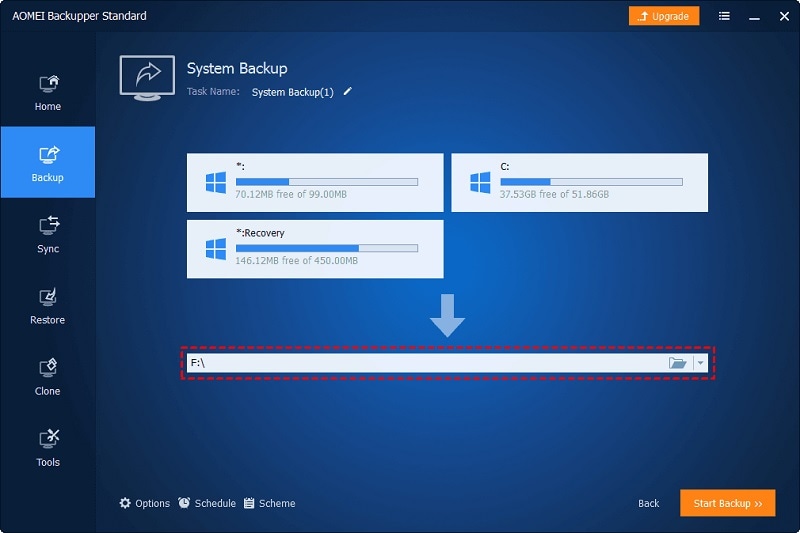
Step 2: Choose the USB Drive to Save the Backup
Now, the application will automatically provide a list of the available partitions and drives. From here, you can select the connected USB drive as a destination to save the system backup. Beforehand, make sure that your USB drive should have enough free space to accommodate the backup of your system.
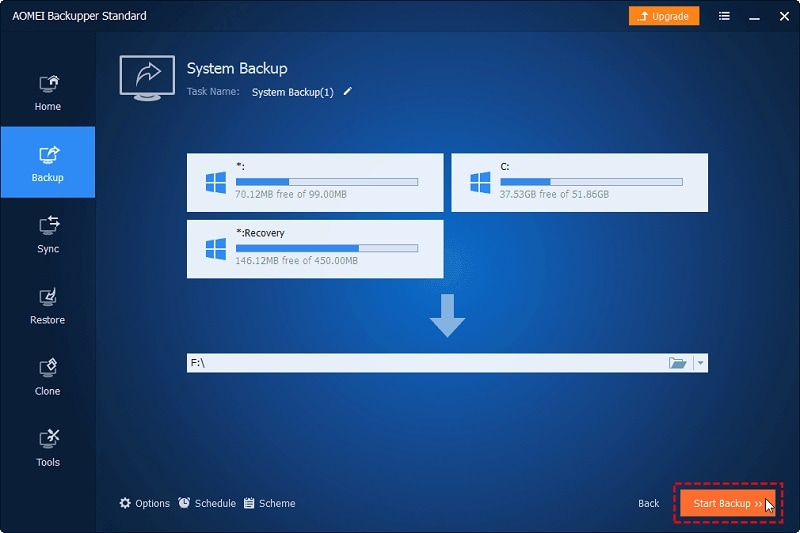
Step 3: Take Windows 10 Backup to the USB Flash Drive
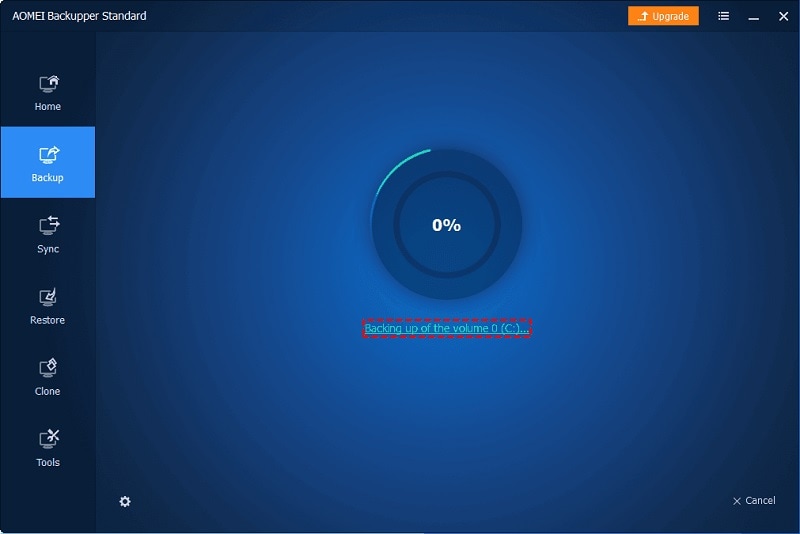
After selecting the USB drive as the target location to maintain the system backup, just click on the “Start Backup” button. This would automatically backup Windows 10 image to the USB drive.
If you want, you can click on the gear icon from the bottom to select the desired operation to perform after the backup process (like restarting or hibernating the PC).
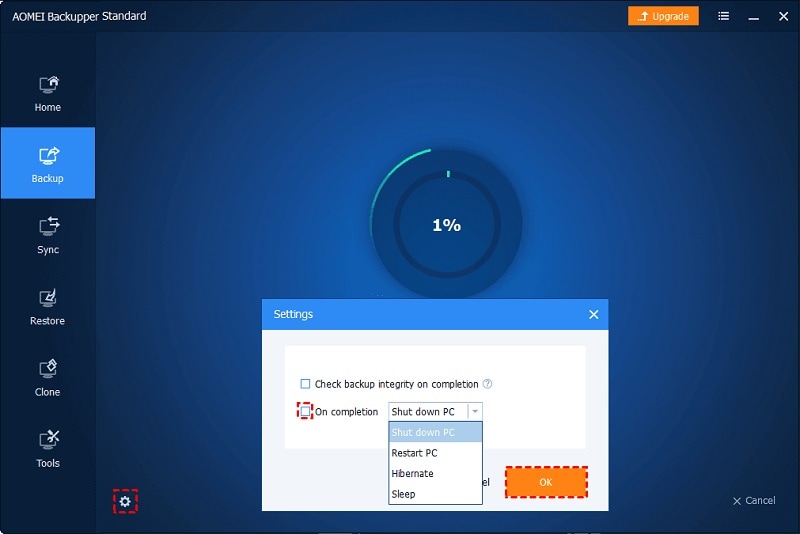
That’s it! Now, you can just wait for a while as AOMEI Backupper would backup Windows to the USB drive and will let you know the progress from an on-screen indicator. When the process is completed, AOMEI Backupper will notify you of the same.
You can now safely remove the USB drive and can even check the backup file. Later, you can go to the Restore section of AOMEI Backupper to extract the system backup however you like.
Method 2 | Backup Computer Files to a Flash Drive on Windows 10
As you can see, it is pretty easy to backup a Windows 10 image to a USB drive with a tool like AOMEI Backupper. Apart from that, you can also take the assistance of Wondershare UBackit to back up user data to your USB drive or any other storage.
- UBackit will let you select the files and folders that you wish to include in the backup.
- There are inbuilt filters and search options to easily find the files/folders to save.
- You can maintain a dedicated backup of the entire disk/partition to any internal storage or an external source (like a USB drive).
- It can maintain different versions of the backup and takes incremental backups to save the overall storage.
- Wondershare UBackit has an inbuilt virus scanner and a storage manager feature. It can also be used to set up automatic backup as per your preferences.
To learn how to use a flash drive to backup your computer’s data via Wondershare UBackit, you can follow this drill.
Step 1: Choose to Create a New Backup
To learn how to save Windows 10 backup to a USB drive, you can first launch Wondershare UBackit on your computer. Afterward, go to its “Backup & Restore” option from the sidebar and click on the “Create New” button.

Step 2: Select the Files to be included in the Backup
Now, UBackit would provide a list of the available drives and partitions on your Windows system. You can just visit any partition or folder to select the data to be included in the backup.
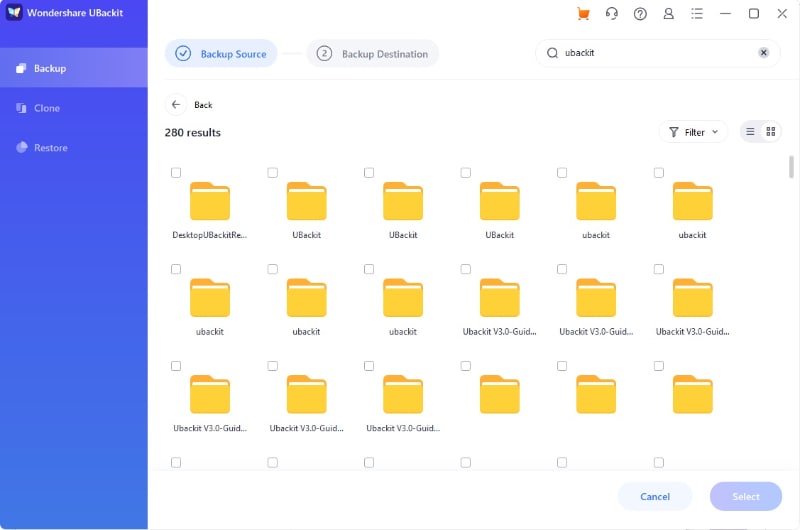
If you are looking for specific files, then just enter keywords on the search bar to find specific data of your choice.
At the top of the interface, you can find an inbuilt filter that would let you select the specific data types to back up (like photos, videos, documents, and more).

Step 3: Choose to save your Backup to the USB Drive
After you have selected the data to back up, Wondershare UBackit will ask you to save the file at any location. From here, you can just select the connected flash drive as the destination to backup Windows data to a USB drive.

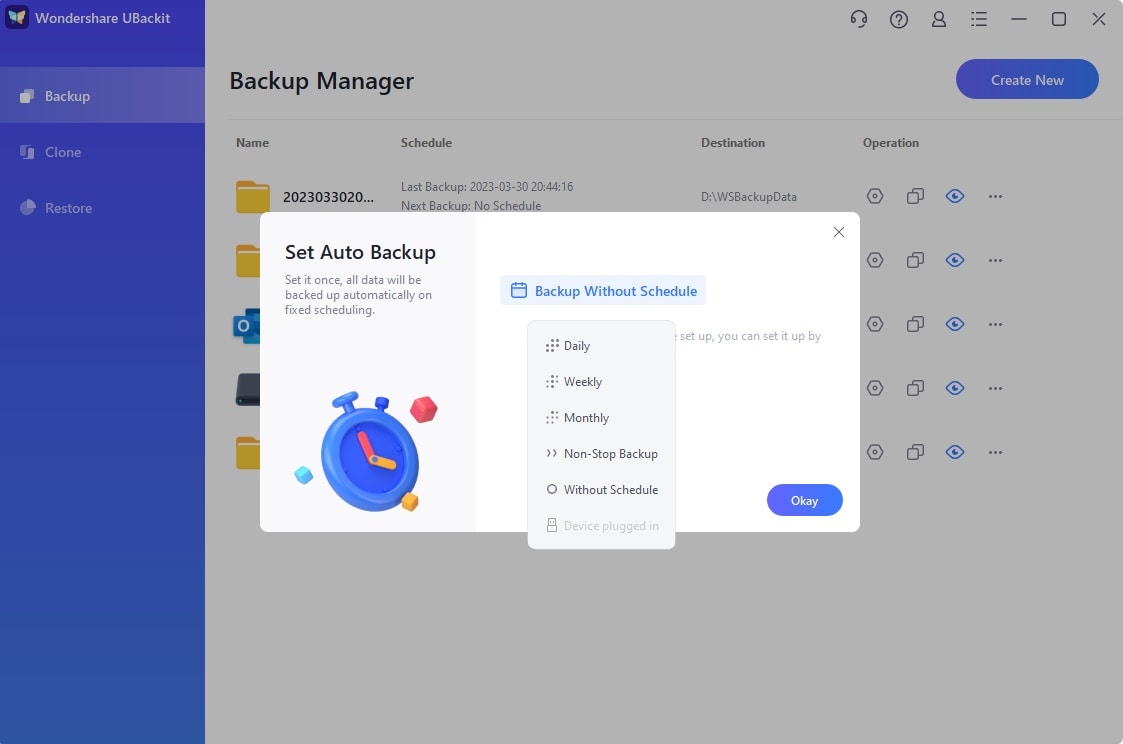
Additionally, you can find an Auto Backup option from the top of the interface. This will let you select a preferred schedule (like daily, weekly, or monthly) to automatically back up your data.
Step 4: Maintain Windows 10 Backup on the USB flash drive
In the end, just click on the “Backup” button and simply wait as Ubackit would maintain the dedicated USB flash drive backup of your data. You can wait for a while and try not to close the application in between till the backup process is completed.
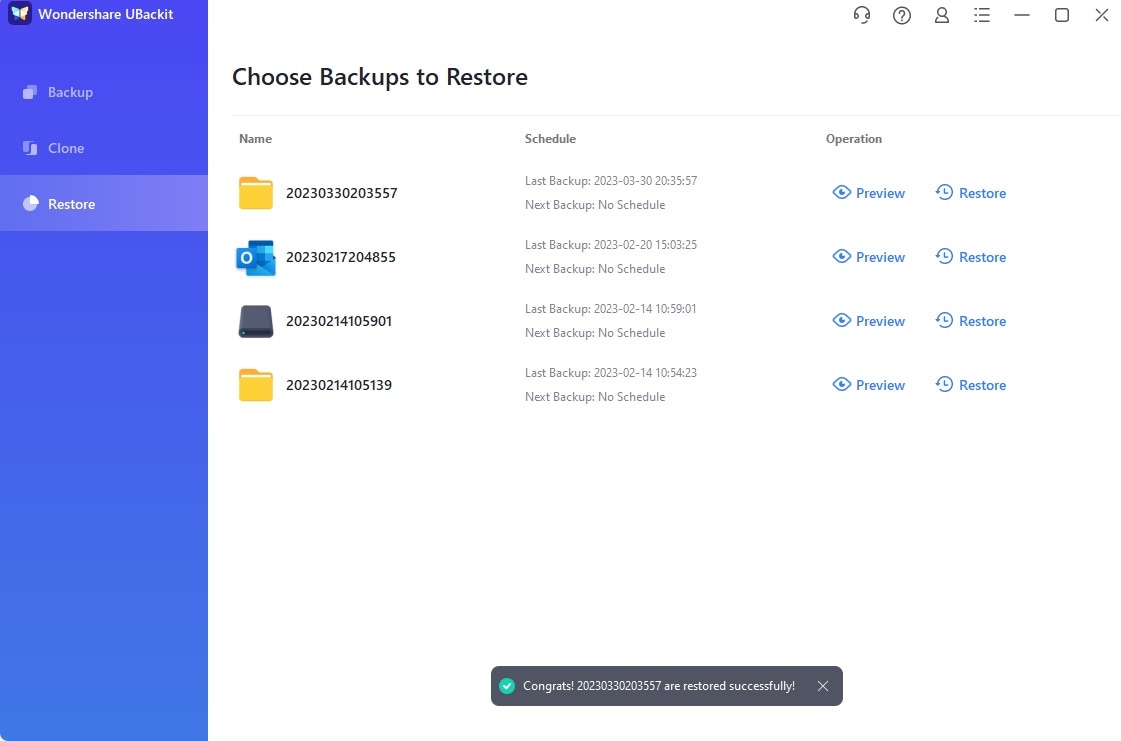
You can now safely remove the USB drive and can later take the assistance of UBackit to restore your Windows backup as per your requirements.
Method 3 | Copy Windows 10 Folders to a USB Drive Manually
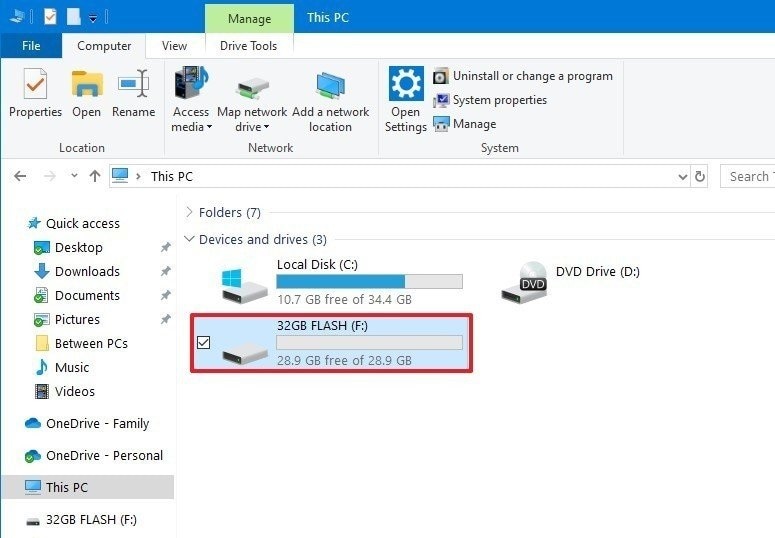
Lastly, you can simply choose to backup Windows 10 data to a USB drive manually. For this, you just need to connect your USB drive to your computer and let it detect it successfully.
Afterward, you can launch Windows Explorer and find the connected USB drive in My Computer (This PC). Now, all you need to do is browse the files on your system, copy them, and paste them to the connected USB drive.
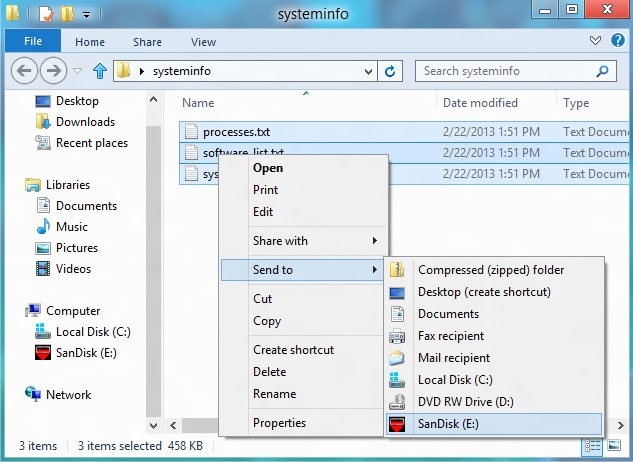
Alternatively, you can just select the files you wish to back up, right-click and directly send them to the connected USB drive. Since it is a more time-consuming process, it is only recommended to follow this to back up a few files. Also, you should note that it can only take a backup of user data and can’t maintain the Windows system image.
By now, you would be able to maintain Windows 10 backup to a USB flash drive easily. If you want to backup a Windows 10 image to a USB drive, then AOMEI Backupper would be an ideal choice. Though, to take the USB flash drive backup of your data, Wondershare UBackit would be the best solution. It can easily maintain dedicated backups of your data to any preferred location that you can later restore to your computer without any hassle.
Data Backup Services
- Computer Backup
- Hard Drive Backup
- Mac Backup
- Cloud Backup


Amy Dennis
staff Editor