
 TL;DR:
You can clone an HDD to an M.2 SSD by first verifying your motherboard's PCIe or SATA interface and UEFI boot compatibility, then completing the data transfer using software like Wondershare UBackit, a physical docking station, or a bootable Clonezilla USB.
● M.2 NVMe SSDs must be partitioned to GPT to support mandatory UEFI booting, and the new drive must be manually initialized in Windows Disk Management before any cloning process can begin.
● Wondershare UBackit offers a straightforward cloning method provided the destination SSD capacity is larger than the source HDD, while the free Clonezilla ISO image requires a complicated USB BIOS boot process and manual partition table selection.
● Hardware docking stations from brands like Inateck, WAVLINK, or SSK bypass the need to open the computer case, but they are the most expensive option and still require secondary cloning software to execute the transfer.
Ask AI for a summary
 ChatGPT
 Perplexity
 Gemini
 Claude
 Grok
Grok
Do you have a slow computer? What if you could accelerate things by upgrading to a faster storage device? You can easily do it by cloning your data on an SSD. Cloning your existing HDD to an M.2 SSD allows you to transfer all your data, including the operating system and programs. It only takes simple steps and a little time. In this guide, the process of how to clone an HDD to an M.2 SSD will be thoroughly discussed.
Table of Content
What Is an M.2 SSD?
SSDs are popular drives that are now standard equipment for most computers. SSDs, unlike hard disk drives, employ persistent flash memory to store data rather than disks, motors, and read/write heads. SSDs have become popular because they outperform HDDs in performance and power consumption.

One popular type of SSDs is the M.2 drive. M.2 SSD is considered the latest Solid-State Drive (SSD) version. It is significantly faster than a standard SSD. Higher performance and smaller size are the two most essential reasons people clone an HDD to M.2 SSD. An M.2 SSD with NVMe protocol connects directly to the motherboard. Thus, allowing for substantially higher data transfer speeds of up to 3500 MB/s.
Other SSDs are NVMe drives, which can be connected to a motherboard's PCI Express (PCIe) slot rather than SATA bandwidth. M.2 SSDs are typically less expensive than NVMe drives. However, you should consider the performance boost an NVMe drive can provide. If you need huge file transfers or the fastest gaming speeds, a higher-priced NVMe SSD is worth the investment.
While other NVMe drives give read/write speeds ranging from 200 MB/s to 550 MB/s. However, the performance of an AHCI M.2 SSD is identical to that of a SATA SSD. Furthermore, M.2 SSDs are substantially smaller than standard SATA SSDs.
Next, we will explain how to easily clone an HDD to M.2 SSD.
Prerequisites
Before purchasing or replacing an HDD with M.2 SSD, you should consider the following:
1. Check to see if your device supports M.2 SSD.
Only the most recent motherboards will support this new SSD, so look for the M.2 interface first. It should be an approximately an inch wide horizontal slot labeled "PCIe" or "SATA" or both. Because PCIe devices will not operate with SATA connections and vice versa, you must acquire a corresponding M.2 SSD.
2. Ensure that the motherboard supports booting from an M.2 SSD.
Booting from an NVMe PCIe SSD is only possible on systems that support UEFI. If the intended drive is an M.2 NVMe SSD, it will only boot in UEFI mode.
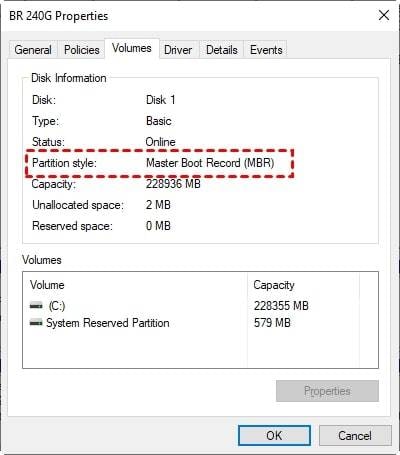
3. Check that the M.2 SSD has the correct partition style.
A disk can be partitioned into several blocks, known as partitions. Each partition must have a partition style (GPT or MBR) to help Windows understand how to access the data on the drive. The partition style must be compatible with the boot mode (MBR/Legacy BIOS and GPT/UEFI) to guarantee that Windows boots successfully.
In other words, if you purchased an M.2 NVMe SSD, it should be partitioned to GPT to support UEFI boot; if you purchased an M.2 SATA SSD, there should be no particular partition type or boot mode requirements. However, GPT is still preferred because it is better compatible with the latest operating systems.
Note:
- To inspect the partition style, press Win + R to open the Run window.
- Type "diskmgmt.msc" and hit OK to open disk management.
- Then, right-click the disk and select Properties > Volume > Partition style. You can change the partition style after eliminating all volumes from the drive.
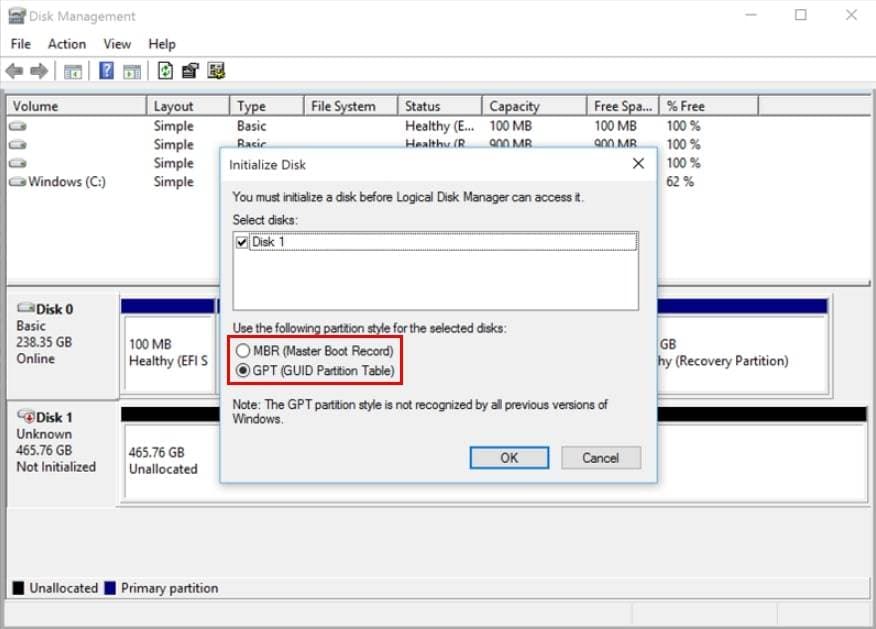
4. Check that Windows can detect the M.2 SSD.
If you insert a new disk into your computer and it does not appear in File Explorer, you may need to set it up.
Note:
- After launching Disk Management, right-click the disk you want to initialize and select Initialize Disk.
- If the disk is marked as Offline, right-click it and select Online.
- Then, select the correct partition style in the Initialize Disk dialog box, then click OK to confirm it.
After completing all the preparations, you can clone an HDD to M.2 SSD. Adhere to the steps listed in the following section.
Three Methods for Cloning HDD to M.2 SSD
There are different tools and ways to clone an HDD to M.2 SSD. See it below.
Method 1. Using Disk Cloning Software - Wondershare Ubackit [Simple and Fast]
Because Windows lacks cloning functionality, you may require the assistance of a reliable third-party M.2 cloning software. Try Wondershare UBackit, as it offers a convenient way to clone an HDD to M.2 SSD. UBackit allows you to clone partitions and drives as long as the backup destination's capacity is bigger than the backup source's.
What makes it so thrilling is the fact that you can enjoy a complimentary one-month trial period which enables you to clone your HDD onto an M.2 SSD without any cost.

Wondershare UBackit - Your Reliable Outlook Backup Tool
Disk Clone: You can clone hard drive to SSD or another HDD easily. It supports a wide range of disk types, such as HDDs from all brands, SATA/M.2 SSDs, NVMe SSDs, USB drives, NAS drives, and SD cards.
Partition Clone: Instead of cloning the entire disk, you have the option to clone a particular partition.
Sector-by-Sector Clone: You are allowed to replicate a hard drive or partition bit by bit.
Supported OS: It is compatible with Windows 11/10/8.1/8/7, 32 bit and 64 bit.
Wondershare UBackit enables you to safely generate disk clones more conveniently. To clone a HDD to M.2 SSD with UBackit, simply follow the procedures indicated below.
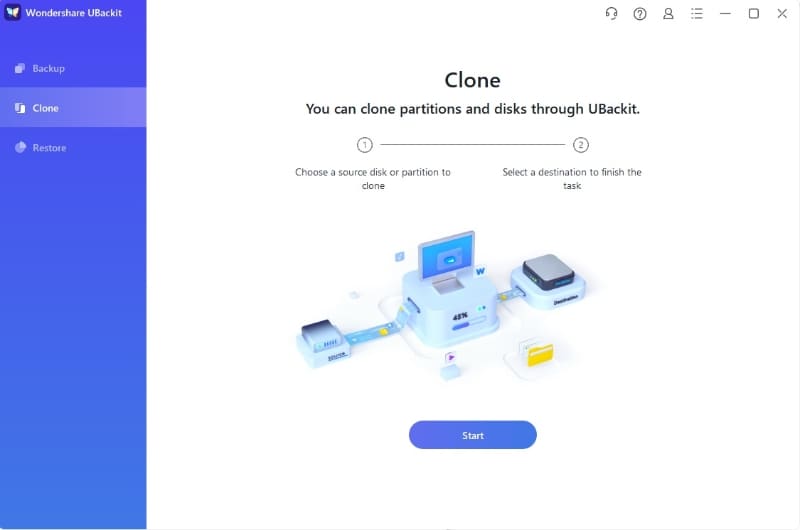
Step 1: Navigate to the Clone Section
Download and install Wondershare UBackit. Launch it and select Clone from the left-hand menu. Then, to proceed, press the blue Start button.
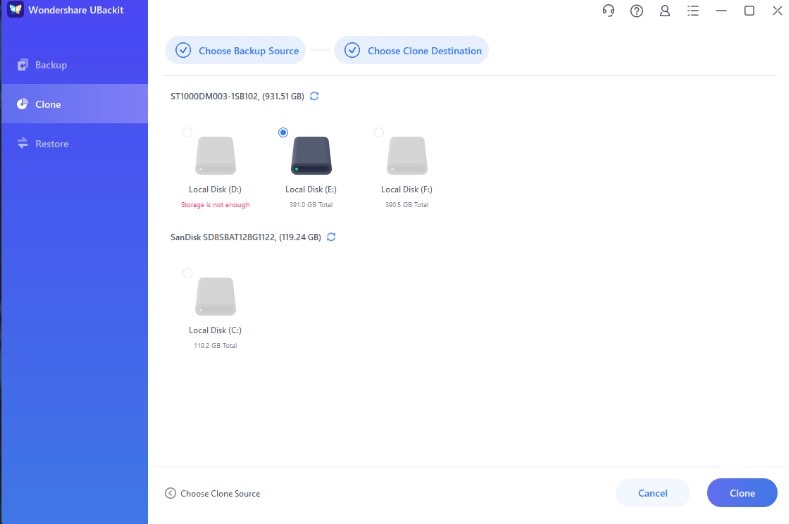
Step 2: Choose a Clone Source and Clone Destination
It is time to select a source disk from which to build a clone to secure your critical data. Choose the HDD and press the Next button.
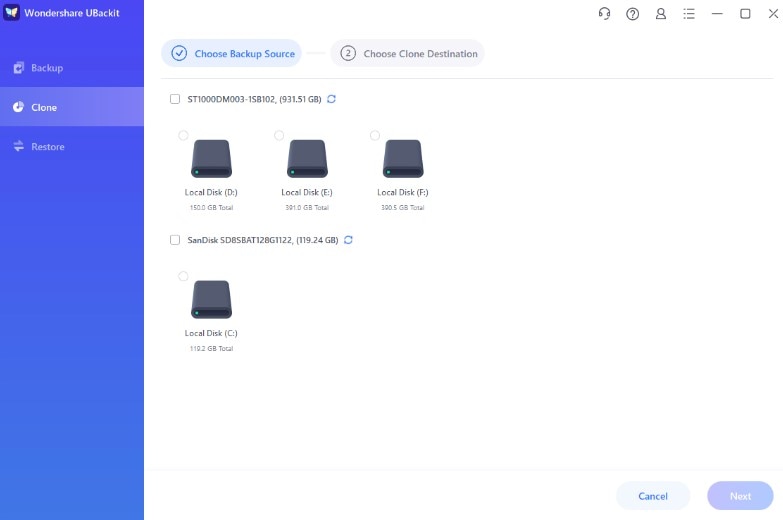
After selecting a source disk, the following step is to select a target drive. Ensure the destination disk has adequate space to store the data from the source disk. Select M.2 SSD. To begin the disk cloning procedure, press the Clone button.
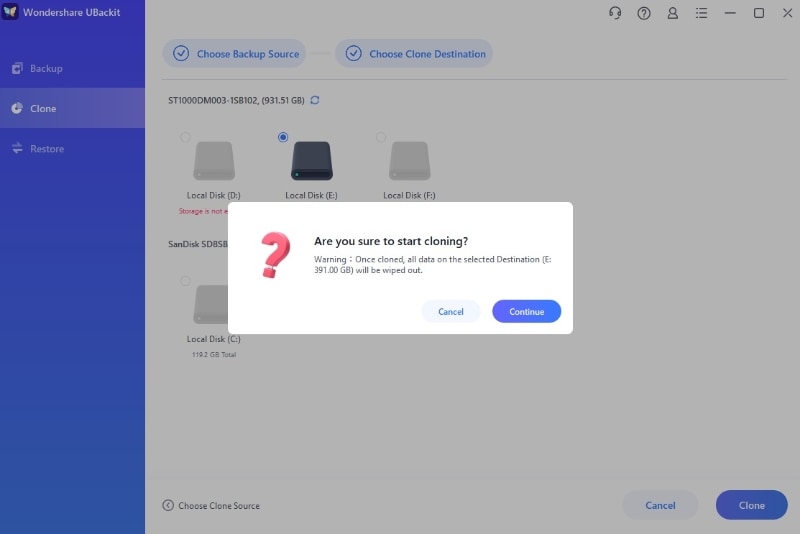
Step 3: Start the Cloning Process
To verify the clone task, click the Continue button. Remember that pressing this button will delete all data on the selected M.2 SSD.
The disk cloning process will take a few seconds or minutes; wait patiently. It is based on how much data you are processing.
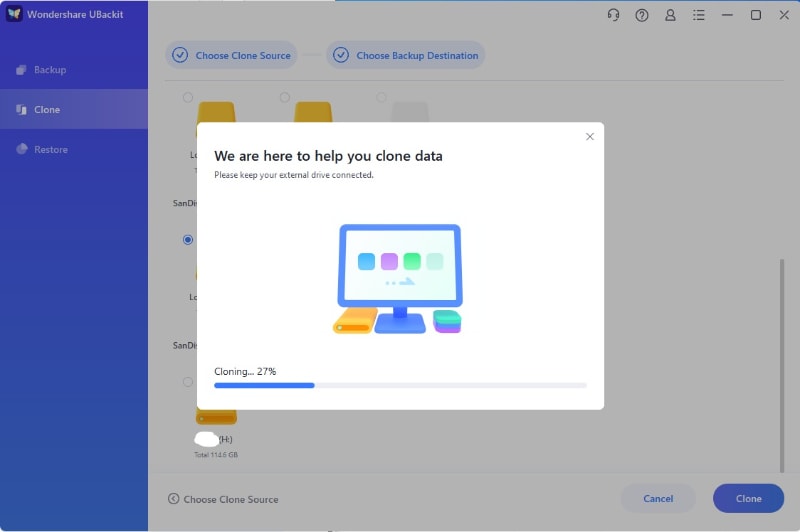
You will see a notice when the cloning process is finished.
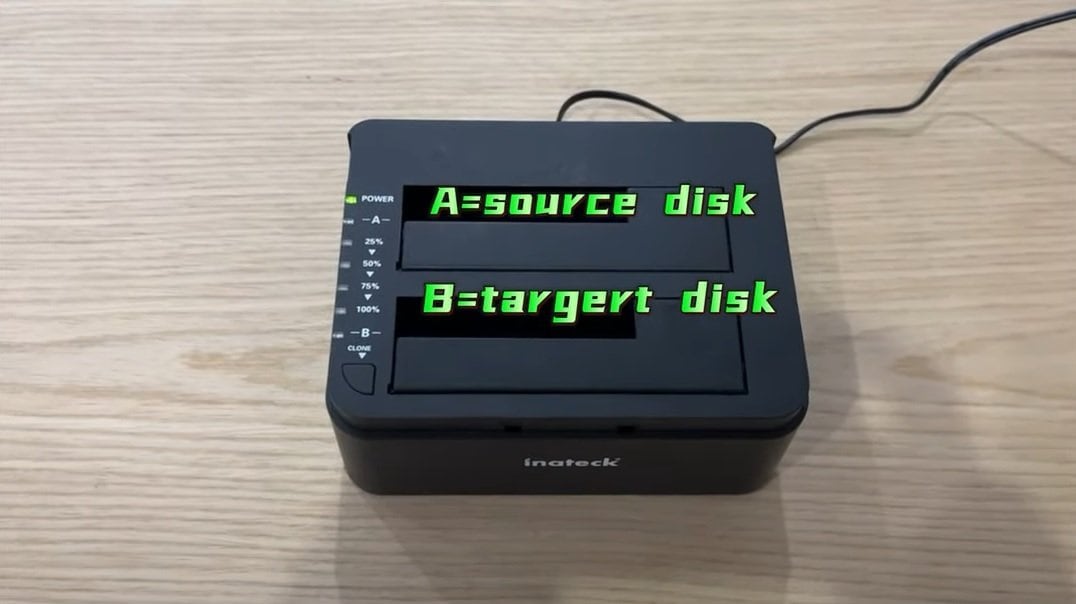
Method 2. Using HDD & SSD Docking Station [Expensive]
Another method to clone an HDD to an M.2 SSD is using an HDD and SSD Docking Station such as Inateck hard drive cloner, such as . It bridges your hard drive and computer, allowing you to access the drive's contents without dealing with a big computer case or extra wires.
If you frequently transfer large amounts of data, backup or clone your data, or simply need quick and easy access to a hard drive, a hard drive dock is the solution you've been looking for. However, buying the best one that fits your needs is difficult with various options available.
You should check these best HDD and SSD Docking Stations:
- Inateck SA02003 docking station
- WAVLINK ST-334U USB Docking Station
- SSK Aluminum Hard Drive Docking Station
How to clone an HDD to an M.2 SSD via HDD and SSD Docking Station? Follow the steps below:
- Step 1: First, you need to purchase a docking station that supports both HDD and M.2 SSD connections. Ensure that it has the necessary interfaces to connect your HDD and M.2 SSD. Then,
- Step 2: Connect the docking station to your computer using USB or eSATA.
- Step 3: Insert the M.2 SSD into the appropriate slot on the docking station. Connect the HDD you wish to clone to one of the available ports on the docking station. Again, ensure a secure connection.
- Step 4: After connecting it, you must have a reliable tool to clone the HDD to M.2 SSD.
While this method may provide convenience and versatility, it is true that docking stations can be relatively more expensive compared to other methods, such as using software or other cloning devices.
Method 3. Using Clonezilla ISO Image [Complicated]
The last method is by using Clonezilla ISO Image. It is a powerful disk imaging and cloning tool for cloning HDDs to M.2 SSDs. It is an open-source program that runs from a bootable ISO image to generate an exact copy of your hard drive.
To use this Clonezilla ISO Image, follow the steps below:
Step 1: Download and install Clonezilla ISO Image. Then, write the ISO image to USB and connect your new SSD, and Boot into BIOS.
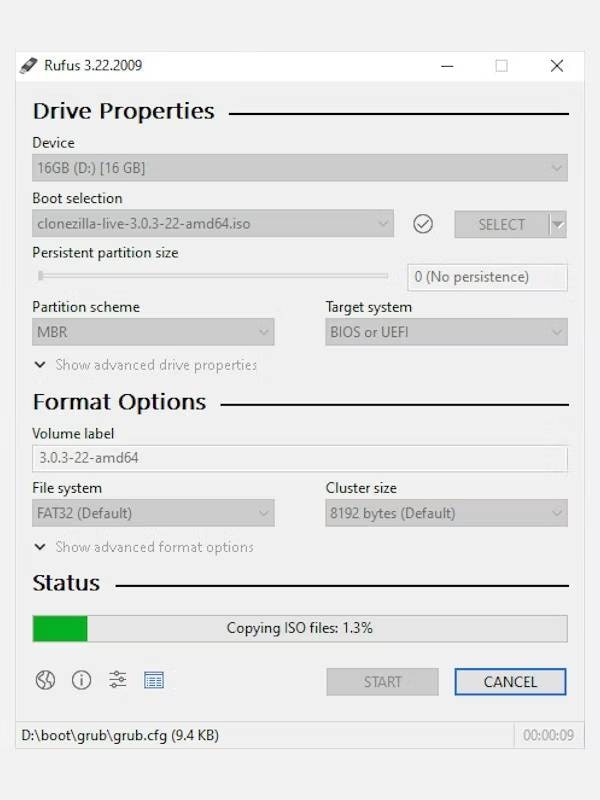
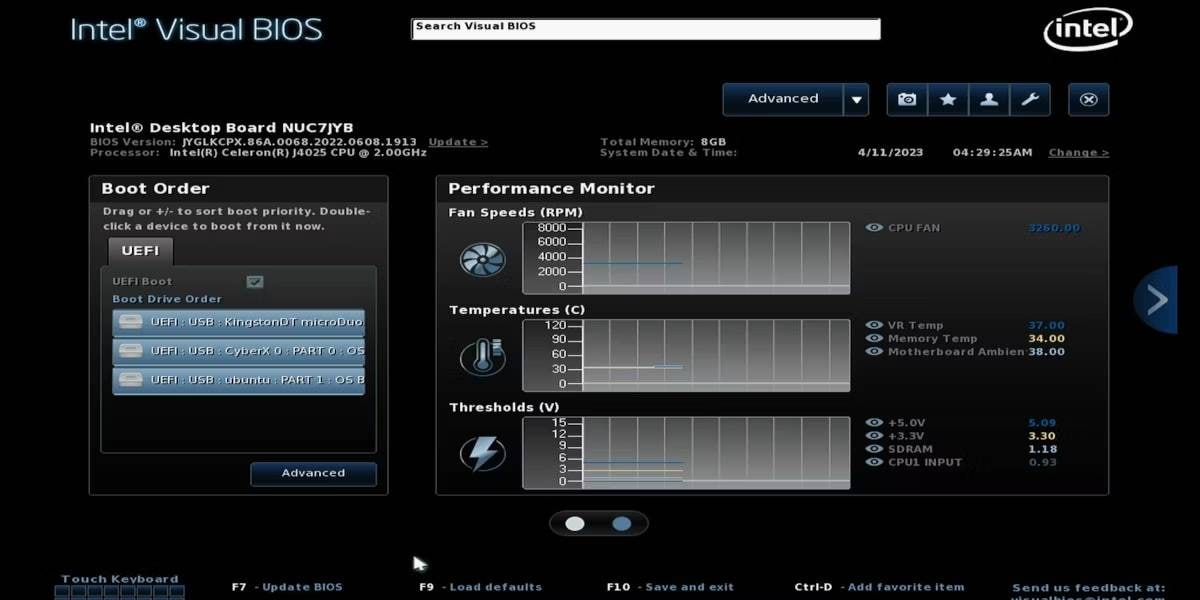
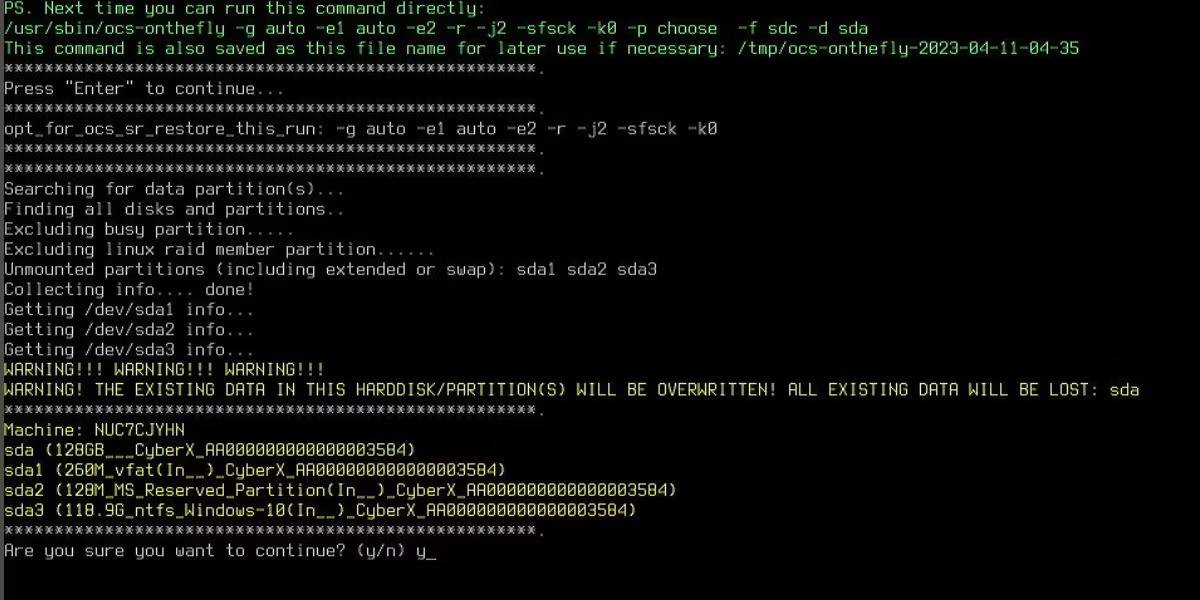
Step 2: Connect the new SSD to a disk that will be copied. You can use a SATA port, a USB tSATA Adapter, or an M.2 NVME slot. Then, connect the bootable Clonezilla USB pen drive to the drive and turn it on. Using the F2 or DEL keys, navigate to the BIOS settings. Click the BIOS to boot first from the USB pen drive. BIOS should be saved and exited.
Your device will then restart and enter Clonezilla mode.
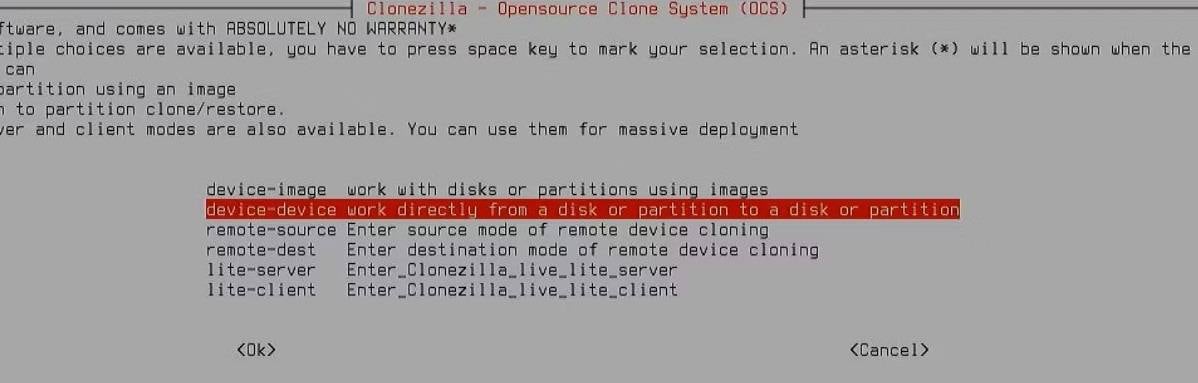
Step 3: Clonezilla will display numerous options for cloning drives once you've logged in. Select the device-device option because you copy an entire hard disk to an SSD.
Step 4: Both disks are linked to the same computer. Select the disk_to_local_disk setting.

Step 5: Select your hard drive as the Source Disk. Then, select the Target Disk and your SSD on the following screen.

Step 6: Skip checking.

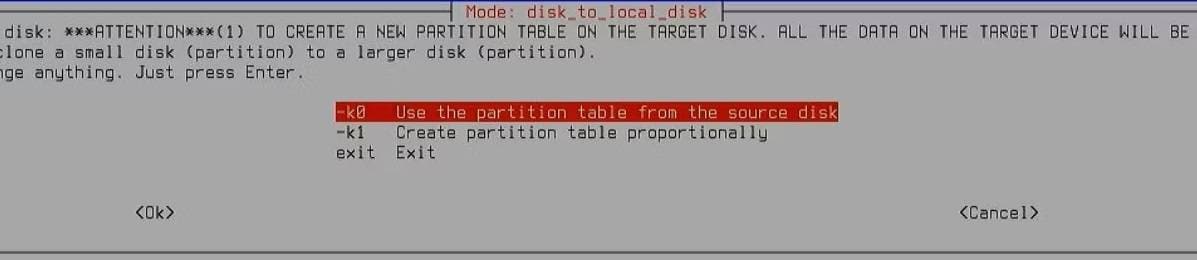
Step 7: Select Use partition table from the Source disk. Instead of raising the partition size proportionally, you will enlarge it later. This will save disk space for partitions that have just a fixed size.
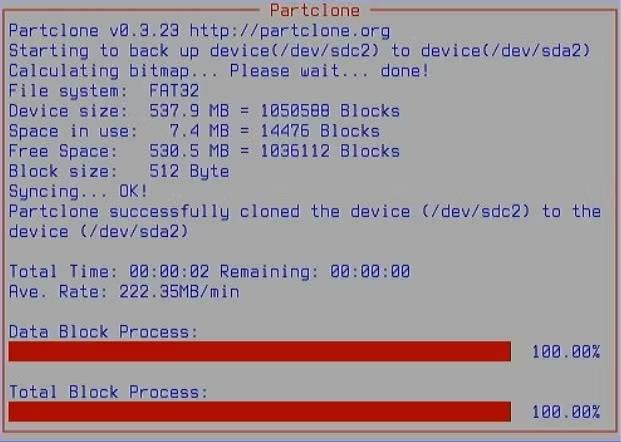
Step 8: Cloning will begin instantly, and this process cannot be disturbed.
Step 9: Clonezilla will now clone the entire disk, regardless of how many files it contains. As a result, the time required to finish the cloning will be determined by the size of the disks.
Step 10: When finished, restart the computer.Enter the BIOS again and choose the SSD as the first boot device. You will notice a significant reduction in startup time and increased computer responsiveness.
Conclusion
Now, you will understand the different steps to clone HDD to M.2 SSD. Changing the old hard drive with an SSD is highly recommended for better speed and performance. With the help of the Wondershare UBackit-Disk Clone feature, you can easily clone all kinds of hard drives or upgrade M.2 SSD without hassle. However, it is crucial to be aware of the potential risks involved in the process and know how to recover data from M.2 SSD in case any issues arise during the cloning or upgrading procedure.


