Google Photos Backup Not Showing | 10 Solutions
Google Photos has come up with a hassle-free solution to back up and sync our photos on different devices. Though, there are times when users encounter issues and can’t understand where to see Google backup photos. Also, even after completing the process, you might notice that Google Photos backup is not showing the uploaded pictures. Don’t worry – in this post, I will let you check your Google Photos backup and resolve any unavailability issue for your data.

Where Can You See Your Google Photos Backup?
If you have already taken a backup of your data on Google Photos, then you can access it via its website or its app.
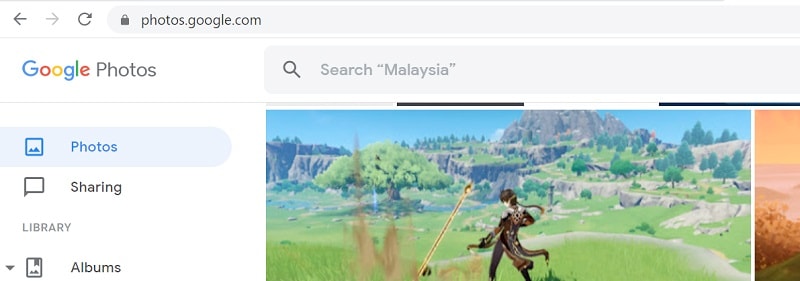
Let’s say that you wish to know where to see Google backup photos on your computer. Now, all you need to do is visit the Google Photos website (photos.google.com) and log-in to your account. Here, you can view all the synced photos listed under different categories that you can browse from the sidebar. You can visit any existing folder or use the search bar to find any picture of your choice.
Similarly, if you want to know where to see Google Backup photos on your smartphone, then install the Google Photos app on it. You can grant it the needed permissions and enable the syncing option. Later, you can browse the stored photos, view the existing folders, and lookup any picture via its smart search.
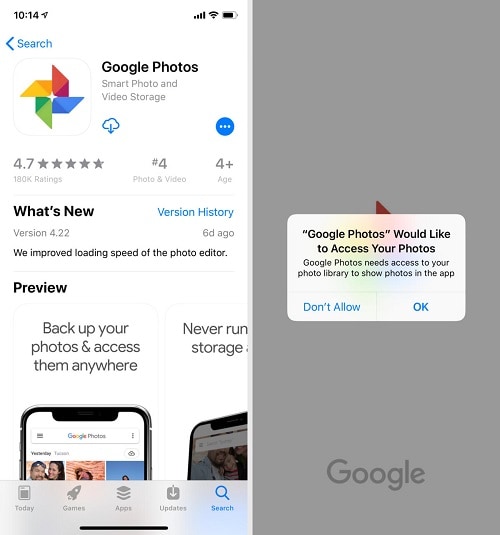
You can enter any keyword (for people, places, objects, etc.) on the search bar and it will readily display the relevant results on the web or your phone.

Why Does the Google Photos Backup Not Showing?
In case if your Google Photos backup not showing, then it could be due to the following reasons:
- The photos you are looking for might be deleted on unavailable.
- Your device might not be connected to a stable internet connection.
- The Google Photos app you are using might be old or corrupted.
- The photos/folders would not be uploaded to Google Photos.
- An ad-blocker or anti-virus can also tamper with the Google Photos connection.
- The Google Photos account might be unavailable or its server could be down.
- You could have disabled the option to sync your photos with your Google account.
- Any other app, network, or device-related issue can also cause this problem.
How to Fix the Google Photos Backup Not Showing Issue?
Now when you know the possible reasons for Google Photos backup not showing on your device, let’s quickly discuss some smart ways to fix it.
Solution 1: Maintain a Stable Internet Connection
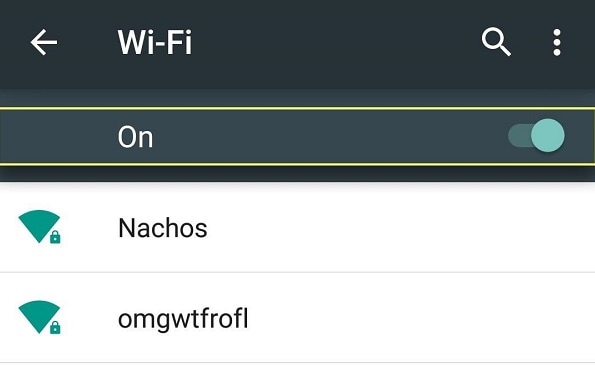
If your phone or PC is not connected to the internet, then you can’t find your synced pictures on Google Photos. That’s why before taking any drastic measures, you can go to the Network Settings on your system or phone. For instance, you can go to your phone’s Settings > Network and connect to a stable WiFi network to access your photos.
Solution 2: Enable the Backup and Sync Option
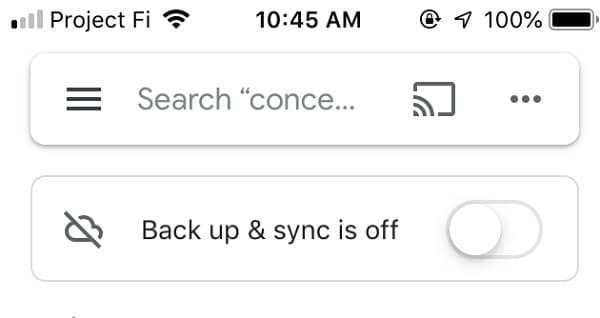
A lot of times, users forget to turn on the Backup option on the Google Photos app. Therefore, if the Google Photos backup is not showing on your phone, then just launch the application on the device. Now, go to the home page and make sure that the Backup and Sync option on your phone is turned on.
Solution 3: Make Sure Your Folders are Synced on Google Photos
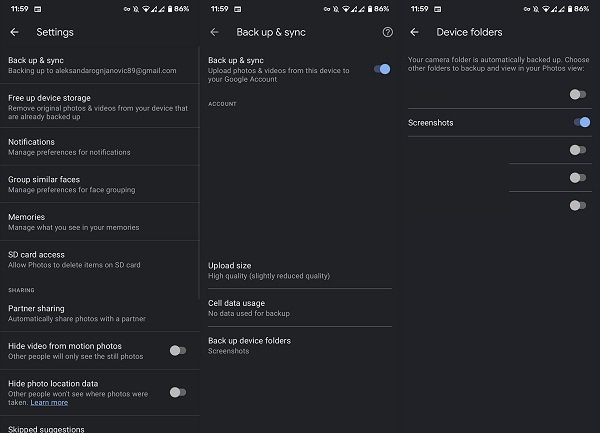
You could have had a lot of folders stored on your device’s gallery. Though, the syncing option for some folders might be disabled on Google Photos. In case the Google Photos backup is not showing for some folders, then first launch the app. Now, go to its Settings > Backup & Sync > Device Folders and select the folders you wish to sync to Google Photos.
Solution 4: Delete the App and Cache Data for Google Photos
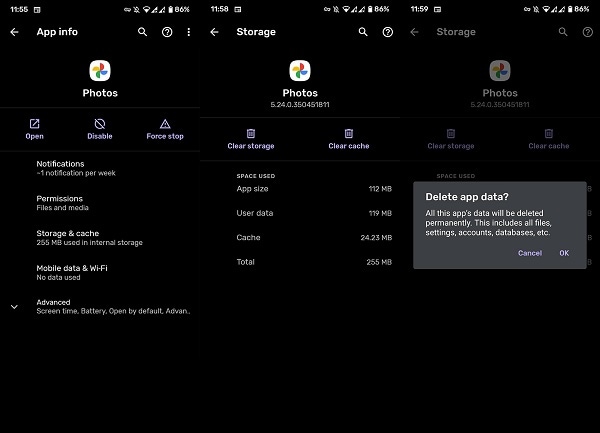
As I have listed above, a corrupt app can be a prominent reason for Google Photos backup not showing up. The easiest way to fix this is by deleting the app and cache data on the Google Photos app. You can just go to your phone’s Settings > App Info and select Google Photos from the available list. From here, you can just select the option to clear cache and app data for Google Photos on your phone.
Solution 5: Enable Google Photos for the Backup & Sync Tool
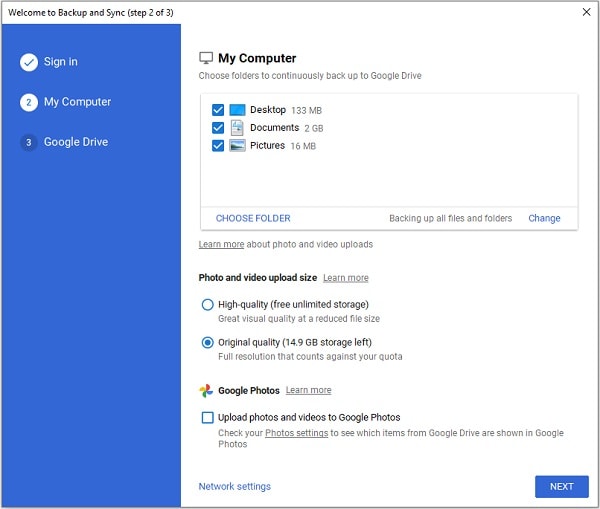
Google Backup and Sync is a popular desktop application that can help you backup your data to Drive. If you are also using the same application and the Google Photos backup is not showing up, then you can go to its Settings. From the list of the available folders, you can turn on the “Google Photos” option and make sure your photos are synced here.
Solution 6: Check the Archive and Trash folder in Google Photos
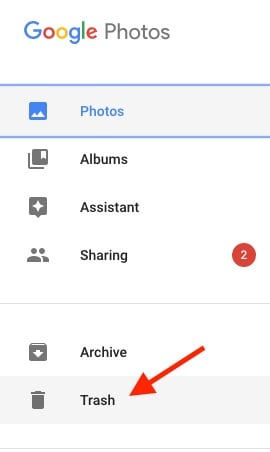
Chances are that you could have accidentally deleted your photos from the app or might have moved them to the Archive folder. Simply launch the Google Photos app on your device and tap on the hamburger icon to view the available folders. Now, visit the Trash or the Archive folder and move your photos to the Primary folder from here.
Solution 7: Move your Folders to the Internal Storage of the Device
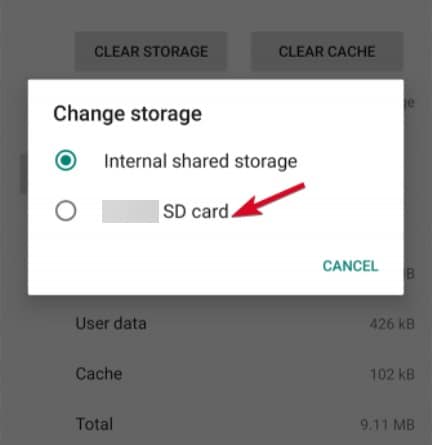
Sometimes, Google Photos can’t sync the folders that are stored on the SD card of your device. To fix the Google Photos backup not showing issue, you can first launch the File Manager app on your device. Now, browse to the connected SD card, select the respective folder, and move it to your device’s internal storage. You can later go to Google Photos and sync this folder on your device.
Solution 8: Reinstall or Update the Google Photos App
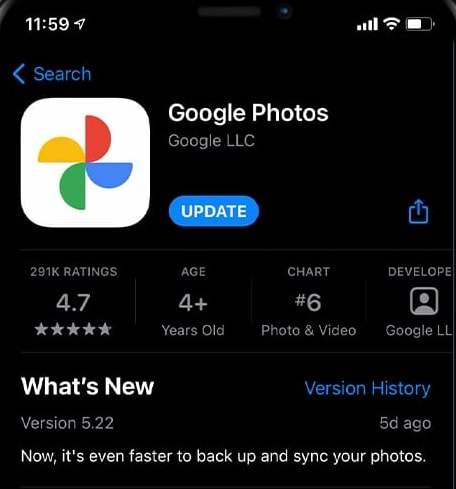
If it has been a while since you have updated the Google Photos app, then you can consider upgrading it. To fix the Google Photos backup not showing issue, just go to the App/Play Store on your device and simply tap on the “Update” button. After that, you can simply wait as your device would update the app. Besides that, you can also uninstall the Google Photos app, restart your device, and go to the Play/App Store to install the application again.
Solution 9: Upload your Photos Manually to Google Photos
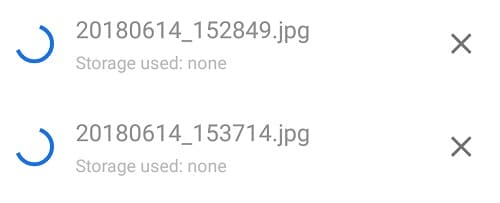
Lastly, if you are not able to upload your picture or Google Photos backup is not showing your data, then you can choose to manually upload your files. You can just go to the Google Photos website or launch its app. Now, click on the app icon to manually browse and upload your pictures to the drive one by one.
Solution 10: Back up and Restore your Data with Wondershare UBackit
Instead of Google Photos, you can take the assistance of Wondershare UBackit to back up and restore your data. It is a dedicated desktop application that can take an entire or selective backup of your data to the location of your choice.
- UBackit would let you select any partition, folder, or file that you want to back up. You can also save the backup on your system or any other external source (like an external hard disk).
- You can maintain different versions of the backup via its incremental backup system that can save up to 80% of the storage.
- UBackit also provides an automatic backup system that would take a scheduled backup of your data.
- It features tons of other services like storage management, virus scan, the preview of data, and more.
- It includes various filters and even an inbuilt search option to look for specific files to backup. All the data types such as photos, videos, audios, documents, etc. are supported.
After reading this guide, you can easily check where to see Google Backup photos and how to retrieve your pictures. Though, if Google Photos backup not showing, then you can simply follow the above-listed suggestions to fix the issue. If you want, you can also take the assistance of Wondershare UBackit to back up and restore your photos and other data types however you like.
How to Backup Google Photos with UBackit Data Backup?
UBackit offers 30-day free trial license for the new users, download and try to backup your Google Photos with it!
Step 1. Download and launch the program
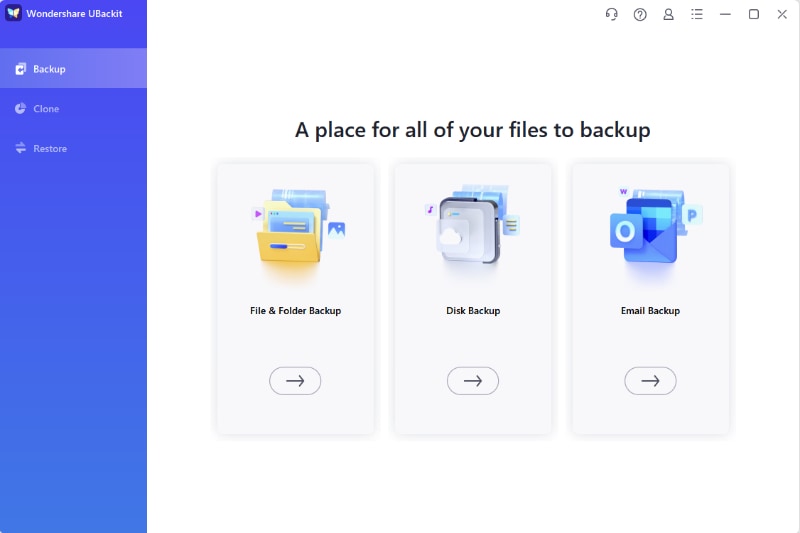
After downloading and installing Wondershare UBackit, launch the program. Select the Create New option from the main screen, then click File Backup.
Step 2. Select Files to Backup
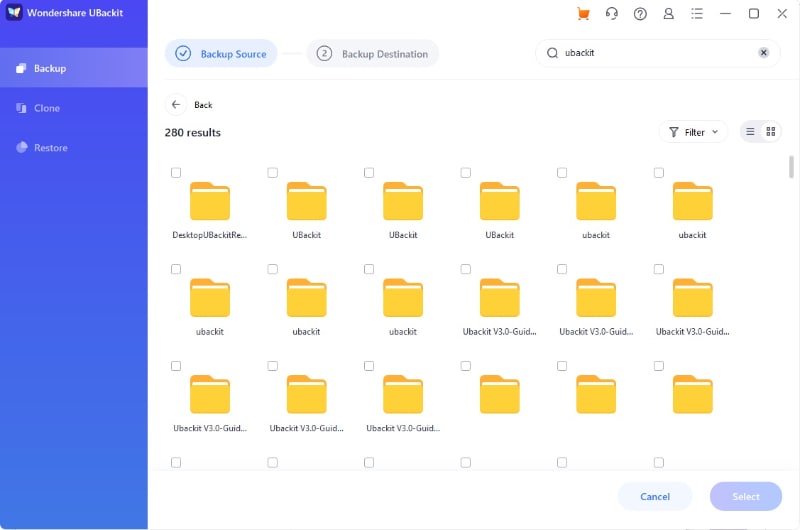
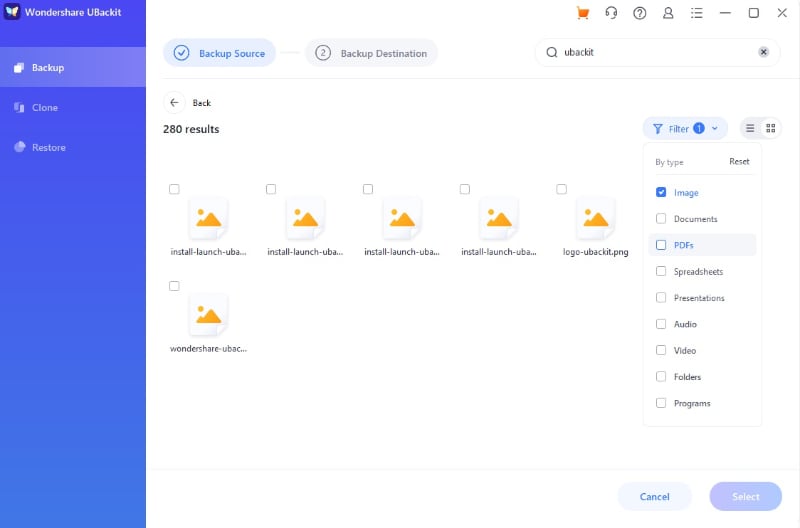
You may need to find where the Google photos are saved in advance. Then select the folders here to backup. Or you also can click Filter at the top right corner to find the folder quickly and easily. Next, click Select to continue.
Step 3. Select Backup Destination for Google Photos
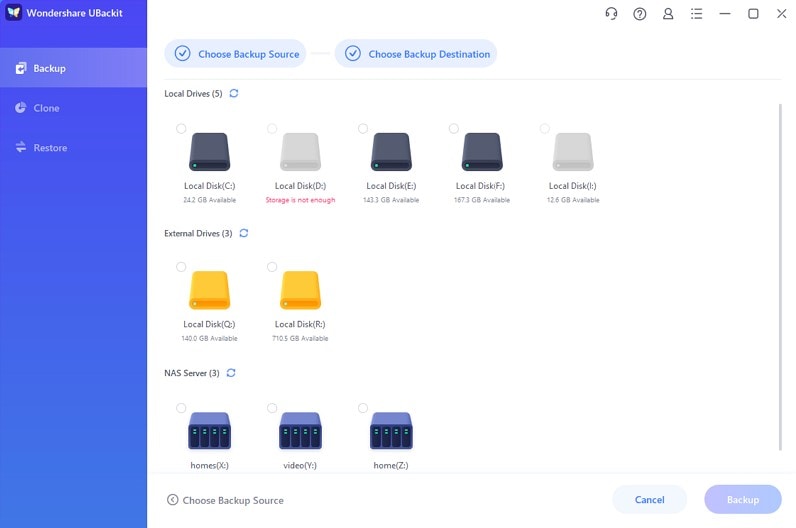
Now you need to select the destination for the backup folder. If you prefer to save the files on the external hard drive, please ensure you've connected it to the computer. Then click Select to let the backup process begin.
Step 4. Copmlete Google Photos Backup
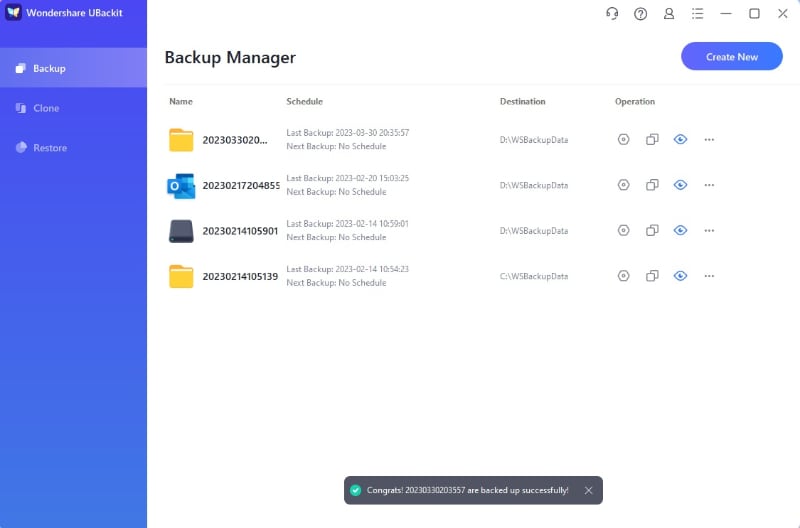
You will receive an automatic notification from the program once the process completes. To set a backup schedule, you can click the Schedule option at the bottom of the backup folder. It enables you to set daily, weekly, monthly and non-stop automatic backup. So next time UBackit will start to backup your Google Photos automatically according to the settings.
Data Backup Services
- Computer Backup
- Hard Drive Backup
- Mac Backup
- Cloud Backup


 ChatGPT
 Perplexity
 Google AI Mode
 Grok
Grok


Amy Dennis
staff Editor