How to Backup a cPanel Website to Google Cloud Storage
cPanel is a Linux-based control panel that currently enjoys being one of the most popular on websites. Thanks to the fact that it allows you to comfortably manage all the services in one place and, in addition to being intuitive and easy to use, it is the number one option for many users who manage web hosting, which is why this tool offers many advantages. One of the greatest advantages is that users can make cPanel backups to Google Cloud Storage, a task that you can learn here step by step and in a concise way.
Part 1: Method to Backup a cPanel Website to Google Cloud Storage
Q: Is there a way to back up my cPanel Website to Google Drive? I don't want to lose my information in just a second.
Google Cloud Storage is an online file storage service that combines Google's cloud performance with advanced security and sharing capabilities. The use of this platform is on a professional scale, which is why many companies and websites use it to back up your data and with the confidence that they will be protected and safe.
Among the dozens of functions that exist in Google Cloud Storage, is the cPanel account backup, which results in a maximum advantage for users of this dashboard control. This means that the changes and updates you make within the cPanel interface will be automatically reflected in Google Cloud Storage and you will not have the need to make manual backups or do an individual backup of files.
Part 2: How to Backup a cPanel Website to Google Cloud Storage?
To back up a cPanel website to Google Cloud Storage, you must follow the next steps that I will show you:
1. Backing up to Google Storage
First of all, you have to create a Google Cloud Storage account.
Step 1: Go to Google Cloud Storage website

Go to: https://cloud.google.com/, then click on "Get started for free."
Step 2: Sign in

To sign in, you just have to type your Google email address or phone and your password, you can also create a Google account if you don't have one or you want to destinate a new one for this.
Step 3: Select your country and accept Terms of Service

In this section just select the country where you live and if you agree the Terms of Service click on the blank square to tick it.
Step 4: Finish the process

In this section, fill the Customer info and your Google Storage account will be ready.
2. Setup Google Bucket
You have to set up a bucket, which is a container of your data. All of the information stored in your Google Cloud will be contained in the buckets.
Step 1: Go to the buckets section

Open your Google Cloud website. To go to the buckets section, click on the three parallel white lines on the upper left corner, then click on "Storage" and then select "Browser."
Step 2: Create a new bucket

In this section, click on "CREATE BUCKET" to begin the process.
Step 3: Customize bucket

Assign a name to your bucket, it will have to be original and different from the rest. Then customize its configuration and click on "Create." Now you will have a new bucket to store your data.
3. Create Google Credentials
This will enable the credentials to your Google Cloud account so your application will be authorized to access Google Cloud APIs (that allow communication and integration between Google and other services such as searches, translators, and geolocation). Furthermore, credentials are necessary to identify your application for quota and billing. To create Google Credentials, you have to create a new project, follow these steps to do it:
Step 1: Open New Project window

Go to your Google Cloud website. Click on "Select a project" on the top blue bar, then in the white window click on the "+" icon on the upper right side.
Step 2: Create a new project

Choose and type a name for your project and then click on "Create."
Step 3: Select your project

You will have to wait some seconds and the project will be created. Then click again on "Select a project" in the blue top bar and click on the project you have just created.
Step 4: Go to APIs section

Now click on "Go to APIs overview."
Step 5: Enable Google Cloud APIs and devices

In this section, click on "ENABLE APIS AND DEVICES." This will let you open the API Library.
Step 6: Search for Google DriveAPI

Now you are in the API Library. In the white box type "Google Drive" to search Google Drive API.
Step 7: Click on Google Drive API to open its section

Click on "Google Drive API."
Step 8: Enable Google Drive API

Just click on "ENABLE" and Google Drive API will be enabled in your project
Step 9: Open Create credentials window

Click on "Create credentials" which is in the blue box in the right part of the screen.
Step 10: Customize your credentials

Customize the kind of credentials you need. In this case, you must choose Google Drive API and the settings to configure, if you are working with Windows, you must select "Other UI (e.g. Windows, CLI tool). Then click on "User data" and click on "What credentials do I need?"
Step 11: Name your client ID

Type your client name, then click on "Create client ID."
Step 12: Customize the consent screen

Type your email address and the product name which you want to show to the users that access your project. Once you finish click on "Continue."
Step 13: Download credentials

Click on "Download" to get a JSON file with your credentials. It is important to have it so you can know your credential information.
Step 14: Check your file

Open your file and check the credential information. Then click on "Done" in the Credentials window.
4. Mount Google Cloud Storage as a remote filesystem
Cloud Storage FUSE proporciona una manera para que las aplicaciones suban y descarguen objetos de Cloud Storage y será necesario para interactuar de manera remota con los archivos almacenados en la nube.
Once gcsfuse is installed, you need to put an entry in the /etc/fstab to use it. The following entry specifies to mount the Curtis test bucket to /backups using the file /root/gcreds.json for authentication.
curtistest /tbackups gcsfuse rw,noauto,user,key_file=/root/gcreds.json
Once you have created the /tbackups directory, you can just tell Linux to mount the drive.
# mount /tbackups
Step 1: Add the gcsfuse distribution URL as a package source and import its public key:

You can copy the following code:
export GCSFUSE_REPO=gcsfuse-`lsb_release -c -s`
echo "deb http://packages.cloud.google.com/apt $GCSFUSE_REPO main" | sudo tee /etc/apt/sources.list.d/gcsfuse.list
curl https://packages.cloud.google.com/apt/doc/apt-key.gpg | sudo apt-key add –
Step 2: Update the list of packages available and install gcsfuse.

You can copy the following code:
sudo apt-get update
sudo apt-get install gcsfuse
Step 3: Create a directory

You have to replace the path/to/mount line with the name of the directory you want to connect.
Step 4: Use Cloud Storage Fuse to mount the bucket

Type gcsfuse bucket path/to/mount. Replace "Bucket" and Path/to/mount with the names of your folders.
Step 5: Start working with the mounted bucket

Now, all you have to do is to type ls /path/to/mount, replacing "/path/to/mount" with the name of the path.
5. Configure cPanel Backups to use the mounted Google Drive
Now, all you have to do is to enable the cPanel backup feature. Go to the Backup configuration section and follow these steps.
Step 1: Enable Backups

Make sure you have the "Enable Backups" option activated and choose a backup type, in this case, "Compressed" would be the best choice.
Step 2: "Select Google Drive" in "Destination Type"

Go to Backup Configuration, then scroll down to the 'Additional Destinations' section, now, click on the "Destination Type" dropdown menu, select "Google Drive"
Part 3: How to Perform a Full Backup in cPanel?
Performing a full cPanel backup is a fairly straightforward process, below, I'll show you how.
Step 1: Go to Backup utility

In the list of cPanel utilities, click on "Backup"
Step 2: Click on "Download a Full Website Backup"

Once you have entered the "Backup" tool of cPanel, you will find the option to create a complete backup of your website, you can download this file and save it wherever you want, also, in this section you can choose some other options that allow you to choose to customize downloading your backup.
Part 4: How to easily back up your website to Google Drive
To perform an automated backup process easily, you will need to rely on 3 tools; "Google Drive File Stream", "cPanel backup" and AOMEI Backupper.
To use Google Cloud Storage as a remote filesystem manually, you should bear in mind that you need a Google account that allows the use of "Google Drive File Stream". Next, I will show you how to use this tool.
Step 1: Open "Google Drive File Stream"

Remember that you can download this tool for free through the Google website.
Step 2: Log in

Once you have opened the application, the application will ask you to log in to your Google account.
Step 3: Confirm

Once the installation process is complete, you will notice that Google Drive File Stream has created a new storage device on your system. Please note that you will need to stay connected to the internet to use this device.
Step 4: Back up to your computer with cPanel
Now you must download the backup copy to your computer from your cPanel. To do this you must perform the following steps.
Step 5: Go to Backup utility

In the list of cPanel utilities, click on "Backup"
Step 6: Click on "Download a Full Website Backup"

Click "Download a Full Website Backup" and select a specific folder to store your website backups.
Step 7: Open AOMEI Backupper
Now you must download and install the AOMEI Backupper program to your computer.
Step 8: Go to File Backup
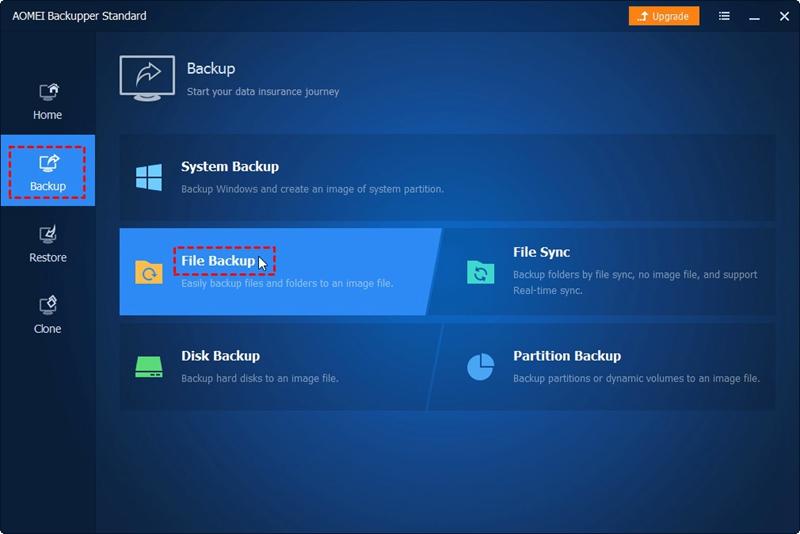
Once the tool is open, go to the "Backup" section (located on the left panel of the window). Now click on the "File Backup" option.
Step 9: Assign a name to your task
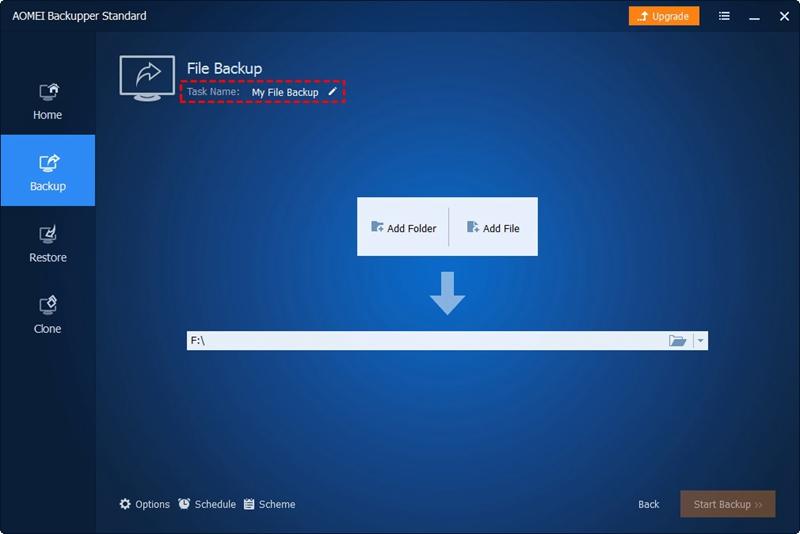
Before going further. It's advisable to name each backup task to help you to distinguish each backup process from other ones. You can do this by clicking on the "Task name" edit icon.
Step 10: Select the folder to backup
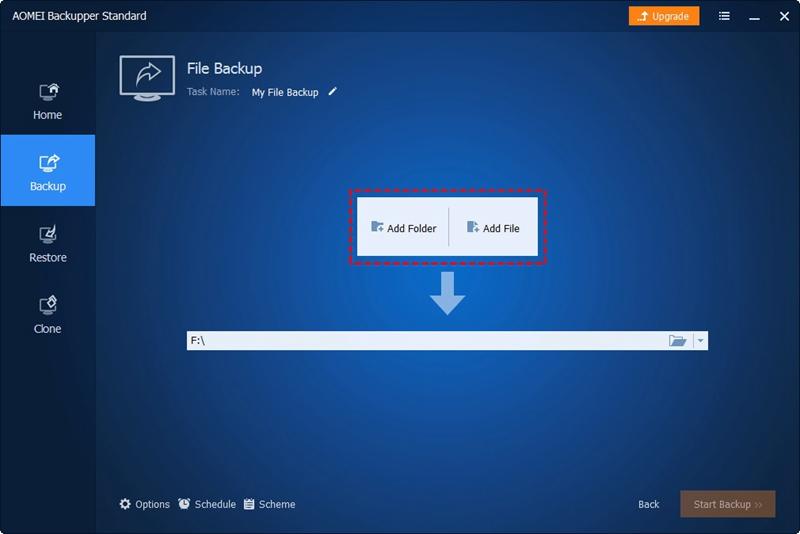
Click on "Add File/Folder" and go to the cPanel backup location.
Step 11: Set a target location
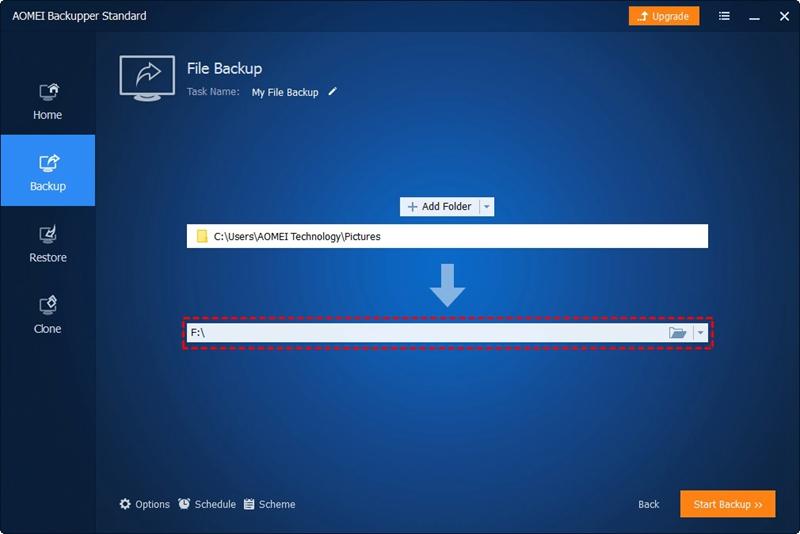
Click on the highlighted area and set the "Google Drive File Stream" device as the target location.
Step 12: Start the backup process
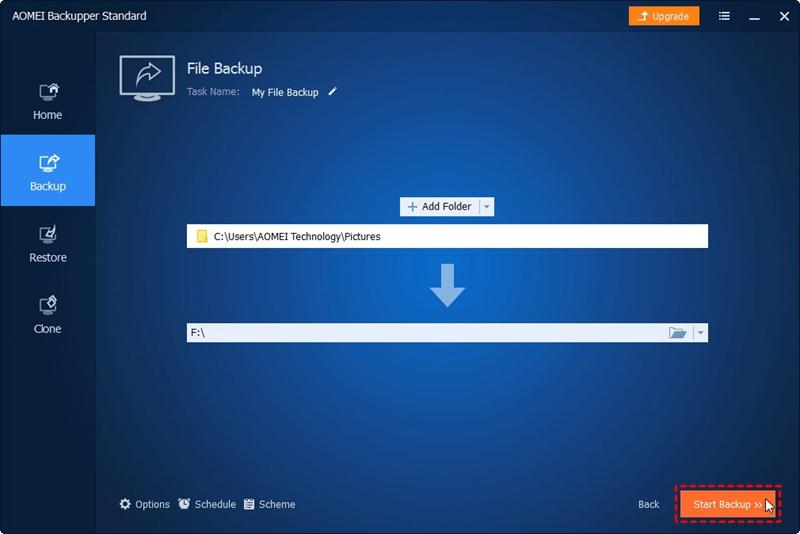
Click on the "Start Backup" button. Now the tool will create a backup into the Google Drive File Stream device, keeping your backup stored in the Cloud as well as on your computer. Keep in mind that AOMEI Backupper will help you with the backup process by allowing you to schedule automatic backup processes.
Conclusion
Building a website is not an easy task and each website is different from each other. Companies depend on their websites to function properly and despite having a highly qualified team to carry out maintenance tasks, there will always be the possibility that a failure may corrupt or damage the integrity of the information that makes up the website. This can be a serious problem, fortunately, there are methods to back up the information that makes up a website and as you may have noticed, with the help of AOMEI Backupper, it becomes an extremely easy task to perform.
Data Backup Services
- Computer Backup
- Hard Drive Backup
- Mac Backup
- Cloud Backup


Amy Dennis
staff Editor