How to Fix Sync Is Not Available for Your Account Error on Windows 10
Q: How to fix sync is not available for your account error on Windows 10?
"Hi, is anyone getting the sync not available error on Windows 10? I am trying to figure out this issue, but none of my attempts are thriving so far. My Microsoft account is also verified. Then what's causing this troublesome error? How to solve it?"
A Microsoft account can be used across multiple devices. Windows 10 allows you to store some of your system settings on this account to sync across devices. That makes it possible to obtain the same settings across different devices. However, you may notice that sync is not available for your account when attempting to sync.

This issue only occurs on Windows 10/11 and not on older Windows versions. What are the causes of this problem, and how do you fix it? You will learn precisely how to resolve the issue in this post.
Part 1. What's Causing the Error - Sync Is Not Available for Your Account?
Trying to use sync on Windows 10/11 may sometimes return sync is not available for your account error. There are numerous causes behind this issue.
We'll break down this problem by looking at instances where this has happened to users previously. We will also test the methods that successfully fixed the problem for other users. There are many ways this issue can arise, and we'll look at some of the most common ones:
1. Work or School Accounts Are Connected
If you have accounts connected in the "Access Work or School" settings page, you may encounter this error. If this is the case, removing the accounts can sometimes be all you need to make syncing work.
2. Microsoft Account Is Not Verified
Another notable reason this might happen is if you have an unverified Microsoft account. It's easy to fix if this is your issue. Visit Microsoft's website and verify your account from the Your Info section. You should be able to enable syncing now.
3. A Registry Policy Might Be Preventing Syncing
The Registry is complicated, and this complexity can sometimes interfere with normal functioning. A REG_DWORD with the name "NoConnectedUser" may be responsible for preventing your syncing. You can solve it by using the Registry Editor to block the policy from interfering.
4. Azure Not Allowing Syncing
It's a possibility that Azure is preventing connected users from syncing data. If you don't use Azure, this won't apply to you. If it does, however, this can be fixed from the Azure portal. You may merely need to modify an Azure Active Directory setting to do this.
5. Corrupted System Files
Though not very common, in some cases, this may occur if specific system files are corrupted. These system files may be integral to the functioning of the syncing process. A system repair may be all that is needed. It will essentially reset the system files to ensure they are clean and uncorrupted.
The reasons why you may get sync is not available for your account are not limited to the above. You can see some of the solutions above, and you may be wondering how exactly to do them. So, we'll go through each one in the section below.
Part 2. 6 Methods to Fix the Error Sync Is Not Available for Your Account on Windows 10/11
This section discusses the ways to rectify sync is not available for your account.
Method 1: Removing School or Work Accounts
The error can present itself if any accounts are connected in the "Access Work or School" settings. On systems where this happens, it is because these accounts were connected before a critical update was installed.
Certain users solved this problem by removing the connected accounts, restarting the PC, and syncing again. In addition to that, reconnecting the offending accounts afterward didn't seem to affect syncing from that point on.
If this sounds like your circumstances because you have a school or work account connected, this may help. So, check and implement the below instructions to get rid of the issue.
It is a quick and easy way to remove connected work or school accounts to fix the syncing problem:
Step 1. Open Run in the first step by pressing the "Windows" key + "R." The text box comes up. You should type in "ms-settings:workplace". Press the enter button so that you can open the "Access Work or School" part of "Settings."
Step 2. After getting to this section of Settings, move to the right side menu. There should be a "Disconnect" button beside the listed "Work or School" accounts. Click that, and confirm. Afterward, restart your PC.
Step 3. After your PC has successfully restarted, open Run by pressing the "Windows" key + "R" again. Type "ms-setting:sync" this time, and press enter to launch the "Sync your Settings" page.
Step 4. Once done successfully, look towards the right side of the window. There should be a toggle for "Sync Settings." Activate that toggle.

Step 5. If you have followed all the above settings without running into any errors, the process was successful. You can now re-add the Work or School accounts that were previously removed, without any issues.
If you have no Work or School accounts connected, or this method didn't help, try the next fix.
Method 2: Verifying the Microsoft Account
As previously stated, Windows 10 sync is not available for your account may have an unverified Microsoft account to blame.
Fixing this is as easy as verifying your Microsoft account. Learn how to do exactly that by following the steps below:
Step 1. Firstly, go to the official Microsoft account webpage. Select "Sign In" to proceed.
Step 2. Enter the username and password for your Microsoft account.

Step 3. If this goes without a hitch, you should be successfully signed in. Navigate to the "Your Info" tab and select "Security & Privacy." Select the "Verify" link beside the phone number or email address connected to the account. After that, you will get an email or text message containing a verification code. Enter it on the account page to successfully verify your account.

Step 4. If these steps have been carried out successfully, restart your PC. After that, navigate to the "Sync your Settings" page and toggle "Sync Settings" to "On."
Perhaps your account is already verified, yet you still ran into these problems. So, continue reading to cover another repair method.
Method 3: Enabling the Microsoft Account via Registry Editor
Another method to fix the Windows 10 sync is not available for your account error is below. However, it involves editing some values in the Registry Editor. Follow the steps listed below:
Step 1. Firstly, hold the "Windows" key and "R" simultaneously to launch Run. Type "regedit" into the bar that appears, and press "OK" to launch Registry Editor.
Step 2. Once the Registry Editor has appeared, locate the following directory:
"HKEY_LOCAL_MACHINE\SOFTWARE\Microsoft\Windows\currentversion\policies\system"
Step 3. After that, you will find a panel on the right side. Look for the entry that says "NoConnectedUser" and click on it. Look for the "Value" data entry and change the value to "0".

Once complete, restart your PC. Once successfully rebooted, navigate to the "Sync Settings" to see if Windows 10 can synchronize your folders now.
Method 4: Enable Syncing from the Azure Active Directory
If the above methods have not proven useful for fixing your issue, then the next one may help. It only applies if you have an Azure Active Directory account. If not, then this solution is not applicable and can be skipped.
Step 1. Go to the official Azure Portal website. After that, log into your administrator account with your Azure AD or Office365 credentials, depending on which applies.
Step 2. Now, go to the "Azure Active Directory." After that, move to the "Device Settings."
Step 3. At the pane on the right side, modify the "User may sync settings and app data" option to "All."
Step 4. Lastly, if this has been done successfully, return to the "Sync your settings" page. Toggle "Sync Settings" to "On."
Once this has been done successfully, check to see if Windows 10 sync is not available for your account has been remedied.
Method 5: Completing a Repair Install
If you have moved through every potential fix on this list with no success, it is likely a more severe issue. You may have a problem with an OS file or component that may require more extensive repair measures. So, if this sounds like your case, you can refresh OS components individually until the issue is resolved.
A fresh and up-to-date installation of the OS may help, but apps and user settings may be lost if not backed up prior.
Method 6: Use Backup Tool to Sync Files
If the issue that "Windows 10 sync is not available for your account" can't be solved successfully with the solutions introdueced above, you can try Backup tool to sync the files between two devices. UBacit Data Backup is the best program you can't miss. Though it would be a little complicated to complete the process, it still can sync your files to the external disk, then transfer the files to another device successfully and securely. If you are interested in it, follow the steps to fix Windows 10 sync is not available for your account:
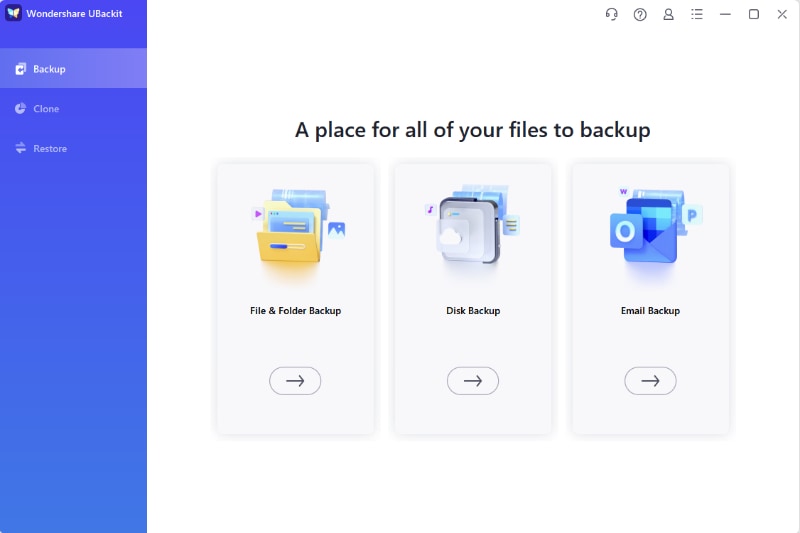
Step 1. Download and install Wondershare UBackit on your computer, and launch the app.
Step 2. Click Create New from the screen, then File Backup.

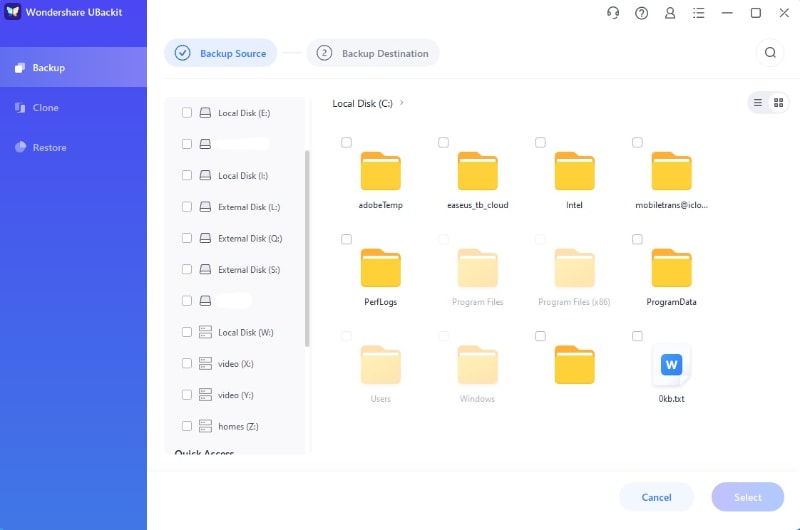
Step 3. Select the files you want to sync to another computer. And click Select to continue.

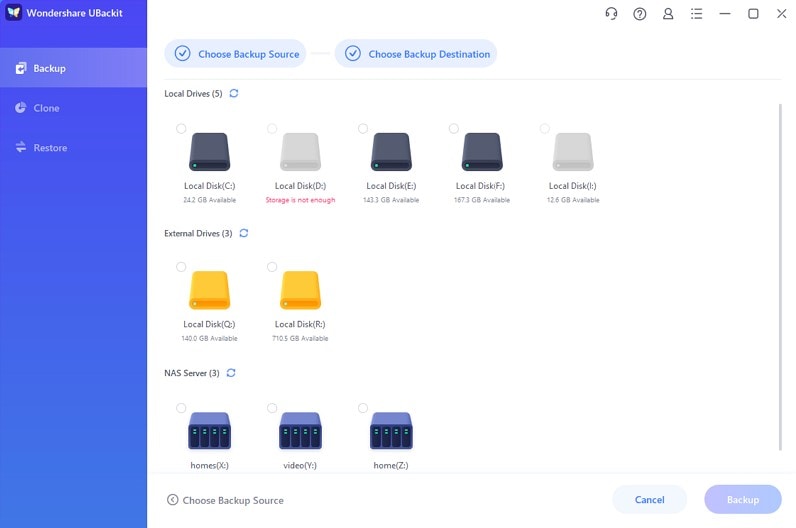
Step 4. Now, select the destination where you want to save the backup. To sync the files to another device, you need to connect the external disk to your computer in advance. Then select the external disk as the backup destination. Then click Select to start the progress.

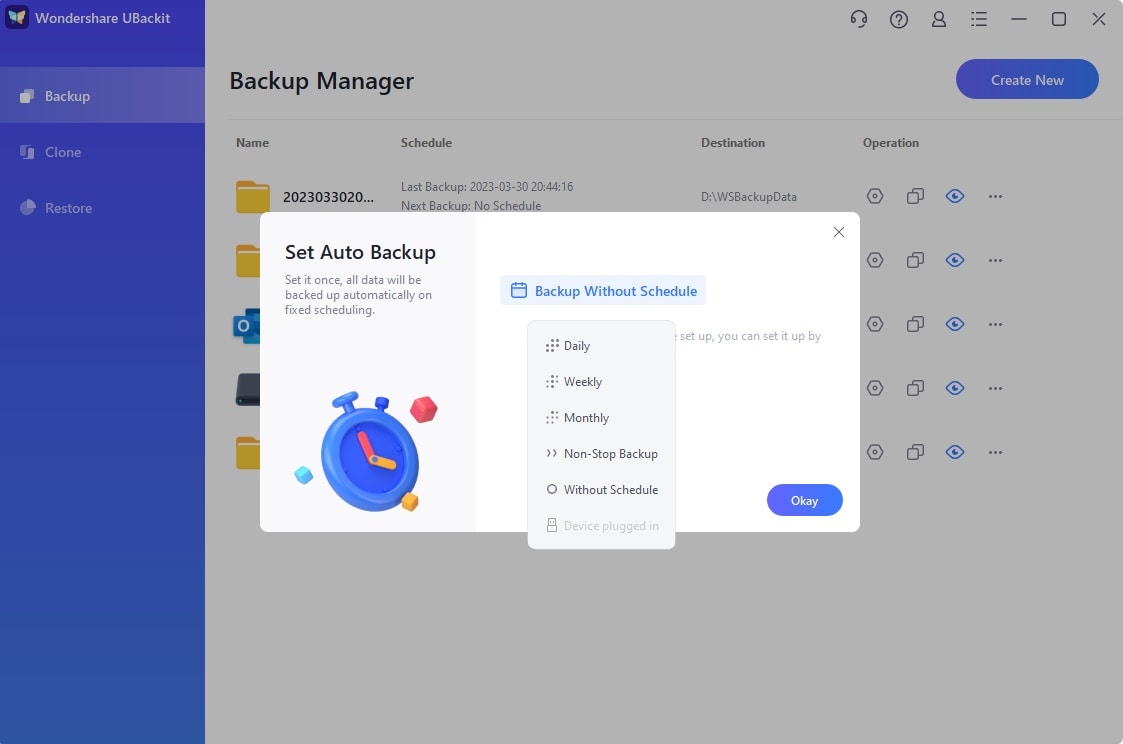
Step 5. Once the progress completes, you can click View to preview the backup files. And you also can set automatic file backup daily, weekly, monthly and real-time. UBackit will start automatic backup next time the external drive gets connection with your computer.

Step 6. When you complete all the settings, just unplug the external disk and connect it to the other device to transfer the backup. Then all set.
Conclusion
It is an error that numerous Windows 10 users experience. They are unable to get Windows 10 to synchronize folders despite all efforts. From user experiences, it seems that the issue only occurs following installing the Fall Creators Update. This issue should no longer occur, and Windows 10 should be able to synchronize folders. If this still occurs, the problem may be with your Microsoft account.
In summary, this post gives you five fixes for when Windows 10 sync is not available for your account. If this is what you are facing, attempt each of these solutions to fix the problem.
Data Backup Services
- Computer Backup
- Hard Drive Backup
- Mac Backup
- Cloud Backup


 ChatGPT
 Perplexity
 Google AI Mode
 Grok
Grok


Amy Dennis
staff Editor