How to Use Windows Server Migration Tools
Windows Server Migration Tools enable administrators to transfer roles, features, data, and operating system settings by installing the feature on both the source and destination servers via the Server Manager.
● Prior to migration, administrators must generate a deployment folder on the destination computer using the SmigDeploy.exe command specifying architecture and OS parameters, then copy and register this folder on the source device.
● The actual migration process is executed through specific cmdlets, utilizing Export-SmigServerSetting on the source server to extract configurations and Import-SmigServerSetting on the destination server to apply them.
● For scheduled file synchronization across networks, NAS devices, or cloud drives, AOMEI Backupper Server serves as a third-party alternative compatible with Windows Server versions 2003 through 2016, including R2 and SBS editions.
Ask AI for a summary
Why can you not install the Server Migration Tools to the server running Windows Server 2008 R2 using the Add Roles and Features Wizard on your server running Windows Server 2012 R2?
As an answer to the question i.e., what are the windows server migration tools, it is the feature that can be employed by the administrator for migrating the server roles, features, data, and operating system settings between the devices running on the server. The server administrator utilizes this feature at times of any system crash, system failure, or data loss consequences. Most of the time, the data is transferred or migrated among devices on the server to create a backup and avoid data loss. Windows server migration tool download helps to utilize the feature efficiently, and one can migrate the data. This article reveals all about the windows server migration tools.
As mentioned above, the windows server migration tool is readily available to be installed on the devices acting as servers in a network. These tools are highly compatible with all windows servers. As the name implies, the migration tools help to migrate the data, features, and roles, including the operating system s from one device to another. The tools are deployed on the source server in on the device. This device will then create a deployment folder i.e., the folder carrying all relevant data targeted for migration. The migration tools are installed on the device via Add Features Wizard in Server Manager, whereas they are uninstalled via Remove Features Wizard. To install the migration tools on the server, apply the procedure i.e., windows server migration tool download. This article explains i.e., what are the windows server migration tools? It also carries various stepwise methods to elucidate the installation of windows server migration tools. Here are the topics that would be discussed in detail.
Part 1: Install Windows Server Migration Tools on the Destination and Source Server
When dealing with the installation of windows server migration tools, both the destination and source server devices need a copy of the tools to act on migration. Here is the steps wise technique to follow to install the windows server migration tools on the destination and source server.
Step 1: In the main menu of windows, click the option of start and in the search box, type server manager.
Step 2: Launch the server manager.
Step 3: In the server manager window, in the top right corner, select the option of manage, followed by selecting add roles and features. Click next to continue.

Step 4: In the next window, select the destination server and click next to proceed.
Step 5: In add roles and features wizard, select window the option of server migration tools in the features tab. Click next to proceed.

Step 6: Give all the permissions to confirm the process of installation. Click install for installing tools to the destination device.
Step 7: Repeat the same procedure for installing the windows server migration tools to the source device.
Part 2: Create a Deployment Folder on the Destination Computer
As soon as the windows server migration tools are installed on the destination device (computer), a deployment folder is created on the device. This folder is then utilized in the process of data migration. Here are the steps to follow:
Step 1: Press Windows key + X to launch the command prompt and run it as the administrator.
Step 2: In the command prompt, change the directory carrying smigdeploy.exe tool. Type the command and click enter to continue.
cd %Windir%\System32\ServerMigrationTools\

Step 3: Type another command. It represents the path of the deployment folder on the source device. Click enter to complete the action. SmigDeploy.exe /package /architecture X86 /os WS08 /path

Part 3: Register Windows Server Migration Tools on the Source Computer
Once the deployment folder is created on the destination device, the folder is then copied to the source device's local drive. Make sure that the deployment folder architecture is compatible with the operating system of the source device. Here are the steps to follow:
Step 1: Press Windows key + X simultaneously to select the command prompt (admin). Launch the command prompt on the source device.
Step 2: Change the directory of the folder containing the copied deployment folder from the destination device.
Step 3: Now, in the command prompt, type the command to register windows server migration tools cmdlets. Click enter to continue.
.\Smigdeploy.exe

These are some of the pre-usage procedures that should be carried out on both the destination and source device to efficiently use the migration tools.
Part 4: Use Windows Server Migration Tools Step by Step
This section explains the stepwise procedure that can be followed for using the windows server migration tools. Here is how you can use it.
Step 1: In the windows main menu, type server manager in the search box to launch it. In the server manager window, select the option of tools—select windows server migration tools as the next step.
Step 2: Initiate the process by launching the migration tool on the source server device.
Step 3: Once the migration tool is launched, run the following command i.e.
Export-SmigServerSetting -User All -Group –Path C:SysAdminExportMigUsersGroups –Verbose
If the target is to import the local users and groups to the server, here are the steps to follow:
Step 1: Launch the windows server migration tools on destination server device/
Step 2: Run the command and click enter to continue.
Import-SmigServerSetting –User Enabled –Group -Path C:SysAdminExportMigUsersGroups -Verbose
Part 5: How to Share Files in Windows Servers Step by Step?
Once you are familiar with all the pre-requisite steps to use the windows server migration tools and the procedure to use them, the next step is to have complete knowledge of sharing files in the windows server. Although this process can be performed via the migration tools, yet one can utilize third-party application software as a reliable alternative.
In this context, the AOMEI backupper server is the top-notch third-party software that carries a high-end file sync feature that is utilized to sync the files between windows servers. This feature can be used to sync the files on the network, NAS devices, and cloud drives. Users can schedule the synchronization process on a daily, weekly, and monthly basis via scheduling features. AOMEI backupper server is compatible with Windows Server 2003/2008/2012/2016 (including R2)/SBS 2003/2008/2011 and Windows PC systems. Here are the steps to use the software to carry out the file-sharing procedure.
Step 1: Start the process by downloading and running a successful installation of software on the server device.
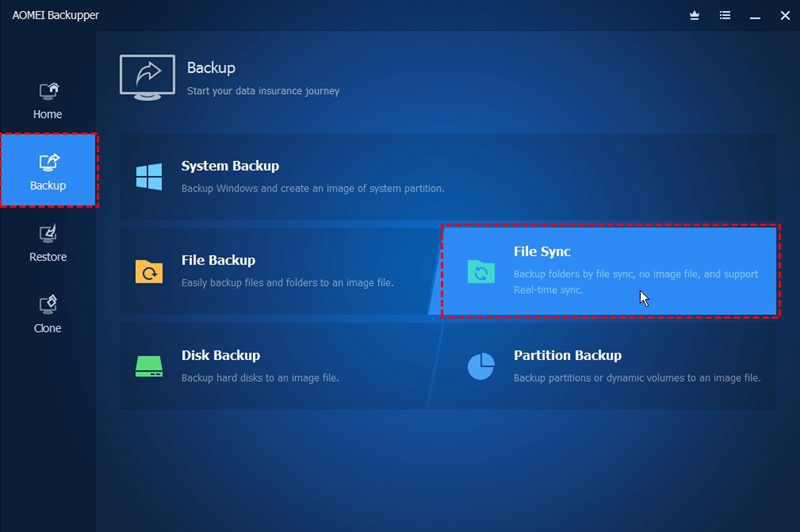
Step 2: Launch the software and, in the main menu, select the option of file sync.
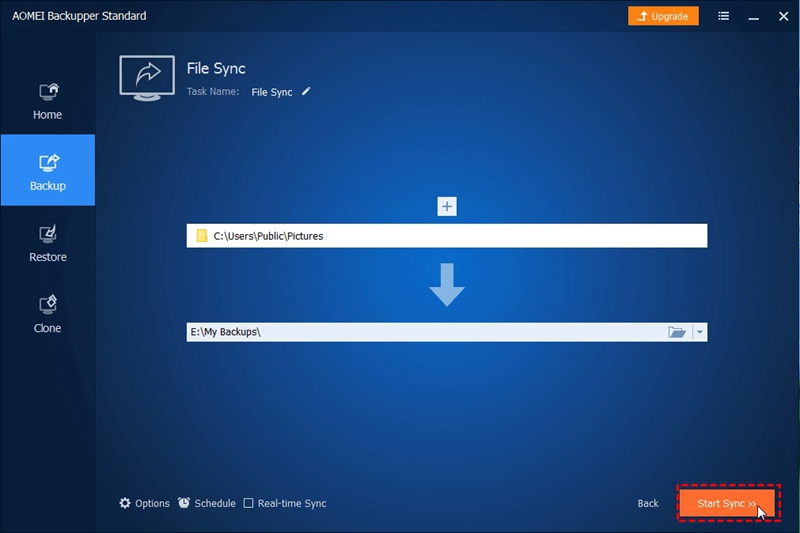
Step 3: In the next window, select all the targeted folders and files you want to share. Click ok to continue.

Step 4: Next step is to select the destination folder where you want to store the shared files and folders. Select the network location by clicking the inverted triangle and then choose the option of add network location.
Step 5: Type the network path, username, and password. Click ok to continue.
Step 6: Schedule the sync operation. It could be done on a daily, weekly, and monthly basis. Select the option of schedule in the lower right corner. Once scheduled, click ok to continue.
Step 7: Click start sync to complete the action.
Hence, using windows server migration tools can help migrate data between the server's devices. The data is migrated in certain conditions, i.e., to avoid data loss consequences, protect the data of one device against system failure, copy the features on one device to another, or sue the same operating system in all devices network. All you have to do is to initiate windows server migration tool download. Once installed on both destination and source server devices, these tools can be used efficiently. This article explained all the facts related to i.e., what are the windows server migration tools along with stepwise procedures to install the windows server migration tools on the source and destination server devices. It also recommended a third-party application software i.e., AOMEI backupper server, that can be used as a reliable alternative to the windows server migration tool.
Data Backup Services
- Computer Backup
- Hard Drive Backup
- Mac Backup
- Cloud Backup


 ChatGPT
 Perplexity
 Gemini
 Claude
 Grok
Grok


Amy Dennis
staff Editor