 TL;DR:
Safely fix system-wide font rendering issues by restarting the Windows Font Cache Service on Windows 10 and Windows 11, or by using the Advanced "Reset Fonts" feature in Font Book on current macOS.
● On Windows, if a simple service restart fails, perform a full rebuild by stopping the service and using administrator access to manually delete only the C:\Windows\System32\FNTCACHE.DAT file and the contents of the LocalService FontCache folder before restarting the PC.
● On Mac, the Font Book reset workflow restores default fonts and moves all installed third-party fonts to a Fonts (Removed) folder, making custom fonts unavailable across the system until you reinstall them.
● Restrict these system-level resets to typography errors that span multiple applications; if incorrect fonts only appear in a single program, troubleshoot that specific app instead of clearing the operating system font environment.
Ask AI for a summary
 ChatGPT
 Perplexity
 Gemini
 Claude
 Grok
Grok
If fonts suddenly look garbled, appear as boxes, refuse to update after installation, or show the wrong typeface across several apps, a stale or damaged font cache can be one possible cause. The safest fix depends on your operating system: on Windows 11 and Windows 10, start by restarting the Windows Font Cache Service; on current macOS, Apple documents Font Book's Reset Fonts workflow rather than the old ATS server command sequence found in many legacy tutorials.
⚡Quick Fix: Clear Font Cache Without Deleting the Wrong Files
● Windows first step: restart Windows Font Cache Service before manually deleting cache files.
● Windows full rebuild: if the problem remains, stop the service, remove only the font-cache files from the documented cache locations, and restart Windows.
● Mac current approach: use Font Book > Settings > Advanced > Reset Fonts when a system-wide font problem persists; Apple notes that this moves installed third-party fonts aside.
● If only one app is affected: troubleshoot that app before resetting the system font environment, because the problem may be app-specific rather than a system font cache issue.
In This Article
Part 1. What the Font Cache Does and When to Clear It
Windows uses the Windows Font Cache Service to cache commonly used font data so applications can load fonts more efficiently. macOS also maintains font registration and font-management data, but the current user-facing Apple troubleshooting flow centers on Font Book rather than asking users to delete system font files manually. Before you reset anything, first make sure your symptoms actually point to a font problem.
Signs the Font Cache May Be the Problem
Font cache troubleshooting is most relevant when a font problem appears across multiple parts of the system or persists after you close and reopen the affected application.
| Symptom | What It Can Mean | Best First Move |
| Fonts appear as boxes, symbols, or the wrong typeface in several apps | Font registration or cached font data may be stale or corrupted | Restart the font service on Windows; review Font Book on Mac |
| A newly installed font does not appear after an app restart | The app may not have refreshed its font list, or the font may have failed validation | Restart the app first; on Mac, validate the font in Font Book |
| Two copies of the same font conflict on Mac | This is a duplicate-font problem, not necessarily a cache problem | Use Font Book's Resolve Duplicates feature |
| Only Word, Adobe, Chrome, or another single app shows the wrong font | The issue may be app-specific | Troubleshoot that app before resetting the system font environment |
| Windows Search or another Windows component behaves oddly together with font symptoms | Windows Font Cache Service may be involved | Restart Windows Font Cache Service |
When Clearing the Font Cache Will Not Help
Clearing or rebuilding cached font data cannot repair every typography problem. If a font file itself is damaged, missing, unsupported, or deliberately removed, rebuilding the cache simply rebuilds information from the same underlying files. On Mac, Apple recommends using Font Book to validate fonts and resolve duplicates when those are the real problems.
- Missing font file: Reinstall or re-download the correct font instead of repeatedly clearing cache data.
- Duplicate font conflict: Resolve the duplicate in Font Book rather than treating it as a cache-only issue.
- One-app problem: Check that application's font settings, plug-ins, or vendor troubleshooting steps first.
- Unsupported font format: A cache reset cannot make an unsupported font format compatible with the operating system or application.
Part 2. How to Clear Font Cache on Windows 11 and Windows 10
For Windows, use a two-stage approach: start with the low-risk Microsoft-documented service restart, then perform a full cache rebuild only if the font problem remains. This order avoids deleting system cache files when a simple service refresh is enough.
Method 1. Restart Windows Font Cache Service First
Microsoft's current Windows troubleshooting documentation still uses a restart of Windows Font Cache Service as a supported diagnostic step. This does not delete your personal fonts or files.
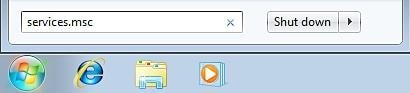
Step 1. Open Services.
Press Windows + R, type services.msc, and press Enter.
Step 2. Stop Windows Font Cache Service.
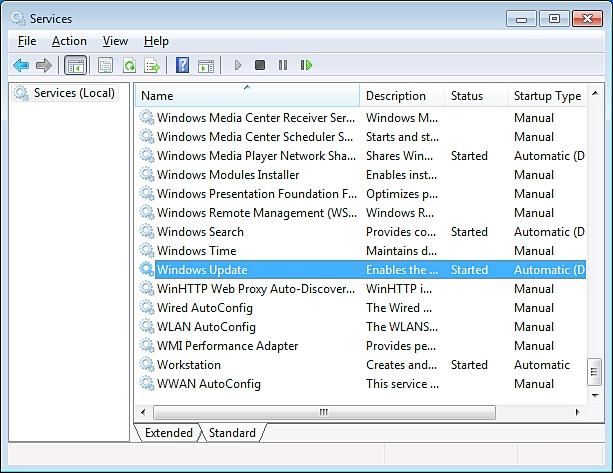
Find Windows Font Cache Service, right-click it, and choose Stop. Do not change the startup type to Disabled.
Step 3. Start the service again.
Right-click Windows Font Cache Service again and choose Start. Then reopen the application that had the font problem and test it again.
Microsoft documents this service restart in its current Windows client troubleshooting guidance. If your fonts now render normally, stop here; there is no need to delete cache files.
Method 2. Rebuild the Windows Font Cache Files
If restarting the service does not help, you can rebuild the Windows font cache by stopping the service and deleting only the cache data Windows can recreate. This method requires administrator access and should be limited to the exact paths below.
Step 1. Save your work and close font-heavy applications.
Close design tools, Office apps, browsers, font managers, and any other applications that may be actively using fonts.
Step 2. Stop Windows Font Cache Service.
Open services.msc again, right-click Windows Font Cache Service, and choose Stop.
Step 3. Open the FontCache folder.
In File Explorer, navigate to:
C:\Windows\ServiceProfiles\LocalService\AppData\Local\FontCache
If Windows asks for administrator permission to enter the LocalService profile, approve access only if you are using an administrator account and have confirmed the path.
Step 4. Delete the files inside the FontCache folder.
Delete the cache files inside the FontCache folder. Do not delete the LocalService profile, AppData folder, or unrelated folders beside it.
Step 5. Delete FNTCACHE.DAT.
Navigate to:
C:\Windows\System32\FNTCACHE.DAT
Delete FNTCACHE.DAT only. Microsoft Q&A guidance for Windows 10 and Windows 11 confirms this file together with the FontCache folder contents as part of a full font-cache rebuild workflow.
Step 6. Restart Windows.
Restart the PC. Windows can regenerate the font-cache data from the fonts still installed on the system.
Important: Do not delete the C:\Windows\Fonts folder. That folder contains installed fonts, not merely disposable cache data.
What to Do if Windows Says Access Is Denied
An access-denied message is a sign to verify permissions and the path, not a reason to take ownership of broad Windows system folders. Before changing permissions, confirm that you have stopped Windows Font Cache Service and that you are opening the specific FontCache folder under LocalService.
- Confirm administrator access: Use an administrator account for the full rebuild method.
- Verify the exact path: Do not apply ownership changes to C:\Windows, System32, or the entire ServiceProfiles directory.
- Restart and try the service-only method again: If you are not comfortable changing permissions, a normal restart plus the service restart is safer than broad permission changes.
- Managed PC: If the computer belongs to an employer or school, contact the administrator instead of overriding policy-controlled permissions.
Part 3. How to Clear Font Cache on Mac
Current macOS troubleshooting needs a different approach from many older web tutorials. Apple does not expose a dedicated “Clear Font Cache” button in Font Book; its current documented recovery path for persistent system-font problems is to reset the font environment in Font Book. This is broader than a simple cache flush, so read the effect before you click Reset Fonts.
Use Apple's Current Font Book Reset Workflow
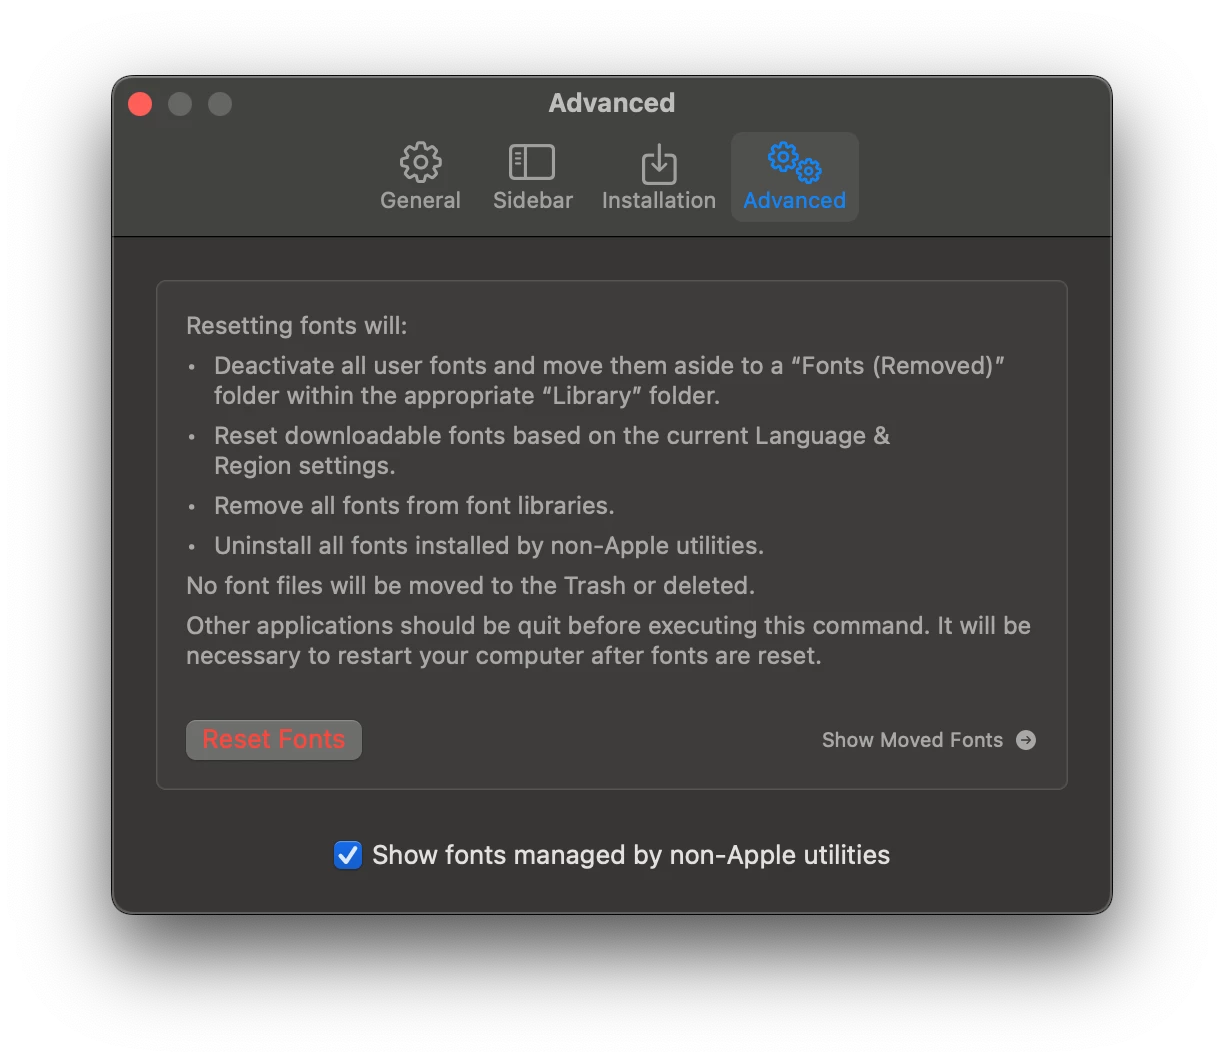
Apple says Reset Fonts restores the fonts that originally came with your Mac and moves fonts you installed into separate Fonts (Removed) folders. That means this method can temporarily make your third-party fonts unavailable until you reinstall them.
Step 1. Quit apps that are using fonts.
Save your work and quit design apps, browsers, Office apps, and other programs that may be actively loading fonts.
Step 2. Open Font Book settings.
Open Font Book, then choose “Font Book > Settings”.
Step 3. Open Advanced and choose Reset Fonts.
Select Advanced, then click Reset Fonts.
Step 4. Confirm the reset.
Click Proceed and authenticate if macOS asks for a password or Touch ID. Apple states that fonts you installed are moved to /Library/Fonts (Removed) or ~/Library/Fonts (Removed).
Step 5. Restart the affected apps and test.
Reopen the app that showed broken fonts. If a custom font you need is now unavailable, reinstall that font from a trusted original source or from the Removed folder after confirming it is not the font causing the problem.
For the current Apple procedure, see Restore fonts that came with your Mac using Font Book.
Why Old atsutil Server Commands Are Not the Best Default Anymore
Older Mac guides often tell users to run a sequence such as atsutil databases, atsutil server -shutdown, and atsutil server -ping. Those instructions were written around older Apple Type Services behavior. Apple's current Font Book documentation does not use that command chain as its standard troubleshooting procedure, so this article does not recommend copying legacy ATS server commands into Terminal on current macOS.
This distinction matters because a “font cache” search often surfaces instructions written for much older macOS releases. If you are on a managed production Mac, rely on the current Apple-supported Font Book workflow or your administrator's documented procedure rather than deleting undocumented system cache folders.
Part 4. Match the Fix to the Font Problem
Clearing font cache data is most useful when the symptom matches the scope of the cache problem. Use this decision table before repeating the same reset several times.
| What You See | Likely Scope | Best Next Step |
| Wrong or garbled fonts across several Windows apps | System-wide Windows font state | Restart Windows Font Cache Service, then rebuild cache files only if needed |
| Wrong or garbled fonts across several Mac apps | System font registration or installed-font conflict | Review fonts in Font Book; use Reset Fonts if the issue persists |
| One new font will not appear on Mac | Font installation or validation problem | Validate the font and check for duplicates in Font Book |
| One application shows bad fonts but the rest of the system is normal | Application-specific problem | Restart or troubleshoot that app before changing system font data |
| Mac custom fonts disappear after Reset Fonts | Expected result of the reset | Review the Fonts (Removed) folders and reinstall only trusted fonts you still need |
| Font problem started after an OS update | Could be font registration, app compatibility, or an OS-specific bug | Install current OS/app updates and test before repeating destructive troubleshooting |
On Mac, Font Book can also validate a font and resolve duplicates. Use those tools when the problem is a specific font rather than a system-wide rendering issue.
Part 5. Font Cache Clearing Mistakes to Avoid
A font-cache reset should be a targeted troubleshooting step, not a general-purpose disk cleanup. The cache itself is not a meaningful place to reclaim storage, and aggressive deletion can create bigger problems than the original font glitch.
- Do not delete installed font folders: Never treat
C:\Windows\Fontsor/System/Library/Fontsas disposable cache folders. - Do not permanently disable Windows Font Cache Service: Microsoft describes the service as a performance component that caches commonly used font data. Stop it only as part of troubleshooting, then start it again.
- Do not use secure-erasure software just to clear font cache: Secure deletion is unnecessary for cache rebuilding and can increase the risk of deleting unrelated data.
- Do not promise that a cache reset fixes every font problem: Broken font files, duplicate fonts, unsupported formats, or application bugs require different fixes.
- Do not copy legacy Mac Terminal commands without checking your macOS version: Current Apple documentation uses Font Book for font-reset troubleshooting.
- Do not reset fonts on Mac without understanding the result: Apple moves installed fonts aside, so custom fonts can disappear from apps until you reinstall them.
Part 6. What if You Delete the Wrong Files While Troubleshooting?
If you followed the steps above exactly, clearing font cache should not delete personal documents, photos, videos, or project files. But if you accidentally removed personal data from another folder while manually cleaning your PC or Mac, stop writing new data to the affected drive and check Recycle Bin or Trash first.
If the personal file is no longer in Recycle Bin or Trash and you do not have a usable backup, data recovery software can be considered. Recoverit for Windows and Recoverit for Mac are designed for recovering deleted or inaccessible personal files from detectable storage devices.

Important: Recoverit is not a font-cache repair utility and should not be used to restore Windows or macOS system font-cache files. If you need to recover personal data, save recovered files to a different healthy drive to reduce overwrite risk. No recovery software can guarantee recovery after the deleted data has been overwritten.
Conclusion
To clear font cache safely, match the fix to the operating system and start with the least disruptive step. On Windows 11 and Windows 10, restart Windows Font Cache Service before deleting cache files. If a full rebuild is still necessary, remove only the documented FontCache contents and FNTCACHE.DAT, then restart Windows. On current macOS, use Apple's Font Book troubleshooting flow and understand that Reset Fonts moves installed third-party fonts aside. Most importantly, do not confuse font-cache troubleshooting with deleting installed fonts or running broad system-cleanup tools.
FAQ
-
Is it safe to clear the font cache in Windows?
It can be safe when you stop Windows Font Cache Service and delete only the font-cache files from the correct cache locations. Start with a service restart first, because it is less disruptive. Do not delete the Windows Fonts folder or unrelated files in System32. -
Where is the font cache in Windows 11 and Windows 10?
Windows font-cache data can be found under C:\Windows\ServiceProfiles\LocalService\AppData\Local\FontCache, and Windows also uses C:\Windows\System32\FNTCACHE.DAT. Administrator permission may be required to work with these locations. -
Do I need to restart Windows after clearing font cache?
Yes. After a full cache-file rebuild, restart Windows so the system can regenerate font-cache data from the fonts that remain installed. -
How do I clear font cache on a Mac?
On current macOS, Apple's documented troubleshooting route is Font Book > Settings > Advanced > Reset Fonts. This is broader than a simple cache clear: it restores standard fonts and moves fonts you installed to Fonts (Removed) folders. -
Will Reset Fonts on Mac delete my custom fonts?
Apple says installed fonts are moved to /Library/Fonts (Removed) or ~/Library/Fonts (Removed), making them unavailable to apps until you reinstall them. Review this impact before using Reset Fonts. -
Why does only one app still show the wrong font after a cache reset?
If every other app displays fonts correctly, the remaining problem is more likely app-specific. Restart the app, verify its font settings and plug-ins, and use the developer's troubleshooting guidance instead of repeatedly resetting the system font environment. -
Does clearing font cache free a lot of disk space?
No. Font-cache clearing is a troubleshooting step for font rendering or registration problems, not a meaningful storage-cleanup method.


