
Jun 03, 2026 • Filed to: Recover Files • Proven solutions
 TL;DR:
Safely deleting accumulated temporary files prevents system memory clogging and reclaims disk space without affecting your device or installed applications.
● Standard temporary files can be accessed by executing \temp\ in the Windows Run dialog, while hidden application temporary files require the built-in Windows Disk Cleanup utility (cleanmgr) for comprehensive removal.
● Windows 10 Version 1903 and later natively supports removal via Settings > Storage, whereas any system running Windows Vista or higher can isolate scattered files using Advanced Query Syntax searches like ext:.tmp or *.tmp.
● For automated or unrecoverable deletion, users can either save the rd \temp\ /s /q command as a reusable .bat script or utilize Stellar BitRaser to schedule routine wipes applying 17 specialized erasure algorithms.
Ask AI for a summary
 ChatGPT
 Perplexity
 Gemini
 Claude
 Grok
Grok
Deleting temporary files from your device will usually not affect your device. These files usually hold tiny miscellaneous configurations or settings that have most likely been used by the software that created them in the first place. Temporary files may not be deleted immediately after use by the software that created them thereby leading to heavy junk. Clearing these files is usually the best option.

- Part 1: What are the Temporary Files?
- Part 2: Where are Temporary Files Stored?
- Part 3: Why should I remove Temporal Files?
- Part 4: How to Clear Temp Files through Deleting Windows Temp Folder
- Part 5: How to Clear Temp Files by Command Line
- Part 6: How to Clear Temp Files using Windows Disk Cleanup
- Part 7: How to Clear Temp Files in Settings on Windows 10 Version 1903 or Later
- Part 8: How to Clear Temp Files through Searching for .tmp Files
- Part 9: How to Clear Temp Files with One-click using Stellar
In this article
Part 1: What are the Temporary Files?
Just in case you wonder what all this is. Just as the name suggests, temporary files, also known as temp files are files that are frequently accessed, read and edited or overwritten.
These files are created by the software or applications you have installed on your device. Temp files hold tiny info such as quick settings or very large caches used by the software which created it.
Part 2: Where are Temporary Files Stored?
Temporary files on Windows are mainly stored in the Temp folder, typically located at C:\Windows\Temp or within your user profile at USERPROFILE\AppData\Local\Temp. On older systems like Windows XP, you’ll find them in USERPROFILE\Local Settings\Temp.
To quickly access these folders, press Windows + R to open the Run dialog, then type \temp\ and hit Enter. This shortcut instantly takes you to your main temporary files location, making cleanup fast and easy.
Knowing where your temp files are stored helps you keep your PC clutter-free and running smoothly.
Part 3: Why should I remove Temporal Files?
The volume temporal files occupy may range from a few megabytes to many gigabytes... Say over a hundred gigabytes. When temp files become too large, they clog your computer's memory. This decreases your computer's performance and eats up your device’s memory. You'll gradually run low on disc space. To prevent all these from happening, you'll need to clear your temporary or temp files once in a while.
Part 4: How to Clear Temp Files through Deleting Windows Temp Folder
One way to do this is by navigating to (on Windows Vista, 7, and 8) \USERPROFILE\AppData\Local\ or (on Windows XP or earlier versions) \USERPROFILE\Local Settings\ and select all or the specific application's temp files you want to clear and deleting them. However, there's an easier way to do this. Simply follow the procedures below to find the temp folder and delete its contents on your Windows machine.
Step 1: Launch the Run program.
On your keyboard, hit the Windows button + R key. A program such as the one that appears below in the picture will appear. Next, follow the procedure in the next step.
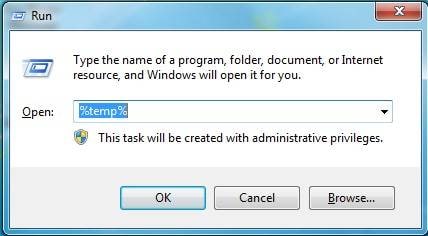
Step 2: Automatically find the temp folder.
To automatically open the temp folder type in \temp\ as shown in the image above and your temporal files folder will be opened.
Step 3: Delete Temporary Files.
Here you'll find all applications on your device that uses temporary files.
You have two options:
- Selectively delete files
- Delete all temp files
Option 1. Selectively delete files.
To delete temporary files selectively, simply delete the folder. Most applications store their temporal files in folders named after the application. Alternatively, you can double-click on the folder to open it and delete the files you find in it.
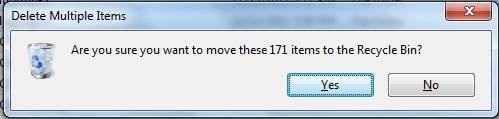
Option 2. Delete all temp files.
To do this, simply highlight all folders and delete or use the shortcut keys: on your keyboard, hit Ctrl + A to select all folders then click hit on the backspace key to delete all or right-click on any of the selected files, scroll to delete and confirm your action.
NOTE: In case of an error saying some files weren't found, simply check or tick the "do this for all current items" option below the dialog and hit skip.

That's it! If your files were successfully deleted, congratulations on your lightheaded computer!
Part 5: How to Clear Temp Files by Command Line
You could clear your computer's temp files from the command line in two ways. You could do it directly from the cmd program or saving the command in a .bat format and running it. The good thing about using a batch file (.bat) is that you could always just click on it to clean your device based on the command you saved in it. Method 2 below explains this. Read on to see the commands used to delete files.
Method 1. Working directly from the command line.
First, you need to open the cmd program by:
- Clicking the Windows icon at the bottom of your screen.
- Typing "cmd" into the search box
After performing the above procedures, a search result containing "cmd" or "command prompt" should be displayed. Click on any of the programs to launch the Windows command prompt.
Next, into the command prompt window, type the command:
rd \temp\ /s /qNote that all the temp files directory will be deleted by doing this. To proceed, hit the enter key.
Alternatively, to be more specific with the program folders you want to clear, use this command:
rd C:\Path\to\tmp\folder /s /qReplace "Path\to\tmp\folder" with the real path to the temp folder you want to clear.
Method 2. Using a batch (.bat) file.
This method is easier and more convenient. It is also reusable and faster.
Step 1: Open your notepad or any other text editor.
Step 2: Type in any of the commands explained in Method 1.
Step 3: Save your text file in a .bat extension instead of .txt extension.
Step 4: Run double click on the file to launch your newly created program.
When next you want to Clear temp files, simply double-click on the batch file to repeat the automated process.
Part 6: How to Clear Temp Files using Windows Disk Cleanup
While temp files may be stored in well-known general folders, some applications store their temp files in stranger folders, such applications make finding all temp files extremely difficult. In such a situation, simply use the Windows Disk Cleanup tool to handle hidden temporary files.
The Windows Disk Cleanup Utility is a tool that can be found on all Windows versions. It is very useful in cases where applications store their temp files in directories or folders other than the well-known temp folders. This tool finds and clears hidden temp files.
To open the Windows Disk Cleanup Tool on Windows 7 please follow the procedures below.
Using Command Prompt:
To use the command prompt to open the Disk Cleanup Utility (the easy way), run the command prompt by clicking the windows icon and searching the keyword "cmd".
To open Disk Cleanup using the Command Prompt program on a Windows 7:
After opening the Command Prompt
- Type cleanmgr into the windows.
- Hit the Enter key on your keyboard.
The long way:
- Click Start at the bottom corner of your screen or hit the Windows key on your keyboard.
- On your device, navigate to All Programs, go to Accessories, next to System Tools
Look for Disk Cleanup in System Tools.
The temp files cleaning process:
By now, you should have successfully opened the Disk Cleanup Utility. Follow the simple process below to clean up:
- Choose the types of files and folders you want to delete under the Files to delete the tab.
- Hit OK.
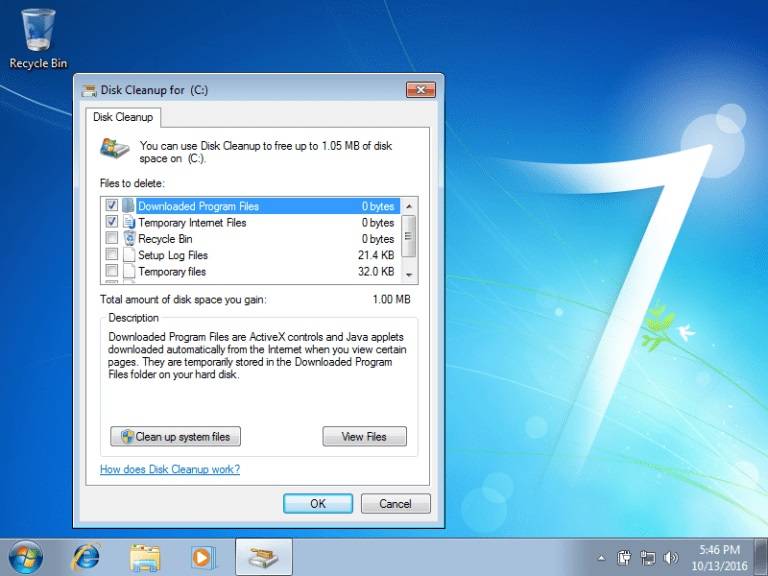
Furthermore, to clear system files that are no longer needed by Windows, click on the "Clean up system files". If prompted by the UAC or User Account Control to confirm your action, simply click on the "Delete Files" option.
Tips:
- The "More options" tab contains options for freeing more space. Go there to free more space from your Windows 7.
- Select "Clean up" at the Programs and Features tab to remove the program files that are no longer needed by your device.
To open and use the Windows Disk Cleanup Tool on your Windows 10 device, please follow the procedures below:
- In the Windows Search Bar, enter "Disk Cleanup".
- Hit Enter on your Keyboard
From the list of drives on your device, select the drive you want to clean or run Disk Cleanup on
- Select the files you want to clean or delete
- Hit OK
- Hit Delete files
Part 7: How to Clear Temp Files in Settings on Windows 10 Version 1903 or Later
To remove temp files from your Windows 10 running a version equivalent to or later than version 1903, please follow the procedures outlined below:
- Click on settings (usually the next icon after the Windows icon on the bottom left corner of your screen)
- Open System > Storage
- Click "Temporary files" seen below the Local Disk space
- Select all the files you intend clearing and click Remove
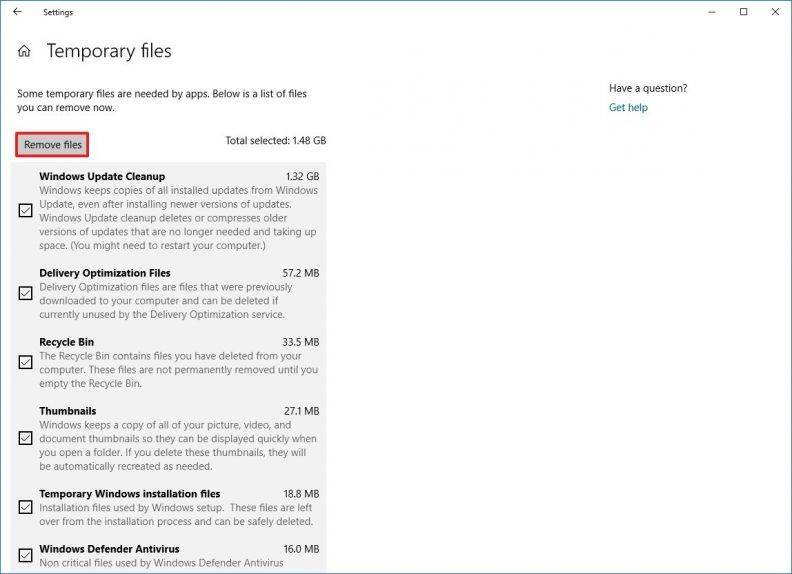
That's it! Space consuming temporary files have been cleared.
Part 8: How to Clear Temp Files through Searching for .tmp Files
Most temporary Files are known to end with a .tmp extension.
One can search for every file that ends with .tmp.
Windows Vista and higher versions support the AQS - Advanced Query Syntax. This functionality allows you to search for all files based on their extensions. This functionality could be very helpful when you're trying to find temporary files on your system.
Learn how to use the Advanced Query Syntax on Windows below:
Use the syntax:
ext:
To find .tmp files, simply open the windows search and type in ext:.tmp and search. After doing that, a list of all temporary files with the extension .tmp will be displayed and at your mercy.
Tip:
- You can simply type in *.tmp instead.
- If the extension search doesn't work for you, try enclosing the extension in quotes. e.g. ext:".tmp" and search.
Part 9: How to Clear Temp Files with One-click using Stellar Biteraser
Ever wondered how deleted files can be recovered after they have been deleted even from your recycle bin? Well, this is because deleting files doesn't actually make the files go, sometimes copies of them are made deep in file partitions. Permanently deleting temp files may just be the option for you. Stellar Biteraser is a software capable of permanently deleting files.
17 Internationally recognized erasure algorithms are provided by Stellar Biteraser. These algorithms permanently erase data stored in directories and also prevent the misuse of your private data thereby protecting your privacy. Learn how to use this software on windows based laptops or desktops – Oh! Before that, did you know you can schedule temp file deleting tasks with Stellar Biteraser?
With Stellar Biteraser, you can make the deletion of useless files automatic. Parameters include (but not limited to) daily schedule, weekly or monthly schedule. How cool is that?
Please follow the steps outlined below to delete windows temporary files using Bitraser.
Step 1: Download BitRaser software.
If you don't already have this software, you'll need to download and install it before proceeding.
Step 2: Launch the software.
After successfully installing the software, launch it. You should have a screen like an image below.
Step 3: Navigate to the tools tab.
Check the list of tabs atop your screen, click on the "Tools" option.
Step 4: Next, find and Click the "Erasure Algorithm" from the Tools tab.
Step 5: Select any of the 17 algorithms provided in the drop-down menu and click the Home tab.
Step 6: Hit erase now and browse the location of the temp files. Refer to Part 2 of this article if you do not know where the majority of your temporary files are stored. Also, with BitRaser, you can search for files —even hidden files.
Step 7: After selecting the folder from Step 5 above, tick the specific temp files or folders from the list now displayed on your screen.
Step 8: Hit the "Eraser Now" button.
After the process is complete, you may be prompted to reboot your system. Allow the reboot by clicking "Yes".
That's it! Your computer will be restarted free of space-consuming junk files.
Conclusion
Applications on your device may use temporary files to function speedily but many of the apps forget to clear these temp files as soon as they are done —which leads to huge disk space consumption. This post has covered numerous ways you could easily get rid of these files.
Rescue & Fix Files
- Recover Document Files
- Repair Document Files
- Recover & Repair More
- Permanently Deleted Files
- Delete Files Command
- Restore Sticky Notes
- Undo Deleted Files
- Get Back Laptop Files
- Cut&Past Files Loss Issue
- Undelete User Profile
- Clear & Delete File


Amy Dennis
staff Editor