

 TL;DR:
Mac users can fix corrupted JPEG images by leveraging built-in workarounds like Safari rendering, triggering the native Photo Library repair tool, or using advanced software like Wondershare Repairit for heavily damaged files.
● Resolve minor macOS corruption and database glitches by holding the Command and Option keys while launching the Photos app to initiate the built-in repair utility.
● Severe corruption or batch repair needs are best handled by Wondershare Repairit on macOS X 10.10 or later, whereas free online converters like JPG.Repair or Online-Convert suit quick, single-file fixes.
● If images are accidentally deleted or lost during the repair process without an active Time Machine backup, Wondershare Recoverit serves as a contingency to retrieve over 1000 file formats.
Ask AI for a summary
 ChatGPT
 Perplexity
 Gemini
 Claude
 Grok
Grok
Imagine you discover that some of your precious images on your computer are not opening or appear distorted. JPEG corruption on Mac can happen unexpectedly due to interrupted file transfers or faulty storage. Fortunately, there are several resources available to repair corrupted photos on your Mac and retrieve them. In this article, we will discuss the top methods to repair corrupted JPEG files.
Try Recoverit to Perform JPEG Data Recovery
 Security Verified. 3,591,664 people have downloaded it.
In this article

Part 1. Signs That Indicate You Must Repair Corrupted JPEG Photos Now
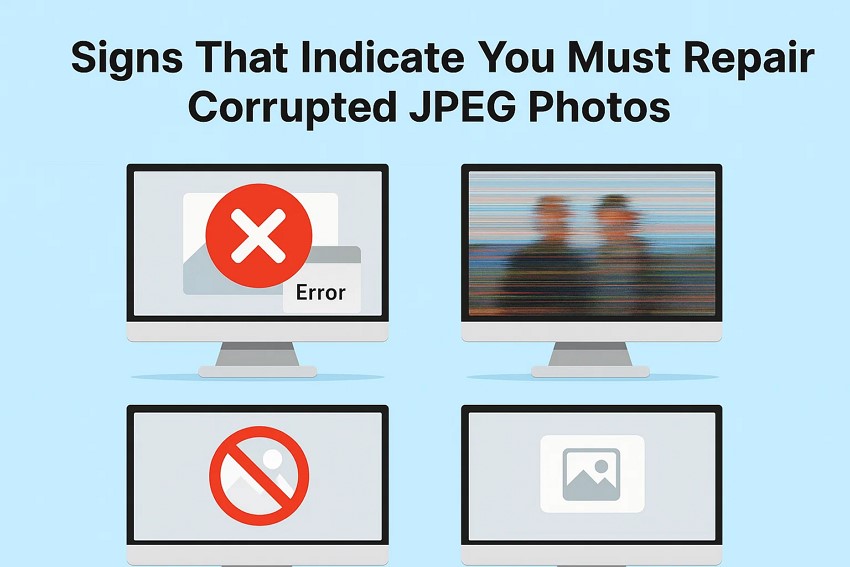
Recognizing early signs of corruption is crucial to preventing permanent loss of valuable memories. Mentioned below are some of the top indications that show why you need corrupted JPEG file repair without wasting time:
- Photos Won’t Open or Show: If your JPEG files consistently fail to open or display error messages like "Cannot open file," it’s a clear indication of corruption, and you might need to repair them.
- Distorted or Pixelated Images: When the photos show unusual lines or pixelation instead of normal visuals, you must prepare yourself for photo corruption.
- Sudden Crash When Opening Photos: Another sign is the crashing of the Photos app while trying to view a certain JPEG file within its interface.
- Thumbnail Preview Unavailable: A file must be corrupted or damaged if the preview within the thumbnail becomes unavailable, and when you open it, there are no visuals.
Part 2. How to Repair Corrupted JPEG Online Free with Web-Based Tools
If you are looking for online solutions to repair your image files instantly, use the following online resources:
1. Repairit Online
One of the top online JPEG repair tool that provides the utility of repairing corrupted image files is Repairit Online. The tool uses advanced technology to perform deep scanning and repairing within your system and restore the data successfully. Besides JPEG files, users can repair various file formats, such as videos and documents, using this incredible tool.
You get the ability to repair zipped files that are corrupted due to a system crash or any other reason. Users can upload their images or simply drag and drop the files within the intuitive interface of the tool. Furthermore, it allows you to repair multiple files at once, giving users batch accessibility. To learn how to use this tool for JPEG file repair, read the steps mentioned below:
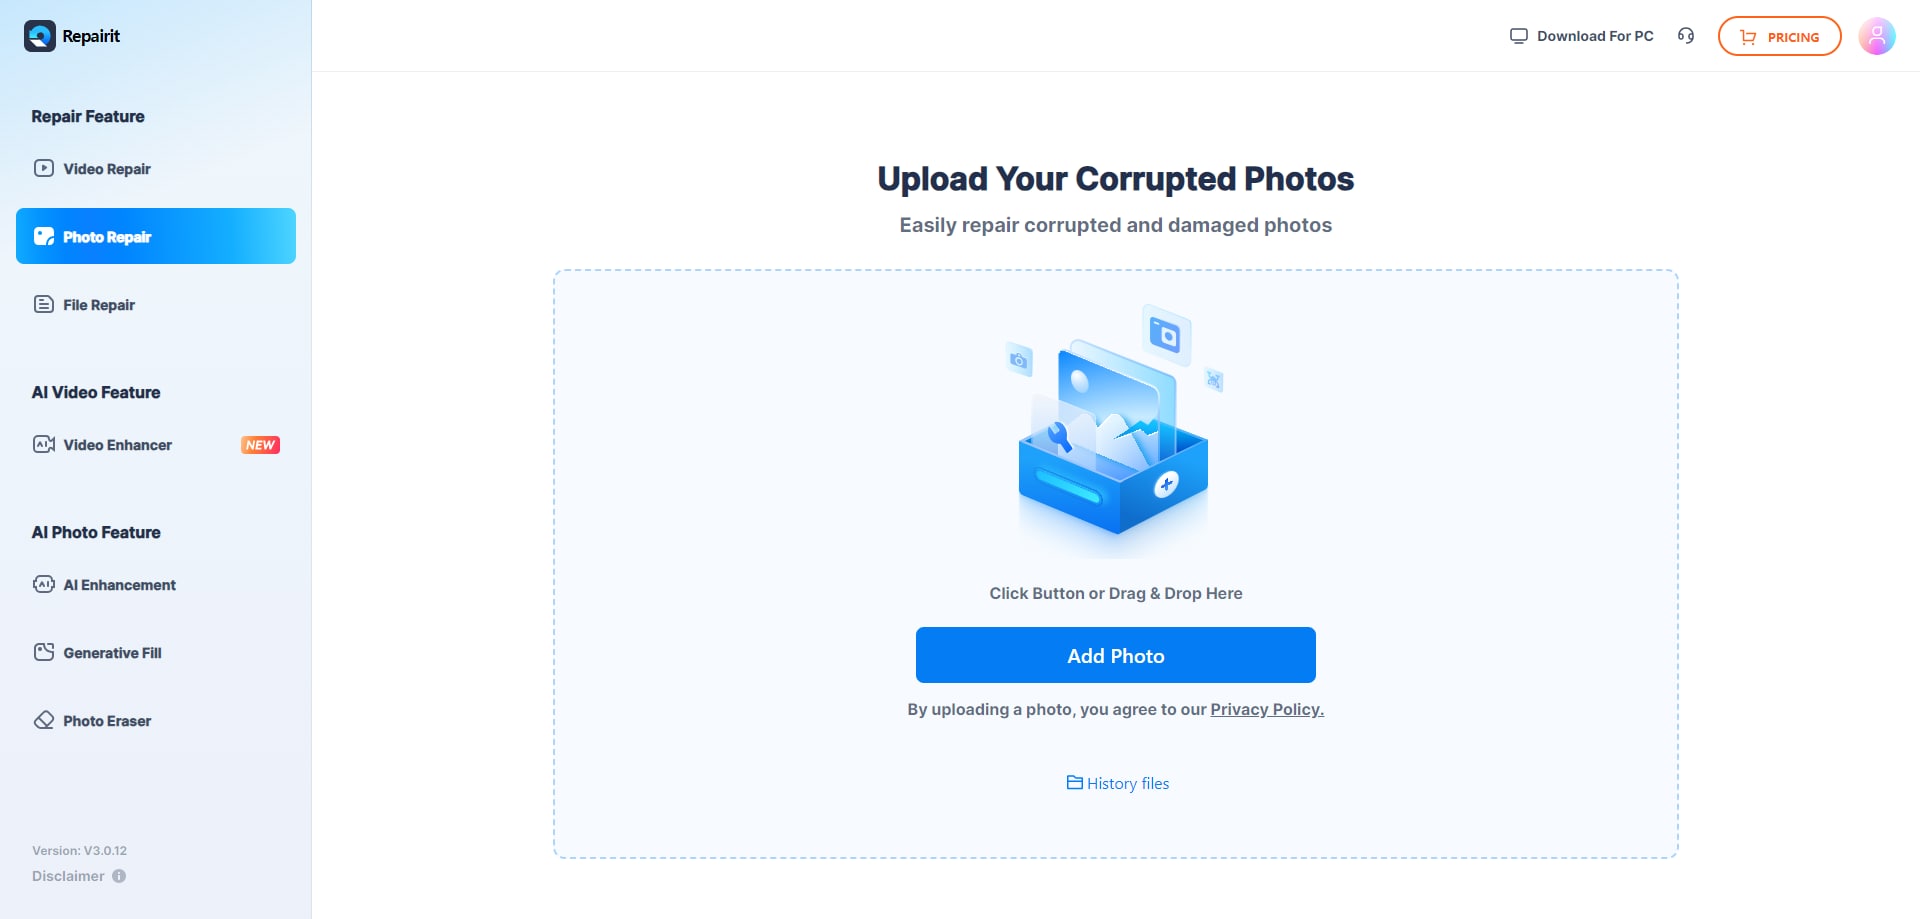
Step 1. Upload Broken Photos Within Repairit Online
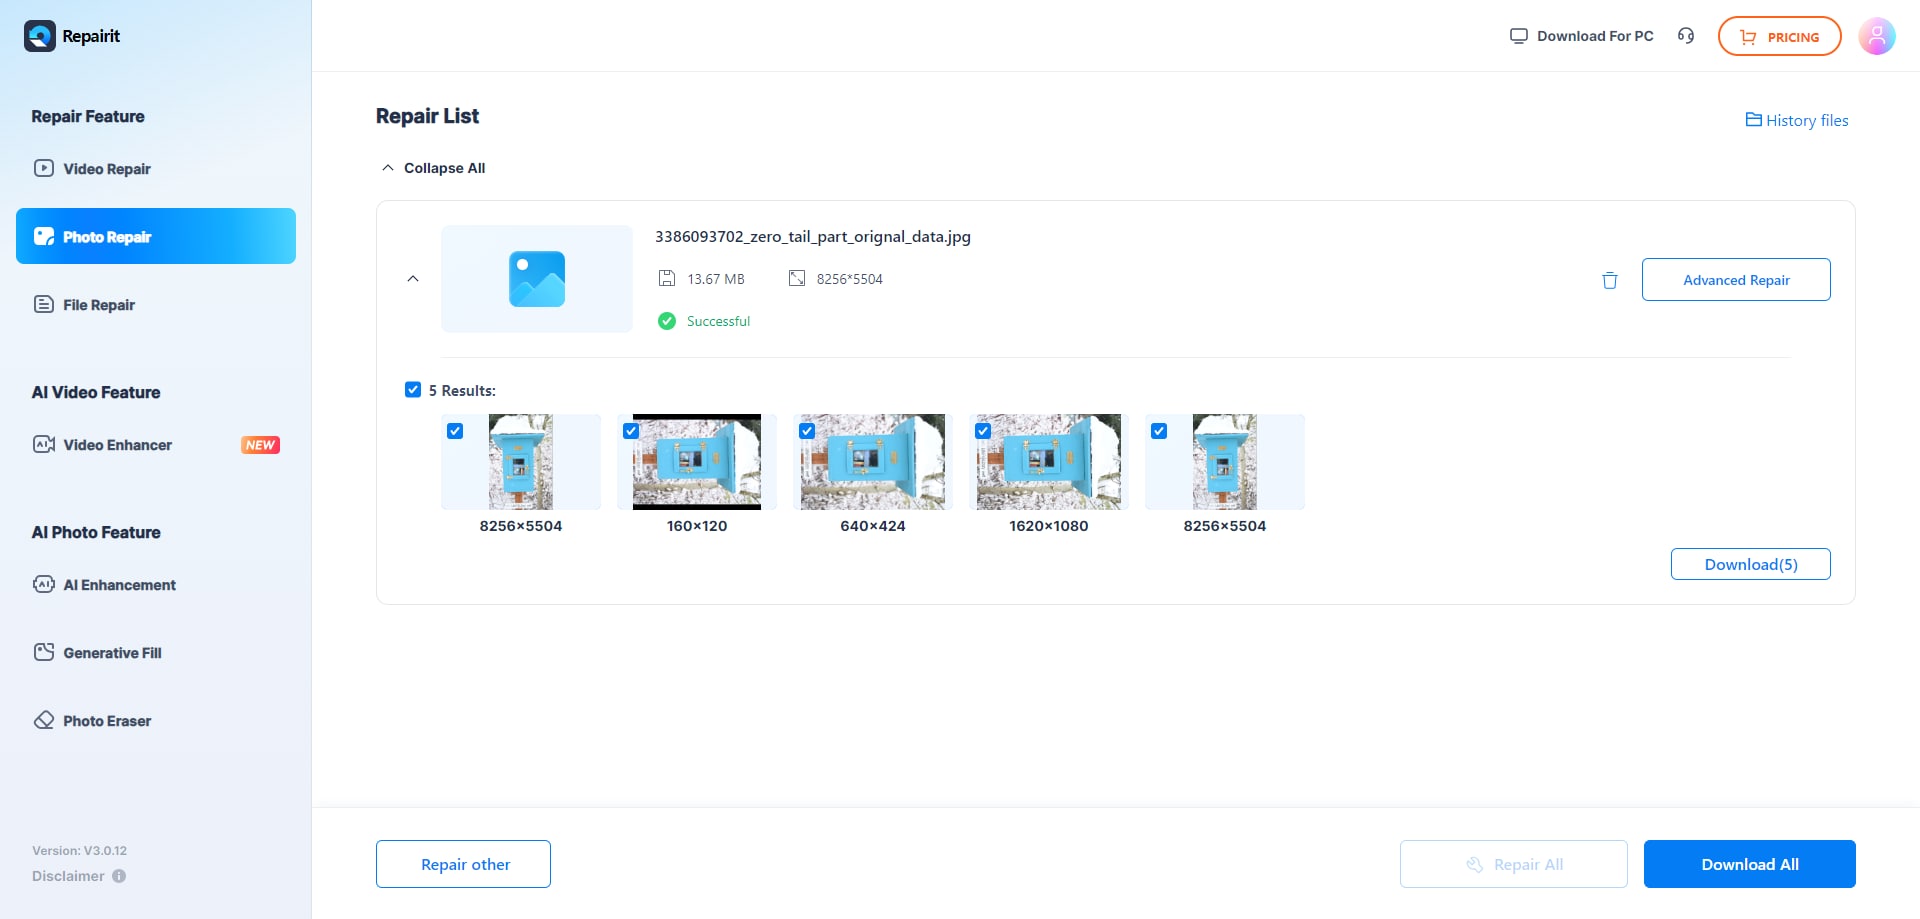
After accessing the tool on your web browser, head to the tool’s homepage and enable the “Photo Repair” from the left. Begin the process by pressing the “Add Files” button to upload your corrupted JPEG photo.
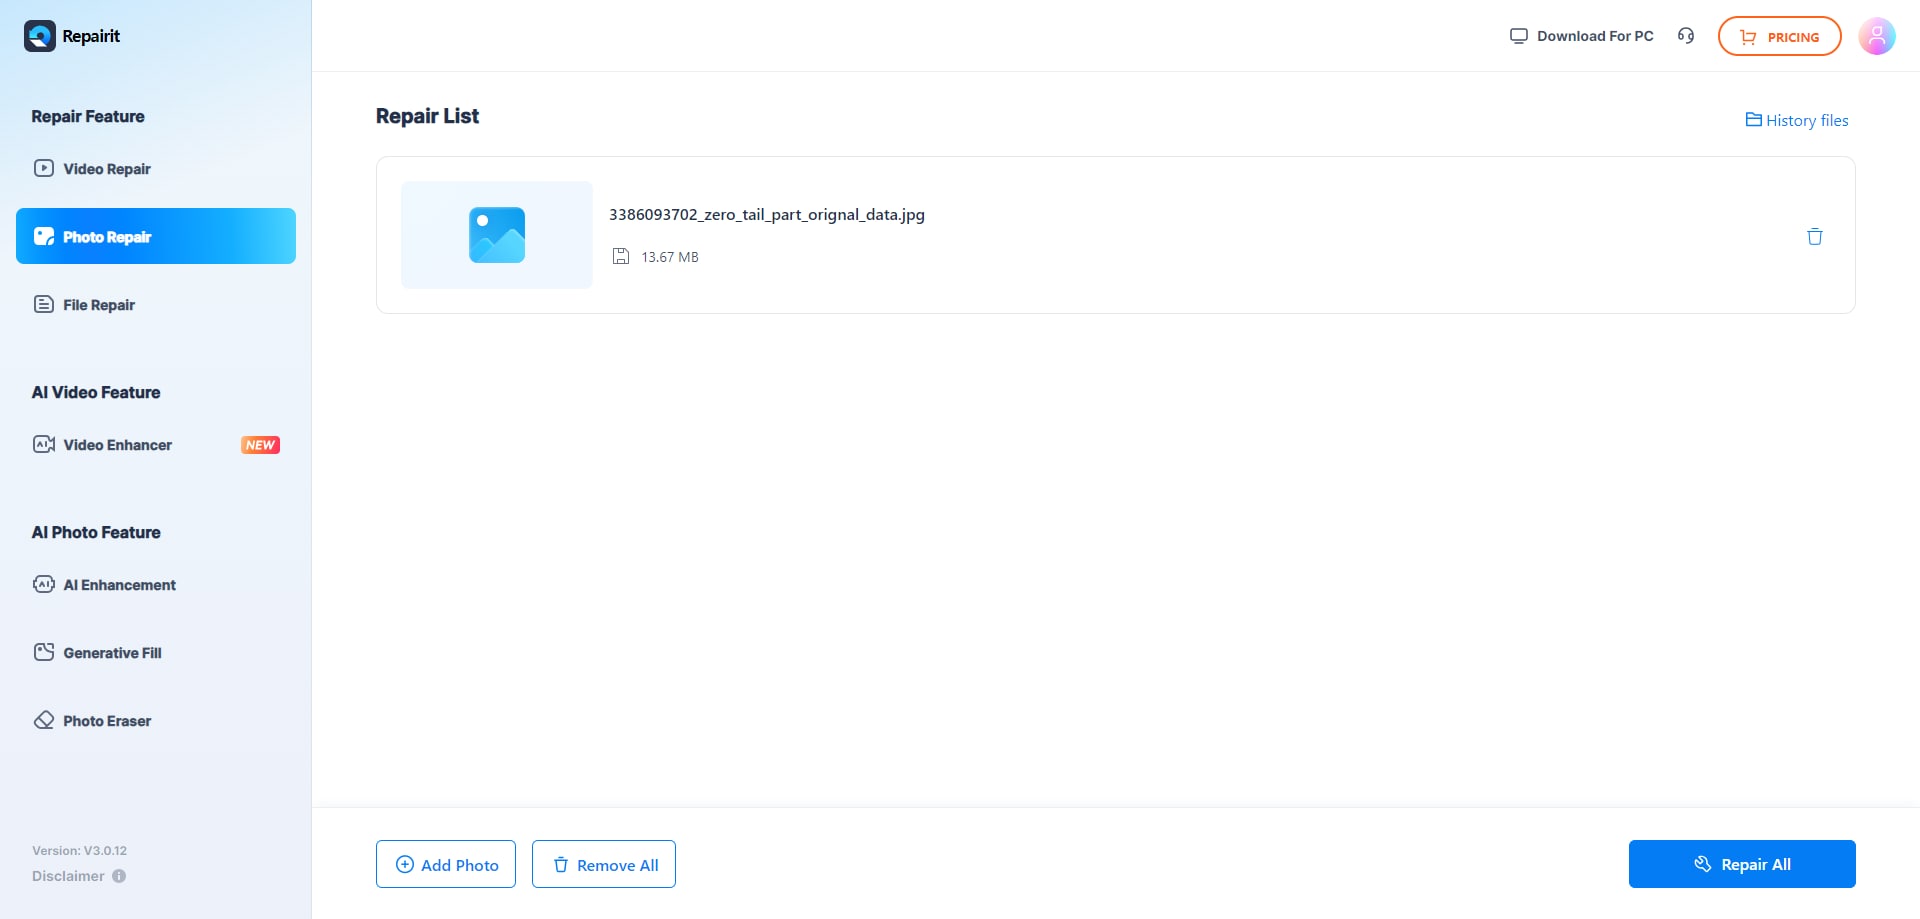
Step 2. Start The Repair Process
Once the image is uploaded, you can add more files using the “Add Photos” button. When done, press the “Repair All” button located at the bottom to execute the process.
Step 3. Preview the Photo and Save
After the process is completed, preview the image within the tool’s interface. Press the “Download” button to save the results to your device from this free JPEG repair tool.
2. JPG.Repair
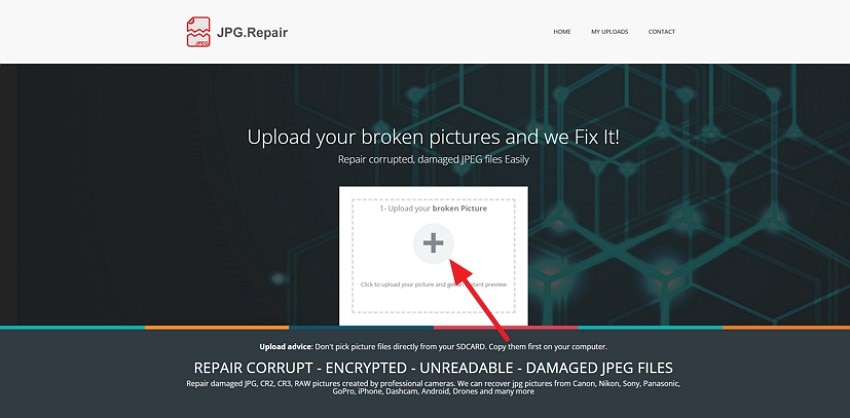
Another online tool that instantly mends your broken photos is JPG.Repair, which offers an easy-to-use interface. You can upload a corrupted, damaged, or even encrypted image, and the tool will make the visuals clear and readable for you with only a few clicks. Follow the steps mentioned below to learn how to use this online tool for repairing JPEG files:
Step 1. Begin by accessing the free JPEG recovery tool on your browser and uploading your damaged image using the “+” button located on the homepage.
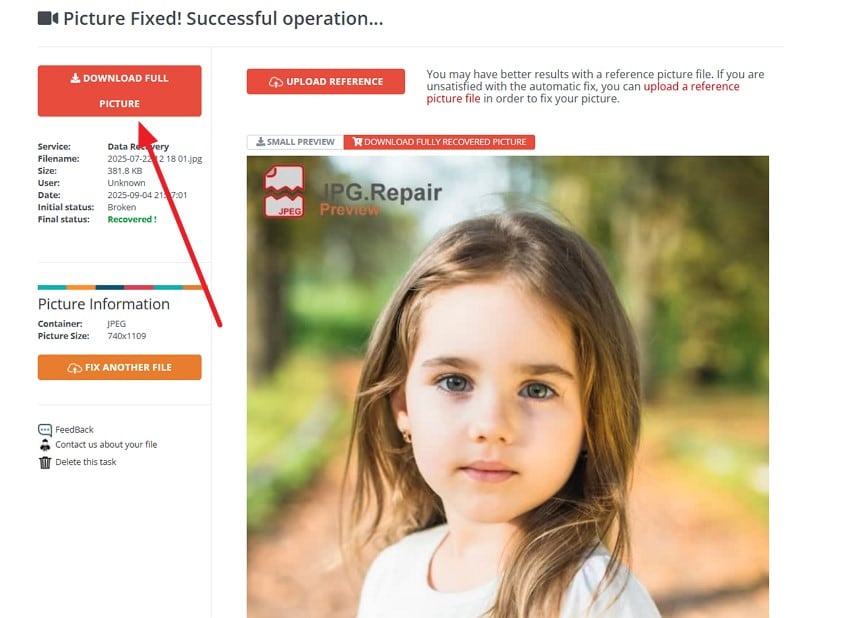
Step 2. Once the image is uploaded, the tool will instantly begin the repairing process, and a preview of the fixed image will be provided in the following interface. Review the image and press the “Download Full Picture” button to save the repaired photo.
3. Office Recovery
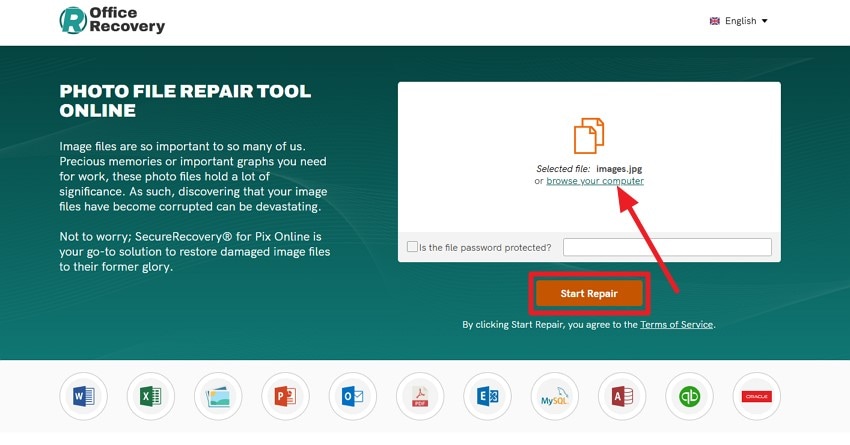
Office Recovery is another online tool that you can use to fix your broken JPEG image effortlessly. Besides JPEG, the tool offers support for other image formats, including GIF and TIFF. Moreover, the advanced technology used by the tool offers accurate color preservation along with original dimension retrieval. To learn how to use this online tool, read the steps mentioned below:
Step 1. Drag your corrupted image file to the tool’s interface opened in your web browser or press the “Browse Your Computer” option. Once uploaded, click on the “Start Repair” button located at the bottom.
Step 2. Once the repair is completed, press the “Preview Results” button located within the interface to successfully download the fixed picture from this JPEG repair tool.

Part 3. Manual Methods to Repair Corrupted JPEGs Without Paid Tools
If you do not want to go for a paid repairing tool, try the methods to fix your corrupted image files:
Method 1. Convert to a Different Format
One of the convenient methods to repair corrupted JPEG file is to change its format. For this, you can use an online format converter that has easy access. One such tool is Online-Convert, which provides easy format conversion to your desired format. To learn how to use this online tool, read the steps mentioned below:
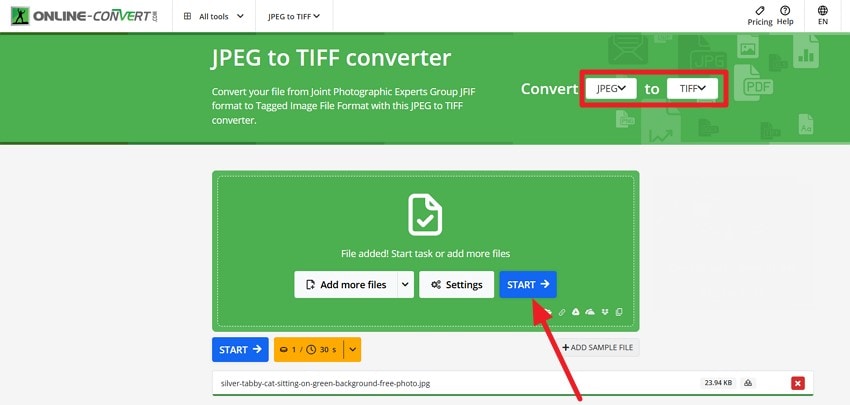
Step 1. After accessing the specific converter from the homepage on your web browser, select “Convert” as “JPEG.” Next, expand the drop-down menu of “To” and choose the relevant option, such as “TIFF.” Press the “Choose File” button to upload your damaged image. Finally, hit the “Start” button to execute the process.
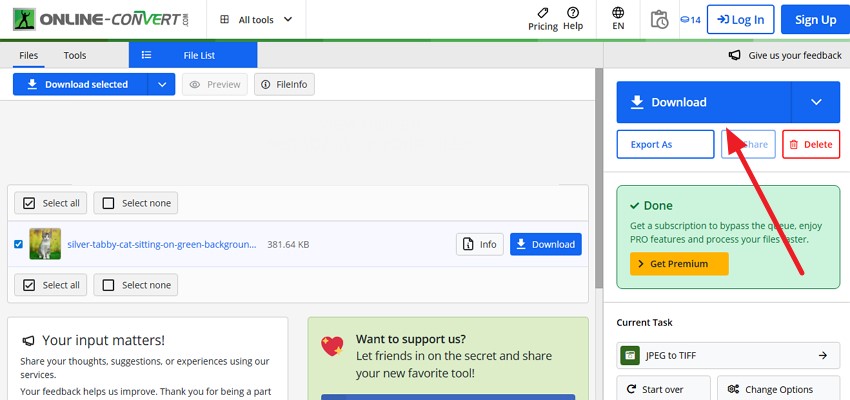
Step 2. Once the file is repaired in the following interface, press the “Download” button to successfully save the results to your Mac.
Method 2. Rename the JPG/JPEG Files | Change Folder Path
Renaming a corrupted JPEG file repair can sometimes resolve minor corruption issues related to the file's name or extension without altering the file content. On Mac, you can conveniently change the file name or change its path using the command-line Terminal. Here are the instructions for changing the image file name and the folder path on your Mac:
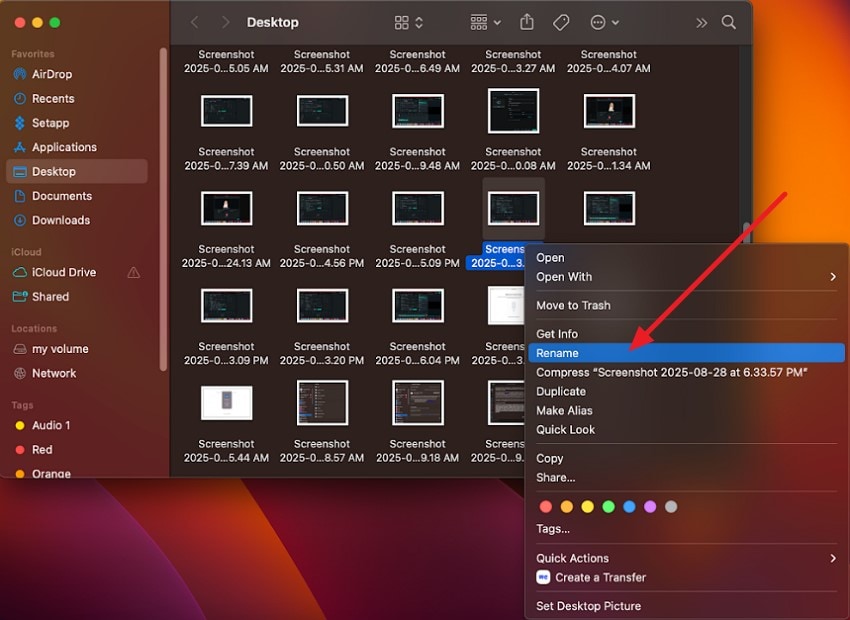
Rename File: After accessing the thumbnail of the corrupted image, right-click on it to enable the list of options. From here, locate the “Rename” option and click on it. Give a new name to the picture and press the Enter key to save.
Change Folder Path: Open the file in the folder in which the image is present and launch the Terminal on your Mac. Input the following command: “cd /path/to/folder” to successfully change the file path.

Method 3. Edit with a Photo Editor
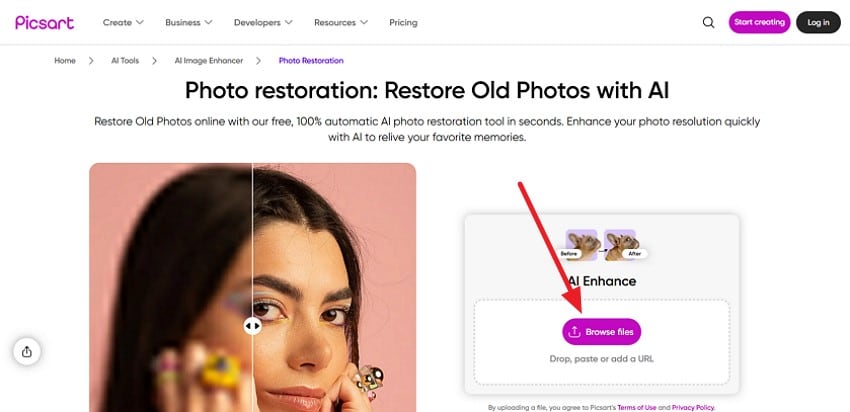
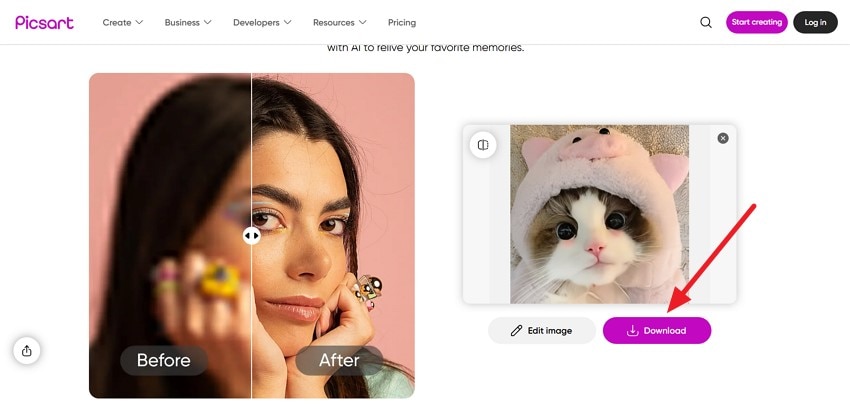
For the images that have become corrupted or pixelated due to corruption, you can use photo editors to restore the original visuals. Picsart is an online image editor that allows users to restore damaged images effortlessly by offering a dedicated image restoration feature. This AI-powered feature instantly enhances the images, removing all possible artifacts from them. Follow the steps provided next to learn how to use this photo editor:
Step 1. Press the “Browse Files” button after accessing this free JPEG repair tool on your web browser to upload your damaged photo.
Step 2. The repaired image will be provided within the interface, which you can save using the “Download” button located below the picture.
Method 4. View Images in Web Browsers
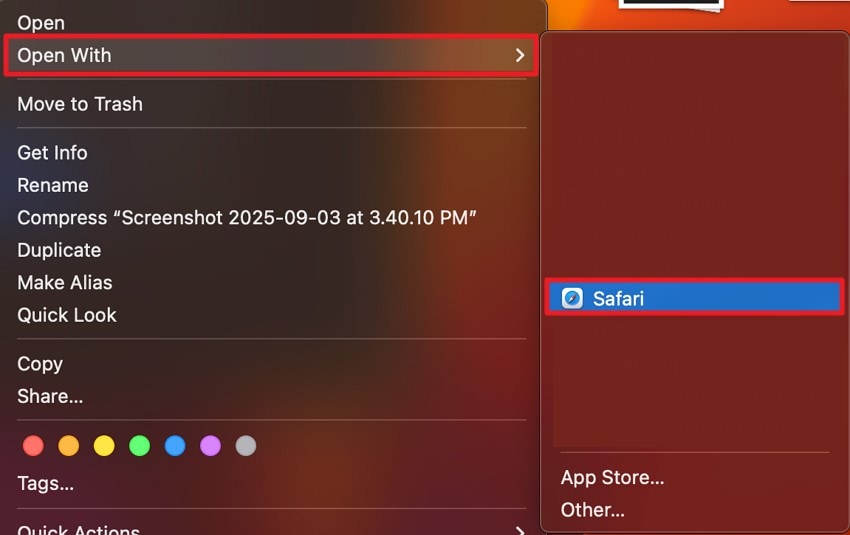
If the image is not opening in the default image viewer of your device, you can try opening it in a web browser. Web browsers often use different rendering methods that may bypass issues related to the viewer software. This allows you to view the image even if it’s partially corrupted. Follow the instructions to learn how to open an image in the Safari browser of your Mac:
Instructions. When you have accessed the image thumbnail in the Finder, right-click on it and press the “Open With” option. Now, click on the “Safari” option to open the picture in your device’s web browser successfully.
Part 4. Other Cognitive Solutions to Repair Corrupted JPEG [Best Options]
If the damage is severe and does not get fixed using the above-mentioned corrupted JPEG file repair fixes, you can use a more intense solution. Provided below are some of the top cognitive solutions to repair the corrupted JPEG files:
Method 1. Wondershare Repairit
One of the most reliable repair solutions that fixes your heavily damaged files using advanced technology is Wondershare Repairit. The success rate of this tool is more than 99% in all scenarios, including system crash or folder corruption. Besides JPEG, users get the ability to repair more than 100 file formats, including videos and audio files.
The intuitive interface of this free JPEG repair software allows you to simply drag and drop the file to the tool's interface for instant repair. Moreover, you can cancel or pause the repairing process whenever you want, depending on your requirements.
Incredible Features Offered by Repairit
- Batch Repair: Users get the ability to repair multiple files at once with Repairit, saving the time and effort of repairing each file separately.
- Preview Before Saving: The tool lets you preview and analyze the files within its interface before saving them to your device.
- Photo Enhancer: A dedicated photo enhancer is offered by the tool to remove grains, artifacts, and other distortions from your pictures.
Steps for Repairing JPEG Files on Mac with Repairit
Having discussed the JPEG recovery software free functionality in detail, let us explore the steps to use this tool for image repairing:
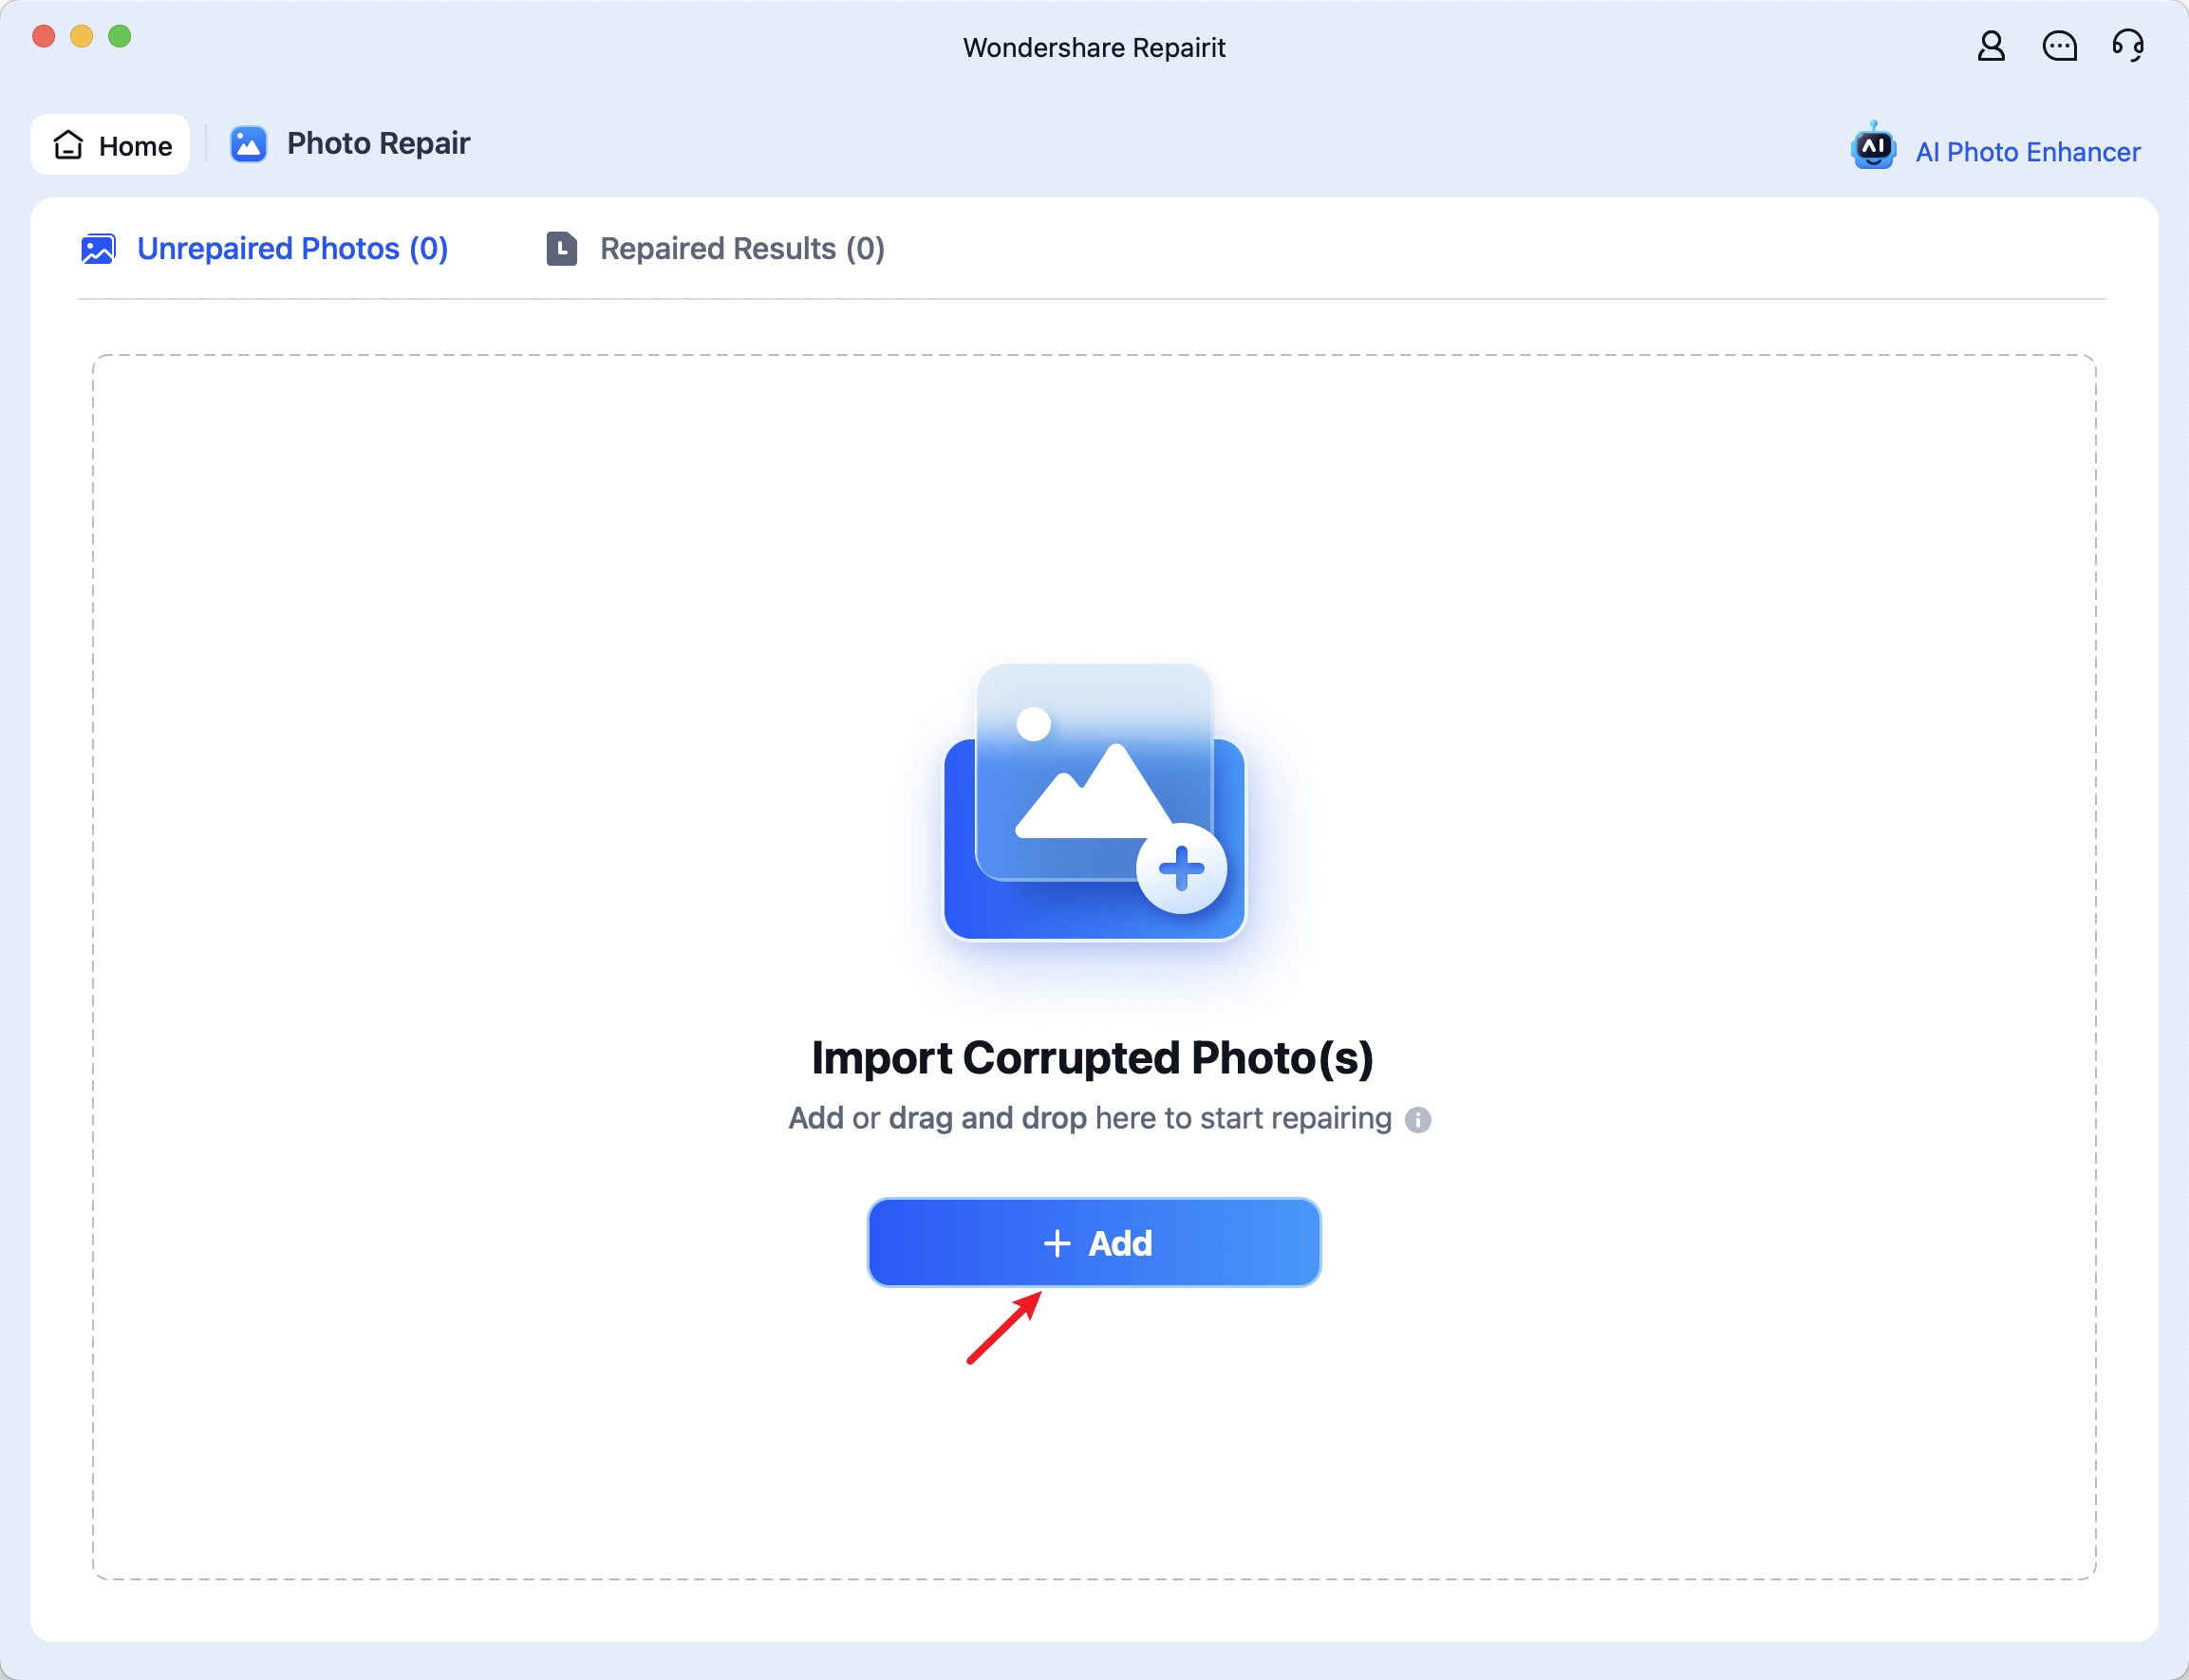
Step 1. Begin by Importing Damaged Images Across Repairit
To start the process, launch Repairit on your device and press the “Add” button to import the corrupted JPEG. You can also directly drag and drop multiple files to the tool’s interface.
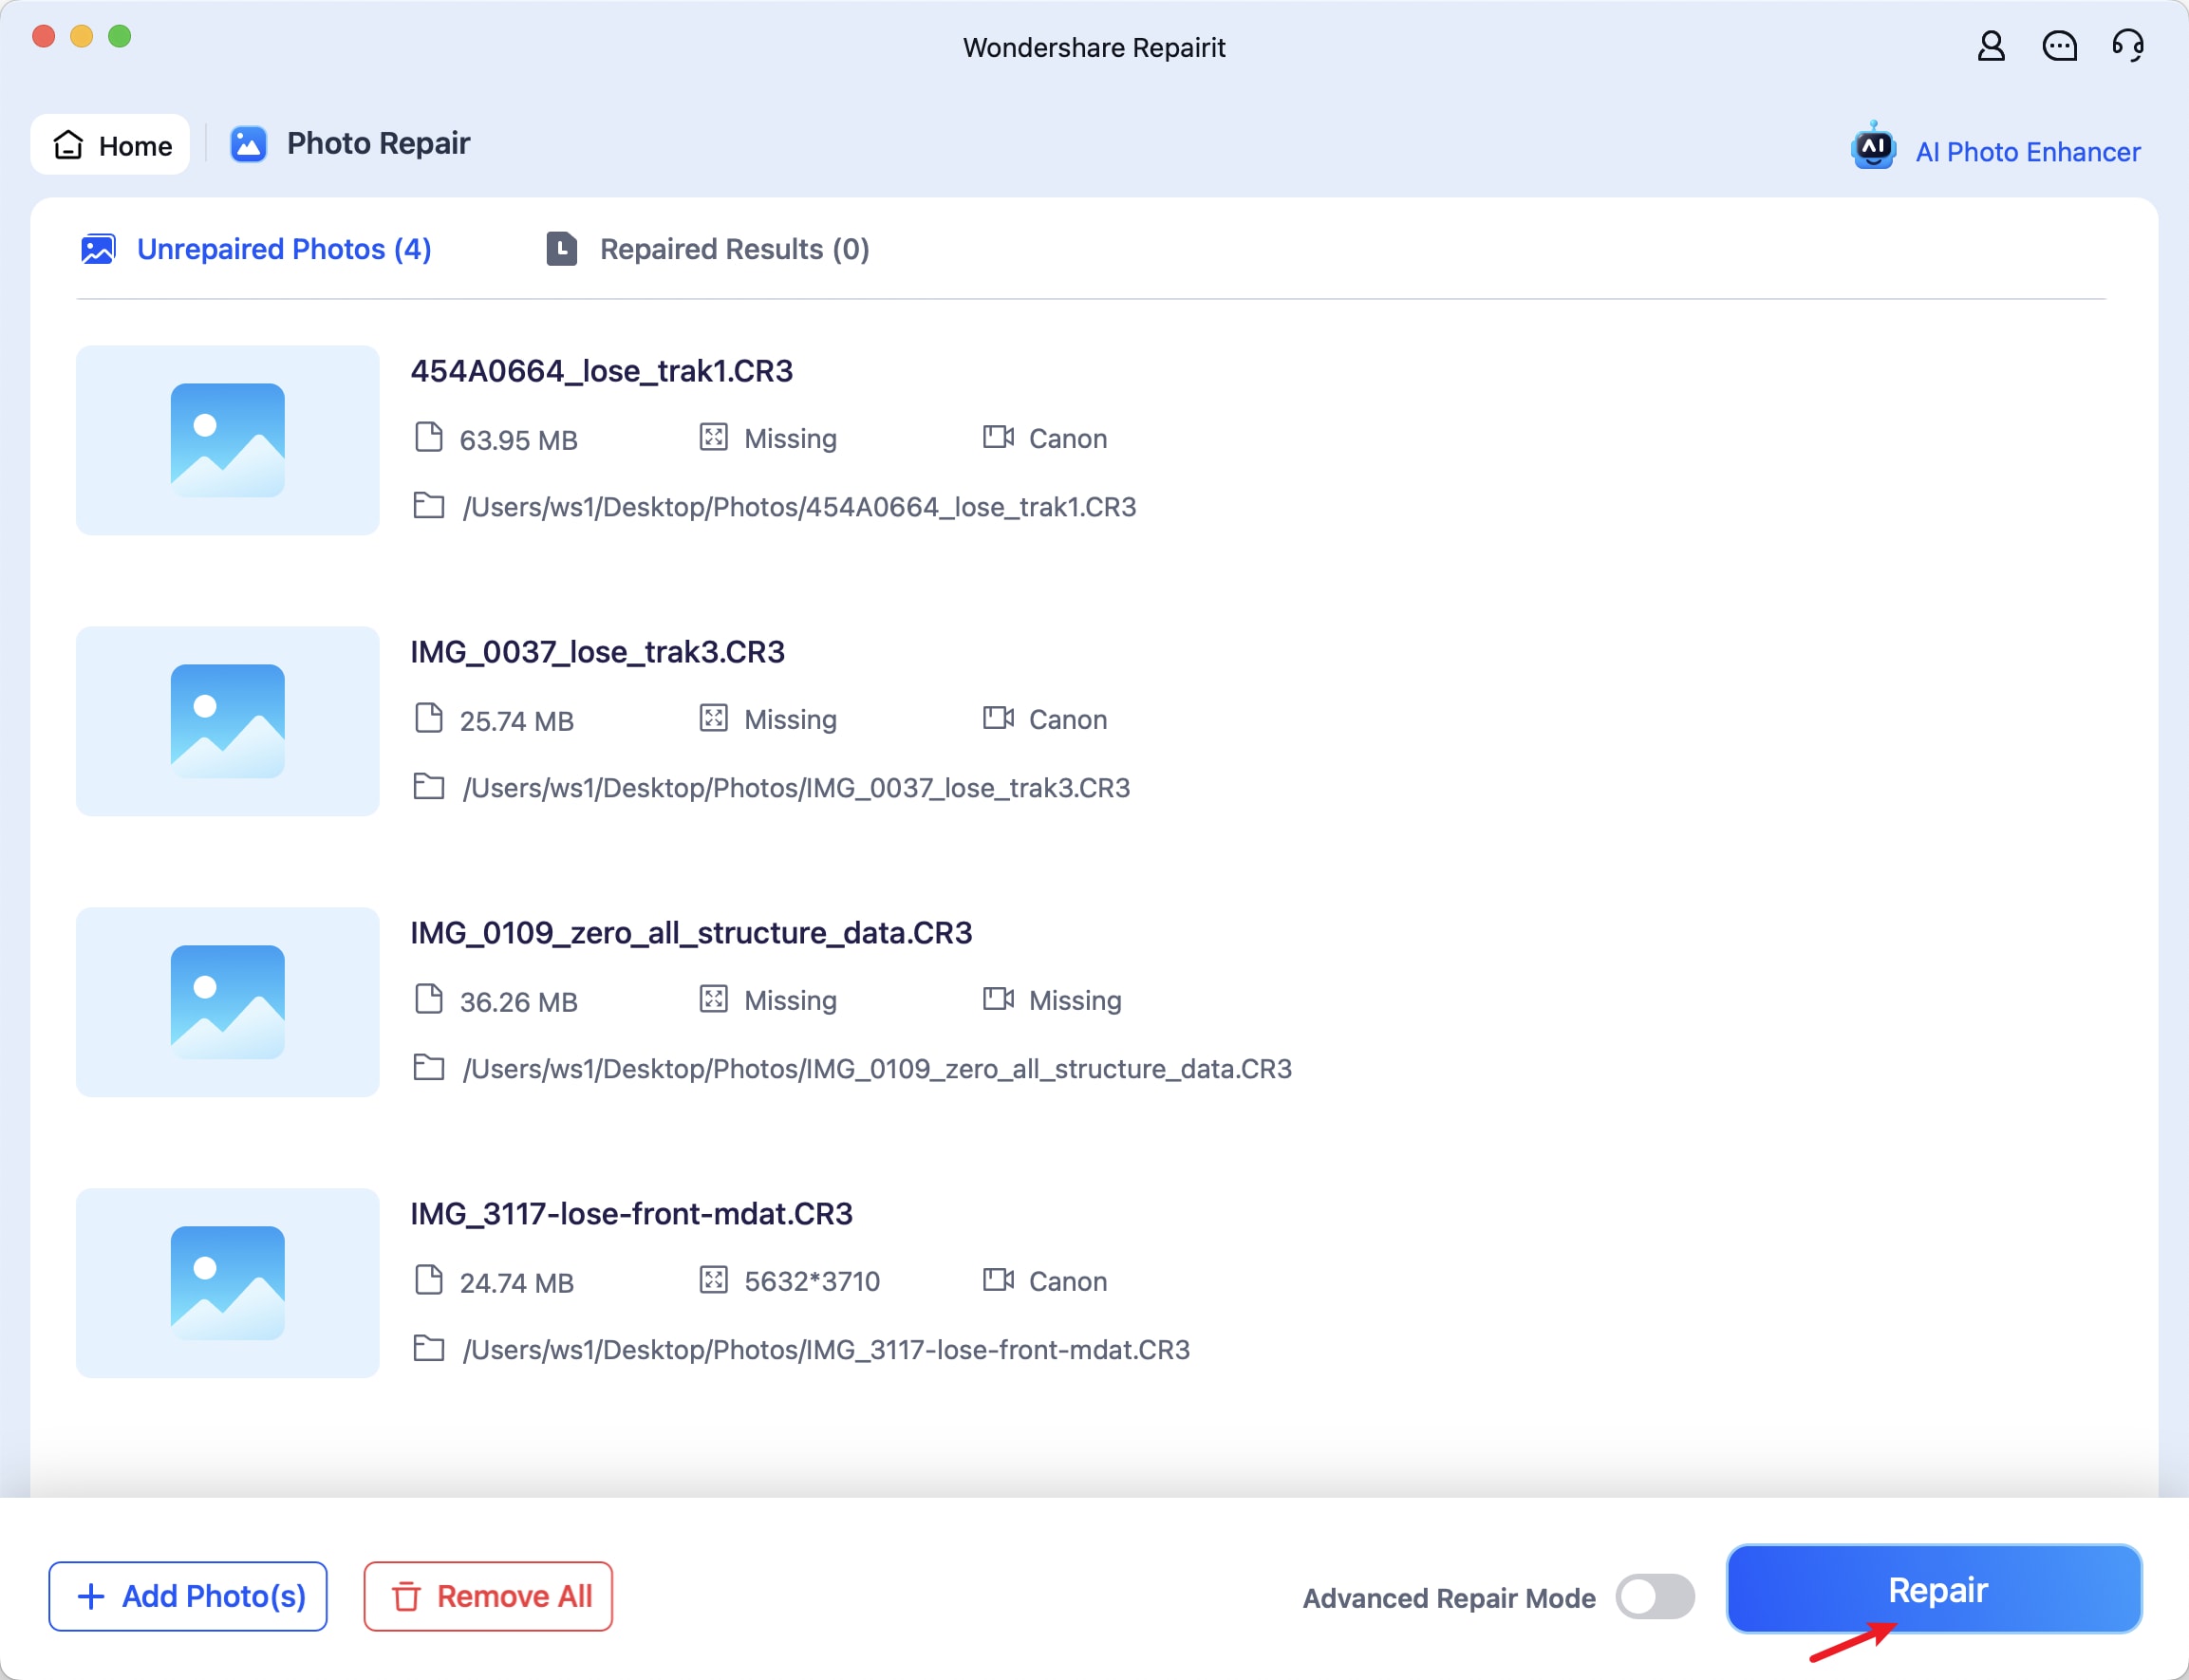
Step 2. Repair Corrupted Files
Once the photos are loaded successfully within the interface, press the “Repair All” button located at the bottom to begin the image repairing process.
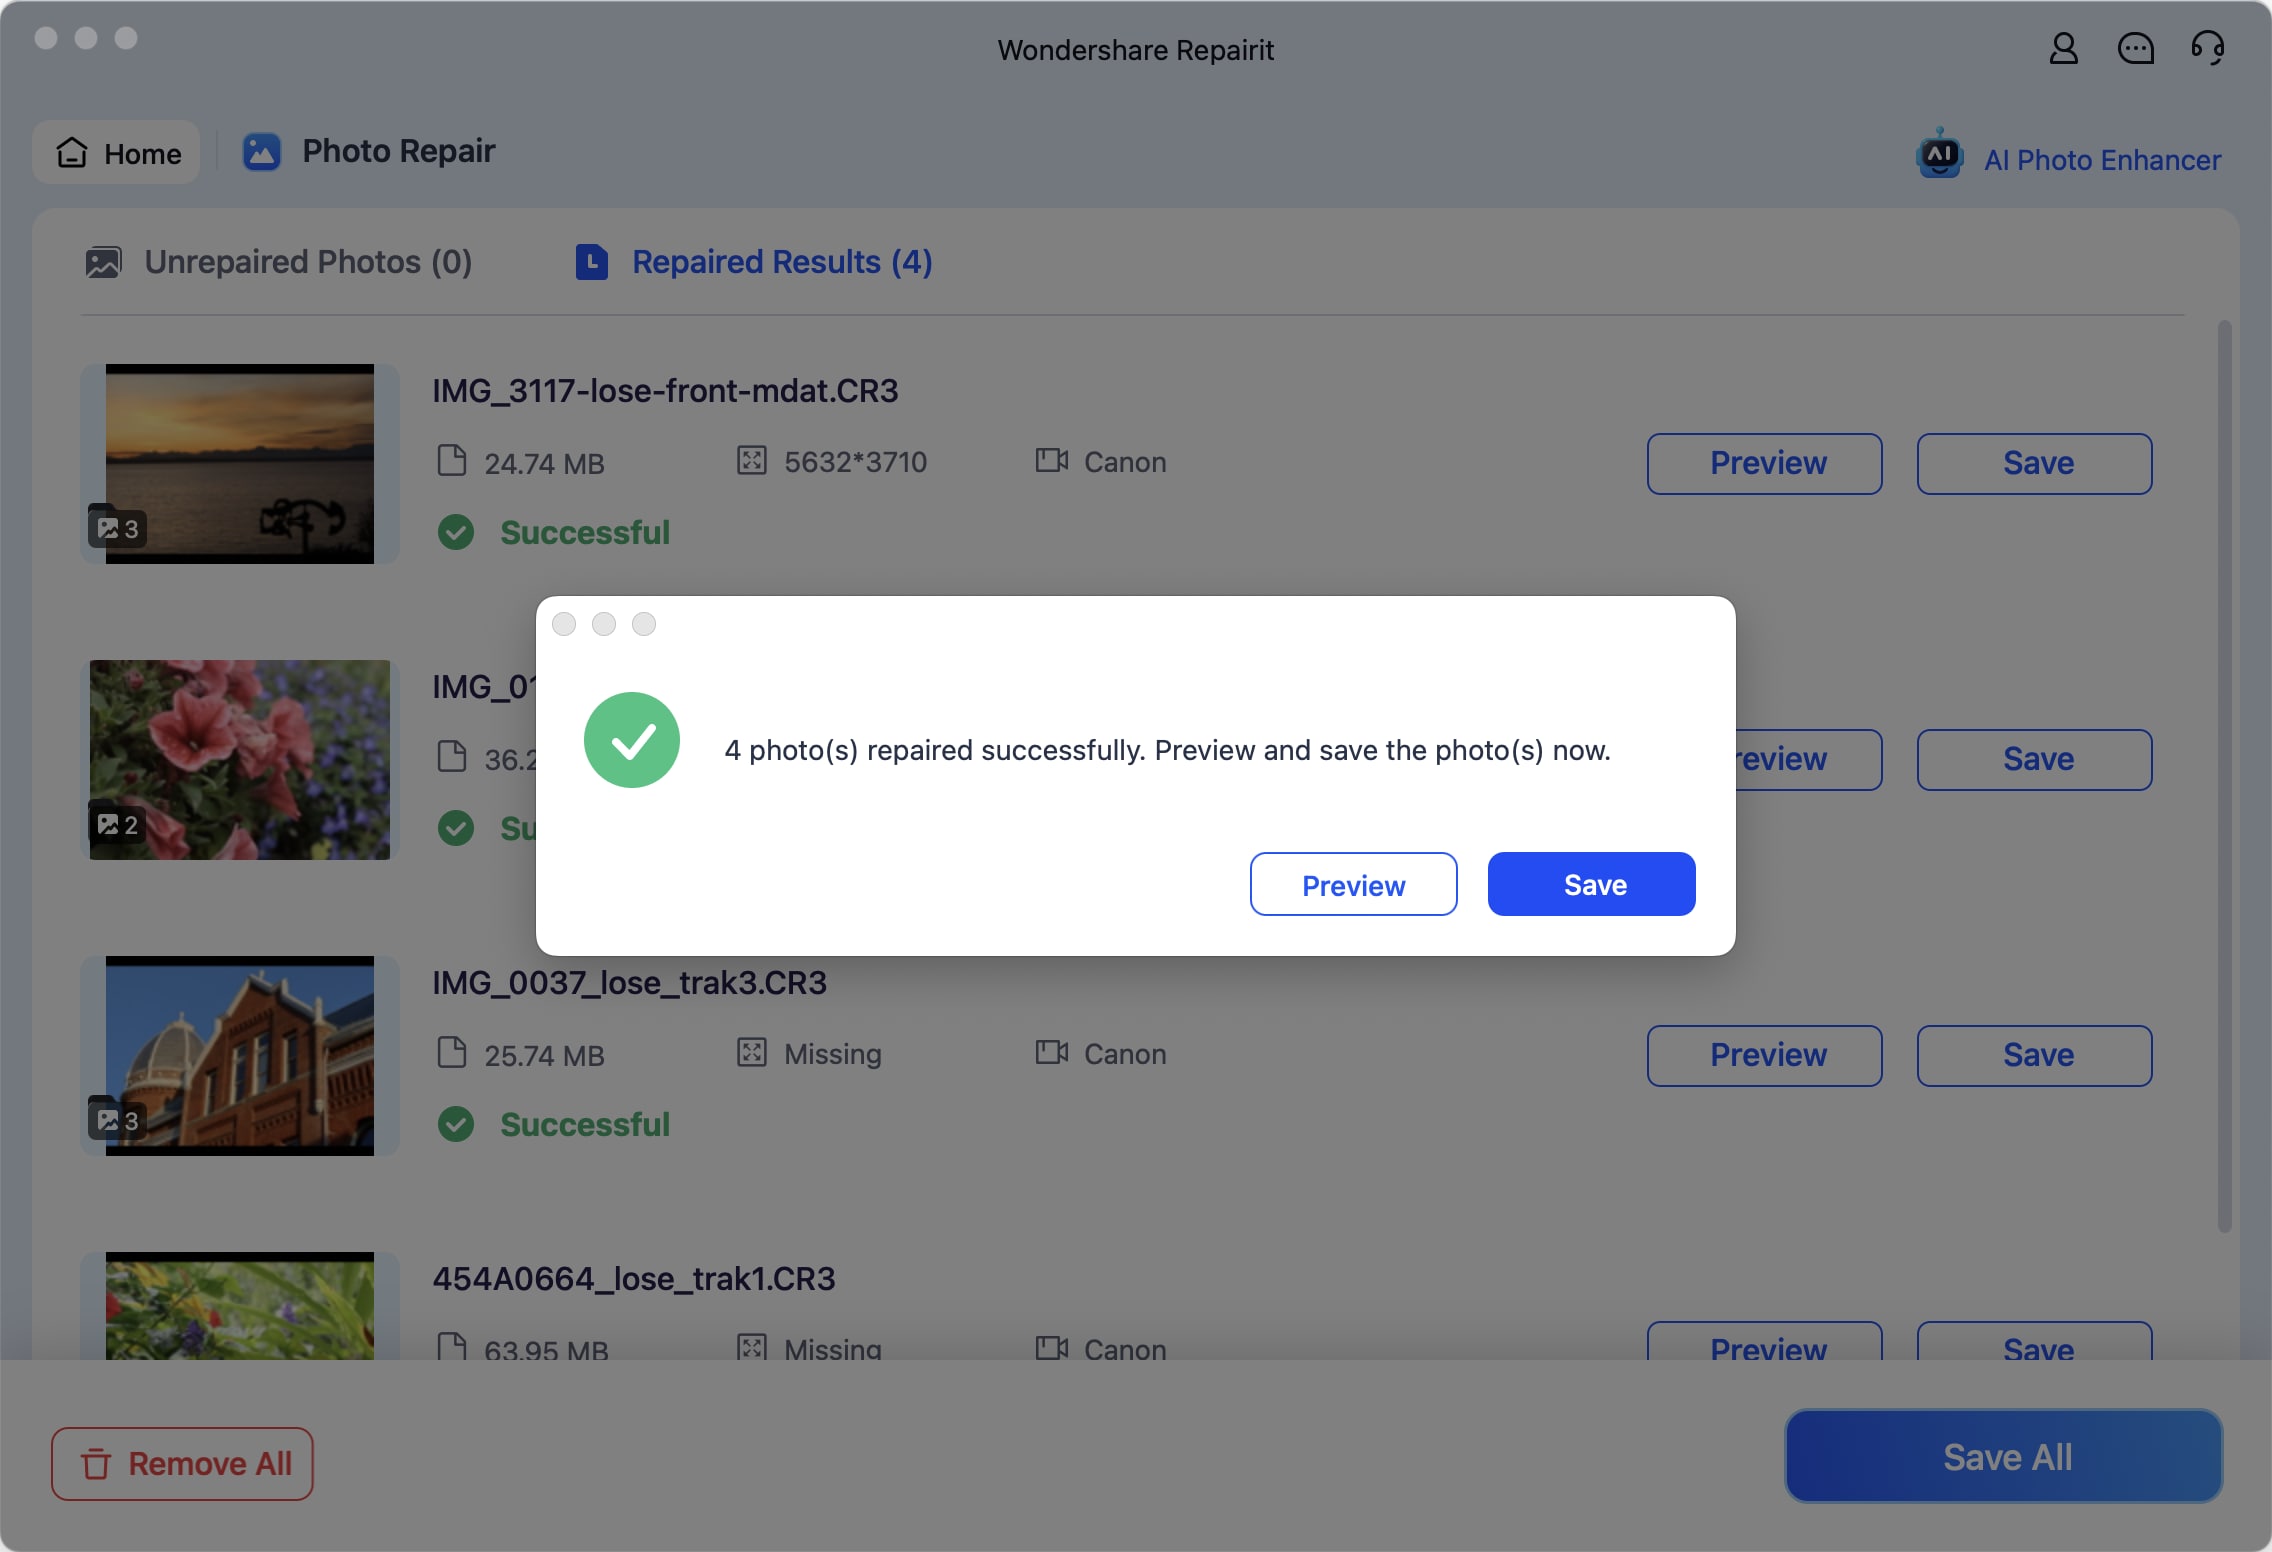
Step 3. Preview and Save Images
When the repair is finally completed, press the “Preview” button located in the small window to review the final file. Export the fixed image by pressing the “Save” button on this free JPEG recovery tool.
Method 2. Restore from Time Machine Backup
Restoring files from a Time Machine backup is a reliable way to recover lost or repair corrupted JPEG images on a Mac. By connecting the Time Machine backup drive and navigating to the folder where the photos were, you can restore the files to their uncorrupted state. Consider the steps mentioned next to learn how to restore the previous version of a picture using Time Machine:
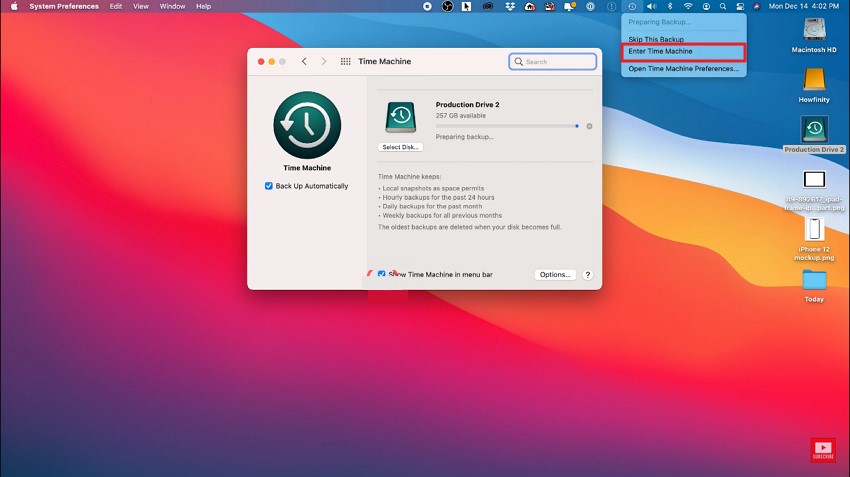
Step 1. Open the folder in which the corrupted image is originally located. Now, head to the top-right corner of the interface and press the small “Clock” icon. Choose the “Enter Time Machine” option located in the expanded list to enable Time Machine.
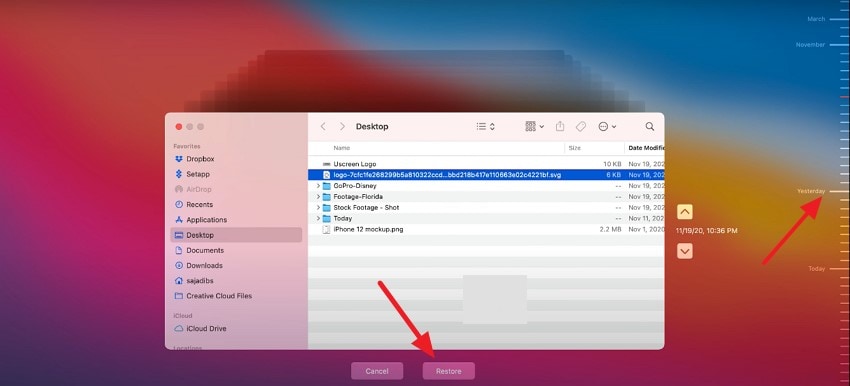
Step 2. Head to the sidebar and scroll through the previous dates when the image was not corrupted. Now, locate the version of the picture in the folder and press the "Restore" button located at the bottom to get the damage-free version of your picture.
Method 3. Repair Your Photo Library
The method of repairing your photo library on a Mac is a useful approach when encountering issues such as corruption. It's a built-in feature that analyzes the internal database of the library and automatically fixes any inconsistencies. The corrupted JPEG file repair process is generally safe and can address a wide range of corruption issues caused by software glitches. Read the instructions mentioned next to learn how to repair the Photo Library on your Mac:
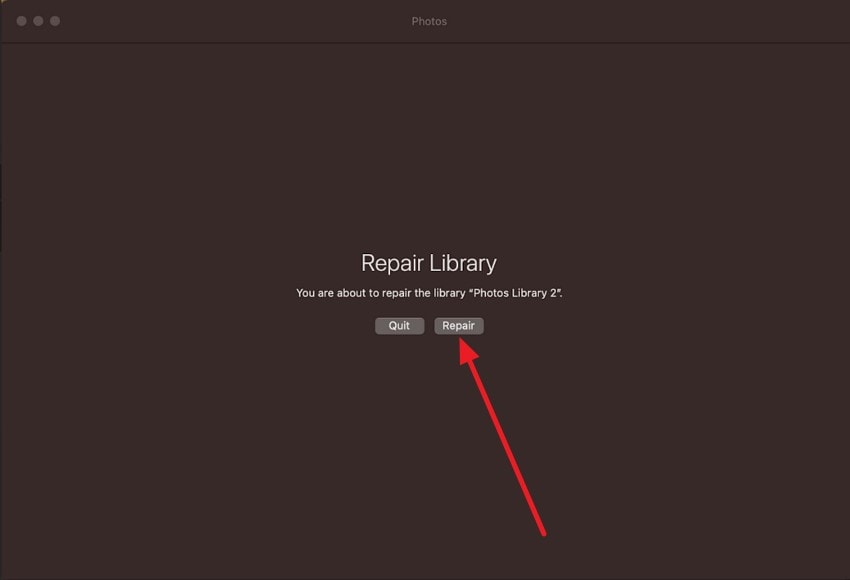
Instructions. To repair the photo library on a Mac, close the Photos app first. While reopening it, hold down the “Command” and “Option” keys together. When the Repair Library window appears, click "Repair." Enter your password if the system asks you to, and it will begin to fix the issues and glitches.
Method 4. Redownload the Image
If none of the fixing, repair corrupted JPEG methods work, you can try redownloading the image from the source you downloaded it from before. It involves retrieving the original photos from iCloud or other backup sources to replace damaged or deleted files in the local photo library. This method ensures the photos are restored in their original quality and helps maintain a complete, organized library.

Bonus Part. Lost Your Images During Repair? Get them Back With Recoverit!
Imagine your images are lost during the repairing process, and you have no backup of the corrupted files, too. In this case, you can use tools like Recoverit that provide a high-quality file recovery solution. Users get the ability to recover multiple files simultaneously and save time. The intuitive interface allows users to search for a specific file by offering a dedicated search bar.
Moreover, the deep scanning utility performs an in-depth scan and retrieves all the data with 99.5% accuracy. You can start and pause the scanning process according to your needs. Additionally, if you are doubtful about any image or file, you can first preview it within the tool’s interface and then save it to your device.
Coherent Features Offered by Recoverit
- Advanced Recovery Mode: The Advanced Recovery Mode of this JPEG recovery software free performs an in-depth scan and recovers severely damaged or lost files with only a few clicks.
- Multiple Formats Support: Whether you have a lost image file in PNG or a video file in MOV format, Recoverit recovers them all as it supports more than 1000 formats.
- Numerous Storage Device Support: Users get the ability to recover files from internal storage or external storage, such as SSD or SD card, on different devices, such as Windows and Mac.
A Guide to Recover JPEG Files on Mac With Recoverit
As discussed, you can effortlessly recover lost images and other files using this tool. Let us explore the steps for recovering lost JPEG files on Mac with Recoverit:
Step 1. Begin by Choosing Device Location
After launching this free JPEG repair tool on your Mac device, select the storage location from the homepage. As soon as you select the device location, the tool will start scanning your storage.

Step 2. Recover the Scanned Files
All the recoverable files will be scanned within the following interface for you to choose from. Select your desired JPEG file from the options and press the “Recover” button located below.

Step 3. Preview and Recover Picture
Preview the recovered file in the next screen and hit the “Recover” button to successfully export the found file to your system.

Conclusion
To wrap it up, this article covered various methods to repair corrupted JPEG files on your Mac device. The article suggested built-in methods as well as online solutions to fix the picture damage. Out of all methods, Repairit turned out to provide efficient results in image repair. However, if your image file is lost during the repair, you can use Recoverit to get it back with only a few clicks.
FAQ
-
1. Why is my JPEG file not opening?
A JPEG file may not open due to corruption or compatibility issues with the viewing software. To fix the pictures, you can use tools like Repairit that offer high-quality file repair with high accuracy. -
2. Can I repair images online?
You can repair images online using specialized JPEG repair tool that fix corrupted or damaged files without losing quality. Wondershare Repairit Online offers a user-friendly interface for efficient photo repair. -
3. How to recover lost picture files?
To recover lost picture files, you should use reliable data recovery software such as Recoverit. The tool supports various file formats and offers high-quality recovery on numerous devices. -
4. Can I recover multiple image files on Recoverit?
Recoverit allows you to recover multiple image files simultaneously, supporting batch recovery to save time and effort.


