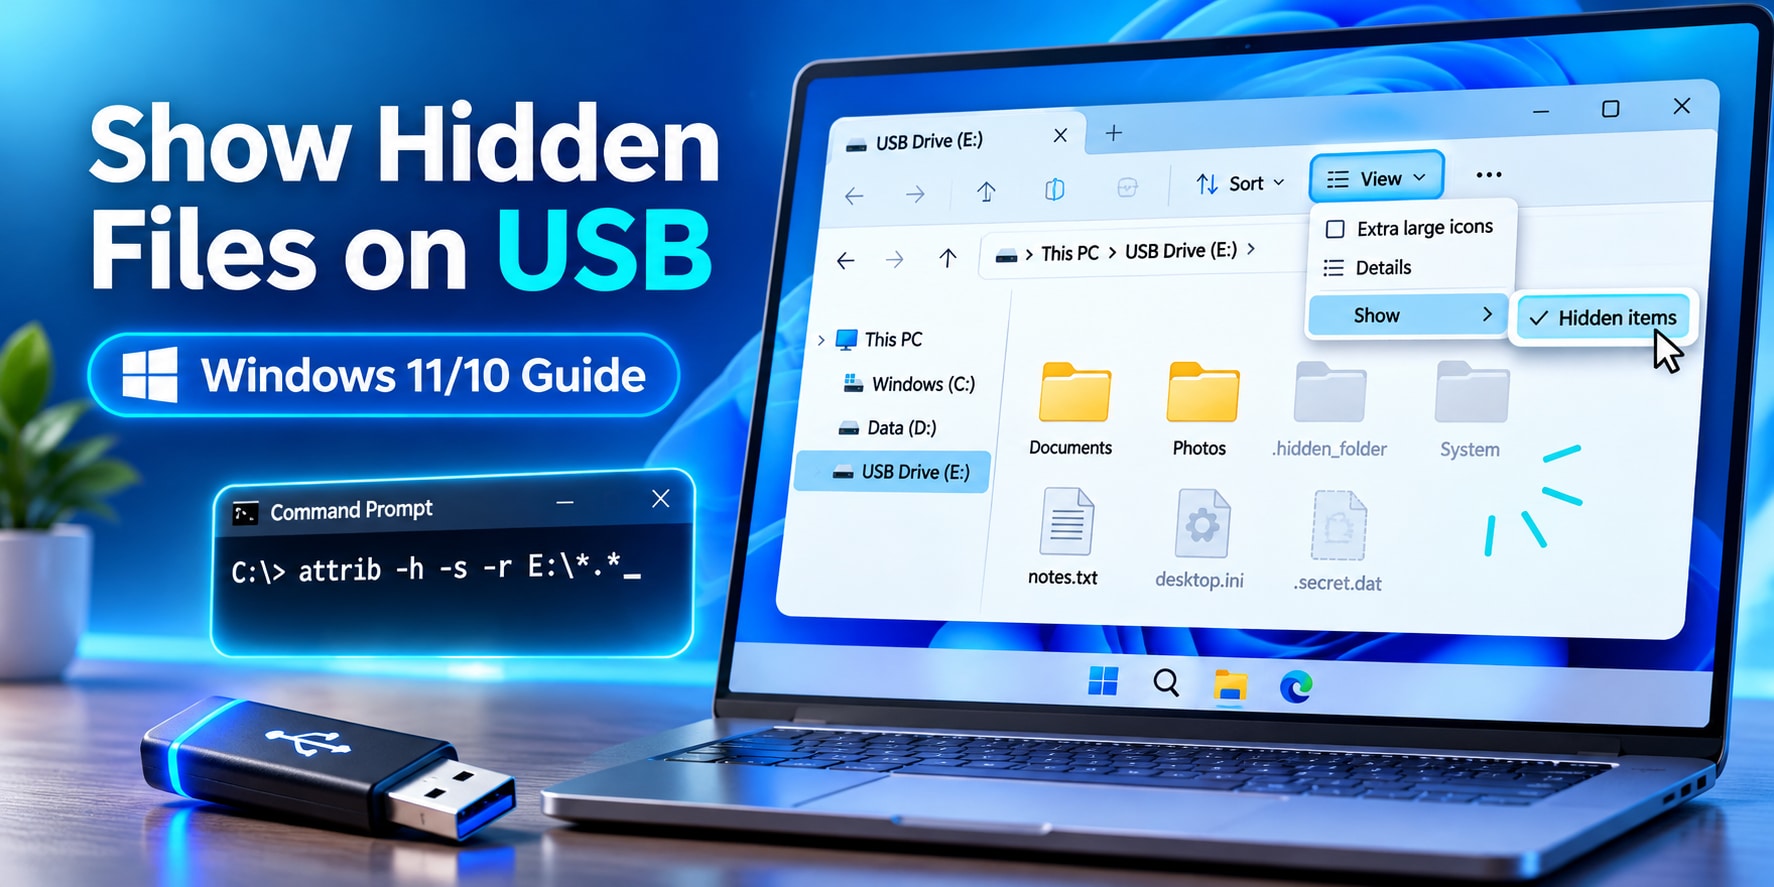
If files seem to have disappeared from a USB drive, first check whether Windows is simply hiding them. In Windows 11, open the USB in File Explorer and select View > Show > Hidden items. In Windows 10, open the drive and check View > Hidden items. Files with the Hidden attribute should then appear, usually with faded icons.
Quick answer: Showing hidden items does not delete, restore, or permanently unhide anything. If your files appear, copy the important ones to a different healthy drive before changing their attributes. If they are still missing, don't format the USB or run repair commands just to make them visible: the files may have been deleted, affected by malware, or made inaccessible by a file-system problem.
In This Article
Part 1. Why Are Files Hidden or Missing on a USB Drive?
A USB folder can look empty for several reasons. The next step depends on whether the files are still present, merely hidden from view, or no longer accessible. A hidden file is not the same as a deleted file.
| What you see | Possible explanation | Safest next step |
| Files appear after enabling Hidden items | Files or folders have the Windows Hidden attribute | Copy them to another drive, then use Properties if you want to remove that attribute |
| Only unexpected .lnk shortcuts or unfamiliar .exe files appear | Possible USB shortcut malware, not proof of data deletion | Do not open unfamiliar shortcuts; scan the USB with Windows Security first |
| USB looks empty but Properties shows used space | Hidden/system attributes, directory damage, or other inaccessible data | Check visibility and detection; avoid formatting until important data is protected |
| Drive is readable, but specific files were deleted | Actual file loss rather than hidden attributes | Stop writing to the USB; check backup copies, then assess a recovery scan |
| Drive repeatedly disconnects or appears as No Media | Possible connection or hardware problem | Stop repeated scans and writes; consider professional assessment if the files matter |
Before you begin: Confirm the USB's name and capacity in This PC. If it contains irreplaceable files, avoid adding anything to the drive. These instructions are for USB storage that Windows can recognize; they do not require formatting or changing its partition layout.
Part 2. Show Hidden Files in Windows 11 or Windows 10
File Explorer is the fastest, least intrusive method. It changes what Windows displays; it does not change the USB files themselves. The menu looks different in Windows 11 and Windows 10.
Windows 11: View Hidden Items
Step 1. Connect your USB flash drive and press Windows + E to open File Explorer.
Step 2. Select This PC and open the USB drive. Check its name and capacity before proceeding.
Step 3. In the command bar, select View > Show > Hidden items. If the missing items have the Hidden attribute, you should now see them with semi-transparent icons.
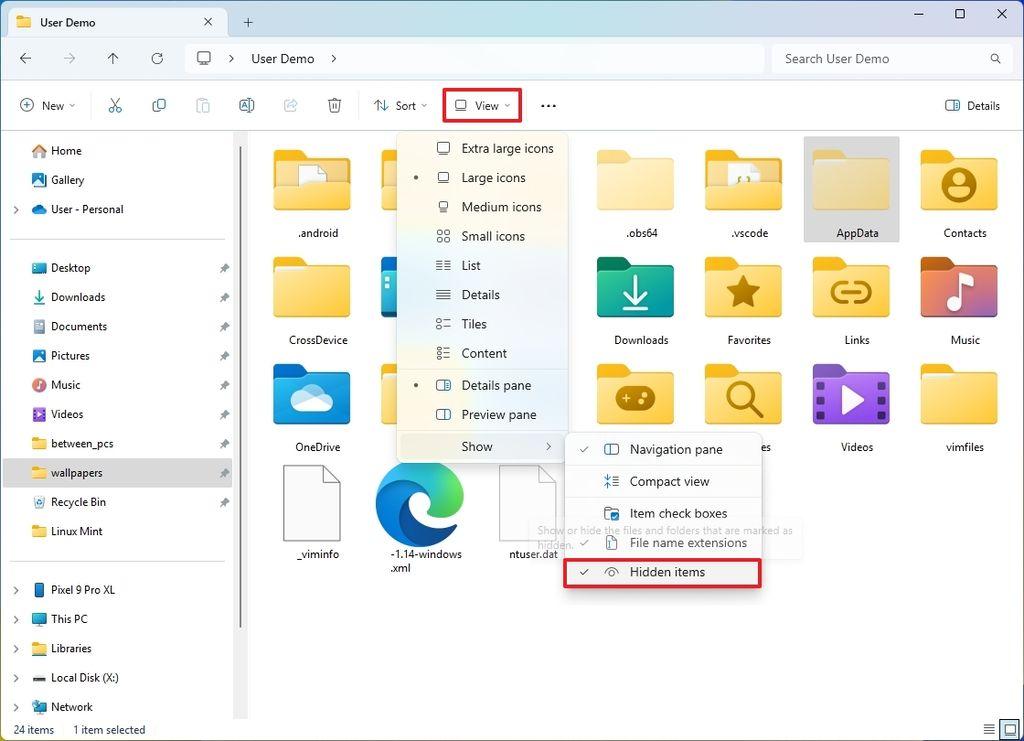
Step 4. Open a familiar document or photo to confirm it is intact, then copy the important files to another healthy drive. If nothing appears, continue to Part 5 instead of changing file attributes blindly.
Microsoft documents the current Windows 11 menu in its File Explorer guide.
Windows 10 and File Explorer Options
On Windows 10, open the USB drive in File Explorer and check View > Hidden items. You can also search for File Explorer Options, open the View tab, select Show hidden files, folders, and drives, then click Apply and OK.

The following original Windows 10 screenshot shows the ribbon's Hidden items checkbox. Windows 11 uses the newer View > Show menu instead.

Note: Do not turn off the protection for hidden operating-system files to troubleshoot an ordinary USB folder. The files you need should be checked through normal Hidden items visibility, not by exposing protected Windows files.
Part 3. Remove the Hidden Attribute from a USB File or Folder
Use this only after you can see the intended file or folder and have verified that it belongs to you. Removing the Hidden attribute makes that item appear during normal browsing even when Hidden items is switched off.
Step 1. Leave Hidden items enabled and locate the file or folder you want to unhide.
Step 2. Right-click it and select Properties. On Windows 11, choose Show more options only if the needed command is not in the initial menu.
Step 3. Under Attributes on the General tab, clear Hidden if it is checked. Click Apply, then OK. For a folder, Windows may ask whether the change should apply only to the folder or also to its contents. Select the intended scope deliberately.
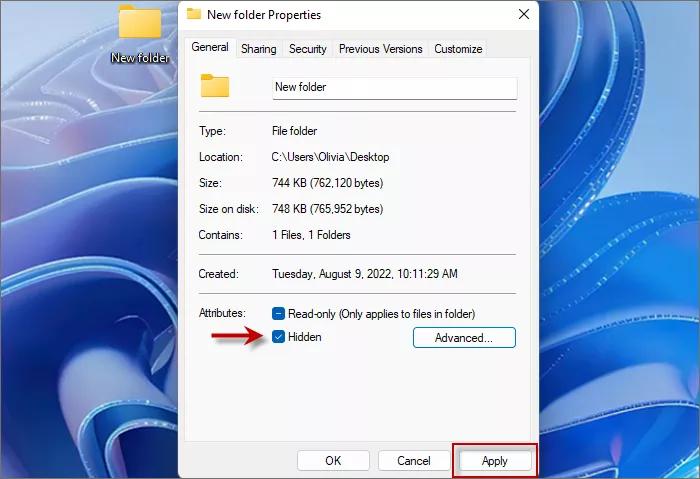
Step 4. Turn Hidden items off briefly to verify that the file is now normally visible. Open a sample file and keep a backup elsewhere.
If Hidden is unavailable, the item has unexpected System attributes, or you are unsure why it was hidden, do not force a change. Check for malware and identify the item first.
Part 4. Check and Unhide a USB File Using CMD
Command Prompt is useful when the file or folder is known but its attributes need inspection. Unlike File Explorer's visibility switch, the attrib command can change attributes on the USB itself. Use the smallest possible path rather than a whole-drive wildcard.
Step 1. In This PC, verify the USB drive letter. This example uses E: and a folder named Photos; replace both with the actual values. Make a copy of accessible files before editing attributes.
Step 2. Open Start, search for Command Prompt, and open it. To inspect the folder's attributes, type:
attrib "E:\Photos"Look for H in the output. The letter S denotes the System attribute, while R denotes Read-only. These are different settings.
Step 3. If this is your own folder, the output shows H but not S, and you want to remove only Hidden, enter:
attrib -h "E:\Photos"
Step 4. Run attrib "E:\Photos" again and check File Explorer. This command changes only the specified folder's Hidden attribute; it does not automatically unhide every file inside. Repeat only for other known files or folders you have verified.
Do not copy the old whole-drive command attrib -h -r -s /s /d E:\*.* as a routine fix. The -r and -s options also clear Read-only and System attributes, while /s and /d extend the change across files and folders. If an item has the System attribute, first establish why; do not clear system attributes across the USB without understanding the consequences. See the Microsoft attrib command reference for the exact flags.
Part 5. What If Your USB Files Still Do Not Appear?
If enabling Hidden items did not reveal the files, the problem may be unrelated to visibility. Compare the symptoms before choosing a repair action. In particular, don't use formatting, CHKDSK, or DiskPart to search for files that could still be recoverable.
Only shortcuts or suspicious programs appear: Do not run unfamiliar .lnk or .exe files. Use Windows Security > Virus & threat protection to scan, or right-click an identified item and choose Scan with Microsoft Defender where available. Microsoft describes both scanning options and how to scan a specific item. For the full recovery path after this symptom, see USB shortcut virus file recovery.
The drive shows used space but no files: Right-click the USB in This PC and open Properties to compare used space with what is visible. The missing files could be hidden, but used space alone does not prove that they are recoverable. Follow the symptom-based steps in USB files not showing but space used instead of reformatting.
Hidden items is on, but nothing changes: Confirm the files are not in a different folder, and check whether a trusted backup copy exists. If Windows cannot change a file attribute, or the Hidden items control does not work, use the specific Show hidden files not working troubleshooting guide.
The USB is unstable or no longer recognized: Safely check the USB connection and try a known-good port without writing to it. Repeated disconnections, a No Media status, or signs of physical damage are reasons to stop do-it-yourself repair attempts if the data matters.
The following Recoverit video covers the related situation in which a USB drive shows used space but files do not appear. It is not a substitute for checking whether the files are simply hidden.

Part 6. Recover Files That Are Actually Lost from the USB
If Windows recognizes the USB but your files were deleted or are absent even after visibility checks, file recovery may be appropriate. Stop saving anything new to the USB first. Check backups and copies on other computers. Recoverit can scan supported, detectable USB storage for recoverable files; changing Hidden attributes is not what the software is for. Recovery is not guaranteed, especially if data has been overwritten or the device is failing.
Step 1. Select the USB. Install Recoverit on a different drive, connect the USB, and open the appropriate external-device or SD Card Recovery selection in your installed version. Choose the USB by its name and capacity. Recoverit's official Windows recovery guide includes both external-device and V15 SD Card Recovery workflows that can recognize USB drives.
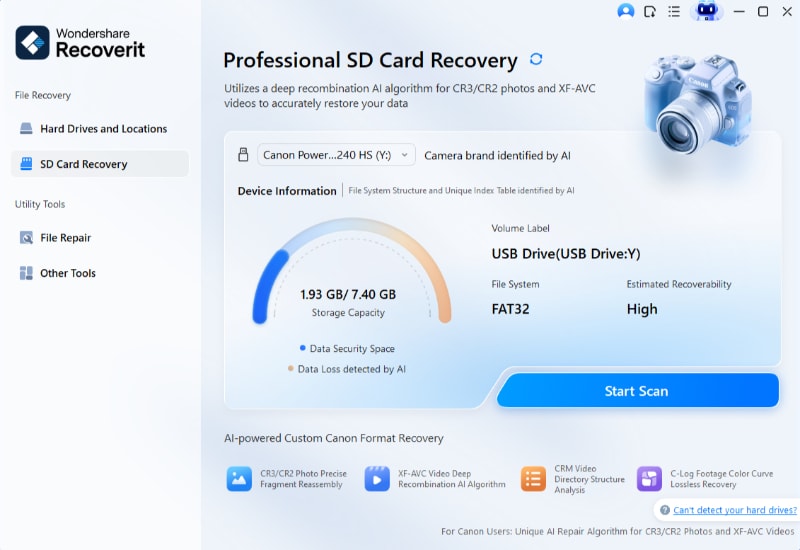
Step 2. Scan the source. Start a scan of the verified USB device. Allow the scan to complete for the most complete results available, and use file-type filters or search to locate the files you need. Do not run repair or formatting commands on the source while scanning.
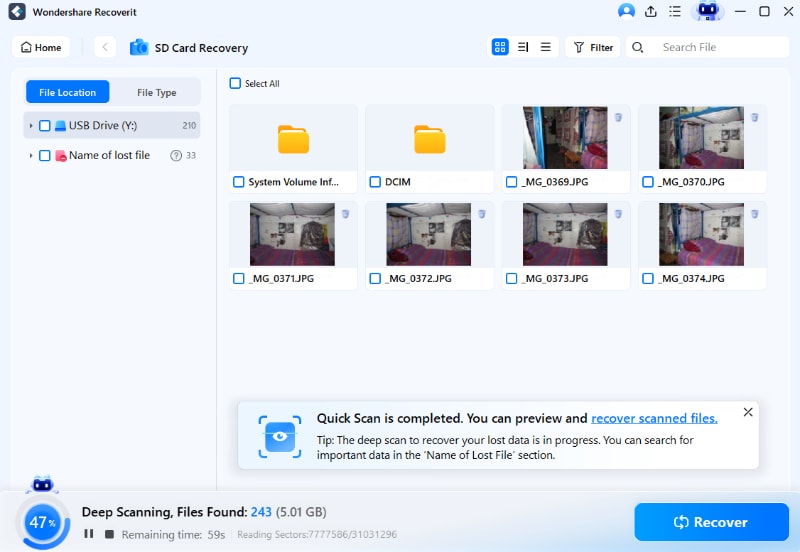
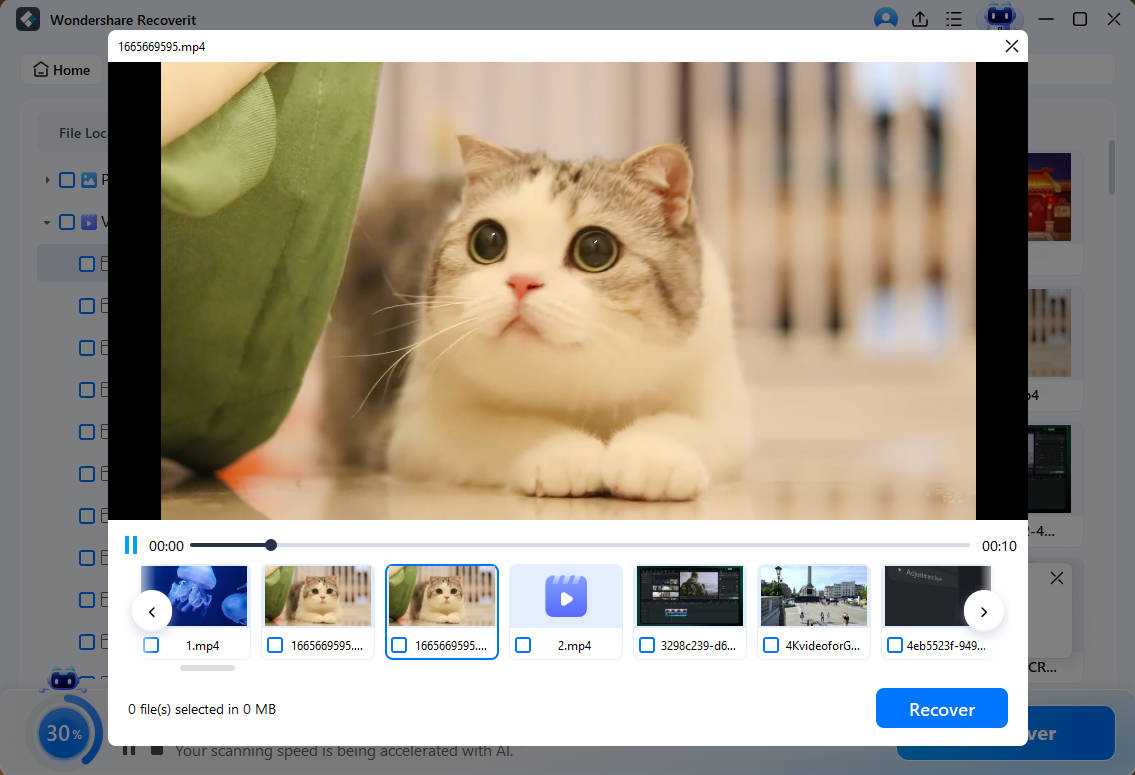
Step 3. Preview and save elsewhere. Preview available files to check whether they are the correct items. Select the recoverable files and save them to a different healthy drive, not to the USB you are trying to recover.
For a broader explanation of USB deletion, formatting, and device-detection cases, see the USB flash drive recovery guide. Do not continue scanning a drive that repeatedly drops offline or shows symptoms of physical failure.
Conclusion
When files are hidden on a USB drive, start with Windows File Explorer's Hidden items option. If the files return, check and back them up before changing their attributes in Properties or CMD. If the USB still looks empty, use the symptoms to distinguish malware, a visibility setting, and true file loss. Only consider recovery scanning when the files are genuinely missing and the source can be read safely.
FAQ
-
How do I show hidden files on a USB in Windows 11?
Connect the USB, open it in File Explorer, and select View > Show > Hidden items. This changes visibility; it does not remove the files' Hidden attributes. -
How can I unhide a USB folder permanently?
After you reveal the folder, right-click it, select Properties, clear Hidden, and apply the change. Back up important files first, and do not change unfamiliar system files. -
What CMD command shows hidden USB file attributes?
Useattrib "E:\FolderName"to inspect a known folder, replacing E: and FolderName with your own USB path. If it only has the Hidden attribute and is safe to change, useattrib -h "E:\FolderName". Avoid whole-drive commands that clear Read-only or System attributes. -
Why are files still missing after I turn on Hidden items?
The files may have been deleted, be inaccessible because of a file-system issue, or be affected by malware. Check storage use and backups. Avoid formatting before protecting valuable data. -
Do I need recovery software just to show hidden files?
No. File Explorer can reveal files with the Hidden attribute without recovery software. A recovery scan is relevant only if files are actually missing from a readable device. -
Should I format my USB to make hidden files visible?
No. Formatting changes the file system and can make recovery harder. Start with the built-in visibility controls and keep the original drive unchanged if important files are missing.


