

 TL;DR:
To perfectly format an SD card for the Nintendo Switch, use the console's built-in Formatting Options under System Settings to automatically create the required folder structure and apply FAT32 for cards up to 32 GB or exFAT for larger capacities.
● The Nintendo Switch 2 strictly requires microSD Express cards and will not mount the standard microSDXC formats used by the original Switch and Switch OLED.
● When formatting on a computer, Windows users should utilize Diskpart to bypass RAW file system errors, while macOS users must choose the Master Boot Record (MBR) scheme in Disk Utility for cards under 2 TB.
● Migrate existing game saves and screenshots to a separate drive before formatting, as the procedure rewrites the card's partition table and permanently destroys the data region signatures.
Ask AI for a summary
 ChatGPT
 Perplexity
 Gemini
 Claude
 Grok
Grok
Formatting an SD card for the Switch is not the same as formatting one for a camera. The Switch only recognises the SDXC partition layout that Windows calls exFAT, with cluster sizes that match the Switch's expectations. If the card came from another device — a phone, a camera, a Raspberry Pi — formatting it again under the Switch's native Settings menu produces the cleanest result, because the Switch knows exactly where its own Nintendo folder structure should live.
This guide sorts out which file system the Switch actually wants in 2026, walks through Switch-side formatting first, then PC-side and Mac-side formatting for the cases where the card has to be reformatted off-console, and finishes with the Switch 2 specifics that recent buyers need.
In This Article
Part 1. The Switch's SD Card Specs in 2026
Before choosing a method, confirm what kind of card you have and what the Switch expects to see on it. The Switch (V1 and OLED) reads microSDXC, and the Switch 2 reads microSD Express — that distinction is the most common reason "a fresh card" refuses to show up on a brand-new Switch 2.
What File System the Switch Wants
The Switch supports microSD cards from 2 GB up to 2 TB. For cards 32 GB and below, it reads FAT32. For any card above 32 GB, it reads exFAT. Why two file systems for one console? Nintendo's official Switch support page notes that exFAT's per-file size limit (16 EB) versus FAT32's 4 GB limit does not matter for most individual saves — but game update downloads and DLC bundles delivered by the eShop can exceed 4 GB on larger titles, so FAT32 only works up to 32 GB.
The Switch treats cards larger than 32 GB that arrive in FAT32 as partly unsupported, which is why the screen prompts "A system update is required to use the microSDXC memory card" on a brand-new card and why the "Format microSD Card" option appears only after a Switch system update installs.
Switch vs Switch 2 — the 2026 Microscopic Difference That Matters
The Nintendo Switch 2 (released 2025 and the dominant console in 2026) dropped support for ordinary microSDXC cards and moved to microSD Express — the variant that adds PCIe and NVMe-style transfer layers. A normal SanDisk Extreme that worked fine on a Switch OLED will simply not mount on a Switch 2. If you bought a Switch 2, the cards to look for are labelled microSD Express or carry the Express logo. Existing microSDXC content can be migrated using the Switch's built-in transfer during the system's first launch setup; copying saves back and forth later requires the same account on both consoles.

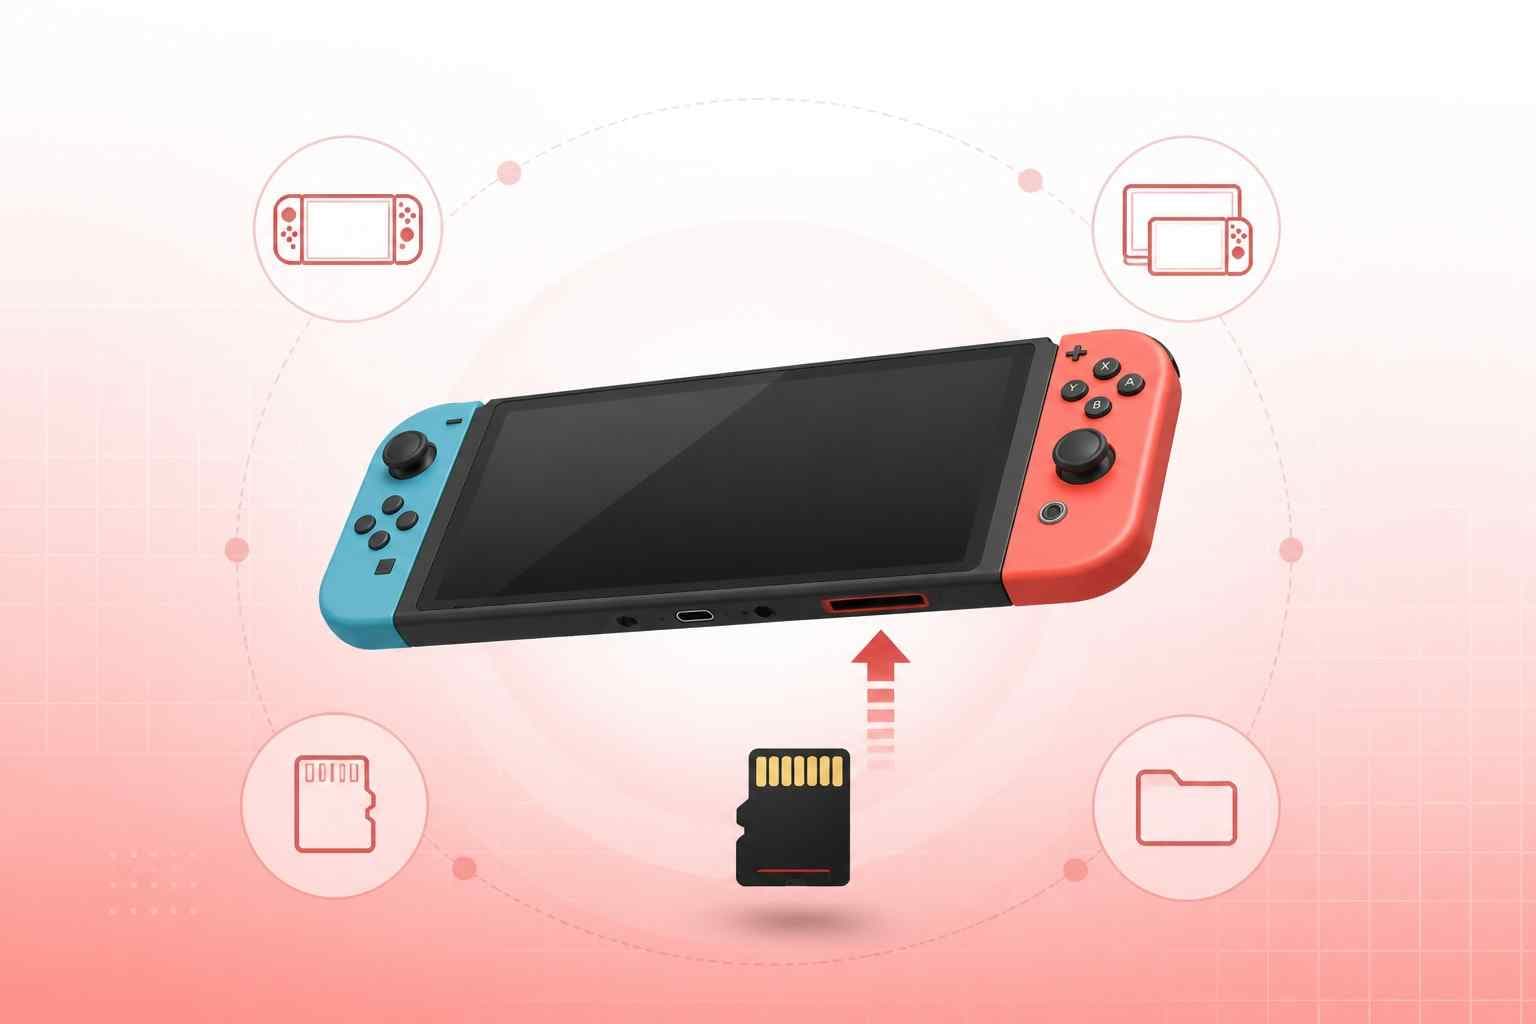
The image above shows where the microSD card slot lives on the back of a Switch (V1/OLED) — underneath the kickstand, with a red/white slot indicator visible when the card is partially inserted. The Switch 2 keeps the same location for microSD Express cards, but the literature stamp on the back reads "microSD Express" only.
Part 2. Recover the Card's Contents First
Before any of the five formatting methods runs, decide whether the card still holds game saves, screenshots, or downloaded data you want to keep. Once you start the format, the card's data region is rewritten and most of those files become unrecoverable.
Why the Recovery Step Comes Before the Format
The Switch writes its data — saves, screenshots, update caches, and ambient game files — into a Nintendo folder structure on the card. If the card came from another Switch, just another unit in your home, the saves are free. If it came from a different console, a phone, or a camera, or if it was previously formatted on a Windows PC that wiped the Nintendo folders, runs of Wondershare Recoverit can still pull files out of the data region — the format rewrites the start of the card, not the deeper sectors, and Recoverit scans those sectors for file signatures.
3-Step Recovery Workflow
Step 1. Select the SD card as the source. Insert the card through a USB card reader. In Recoverit's Hard Drives and Locations view under "External Drives," select the SD card entry. The card appears by its bare size — the old Switch N: or O: letter is not used because the Switch assigns labels through the file system, not the SD card directly.

Step 2. Scan. Click Scan. Recoverit reads the card's sectors. On a Switch-formatted card that previously held saves, the scan typically finds the encrypted save blobs plus the unprotected screenshots in under 20 minutes for a 64 GB card.

Step 3. Preview and save. Preview the recovered screenshots and video clips — including mp4 captures from the Switch's record button — select the files you want, click Recover, and save to a folder on your PC. Do not save the recovered files back onto the same SD card; keep them on the host drive until the format finishes.
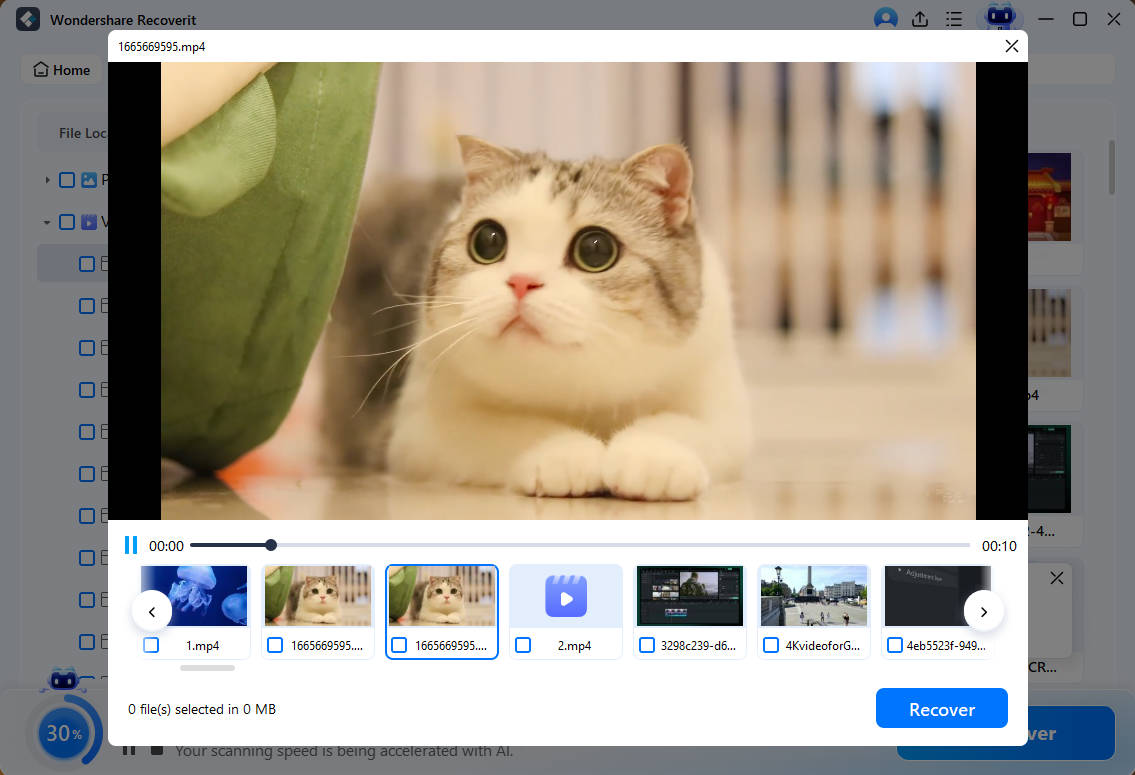

Once the files you wanted are on the PC, the card is expendable — pick any of the five methods below and start the format with confidence.
Part 3. Match the Method to Where the Card Lives
Five methods cover every situation the Switch community reports in 2026. Use the table to pick the right one based on where you have the card and what you have access to.
Decision Table by Use Case
| Scenario | Best method | Why |
| Card is still in the Switch | Method 1 — Switch System Settings | The Switch writes the exact Nintendo folder structure it wants |
| Card is in a Windows PC and you know your way around | Method 2 — File Explorer | Two clicks, no command line, works for sizes Windows lets you format |
| Card shows in Windows but File Explorer's Format is missing | Method 3 — Disk Management | The full Windows partitioning UI lives here |
| Card shows as RAW or the wizard fails partway | Method 4 — Diskpart | Command-line tool that rewrites signatures Windows trusts |
| Card is in a Mac | Method 5 — Disk Utility | The macOS native mac-friendly path; choose exFAT scheme MBR |
| You need to wipe the card to sell the console | Any of the above + Recoverit first | Recover saves before format; sandbox the encrypted blobs |
Part 4. 5 Methods to Format an SD Card for Nintendo Switch
Once you've decided which method fits your situation, the steps below walk through each one in the order that suits most users: start with Method 1 if the card is still in the Switch, then move to Methods 2–4 if it's already in a Windows PC, then Method 5 if you're on macOS. Each subsection closes with the specific warning messages to look for if the format stalls or fails partway through.
Method 1: Format Inside the Switch (Recommended)
Once the recovery step is done, formatting inside the Switch is the cleanest path. The Switch knows its own partition layout and writes the right folder structure automatically.
When the Switch Will Format for You. The Switch exposes the format option in two places. In Switch OS 12.0.0 (released 2024 and still current in mid-2026), the path is HOME Menu → System Settings → System → Formatting Options → Format microSD Card. Earlier OS revisions placed it under Data Management → Format microSD Card. The path changed once because Nintendo reorganised their privacy and storage menus, so the prompt on Reddit r/NintendoSwitchHelp's March 2026 thread "No option to format SD card with latest System Update" applies to anyone whose Switch updated after March 2026.
Step-by-Step via System Settings. Press HOME on the Switch to bring up the menu. Scroll to System Settings and press A. In System Settings, scroll down to System and press A. The version line shows the current OS — confirm your Switch is on the release that exposes the format menu. The screenshot below shows the Switch System submenu, with the current version 12.0.0, the console nickname, the region, and date/time options ready to be navigated.

Scroll all the way to the bottom of the System submenu. Select Formatting Options. Choose Format microSD Card. The Switch confirms with a warning that all data on the card will be deleted — press A to confirm. The console handles the format and re-creates the Nintendo folder structure automatically.
Method 2: File Explorer on Windows
Method 1 covers the in-console path. For owners who formatted the card outside the Switch — or for cards the Switch no longer recognises — Method 2 handles the simplest PC-side case. If the card is already in a PC, File Explorer is the fastest path. It is also the most restrictive: Windows does not let File Explorer format cards larger than 32 GB to FAT32, and for cards that the OS detects as broken (RAW) File Explorer's Format option is greyed out. For those esc cases, skip to Method 3.
Right-click This PC → Manage → open Disk Management for the easiest drive-letter inspection, or stay in File Explorer: right-click the SD card and choose Format. The Format Local Disk dialog appears — the screenshot below shows the configuration that the dialog accepts: capacity, file system dropdown, allocation unit size dropdown, volume label field, and a "Quick Format" checkbox. Pick exFAT for cards 32 GB and above or FAT32 for smaller cards. Leave the allocation unit size at its default. Tick Quick Format for a 30-second reset.

Click Start. Windows warns that all data will be erased — confirm. When the dialog closes, the card has a fresh exFAT or FAT32 volume that the Switch will accept.
Method 3: Disk Management (Windows)
When Method 2 isn't enough — the Format dialog is greyed out, the card shows as RAW, or you want to inspect existing partitions before doing anything — Method 3 is the full Windows path. Disk Management is the full UI when File Explorer refuses: it shows the disk underneath the partition so you can see why Windows won't let File Explorer take over.
The screenshot below shows Partition "Photos (E:)" being formatted via the right-click context menu — that exact menu also shows up for unrecognised SD card volumes. Beyond Format…, the menu offers Change Drive Letter and Paths… (useful when the Switch refuses to mount), Extend Volume (rare on SD cards), and Delete Volume… (delete only when the Recovery step already finished).

Pick Format…. Choose exFAT for cards 32 GB and above, leave "Perform a quick format" checked, and click OK. Disk Management produces the same FAT or exFAT volume the Switch reads.
Method 4: Diskpart (When File Explorer Refuses)
Diskpart is the troubleshooting escalator. When the card is RAW or the File Explorer format fails mid-way, Diskpart's clean command clears the corrupt signatures that are confusing Windows, and Diskpart's format fs=exfat quick lays down a fresh volume — the screenshot below shows the exact command sequence that works.

The commands in order are:
diskpart
list disk
select disk X (replace X with the SD card number — usually the smallest disk)
clean
create partition primary
format fs=exfat quick (use format fs=fat32 quick for cards 32 GB or less)
assign letter=F
exit
The clean command removes only the disk signature and partition table. The file data on the card is untouched, which is why we ran Recoverit in Part 2 before reaching this point. The create partition primary command then lays down a fresh primary partition, and format fs=exfat quick finishes the volume.
Method 5: macOS Disk Utility
For Mac users, Method 5 is the equivalent of Windows Disk Management — click the partition in the sidebar, click Erase, pick the file system, and the drive formats. The screenshot below illustrates the precise state you're aiming at: an external partition "Projects" is highlighted, the Erase button in the toolbar is the action to take next, and the right pane shows the volume status before the format runs.
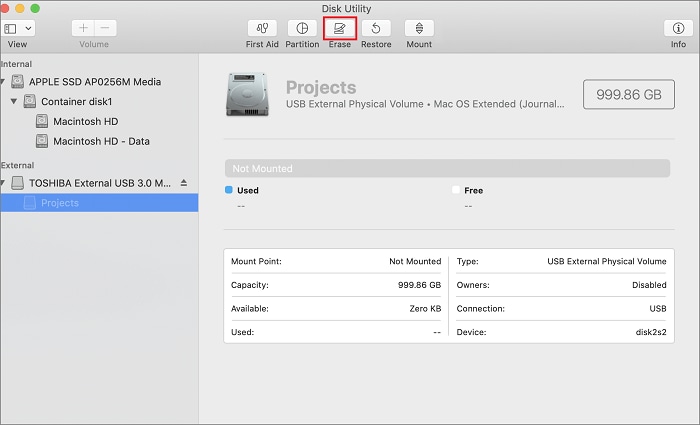
In Disk Utility, pick the SD card volume (the indented entry, not the device entry, in the sidebar). Click Erase. For the format, pick MS-DOS (FAT) for cards ≤32 GB, or ExFAT for larger cards. For the scheme, pick Master Boot Record if the size is below 2 TB — GUID Partition Map works but the Switch expects MBR for cards ≤2 TB. Click Erase again to confirm. macOS produces the volume and the Switch accepts it on the next mount.
Part 5. Verifying the Card After the Format
Three quick checks confirm the card is ready for the Switch: insert it in the Switch and confirm the HOME menu shows a card icon, reinsert in your PC and verify the file system is exFAT (or FAT32 for smaller cards), and round-trip a small file to make sure the volume is solid. Doing all three — not just one — catches the cases where the format wrote a clean header but the underlying sectors are quietly corrupt.
- Insert in the Switch. Power the console fully off, reinsert the card, power on. The HOME menu should detect an SD card icon at the bottom of the screen.
- Check the file system. Reinsert in your PC and right-click → Properties. File system should report exFAT for cards above 32 GB, or FAT32 for smaller ones.
- Try a small write. Copy a small file to it, then copy it back. If the round trip is intact, the volume is solid and the Switch will accept game saves cleanly.
If the HOME menu does not show a card icon, the card's microSD slot on the Switch may be wedged or the card is mis-seated — power off, reseat, retry.
Conclusion
To format an SD card for the Nintendo Switch, match the file system to the card size — exFAT for 32 GB and above, FAT32 for smaller — and let the Switch do the format whenever possible, because it creates the Nintendo folder structure the console expects. For PC-side reformatting, File Explorer covers the standard cases, Disk Management handles the trickier ones, Diskpart rescues the RAW or wizard-failing cases, and macOS Disk Utility handles the Mac. Switch 2 buyers should make sure the card is microSD Express rather than microSDXC. After any of these, run Wondershare Recoverit on the card first if it had saves or screenshots you needed to keep.
FAQ
-
What file system should I use for a Nintendo Switch SD card?
Use exFAT for any card 32 GB and above. Use FAT32 for cards 32 GB and smaller. The Switch accepts both, but exFAT is what the Switch uses for its own card — formatting to exFAT keeps the experience consistent across saves and eShop downloads. -
Is FAT32 OK for a 128 GB or 256 GB SD card on the Switch?
No. Windows does not let you format a card above 32 GB to FAT32 through File Explorer or Disk Management. The cards themselves can be reformatted to FAT32 with tools like GUIFormat, but the Switch ships its own partition layout in exFAT, and that is the format the Switch expects. Stay on exFAT for cards 32 GB and above. -
Will a microSD Express card work on the original Switch?
No. The original Switch and Switch OLED do not support microSD Express — those cards are designed for the Nintendo Switch 2 only. A microSD Express card inserted into a Switch will simply not mount. For the Switch (V1/OLED), stick with microSDXC cards in the SanDisk/Samsung/Silicon Power ranges listed in the official compatibility page. -
How do I format a microSD card on the Switch itself?
Press HOME, scroll to System Settings, select System, scroll down to Formatting Options, and choose Format microSD Card. The exact path was Data Management → Format microSD Card on Switch OS versions earlier than 14.0; it moved to System → Formatting Options in mid-2026. -
Why is the Format microSD Card option missing after a Switch update?
Nintendo reorganised the privacy and storage menus on Switch OS 14.0 and later. The option moved from Data Management to System → Formatting Options. If you have updated and cannot find it, look in the bottom half of the System submenu where Formatting Options now sits. -
What does it mean when my Switch says "A system update is required to use the microSDXC memory card"?
The Switch's microSDXC driver was added in an early firmware patch, and a brand-new Switch out of the box may not have it yet. Run a system update (Home → System Settings → System → System Update), insert the card, and the message disappears. -
Can I use the Nintendo Switch to format a card that came from a camera?
Yes. The Switch will accept the card regardless of its previous file system, wipe it, and recreate the Nintendo folder structure. Recover any photos you wanted first via Wondershare Recoverit before you reformat through the Switch. -
How long does a Switch-format SD card take?
About 30 seconds to a minute for the Switch's own format routine, depending on the card class. UHS-I U3 cards finish faster than older Class 10 cards. If the Switch reports a stuck progress for more than 10 minutes, the card is counterfeit or its controller has failed and replacement is the next step.


